VM parameters can be passed to generated launchers in a variety of ways: You can specify fixed VM parameters, pass them on the command line or add them to a text file where the user or your application can edit them.
Fixed VM parameters
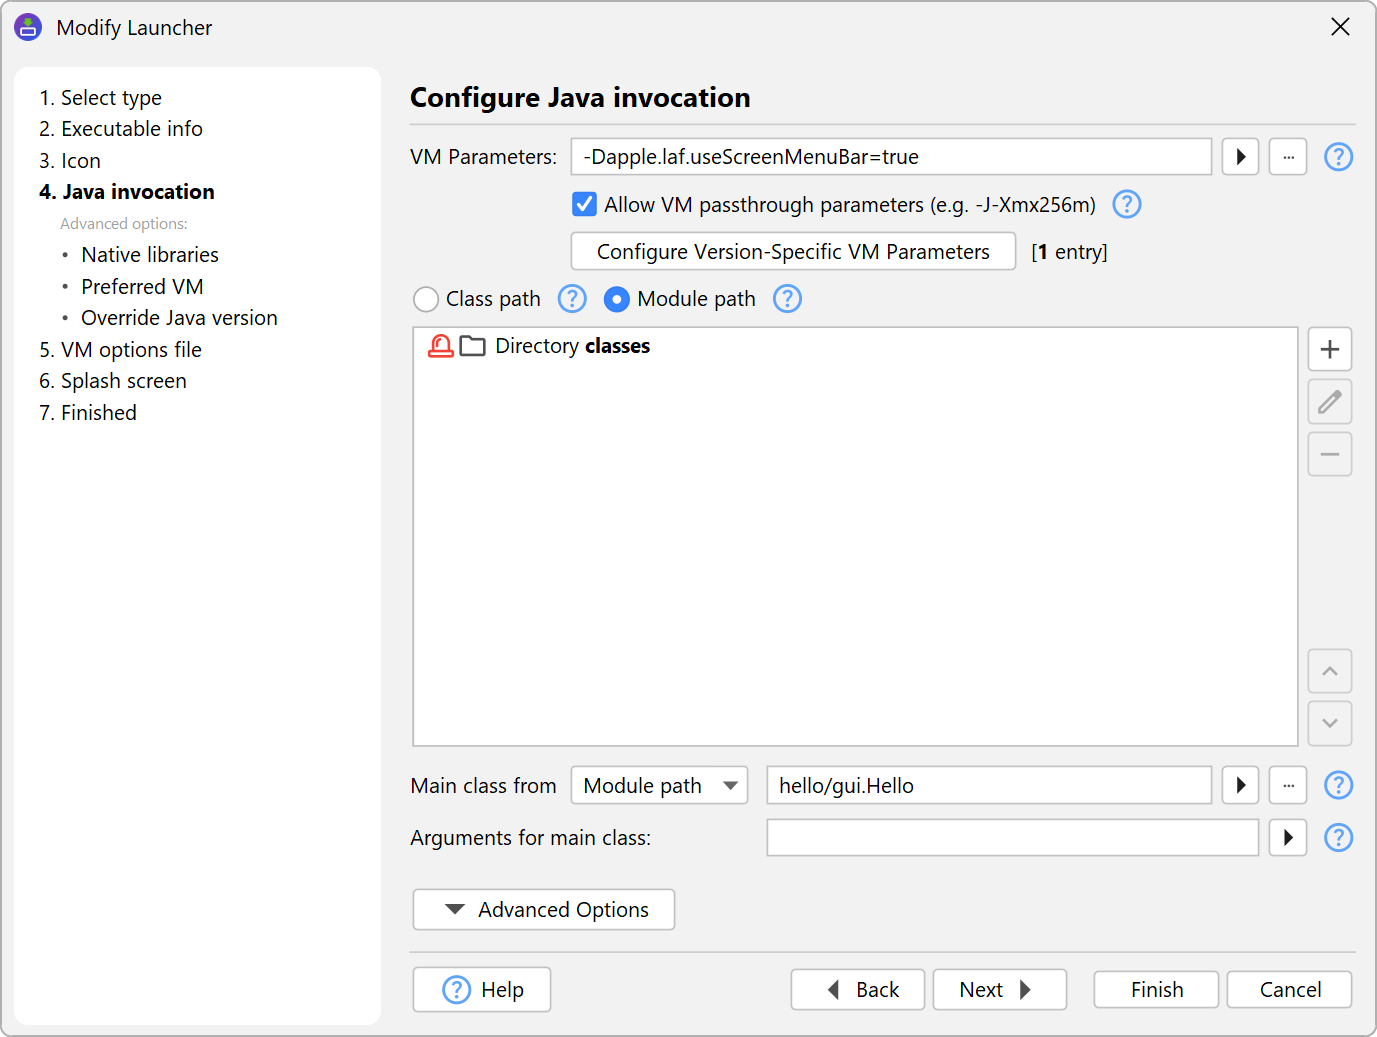
Fixed VM parameters can be configured in the launcher wizard where you can use compiler variables to handle platform-specific changes or launcher variables to use runtime-dependent paths.
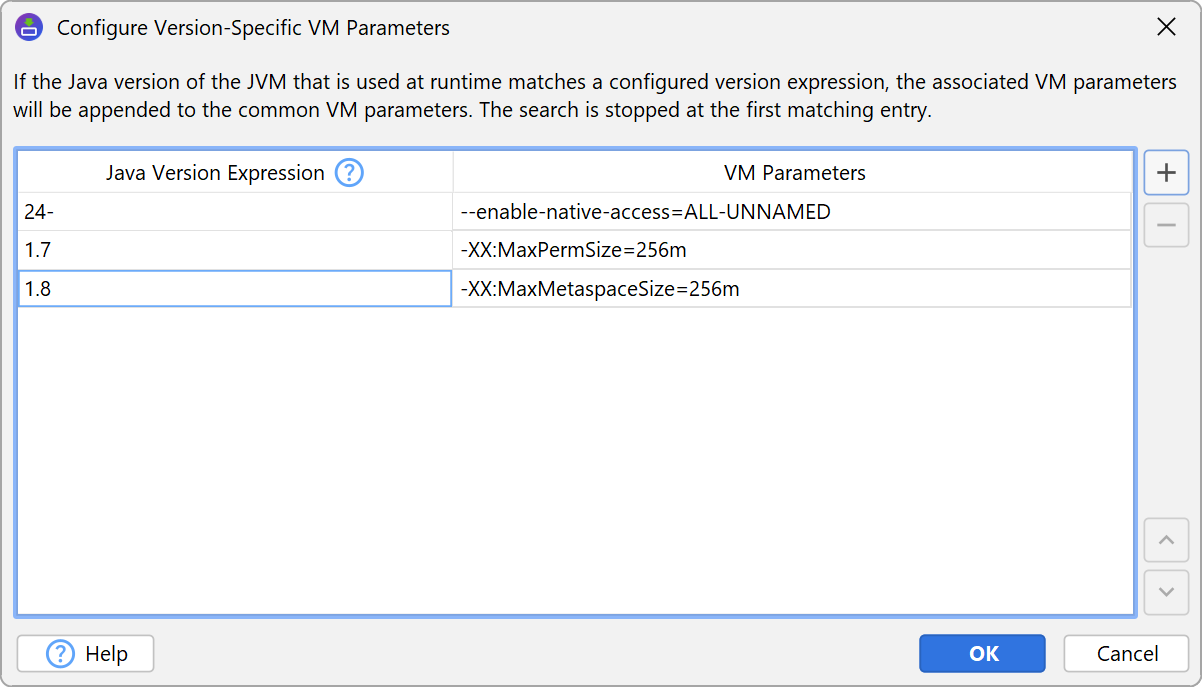
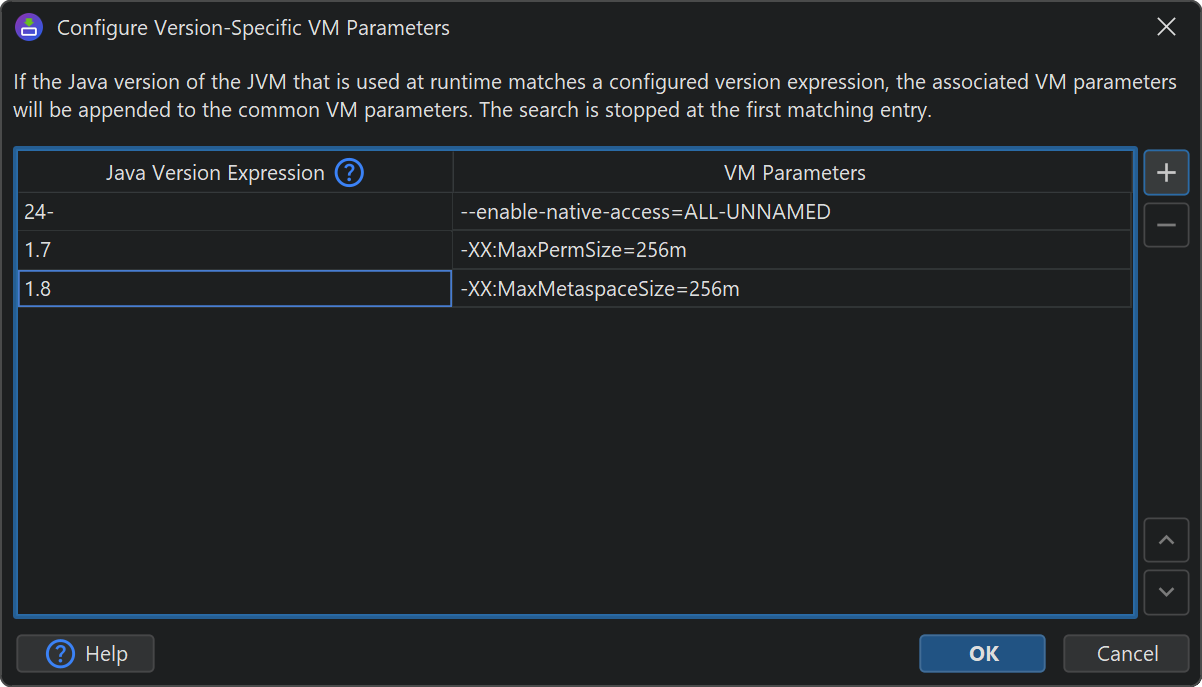
install4j can add specific VM parameters depending on the Java version. To set this up, click on the Configure version specific VM parameters button. In the dialog, add rows for each range of Java versions that should receive specific VM parameters. If the Java version of the JVM that is used at runtime matches a configured version expression, the associated VM parameters will be appended to the common VM parameters. The search is stopped at the first matching entry. The syntax for the Java version expressions is explained by the help icon on the table header.
Passing VM parameters on the command line
When executing a generated launcher, arguments are passed to the main class, so you cannot pass an argument like
-Xmx800m and expect it to be interpreted as a VM parameter. To tell the launcher that you
want to use a specific command line argument as a VM parameter, you have to prefix it with -J, as in
-J-Xmx800m
If this behavior is not desirable, you can deactivate it on the "Java invocation" step of the launcher wizard.
*.vmoptions files
A common requirement is the capability to adjust the VM parameters of launchers after the installation has been completed or to determine the VM parameters at installation time depending on the environment like the target platform or some user selection in the installer.
For this purpose, a parameter file in the same directory as the executable is read and its
contents are added to the list of fixed VM parameters. The name of this parameter file is the same as the
executable file with the extension .vmoptions.
For example, if your executable is named hello.exe, the name of the VM parameter file is
hello.vmoptions. For GUI launchers on macOS, the parameter file is placed inside the application
bundle with the relative path Contents/vmoptions.txt. In addition, a .vmoptions file
next to the bundle is read if it exists.
In the .vmoptions file, each line is interpreted as a single VM parameter and the last line
must be followed by a line feed. install4j adapts your .vmoptions files during the compilation phase
so that the line endings are suitable for all platforms. For example, the contents of the VM parameter file
could be:
-Xmx256m
-Xms32m
The .vmoptions files allow the installer as well as expert users to modify the
VM parameters for your generated launchers.
It is possible to include other .vmoptions files from a .vmoptions file with the
syntax
-include-options [path to other .vmoptions file]
Recursive includes are supported. You can also add this option to the fixed VM parameters
of a launcher. In that way, you do not have to create .vmoptions files for
all your launchers, but you can have a single .vmoptions file for all of them.
This allows you to centralize the user-editable VM options for multiple launchers and to have
.vmoptions files in a location that can be edited by the user if the installation directory is
not writable. You can use environment variables to find a suitable directory, for example
-include-options ${APPDATA}\My Application\my.vmoptions
on Windows and
-include-options ${HOME}/.myApp/my.vmoptions
on Unix. If you have to decide at runtime where the included .vmoptions file is located,
use an installer variable:
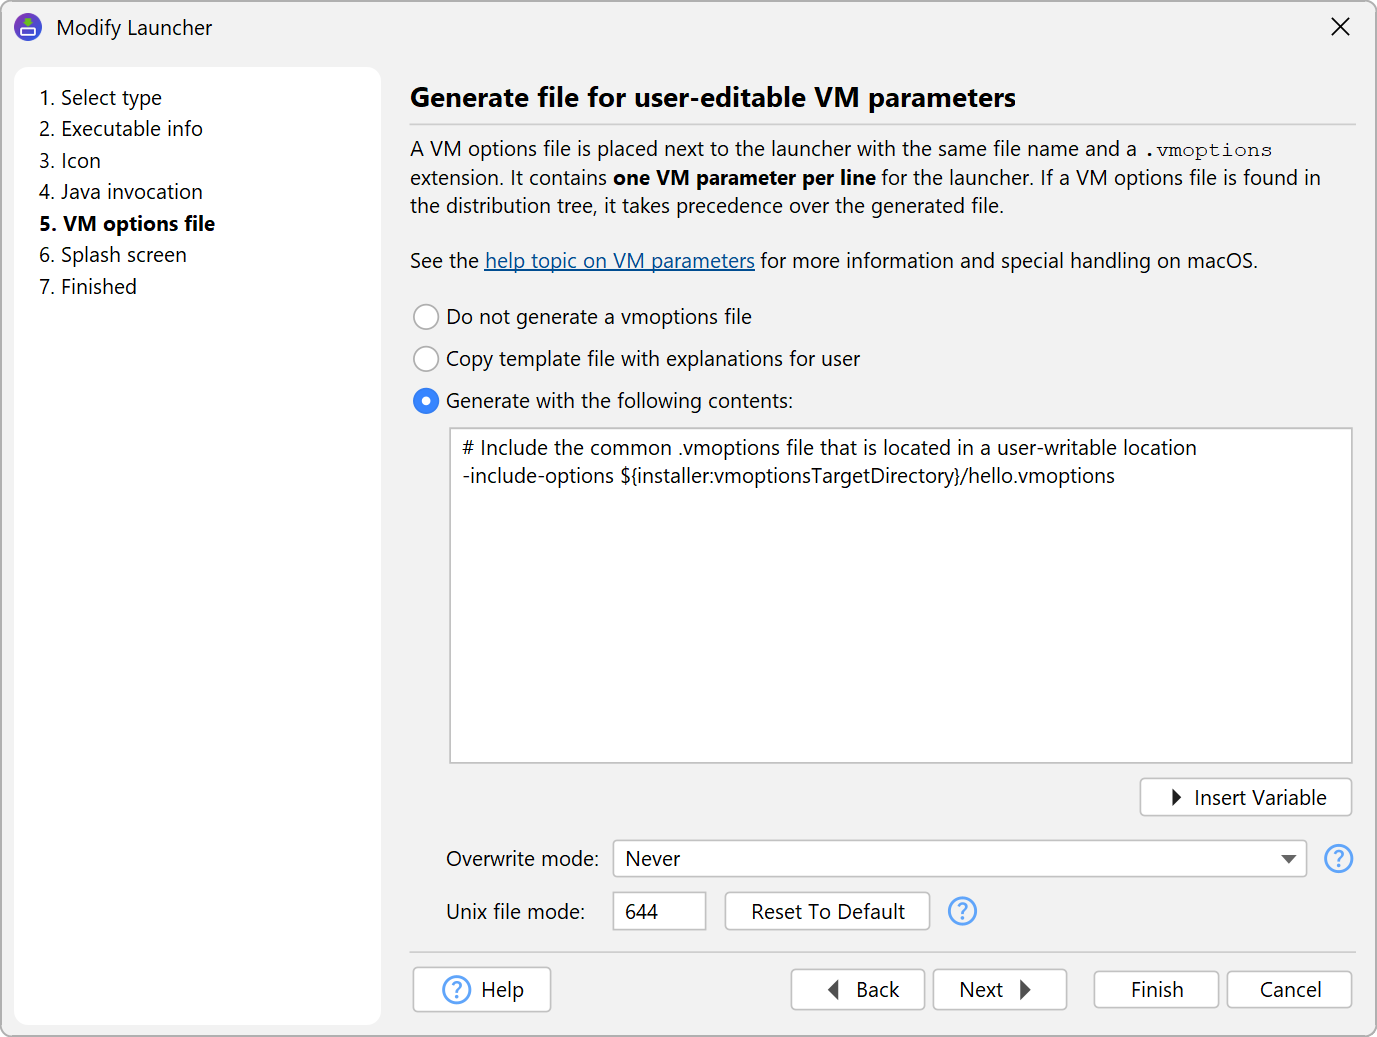
-include-options ${installer:vmOptionsTargetDirectory}/my.vmoptions
and add a "Replace installer variables in a text file" action to replace it after you have set
the vmOptionsTargetDirectory installer variable to a suitable path with a "Set a variable" action.
In addition to the VM parameters you can also modify the classpath in the .vmoptions files with the
following options:
-
-classpath [classpath]
Replace the classpath of the generated launcher. -
-classpath/a [classpath]
Append to the classpath of the generated launcher. -
-classpath/p [classpath]
Prepend to the classpath of the generated launcher.
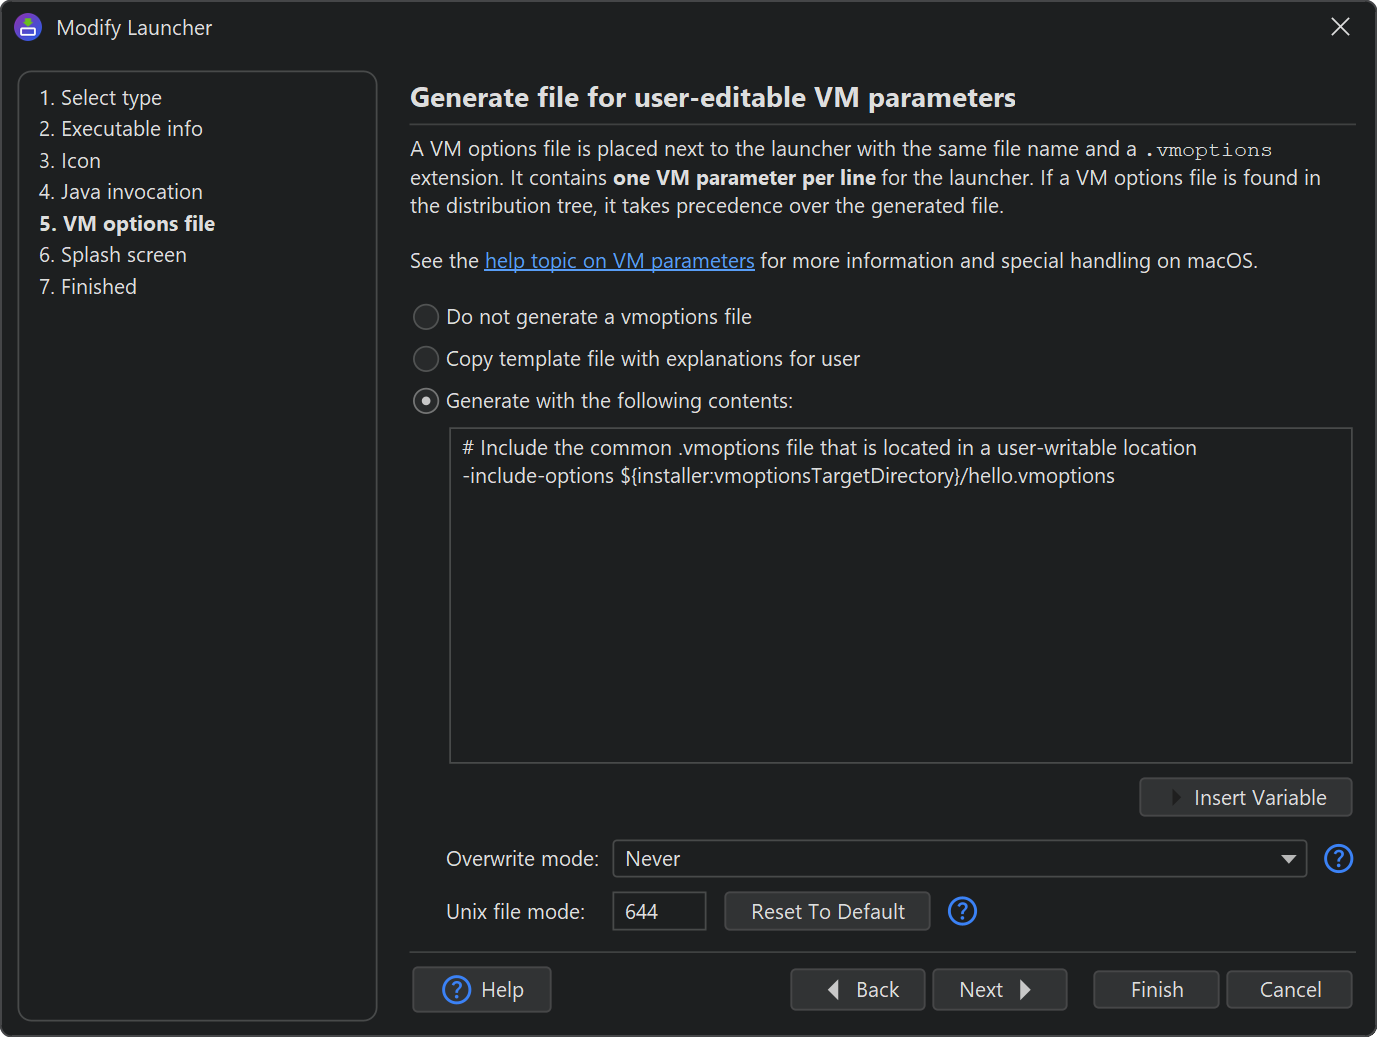
Instead of adding your own .vmoptions to the distribution tree, you can set up an initial
.vmoptions file on the "VM options file" step of the launcher wizard, either with a template
or with your own pre-defined content. Overwrite mode and file rights can also be configured
in this step.
Environment variables
You can use environment variables in the fixed VM parameters and in the .vmoptions file with the
syntax ${variableName} replacing variableName with the name of the
environment variable.
This environment variable syntax also works in the arguments text field and the classpath configuration.
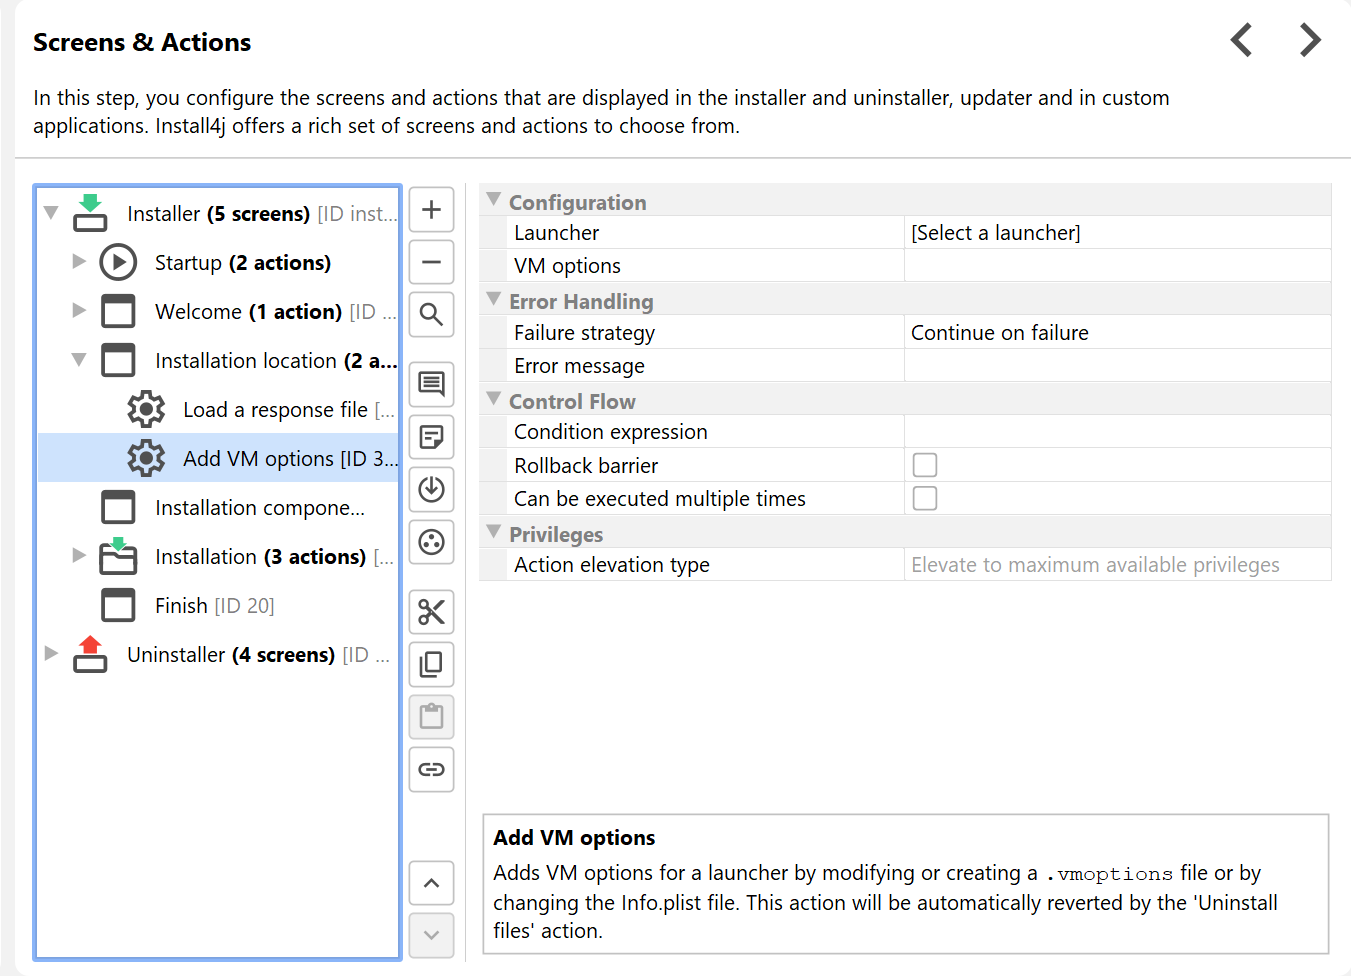
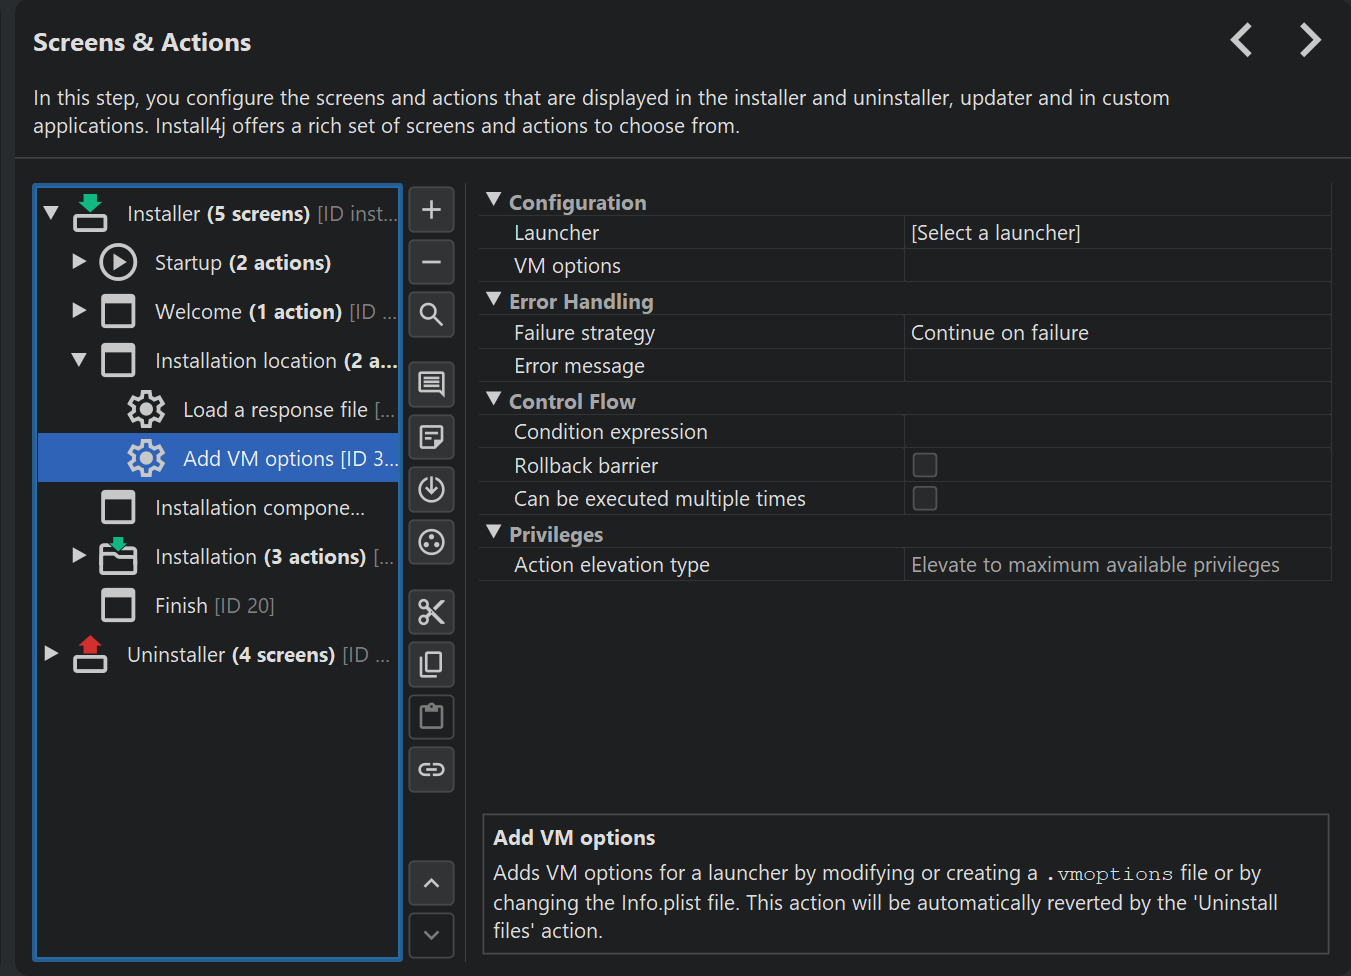
"Add VM options" action
With the "Add VM options" action, you can handle VM parameter
additions to the .vmoptions file in the installer. The action creates a .vmoptions file
if necessary or adds your options if it already exists.
A number of VM parameters can only occur once, so the action replaces the following parameters if they already exist:
- -Xmx
- -Xms
- -Xss
- -Xloggc
- -Xbootclasspath
- -verbose
- -ea / -enableassertions
- -da / -disableassertions
- -splash
as well as the install4j-specific classpath modification options that can be used in .vmoptions files.
To set an -Xmx value to a fraction the total memory of the target system, you can use
a "Set a variable action" that calculates the numeric part of the -Xmx value using the utility method
SystemInfo.getPhysicalMemory(). In the second step, you use that variable in the "VM options" property
of the "Add VM options" action. For example, if you want to set the maximum heap size to 50% of the total memory,
you do the following after the "Install files" action:
-
Add a "Set a variable" action with variable name "xmx" and a script of
"-Xmx" + Math.round(SystemInfo.getPhysicalMemory() * 0.5 / 1024 / 1024) + "m"
- Add an "Add VM options" action with VM options
${installer:xmx}