Code signing ensures that the installer, uninstaller and launchers can be traced back to a particular vendor. A third party certificate authority guarantees that the signing organization is known to them and has been checked to some extent. The certificate authority has the ability to revoke a certificate in case it gets compromised.
The basis for code signing is a public and private key pair that you generate on your computer. The private key is only known to yourself, and you never give it to anyone else. The certificate provider takes your public key and signs it with its own private key. That key, in turn, is validated by an official root certificate that is known to the operating system. The private key, the public key and the certificate chain provided by the certificate provider are all required for code signing.
Code signing is important for installers on Windows and macOS. For unsigned applications that require admin privileges, a window will display special warning dialogs to alert the user that the application is untrusted and may harm the computer. Also, the SmartScreen filter will make it very difficult for the user to execute unsigned executables.
On macOS, the Gatekeeper prevents non-expert users from installing an unsigned application that was marked as downloaded from the internet, so code signing is practically required.
You need different certificates for code signing on Windows and macOS. While it is technically possibly to use the same certificate, the recognized root certificates are different on both platforms.
Code signing for Windows
You can purchase a "Microsoft Authenticode" code signing certificate from a certificate provider such as DigiCert.
Keys and certificates can be stored in a .p12 file and directly used by install4j. Otherwise, they are stored on a token or HSM or in a cloud storage. When signing on Windows, the easiest way to access these types of keys is to use the "Windows keystore" option in install4j. Drivers for tokens and HSMs integrate into the Windows keystore and can be used transparently by install4j.
Another option is to use an external executable for code signing according to the instructions of your certificate authority. In the command line you can use the $EXECUTABLE variable to reference the full path of the executable that is currently being signed. The working directory of the executed process is the directory where your project file is located, so you can use relative file names for key or certificate files. If the signing command cannot replace the executable directly, but rather needs a separate output file, use the $OUTFILE variable. It will receive a temporary output file name that will be moved back to the processed executable after the command has completed.
A third way you can use to access HSMs is using the "Hardware security module PKCS #11 library" option and configure a native library that provides access to the keystore in the HSM through the PKCS #11 API. Libraries can access multiple HSMs that are said to be in different "slots". By adjusting the slot index, you can switch to a different HSM. By default, the first available HSM in slot 0 is used. After the library has been configured, a certificate can be chosen from the keystore in the HSM. Even if you have just one code signing certificate, over time you will likely add certificate renewals to the same HSM.
By default, both the private key and the certificate are assumed to be in the PKCS #11 keystore. If your certificate cannot be found in the keystore for some reason, try switching the certificate search mode drop-down to "User certificate from file, only private key from store". In that case, you can specify a separate certificate file below the certificate chooser. Also try this if you have problems with certificate chains in the keystore, but you can provide a chained PEM-encoded X.509 certificate file with a valid certificate chain.
By default, install4j signs generated launchers and installer applications. You can sign other executables in the distribution tree as well by defining patters against with all files in the distribution tree are matched. The matched files have to be PE executables, otherwise the build will fail.
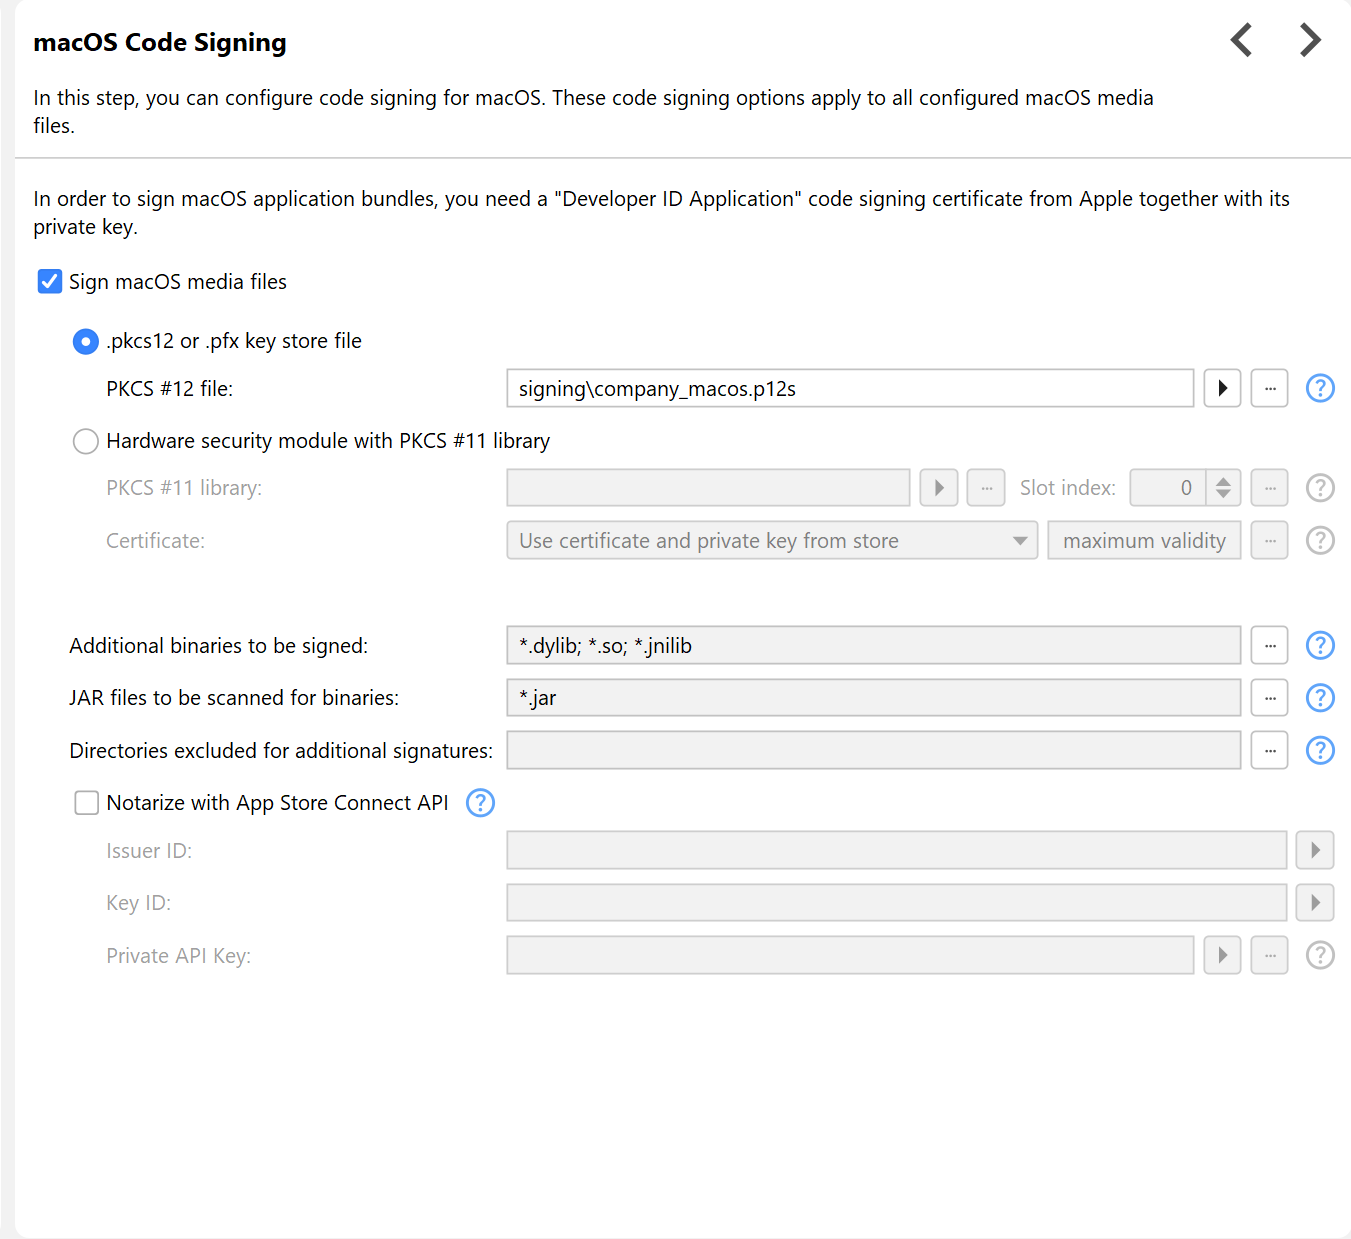
Code signing for macOS
This chapter discusses code signing for the standalone distribution of macOS apps outside the App Store. App Store submission is discussed in a different chapter.
Certificates for code signing are only issued by Apple. To get started, open the Keychain Access app and select
Keychain Access→Certificate Assistant→Request a Certificate From a Certificate Authority.
The assistant will save a certSigningRequest file to your file system.
Then, log in to the Apple Developer Network and request a "Developer ID Application" macOS code signing certificate. Download the certificate and double-click to add it to the Keychain.
Finally, open the Keychain Access app, select the "Keys" category and export the key that belongs to your
"Developer ID Application" certificate by selecting both the certificate and the private key and
right-clicking on the combined selection. Choose .p12 as the file format.
The keychain tool will ask you for a new password for the exported file. This is the password you will have
to specify during the install4j build to access your key.
install4j will refuse to use certificates for code signing that have a certificate subject name other than
"Developer ID Application". It is technically possible to sign with an arbitrary certificate,
although such a signature will not be considered as valid by Gatekeeper. To enable signing with all kinds
of certificates, set the compiler variable sys.ext.macosAcceptAllCerts to true.
Expiration times will still be checked in that case, only the constraints on the certificate subject name
will be removed.
You can find general information about code signing on macOS in the Apple code signing guide.
To check if a DMG has been signed, execute
codesign -vv /path/to/file.dmg
Like for Windows code signing, there is also an option for macOS code signing to use a PKCS #11 key store for the private key and the certificate.
Notarizing macOS media files
Apple offers a service that checks DMGs for security problems and adds them to their database. This is called "notarization" and is required starting with macOS 10.15. The exact steps for notarizing your application are described on the Apple developer web site.
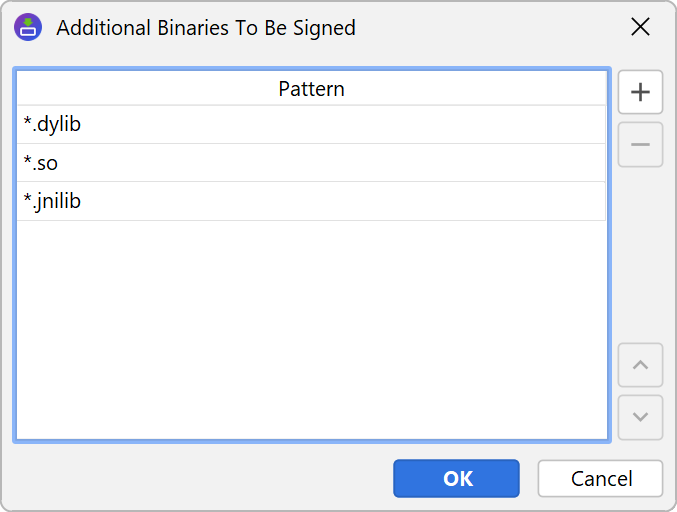
However, Apple will only notarize applications that follow certain guidelines. The "hardened runtime" has to be enabled, which install4j automatically does for you by adding the appropriate entries to the entitlements file. Also, all binaries in the DMG have to be signed. This also concerns binaries that are in a ZIP archive. Because JAR files are ZIP archives, the notarization process can detect binaries in JAR files. Some popular frameworks and libraries, such as SWT or JNA, ship native binaries in their JAR files. These contained binaries have to be signed as well.
For this purpose, install4j lets you configure a list name pattern for binaries. All files in the distribution tree are matched against these patterns, and if a match is found, the corresponding file is signed if it is really a MACH-O binary. The reason why install4j cannot just automatically check all files in this way is that this check is rather expensive.
In addition, you can configure a list of name patterns for JAR files that should be scanned for binaries with the above name patterns. This only works for unsigned JAR files because the modification introduced by the signature would break the signature of a signed JAR file and install4j has no way of regenerating that signature.
The actual notarization of a media file is performed by uploading it with the App Store Connect API to Apple while identifying yourself with an API key generated for an account matching the code signing certificate. If the app passes the inspection, install4j "staples" the notarization signature to the DMG. Stapling is only necessary if a macOS machine is offline and cannot verify the notarization of an app by connecting to the internet.
In the install4j IDE, notarization must be enabled on the "General Settings->Code signing" step and an App Store Connect API team key ID, issuer and private key file has to be entered. The access role of the key must be "Developer". You can generate API keys on the Apple App Store Connect website.
To check if notarization has succeeded, execute
spctl -a -t open --context context:primary-signature -vv /path/to/file.dmg
Key store passwords
Private keys contain sensitive information, and if they get into the wrong hands, your identity is compromised. Because of that, private keys are secured with a password. When install4j signs your installers and launchers, it needs to work with the private key.
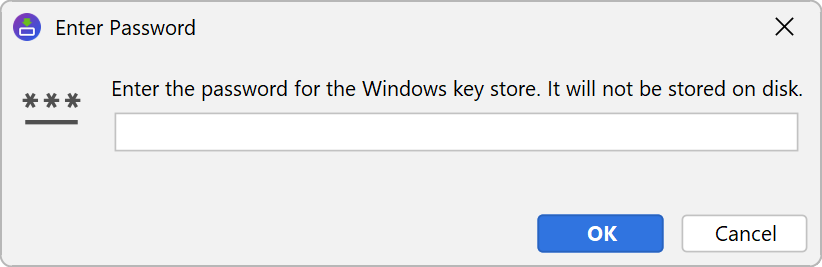
When you start a build in the install4j IDE, you will be asked for the Windows and macOS key store passwords as required. install4j does not store those passwords to disk, but they are cached on a per-project level as long as the install4j IDE remains open.
When you run a command line build, the install4j command line compiler will ask you for the required passwords.
If you want to fully automate a build with code signing, you can pass passwords on the command line by setting
the --win-keystore-password=[password] and --mac-keystore-password=[password]
command line parameters. The plugins for Gradle,
Maven and Ant offer the corresponding
"winKeystorePassword" and "macKeystorePassword" attributes. Note that adding these passwords to shell
scripts or ant build files constitutes a security risk.
In a setup where only a restricted number of people can build signed executables, you can use the
--disable-signing command line parameter, the "disableSigning" attribute of the build system
plugins or the corresponding build option in the "Build" step of the install4j IDE to temporarily disable code
signing. In that way, other developers can build fully functional, unsigned installers without modifying the
project file.
Time stamp counter-signing
Code signing certificates issued by certificate providers expire after a certain time. For Windows code signing, the expiry time is usually one to three years, after which you have to purchase a renewal from your certificate provider. Executables that were signed while the certificate was still valid are trusted indefinitely unless the certificate is revoked.
A computer that validates an executable compares the signing time and the expiry time of your certificate. Certificate providers have to prevent you from turning back the clock of your computer to circumvent the expiry of your certificate. This is why the signing time has to be counter-signed by a certificate provider. Certificate providers offer free web services that will confirm that a signature was performed at a particular time. This counter-signature is not related to a particular certificate, so you can use the web service of any certificate provider, regardless of where the certificate came from. install4j uses the DigiCert time stamp signing service at
http://timestamp.digicert.comand falls back to the GlobalSign time stamp signing service at
http://timestamp.globalsign.com/?signature=sha2if there is a failure.
To use a different service, define the compiler variable
sys.ext.timestampUrl=<URL>
where <URL> can contain multiple URLs separated by semicolons.
If the timestamp service call fails, install4j will retry up to 10 times or whatever the
sys.ext.counterSignRetry compiler variable is set to.
Apple has its own time stamp signature server at
http://timestamp.apple.com/ts01
that can be changed with the compiler variable
sys.ext.macTimestampUrl=<URL>
Setting up a proxy for HTTP calls
The consequence of the time stamp counter-signature scheme is that you need an internet connection at build time. Many build servers are behind fire walls, and you might need to set up a proxy to get internet connectivity and whitelist the above time stamp servers. install4j will try to auto-detect the proxy information. If that fails, the IDE will ask you for proxy information, but the command line builds will not ask for user-input in order to avoid hanging builds due to temporary internet connectivity problems.
For command line builds, you can pass the following VM parameters to the command line compiler:
- -DproxySet=true
- -DproxyHost=[host name]
- -DproxyPort=1234
- -DproxyAuth=true
- -DproxyAuthUser=[user name]
- -DproxyAuthPassword=[password]
The authentication parameters are optional, only the first three parameters are required to set up a proxy.
If you pass these parameters to the command line compiler, you have to prefix them with -J to
mark them as VM parameters, such as
-J-DproxySet=true
The plugins for Gradle, Maven and
Ant offer way to set VM parameters without using the -J
prefix.