Apps that are submitted to the macOS App Store have to fulfill a number of requirements and pass a review process by Apple. While install4j can help you to prepare an artifact that will be accepted by the App Store, you first have to make yourself familiar with the submission process by studying the Apple Developer documentation.
Configuring a media file for App Store submission
To prepare a package that can be uploaded to App Store Connect, start with a media file of type "macOS single bundle archive" and select the ".pkg for App Store submission" option on the "Installer options" step of the media wizard.
Right below that option you can select a provisioning profile file to request app capabilities that have to be allowed by Apple, such as "com.apple.developer.team-identifier", "com.apple.developer.applesignin" and "com.apple.developer.icloud-service". In addition, using TestFlight is only possible when a provisioning profile is specified.
This file is created in the "Profiles" section of your Apple Developer account and determines the Apple distribution channel which must be set to "Mac App Store Connect". When creating the provisioning profile, you will have to select the App Identifier and a certificate of type "Mac App Distribution". The App Identifier and the certificate have to be created in the Apple Developer account before the provisioning profile can be created.
However, the above certificate is not the only certificate that is required. The PKCS #12 certificate file for code signing in the macOS section of the "General Settings->Code signing" step has to contain
- a certificate of type "Mac App Distribution" certificate for your app
- a certificate of type "Mac Installer Distribution" for the submitted .pkg installer
- (optional) a certificate of type "Developer ID Application" if you also have media files for standalone distribution on macOS
As explained in the chapter on code signing, you can export multiple certificates by selecting them in the Keychain Access app together with their private keys.
Configuring the launcher for App Store submission
One requirement for macOS App Store submission is that the App icon contains images in the formats 16x16, 32x32, 128x128, 256x256 and 512x512 as well as their Retina variants with double the resolution. On the "Icon" step of the launcher wizard, add the files for the non-Retina formats. The icon compiler will try to pick up Retina files with an "@2x.png" ending and the same base name.
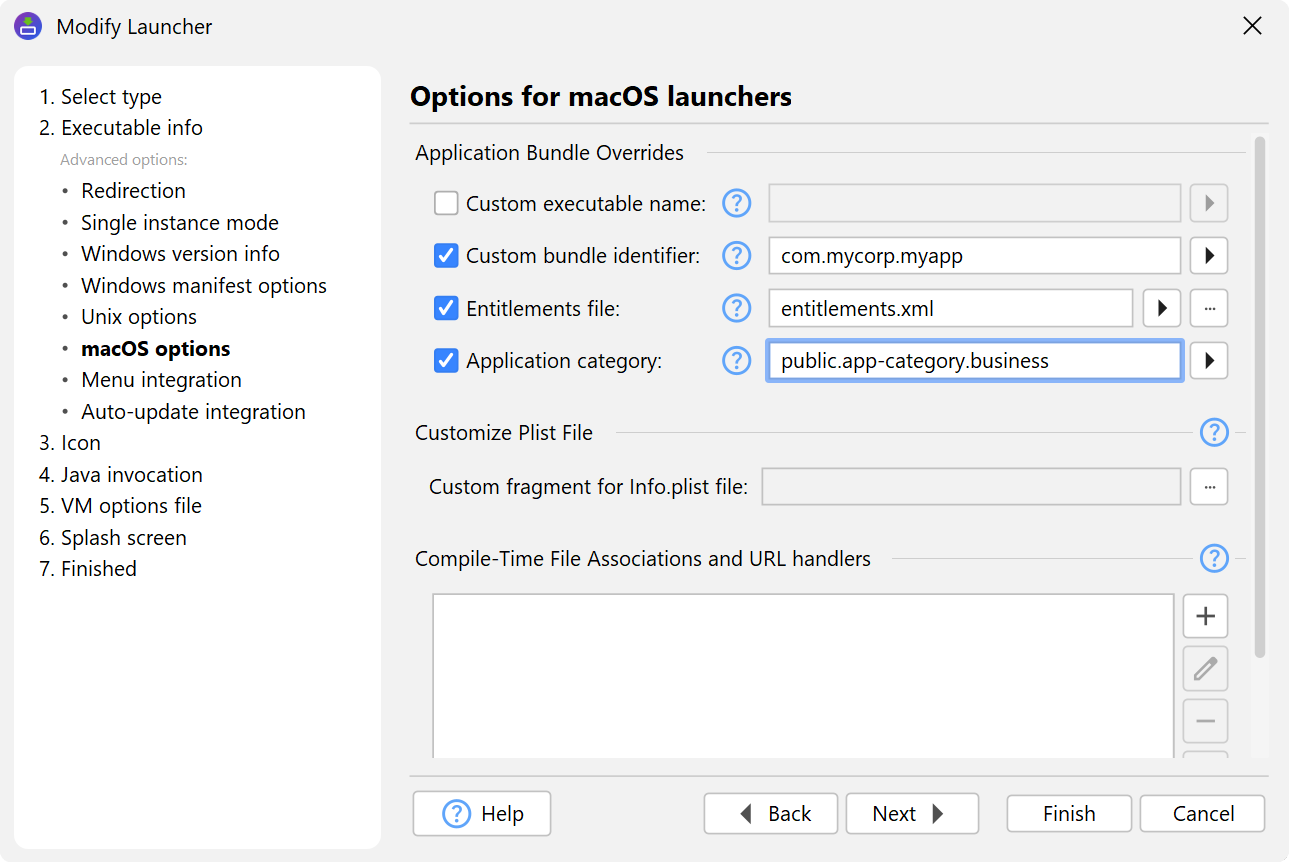
By default, install4j will generate a bundle identifier for your launcher that is written to the Info.plist file. In case of an App Store submission, you have to explicitly set the bundle identifier to the same value that you have configured in the App ID Configuration in your Apple Developer account. This is done on the "Executable info->macOS options" step of the launcher wizard.
Another requirement for the App Store is that the LSApplicationCategoryType key for the application category is set in the Info.plist file. You can also do that on the "Executable info->macOS options" step of the launcher wizard. Possible values for this key are listed in the Apple Developer documentation.
Finally, App Store apps have to run in a sandbox. This is enabled by the "com.apple.security.app-sandbox" key in the entitlements file that install4j adds automatically. Your app may need further entitlements, like the ability to read and write user-selected files. In that case, you have to include an entitlements file on the "Executable info->macOS options" step of the launcher wizard with content like
<?xml version="1.0" encoding="UTF-8"?>
<!DOCTYPE plist PUBLIC "-//Apple//DTD PLIST 1.0//EN"
    "http://www.apple.com/DTDs/PropertyList-1.0.dtd">
<plist version="1.0">
  <dict>
    <key>com.apple.security.files.user-selected.read-write</key>
    <true/>
  </dict>
</plist>
For a list of all available entitlements, see the Apple Developer documentation.
Testing the sandboxed App
install4j will create a .pkg file that contains your application bundle. This is the kind of archive that is required for App Store submission. The App Store will install the .pkg file silently. If you want to test the sandboxed environment of an app, you will want to install it before submitting it to the app store. Apple offers the TestFlight app, so you and other beta-testers can run uploaded builds locally in their final form.
However, if you want to test the app before uploading it and you use an app store provisioning profile, you cannot install the compiled .pkg file locally. You have to use a "macOS App Development" provisioning profile instead. A development provisioning profile is associated with certificates of the type "Apple Development" or "Mac Development". This means that you have to change both the provisioning profile and the code signing certificate to create a development build.
In addition, the development provisioning profile must allow your local device and it must be installed by double-clicking on it in the Finder. When you register your macOS device in the "Devices" section in the Apple Developer Account, make sure to specify the Provisioning UDID and not the Hardware UUID, even if the web interface asks you for it. You can find the UDID from a terminal by executing.
system_profiler SPHardwareDataType | grep UDID
If all these conditions are met, you can double-click the generated .pkg file and follow the instructions in the wizard
to install the application bundle to the /Applications folder. The installed application bundle will run in a sandbox
with the requested entitlements just like the app that end users will download from the App Store. If some functionality in your
application does not work as expected, it may be missing entitlements. Use the "Console" app to record logging output and find the
cause of a failure.
Submitting the App to the App Store
The most convenient way to upload the generated .pkg file to App Store Connect is through the "Transporter" app that can be installed from the App store. For signing in, use the Apple ID of the Apple Developer account where the App is configured.
Before uploading the .pkg file, it is checked for issues that will result in a rejection. After you fix all these issues in your application, the .pkg file is uploaded and a more thorough check is performed that may take a couple of minutes. If that check does not pass, you will get an email with the list of issues that resulted in the rejection. If your app passes these checks, it will be selectable as a build in the App configuration in App Store Connect.