The "Installer->Screens & Actions" step shows a tree representation of the installer, the uninstaller and other installer applications, such as updaters. The nodes in the tree are of the following types:
-
Applications
An application consist of a series of screens. -
Screens
A screens displays information to the user, optionally gathers user input and optionally executes a series of actions when the user moves to the next screen. -
Actions
An action usually makes a modification to the installation.
In this chapter, the functionality and configuration options on the "Installer->Screens & Actions" step are discussed, the underlying concepts are discussed in a different help topic.
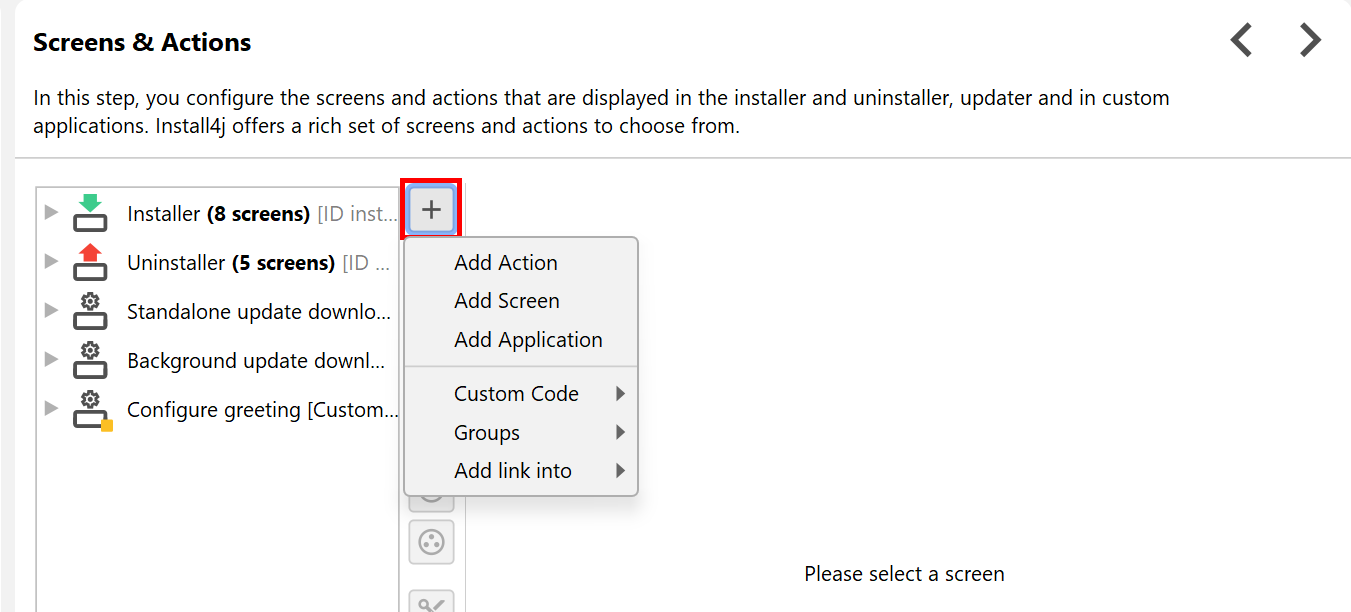
Adding new installer elements
Installer elements are added by clicking the Add button.
In the popup window you can select whether to add
- an action, a screen or an application. Actions and screens are made available by install4j or are contributed by an installed extension. A registry dialog will be shown where you can select the desired screen or action. When adding an application, the application template dialog is displayed.
- an action or a screen contained in your custom code. New types of reusable actions or screens can be developed with the install4j API. In your custom code configuration you can specify code locations that are scanned for suitable classes.
- an action group or a screen group. The new group is initially empty. You can also create groups directly from a selection in the tree of installer elements.
Installer elements can only be added to appropriate parent elements. If no appropriate parent element is selected, install4j tries to find one by moving in the ancestor hierarchy from the current selection. If no appropriate parent element can be found, an error message is displayed.
- Applications are added at the top level.
- Screens and screen groups can be added to applications or screen groups.
- Actions and action groups can be added to screens or action groups.
Editing installer elements
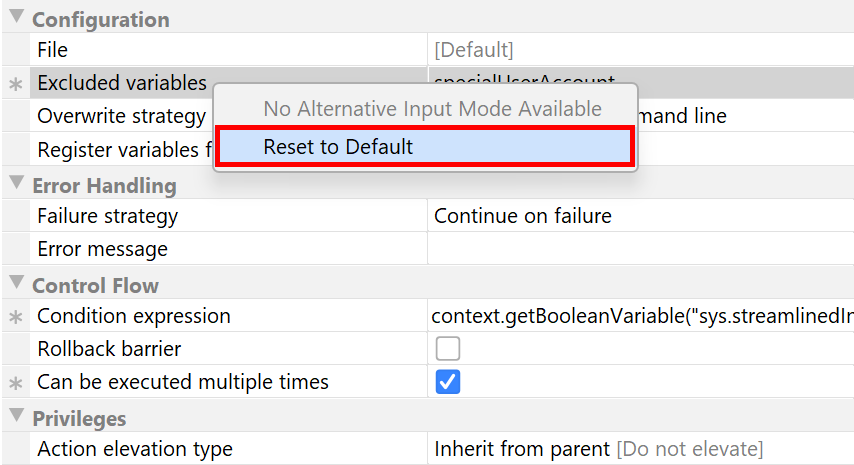
If you select a single installer element in the tree of installer elements, you can edit its properties on the right side. Properties that have been modified are shown with an asterisk (*) in front and can be restored to their default value with the "Reset To Default" action from the context menu.
Selecting multiple installer elements is possible on the same tree level, meaning that all selected elements have to be siblings in the tree.
When the configuration area is focused, you can transfer the focus back to the tree of installer elements with
the keyboard by pressing ALT-F1.
The tree of installer elements provides the following actions in the toolbar on the right that operate on the current selection. You can also access these actions from the context menu or use the associated keyboard shortcuts.
-
Delete
All selected installer elements will be deleted after a confirmation dialog when invoking the Delete action. The deleted installer elements cannot be restored. You will be notified if deleting the selected installer elements breaks links. -
Rename
After you add an installer element, the tree of installer elements shows it with its default name. If you have multiple instances of the same installer element next to each other, a custom name makes it easier to distinguish these instances. You can assign a custom name to each installer element with the Rename action. The default name is still displayed in brackets after the custom name. To revert to the default, enter an empty custom name in the rename dialog. -
Comment
You can add comments to selected installer elements with the Add Comments action. When a comment is added, the affected installer elements will receive a "Comments" tab. After adding a comment to a single installer element, the comment area is focused automatically. Likewise, you can remove comments from one or more installer elements with the Remove Comments action.
In order to visit all comments, you can use the Show next comment and Show previous comment actions. These actions will focus the comment area automatically and wrap around if no further comments can be found.
-
Disable
In order to "comment out" installer elements, you can use the Disable action. The configuration of the disabled installer elements will not be displayed, their entries in the tree of installer elements will be shown in gray and they will not be checked for errors when the project is built. -
Copy and paste
install4j has a clipboard for installer elements. You can Cut or Copy installer elements to the clipboard and Paste them in the same project or in a different project. Note that references to launchers or references to files in the distribution tree might not be valid after pasting to a different project.
Pasted installer elements are appended to the end of the same level that would be chosen if you added installer elements of that type. Sequence restrictions with respect to the already present installer elements may force a different order.
-
Reorder
If your selection is a single contiguous interval, you can move the entire block up or down in the list. The selection can only be moved within the same level with the reorder actions. To move the selection to a different parent, you can cut and paste it. -
Group
You can create a screen group or an action group from the selected installer elements with the Create Group action. The new group will be inserted in place of the selected installer elements.
You can dissolve a group with the Dissolve Group action. This action is only enabled if the selection consists of a single screen group or action group. The elements contained in the group will be inserted in place of the group. Nested groups will not be dissolved.
-
Link
You can reuse screens and actions by linking to a single definition. This is particularly useful if you define an installer maintenance application that should repeat parts of the installer, such as a number of forms that query the user for initial values to set up your application. Also, links are the only way to integrate screens and actions from merged project into the main project.
In order to link to a screen, action, screen group or action group, you click on the "Add" button and select Add Link Into from the popup menu. The first entry in that popup menu is always "This project" for links into the current project. If you have set up merged projects, then you get an entry for each merged project. The configuration area of a link will only contain a button that selects the original definition in the tree of installer elements. For merged projects, the merged project is opened in a new window, unless it is already open.
Another way to add a link into the same project is to select the installer element and invoke the Copy Link action. Then you navigate to the installer element where the link should be inserted and invoke the Paste Link action.
For links into the same project, install4j ensures that there are no broken links in the tree of installer elements. When you delete an installer element, all links to it will be deleted as well. If that is the case, the deletion message will tell you how many links are about to be deleted. Links into merged projects may be broken, this condition is shown in in the configuration panel.
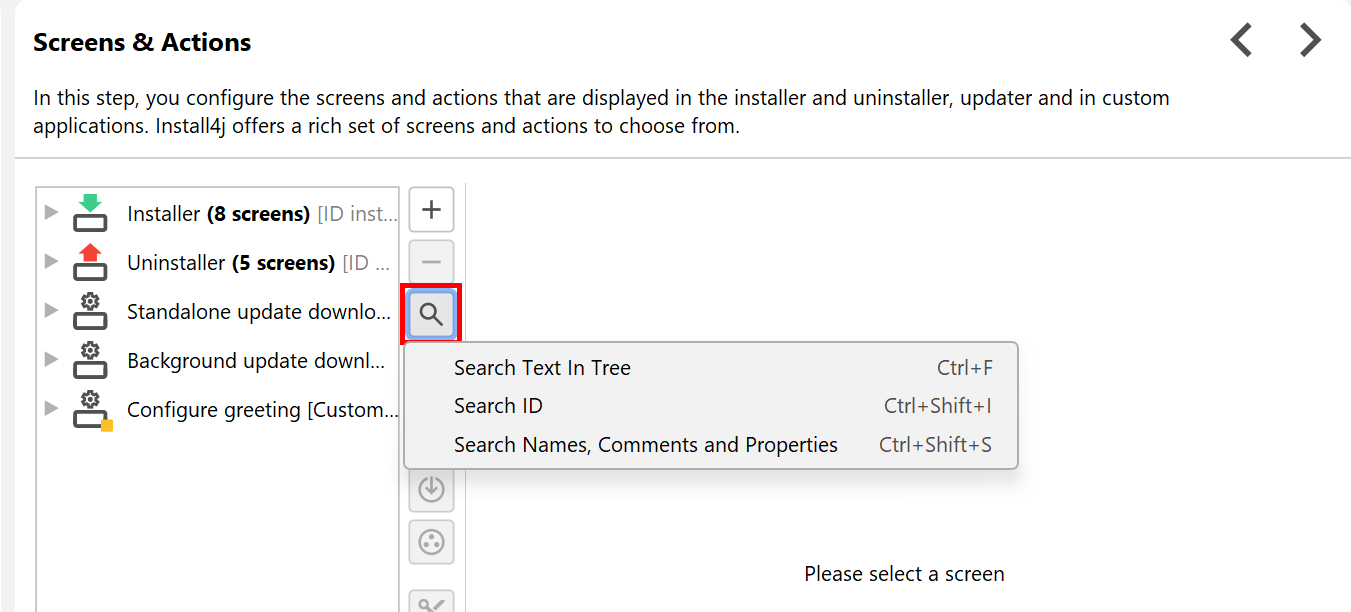
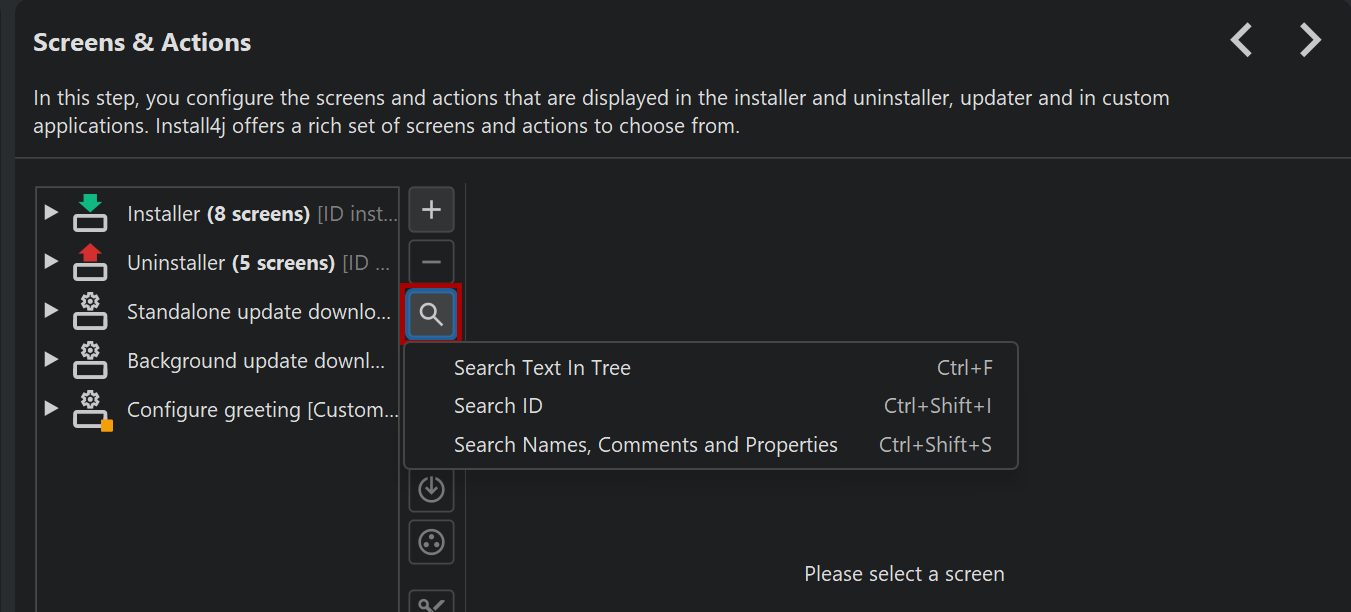
Searching for installer elements
In the log files, actions and screens are logged with their IDs. You can navigate to an installer element if you know their ID by clicking on the search icon and choosing "Search ID" from the popup menu.
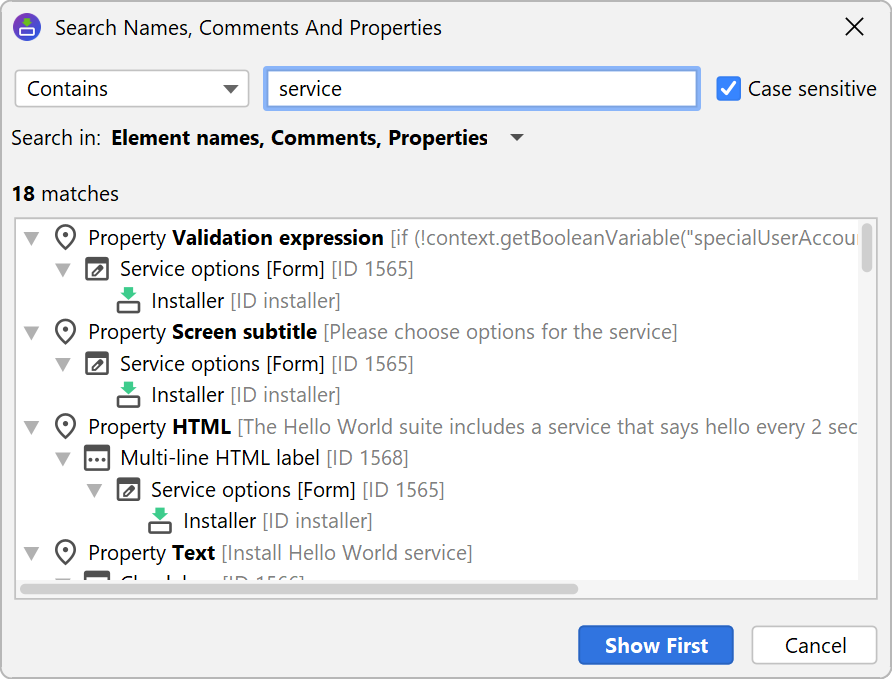
When a match is found the result tree shows the match at the top together with the reverse chain of installer elements that lead to it. You can either show the match itself or select any other element in the result tree and show that element instead when closing the dialog with the Show button. This works even if the target element is in a form component dialog or an action list or a property. The scope of the search is always rooted in the installer elements that are reachable from the current view.
A separate action "Search Names, Comments and Properties" is available to search for arbitrary patterns. You can disable any of the search types to narrow down the scope of the search.
Display options for installer elements
When using the install4j API, you reference installer elements with IDs. You can show IDs in the tree of installer elements by toggling the Show IDs tool bar button.
In order to adjust the information density in the tree of installer elements, you can change the icon size by choosing large or small icons in the Icon Size sub-menu in the context menu. The default setting is to show large icons.