My first try with install4j
A tutorial for beginnersThis tutorial shows the various features offered by install4j 5.0 through the step by step configuration of an installer for Sweet Home 3D, a free open source Java program (so you can reproduce these steps if you want to).
In its current version 3.0, Sweet Home 3D may be installed with Java Web Start or its own installer (built with Inno Setup and launch4j tools under Windows). But install4j is able to build much more powerful installers and Java launchers than these free products.
Downloading and installing install4j
install4j can be downloaded from this page. If you want to test it before buying a license you'll have to fill this form to receive an evaluation key.install4j is available for various operating systems and is available in two versions for each operating system, depending on whether you have already installed a JRE 6 on your computer.
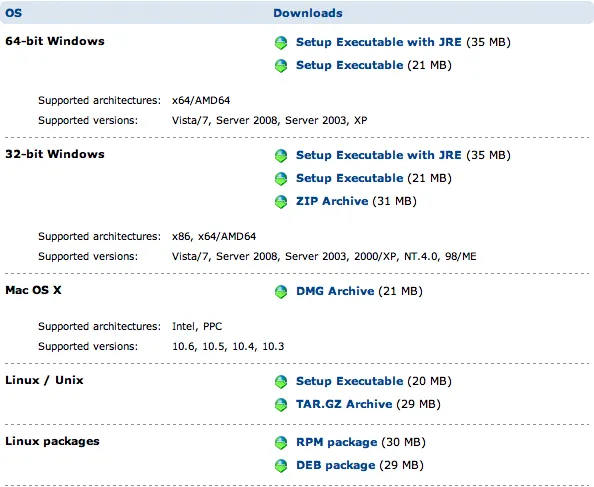
From the previous matrix, I download the Setup Executable (21 MB) for 64-bit Windows and double-click on the installer icon once the file was downloaded.

Installing install4j already gives an idea of its abilities because the installer was of course built with install4j itself. Once the installer launched, I'm surprised to get a screen telling that no JRE is installed on my computer:
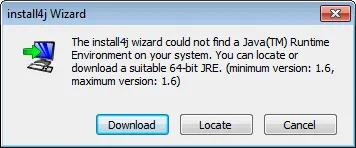
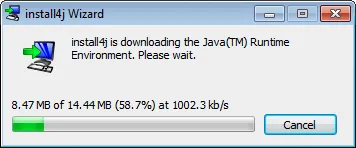
But in fact the installer was right, I didn't have a 64-bit JRE but only a 32-bit JRE! Therefore I click on Download to get a 64-bit JRE.
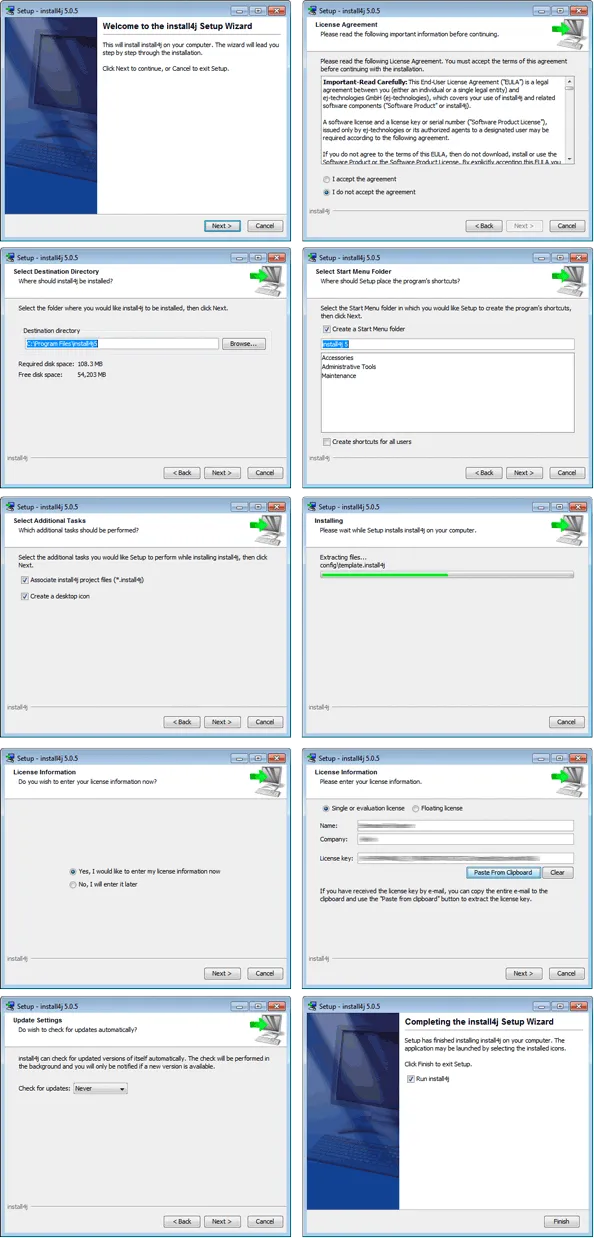
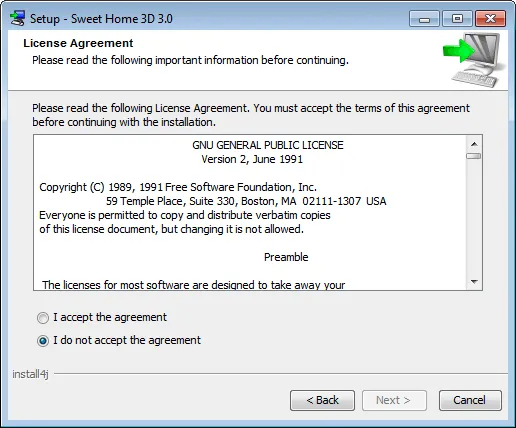
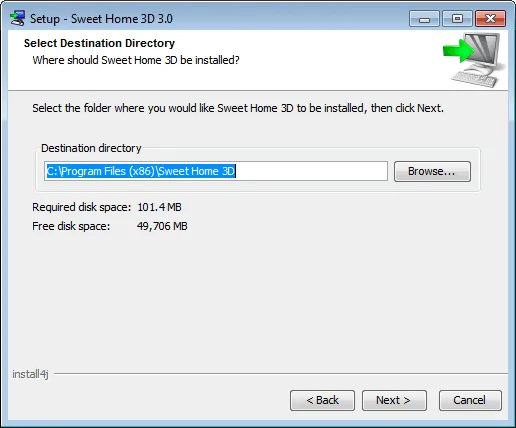
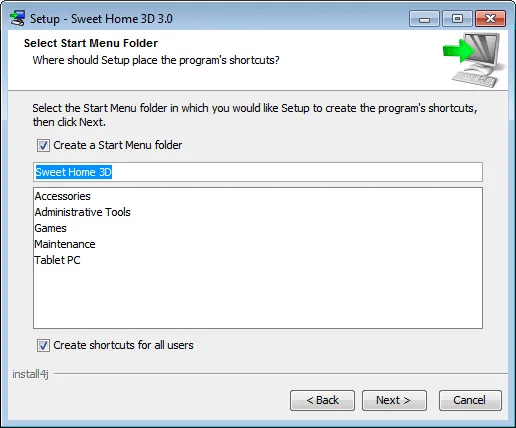
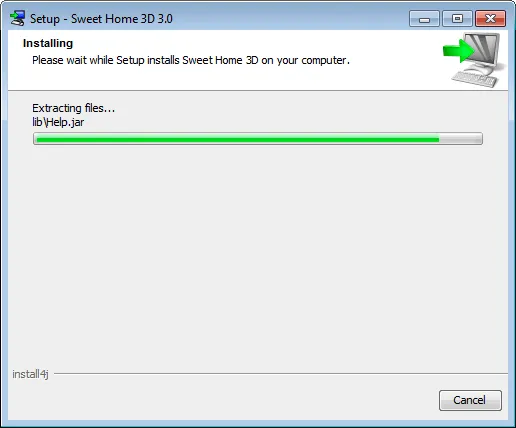
From the license agreement, installation directory selection to license key entry and auto-update configuration, the 10 steps that following look familiar compared to other installers.
Launching install4j
At first launch, Windows Firewall asks me to let install4j use the network to check its license key. I accept to ensure all features of install4j will work.Then the main screen of install4j appears and shows the various features offered to create an installer.
Now I'll try to create a first version of an installer and launcher for Sweet Home 3D.
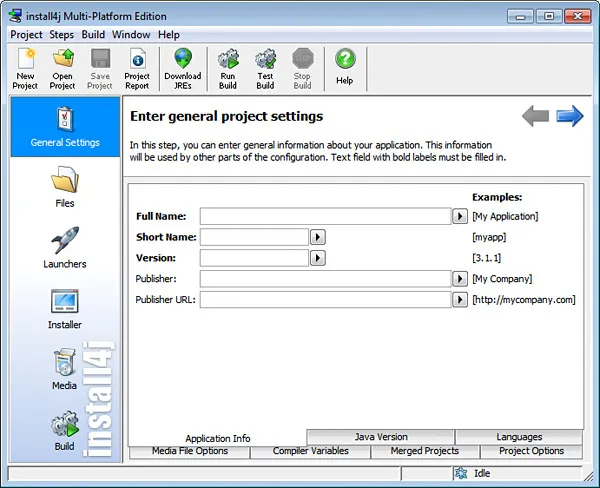
General settings
First, I fill the Application Info tab with the software's name and version.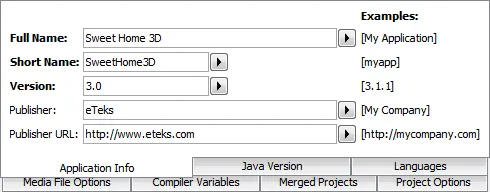
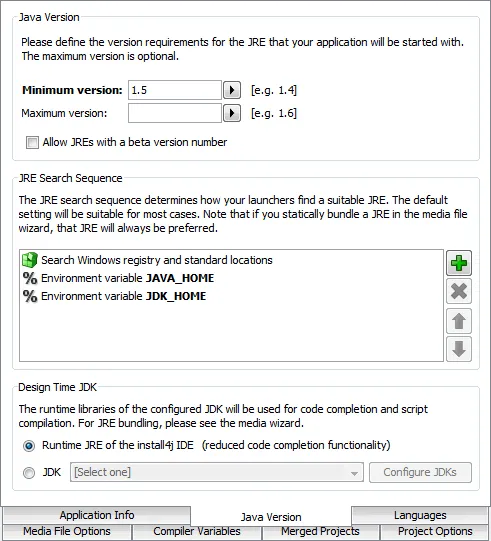
Then, in the Java Version tab, I require a minimum Java version 1.5.
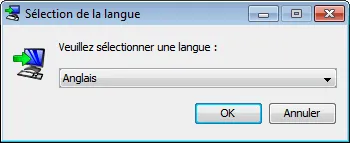
In the Languages tab, I keep English as the principal language and add all the languages supported by Sweet Home 3D found in the list (just missing Bulgarian and Vietnamese).

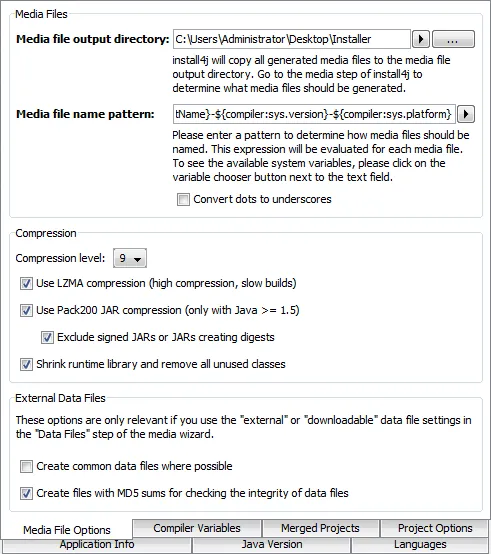
In the Media Files Options, I choose an Installer directory on my desktop as output directory, change the name pattern to "
${compiler:sys.shortName}-${compiler:sys.version}-${compiler:sys.platform}
" in respect to the format previously used for older versions of Sweet Home 3D, and uncheck Convert dots to underscores
option.
Note that this name pattern uses some variables between
${
and }
symbols. There are all kind of variables available in install4j (you can even create your own if needed) and you can
select them in many text fields by clicking on the Insert variable button The "
${compiler:sys.shortName}-${compiler:sys.version}-${compiler:sys.platform}
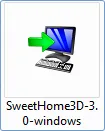
" pattern will resolve to SweetHome3D-3.0-windows
for a Windows installer.
As Sweet Home 3D's current distribution is around 30 MB, I prefer the smallest distribution possible and I also increase Compression level to 9 and check all the compression options
Once General Settings are done I save my Installer project in the Installer directory of my desktop.
Files
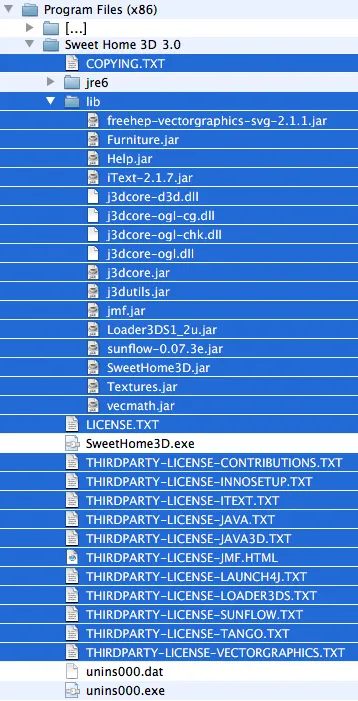
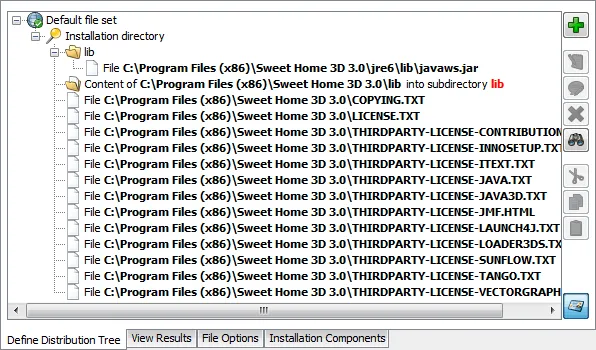
Now I choose files that should be included in the distribution by clicking on the Files icon below the General Setting one. These files could be assembled by invoking the appropriate Ant target in the build.xml file of Sweet Home 3D project, but as this tutorial isn't about Ant, I prefer to use the files installed by the existing setup program available here. I launch this program and install the files in C:Program Files (x86)Sweet Home 3D 3.0 directory.Once the existing installer finished, I have to include the jar and license files in the distribution tree of install4j. These files are indicated in blue in the following list:
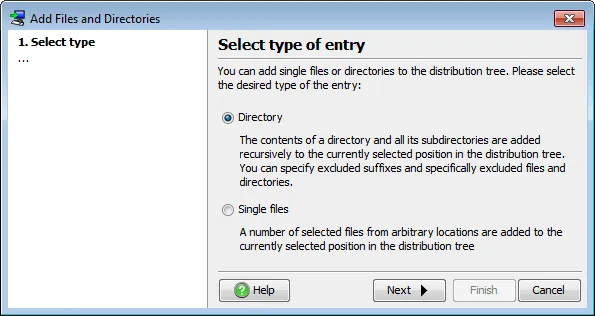
Clicking on the Insert button (the green plus button), I choose the Add Files and Directories option,

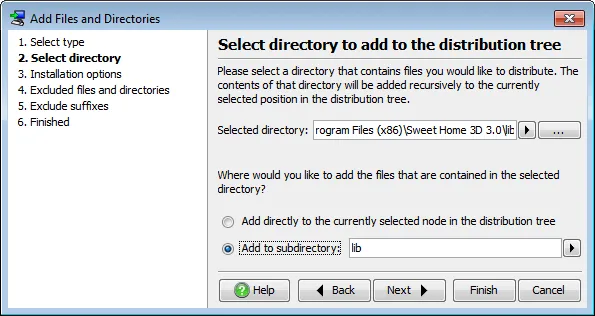
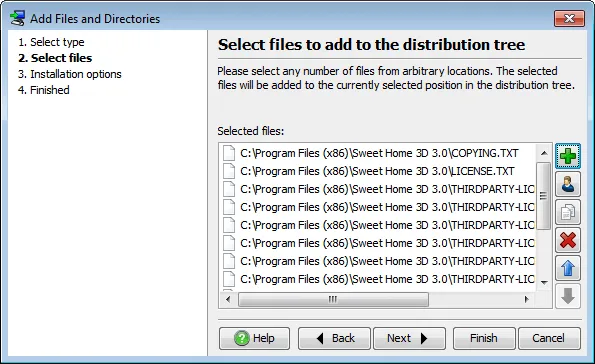
and choose the Directory entry type for the C:Program file (x86)Sweet Home 3D 3.0lib directory with the option Add to subdirectory selected, then Single files type for the licenses files.
I also have to include the javaws.jar file found in the jre6lib subdirectory and required by Sweet Home 3D to run. I insert this file as as a Single file type and to make it appear in the lib subdirectory among other jar files, I insert a new folder named lib where I drag and drop the javaws.jar line.
All these files and directory finally appear in the list of the Define Distribution Tree tab.
Launcher
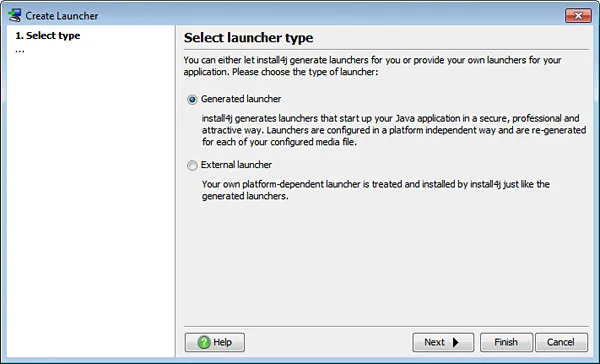
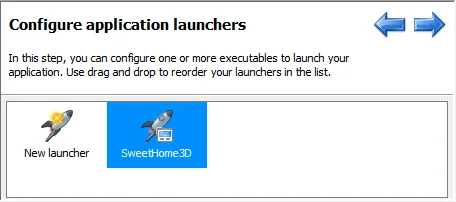
As I don't need to set any File options or don't want to propose optional files at this moment, I now click on the Launchers icon below the Files one, and double click on the New launcher icon.
This will launch a wizard used to create a launcher. As I want to generate a new launcher to test install4j features, I keep the Generate launcher option selected.
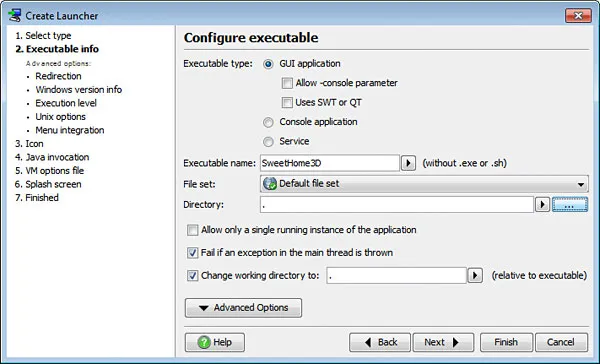
Then I give application name and the directory where it should appear. The Executable info second step offers also an interesting option that allows only a single running instance, that I would check if I didn't program already such a feature in Sweet Home 3D.
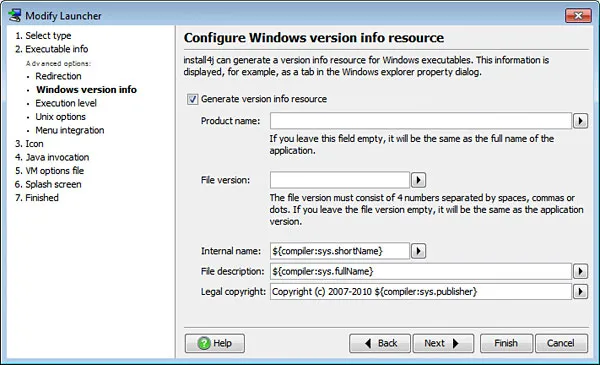
In the Advanced Options list, I choose Windows version info and check the Generate version info resource to get correct values in the file properties dialog box of the future launcher. I let install4j replace Product name and File version fields and enter values in Internal name, File description and Legal copyright text fields, using some existing variables.
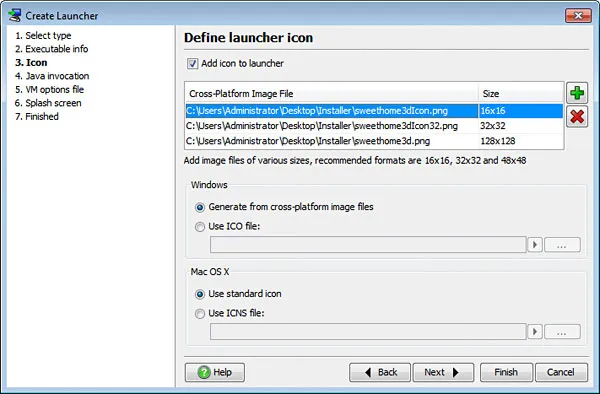
The Icon third step proposes to choose an icon for the program. I select Add icon to launcher option, and configure the program icons at 3 different sizes and add them to the Cross-Platform Image File list.
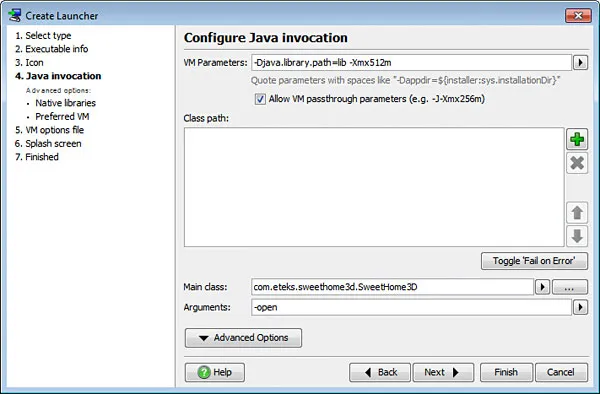
The Java invocation steps shows information required to run a Java application. In VM Parameters, I increase the maximum memory to 512 MB and specify where Java 3D DLLs are available with the parameters -Xmx512m -Djava.library.path=lib (DLLs directory can be set with Advanced Options > Native libraries too). I enter program main class com.eteks.sweethome3d.SweetHome3D and enter -open in Arguments text field because Sweet Home 3D expects this selector before any file passed as an argument.
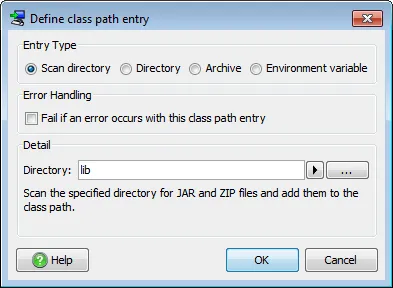
Now I need to complete the Class path list, which accepts individual jar files, directories containing jar files, directories containing .class files or resources, and information from environment variables. As I keep all the jar files in the lib subdirectory, I click on the Insert button, select the Scan directory option and enter lib directory.
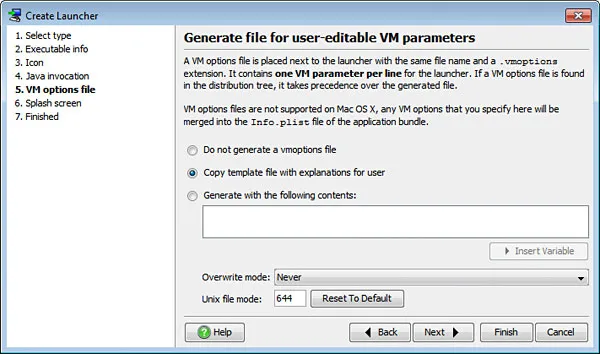
The VM options file step offers an interesting option to the end users who can change default VM parameters in case they need it. As Sweet Home 3D uses a few System properties and may require more memory to run, I keep the default Copy template file with explanations for user selected.
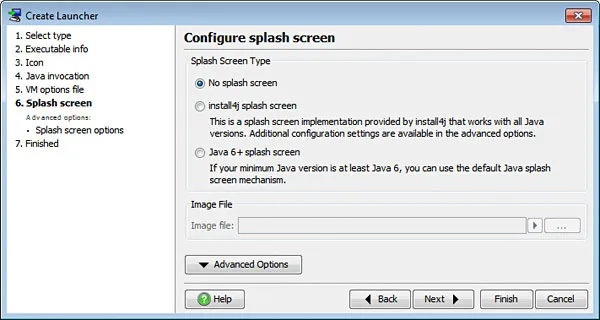
Finally, in the Splash screen step, I can choose the splash screen image that should be displayed during program launch. As Sweet Home 3D handles this feature itself, I don't change default settings but note that you can use install4j splash screen or Java 6 one if needed.
The Advanced options let you even write some texts over the image. Nice!
Once the Launcher wizard is finished, a new launcher icon is added to Launchers screen to let you change launcher settings later.
Installer
The Installer screen describes the various screens that will be displayed to the end user during program installation and uninstallation. It's a highly configurable tool with many options that you can even extend if needed. The screens in the default template will show six screens from Welcome screen to Finish screen.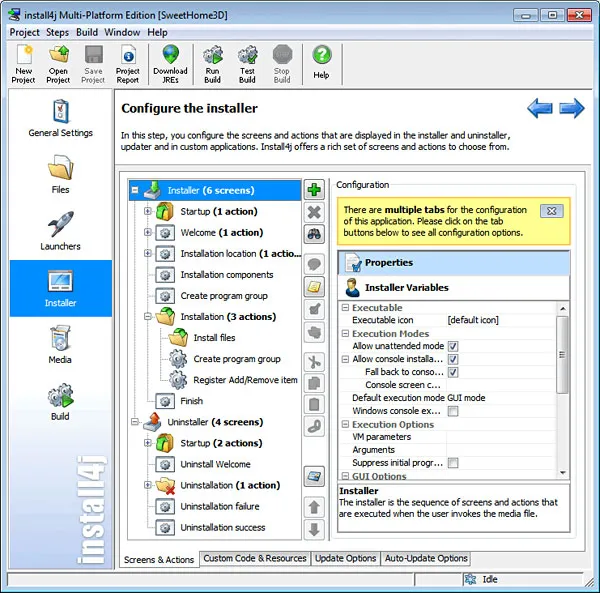
In the Screens & Actions
tab, these screens are represented with an icon showing a gear in a window  and sometimes by custom icons like the one used for the Installation
screen
and sometimes by custom icons like the one used for the Installation
screen  .
The tree shown on the left contains also some actions represented with a gear icon window
.
The tree shown on the left contains also some actions represented with a gear icon window  and by custom icons like the one for the Startup
action
and by custom icons like the one for the Startup
action  .
An action is simply one or more statements (either preprogrammed ones or custom ones programmed in Java) that the
installer should run during the installation.
.
An action is simply one or more statements (either preprogrammed ones or custom ones programmed in Java) that the
installer should run during the installation.
To ensure the installer created with install4j behaves as the existing one, I'll add two screens:
- one displaying the GNU GPL license of the software,
- one that will let the user accept file associations,
and I'll add also two types of actions:
- some registering file extension associations,
- one that will let the user launch Sweet Home 3D once the installation is finished.
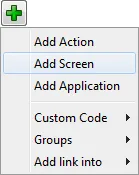
To add the new screens, I click on the Insert button and choose Add Screen in the popup menu.
In the displayed Select an Installation Screen dialog box, I filter the shown list by entering the first letters of "
license
". Once I select Display license agreement
item, I definitively know that screen has some good chances to be the one I look for from its Description
displayed below.

I click on OK and the new screen is automatically inserted after the Welcome screen, just at the right place I wanted it to appear!
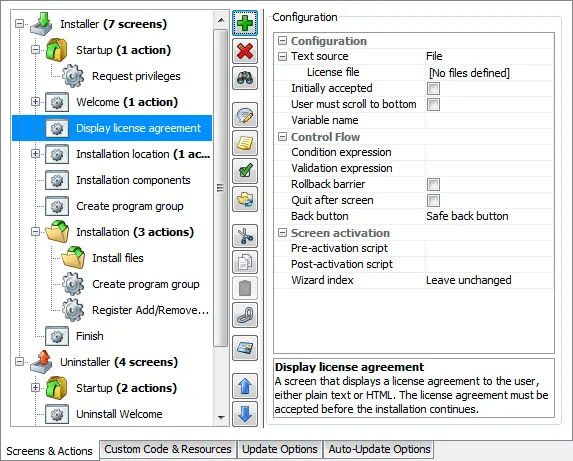
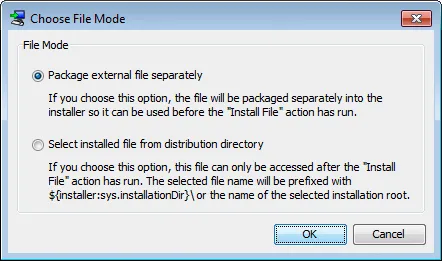
I now enter missing values in the screen properties list displayed at the right. I edit the License file property and install4j lets me choose it either as a file packaged with the installer or coming from installed files.
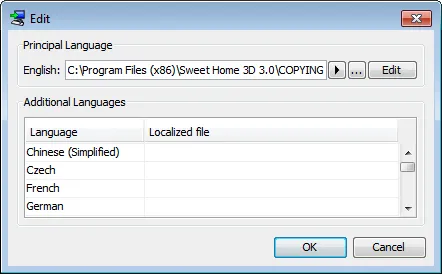
I choose the first option and select the COPYING.TXT file that contains the GNU GPL license text. As the license wasn't translated to other languages, I leave the file empty for the other languages, so the default text in English will be displayed.
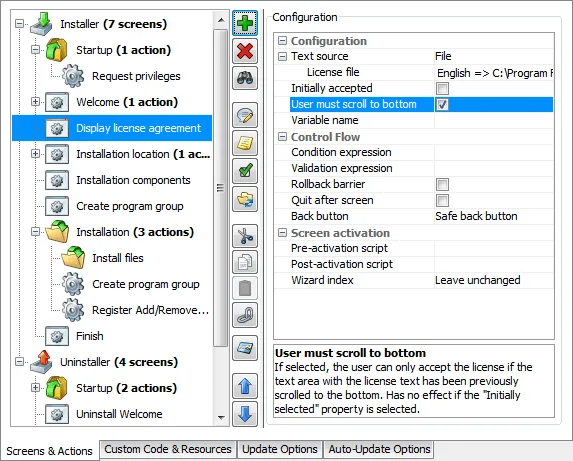
Then I select the User must scroll to bottom option in the hope it will get more users to read the GNU GPL license.
I click again on the Insert button to add a File associations screen and select File associations item in the Select an Installation Screen dialog box.
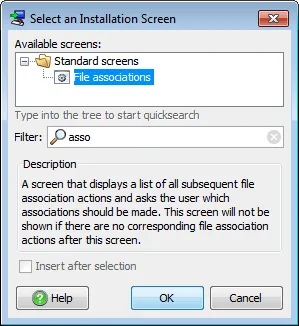
Once I click on OK, install4j warns me that the File associations screen requires one or more File association actions to work.
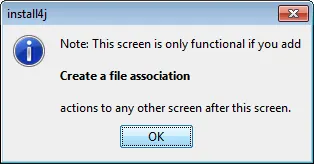
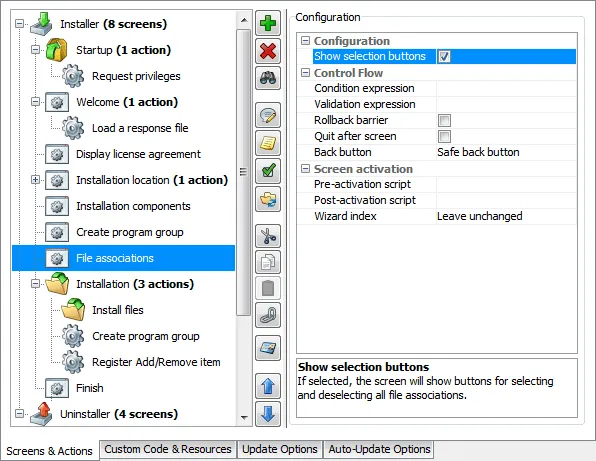
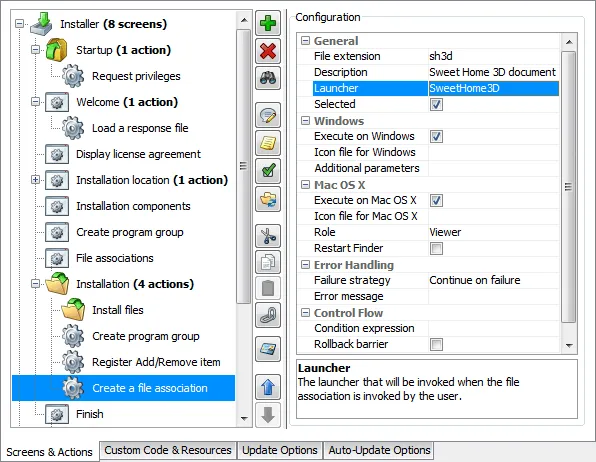
I close the warning message. The File associations screen is added between Create program group and Installation screens, and I check Show selection buttons property to speed up user choice. As Sweet Home 3D has 5 file associations, these buttons will let him or her to select or deselect them with one click.
As file associations should be made only after the executable that handles them is installed, I select the Installation screen in the tree, then I click on the Insert button to add the desired action. In the displayed Select an Installation Action dialog box, I filter the shown list by entering the first letters of "
association
" to quickly find the Create a file association
action among the 60+ preprogrammed actions.
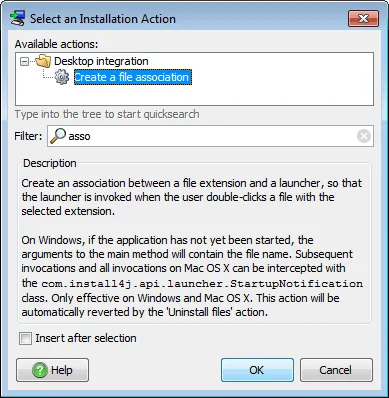
Once I click on OK, install4j appends the new action to the Installation screen, and in the properties list associated to the action, I enter "
sh3d
" File extension,
describe it as "Sweet Home 3D document
" and select the SweetHome3D
launcher.
Then I add the file associations for sh3f, sh3t, sh3p and sh3l extensions in the same way.
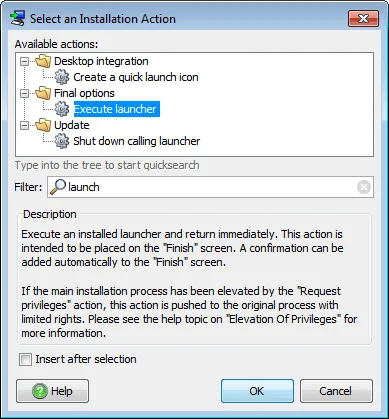
For the action that should launch Sweet Home 3D at the end of the installation process, I select the Finish screen, click on the Insert button and select Add action. In the displayed Select an Installation Action dialog box, I filter the actions list with the first letters of "
launcher
" and select Execute launcher
action.
Once I click on OK, install4j asks me whether I want to add a check box to the Finish screen that will will let the user choose to launch the program or not.
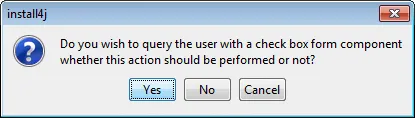
I accept and in the properties list of the Execute launcher action, I finally choose SweetHome3D as the launcher to run.
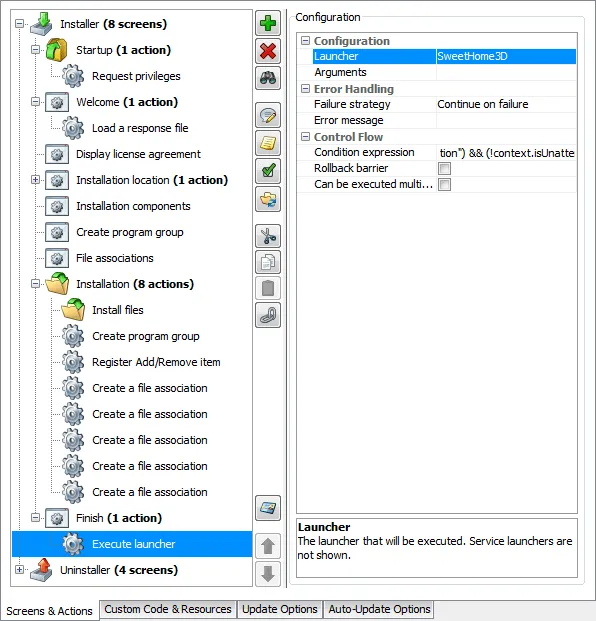
At the end, I get the following list of screens and actions for Sweet Home 3D installer.
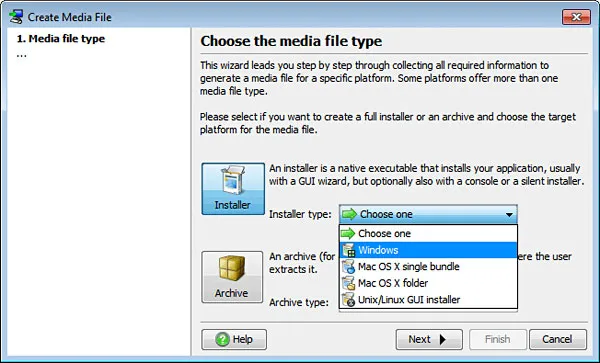
Media
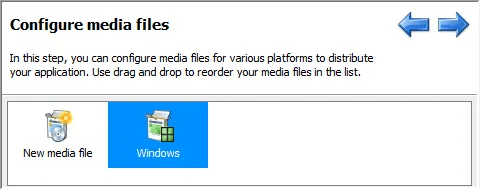
As I don't need Custom code or Update features at this time, I jump to the last part of the installer preparation by clicking on Media icon, then double-clicking on New media file icon.
This will launch a wizard to configure a Media file. As I prefer an executable installer, I choose Windows in the Installer type combo box.
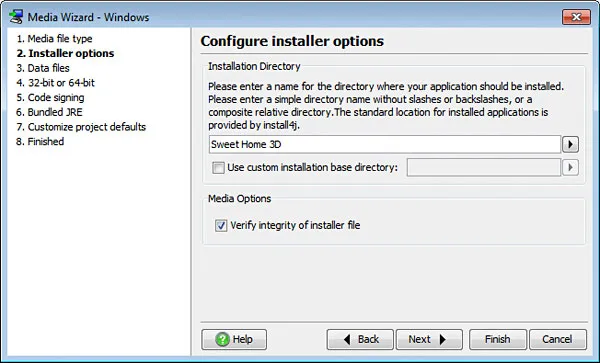
In the Configure installer options step, I change installation directory to "
Sweet Home 3D
".
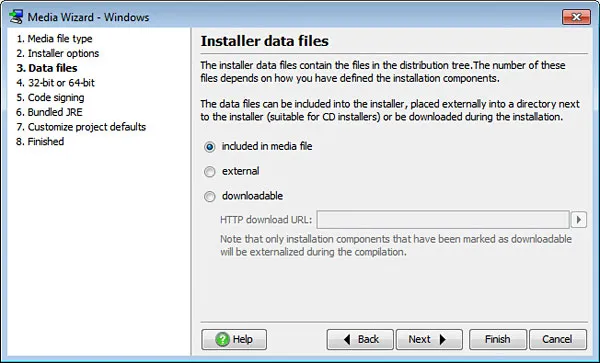
The Installer data files step doesn't need any change since I want to create one installer file that will contain everything required.
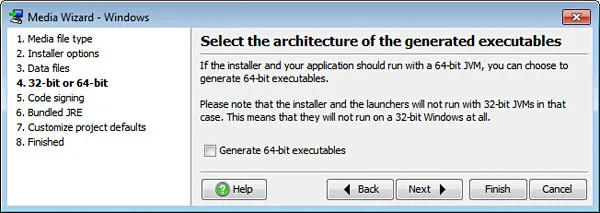
I don't check the 64-bit executable option in the Select the architecture of the generated executables step since the Java 3D DLLs delivered with Sweet Home 3D are 32-bit only.
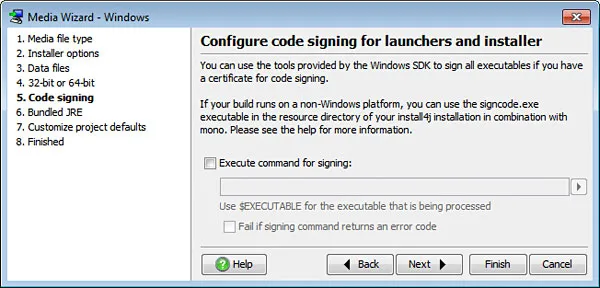
As I don't have any code certificate I must pass the Configure code signing for launchers and installer step too.
The Bundle a JRE with your application step is more interesting for my use case.
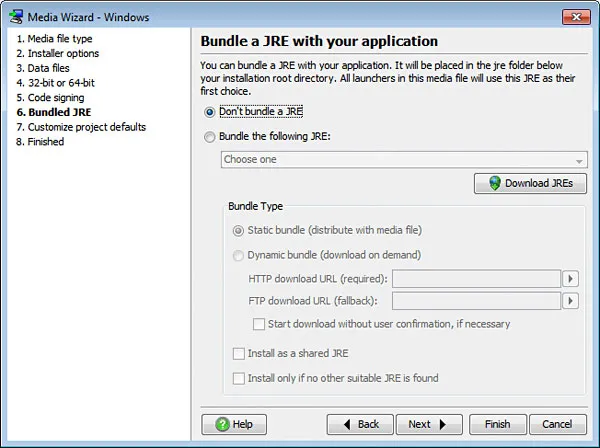
As I want to bundle a JRE with Sweet Home 3D to spare users the installation of a JRE, I select the Bundle the following JRE option and chose the most recent one after clicking on Download JREs.
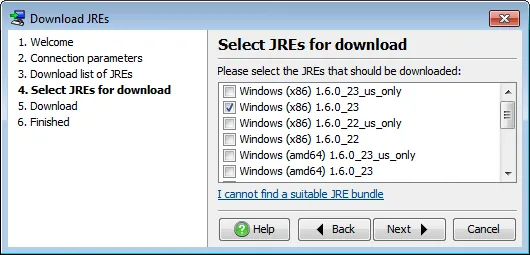
Once the JRE is downloaded, I select it in the Bundle the following JRE combo box.
I'm not interested by any of the Customize project default settings last step, and I can finish the Media Wizard execution that will add an icon for the newly created media.
Build
The installer is now ready to be built. I click on Build icon and then on Start Build button.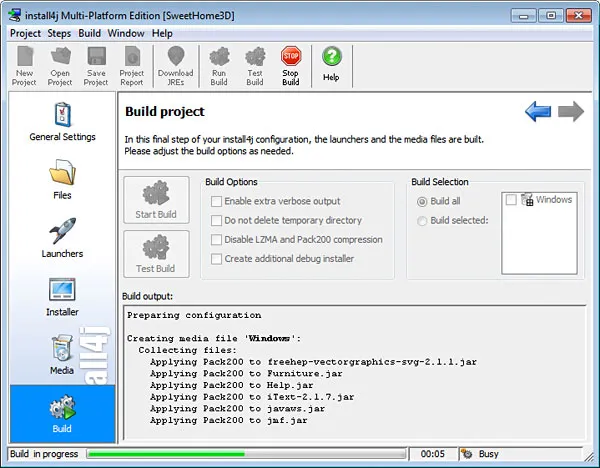
After 60 seconds, the installer is generated, and my first surprise is than the generated SweetHome3D-3.0-windows.exe file is more than 4 MB smaller than the one generated by Inno Setup (26 MB instead of 30.6 MB)! This is probably due to Pack200 compression algorithm.
Test
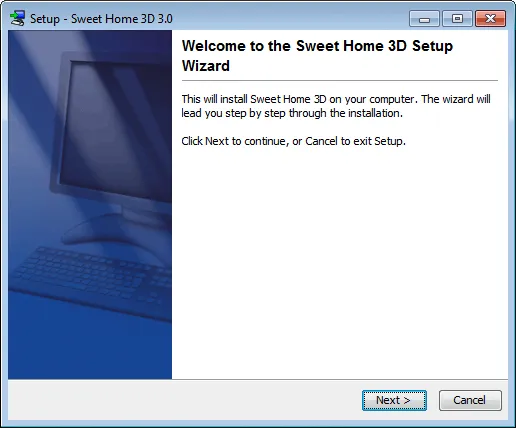
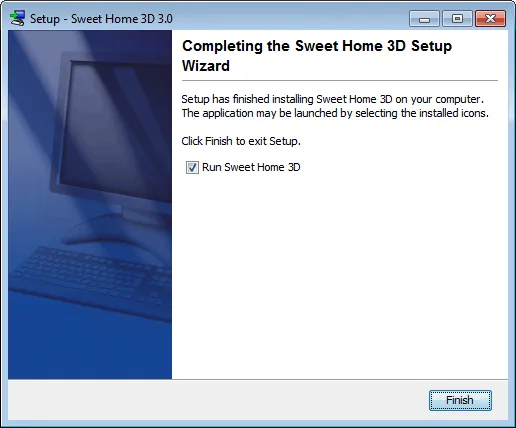
I double-click on the new installer icon to launch it and get the expected installation screens sequence.

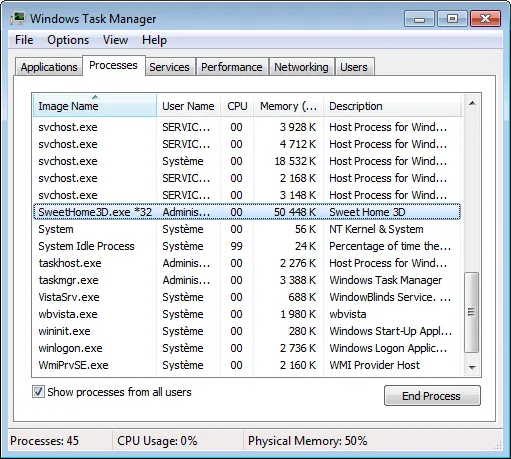
Once Sweet Home 3D is installed and launched, I check how it's listed in the Processes tab of the Windows Task Manager : it appears as SweetHome3D.exe which is much nicer than javaw.exe.
Conclusion
With install4j you can easily create an installer and launcher for your Java application. Even if there are many steps in this installer wizard, you really feel install4j takes you by the hand to the right target. But in fact, install4j offers much more features that I'll test in a second article.I'll use install4j to download some optional files for Sweet Home 3D and configure some program parameters, like memory settings, system properties and default preferences files.
I'll also show how to use the different installation modes and how to update the program automatically.
Archive
July/2
2025/20
Making the JProfiler MCP Server Robust for Weaker ModelsJProfiler 16.2: Profiling From the Command Line
April/3
How I Doubled jclasslib's Performance with JProfiler MCPThe Hotspot Claude Would Never Have Found by Reading the CodeJProfiler 16.1: AI Agents Can Now Profile Your Java Applications
March/2
Breaking the LLM Black Box: Custom Categorization in JProfilerProfiling AI: LangChain4j and Spring AI
February/1
October/1
August/1
July/2
2024/5
2023/7
The power of async tracking in JVM profilingWebsite refresh: Visual updates, dark mode, and semantic search for docs
June/4
All our artifacts are now published on Maven CentralJEP 493 follow-up: install4j 11.0.4 is ready for separate JMOD bundles in Eclipse Temurin 24.0.2JProfiler tips roundup May 2025JVM performance watch roundup May 2025
May/3
JProfiler tips roundup April 2025JVM performance watch roundup April 2025Heap Walker scripting for snapshot analysis
April/8
Capturing and comparing MBean states with JProfilerAdvanced SSH remote profiling with JProfilerProfiling Java applications in VS Code with JProfilerAdvanced Kafka probe configuration in JProfilerProfiling Kafka #1 – Message Flow & Hot SpotsBringing JProfiler to VS Code with Kotlin Multi-PlatformCaching auto-provisioned install4j distributions in CI pipelinesCross-platform JRE bundle creation under threat from JEP 493
January/1
September/5
2022/10
Garbage collector analysis in JProfilerRecording JFR snapshots with JProfilerEnhanced JFR snapshot analysis with JProfilerWorking with probe events in JProfilerCustomizing telemetries in JProfiler
March/1
January/1
December/2
November/3
2021/2
2020/1
2019/1
2018/3
2017/5
2016/1
2015/10
Using sunburst diagrams for understanding Java memory consumptionUsing flame graphs when profiling Java applicationsProfiling a Netty server
October/1
September/1
August/2
July/1
November/5
2014/3
2013/3
2012/5
2011/13
Analyzing specific parts of the call treeAnalyzing incoming and outgoing calls of a methodCollapsing recursions in the call treeRemote profiling through an SSH tunnelFinding JDBC connection leaks
June/5
December/1
October/2
September/5
2010/8
2009/14
Using the "Run interceptor script" trigger actionCreating a custom probeInspections in the heap walkerHeap walker graph: Finding paths between selected instancesFiltering in the reference view of the heap walker
August/4
Request trackingAnalyzing long-running AWT events with JProfilerProbes overviewCPU profiling: Sampling and instrumentation
February/1