

Beyond installing
In the two last articles, I showed how to build an installer with install4j for Sweet Home 3D, then improve it with various options. But a program lives, and more and more users are used to getting program updates automatically. As install4j includes an auto-update feature, I'm going to use it to update Sweet Home 3D when a new version is released. Finally, I'll provide all the nice options that install4j offers for Mac OS X and Linux users by creating a cross platform installer.Auto-updating
install4j offers various ways to check whether updates are available and to manage the launching of the updater. As I want to provide auto-updating without modifying the Sweet Home 3D source code at this moment, I'm going to set options in install4j that will check if a new version of the program is available when the program is launched. The auto-update feature is informed about the availability of a new version thanks to an updates.xml file I'll have to host at a specified URL. Each time an installer is built, install4j creates a default updates.xml file in the output directory, and when a new version will be available, I'll just have to upload that file along with the new version of the installer. For the version 3.0 of the installer, this file looks like this:<?xml version="1.0" encoding="UTF-8"?>
<updateDescriptor baseUrl="">
<entry targetMediaFileId="80" updatableVersionMin="" updatableVersionMax=""
fileName="SweetHome3D-3.0-windows.exe" newVersion="3.0" newMediaFileId="80"
fileSize="27361280" bundledJre="windows-x86-1.6.0_23" archive="false">
<comment language="en" />
<comment language="zh_CN" />
<comment language="cs" />
<comment language="fr" />
<comment language="de" />
<comment language="el" />
<comment language="hu" />
<comment language="it" />
<comment language="ja" />
<comment language="pl" />
<comment language="pt_BR" />
<comment language="ru" />
<comment language="es" />
<comment language="sv" />
</entry>
</updateDescriptor>
To prepare future updates, I have to decide in this version where I'll host the updates.xml file. Thus, I enter the URL "
http://www.sweethome3d.com/download/updates.xml
" in Auto-Update Options
tab of the Installer
screen.
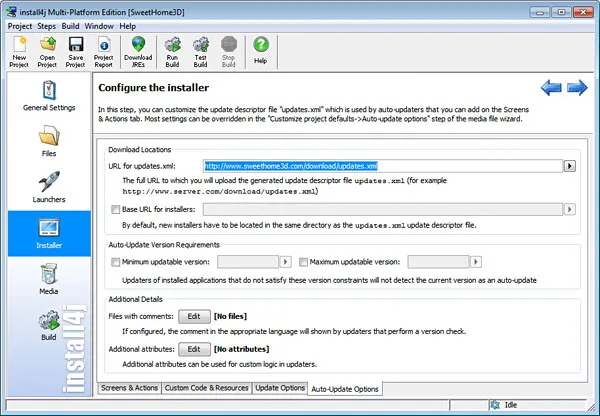
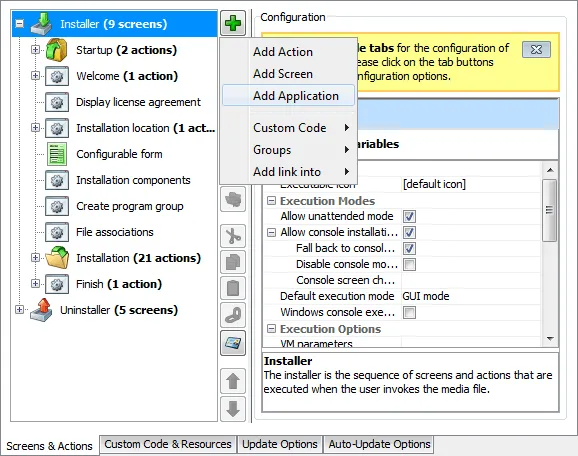
Then, in the Screens & Actions tab, I click on the Insert button and select the Add Application menu item.
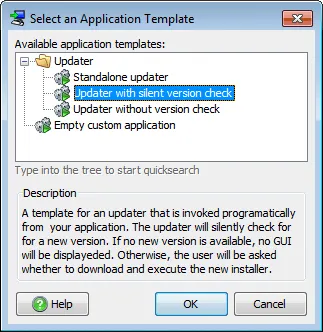
In the Select an Application Template dialog box, I select the Updater with silent version check template.
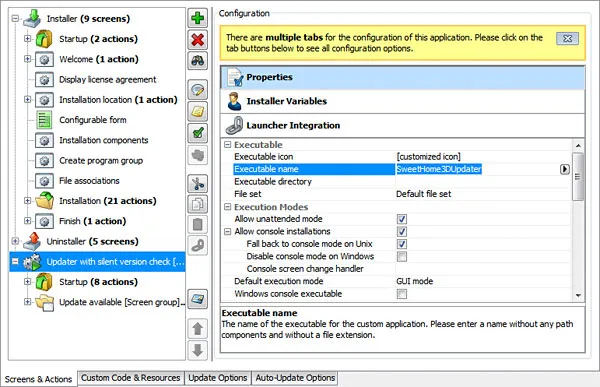
Once I click on OK, a new node is added to Installer screen for the updater application and I name its Executable as "
SweetHome3DUpdater
" in its Properties
tab.
To run this updater automatically when Sweet Home 3D or Furniture Library Editor are launched, I click on the Launcher Integration tab, select the Start automatically when launcher is executed option and choose to Always run the updater.
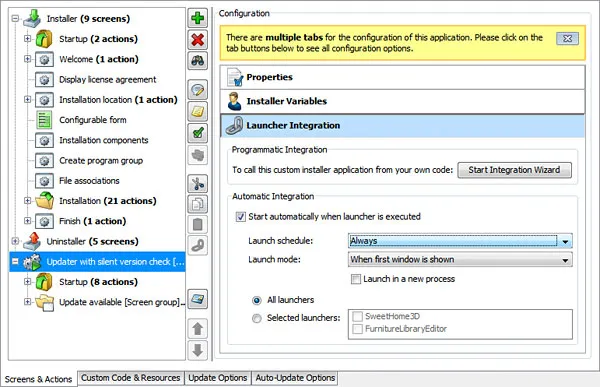
Minimum auto-updating is now integrated and I just have to build a new installer to make it available for a future version of the program.
To test it, I immediately install version 3.0 of the program, generate an installer with a fake 3.0.1 higher version number,
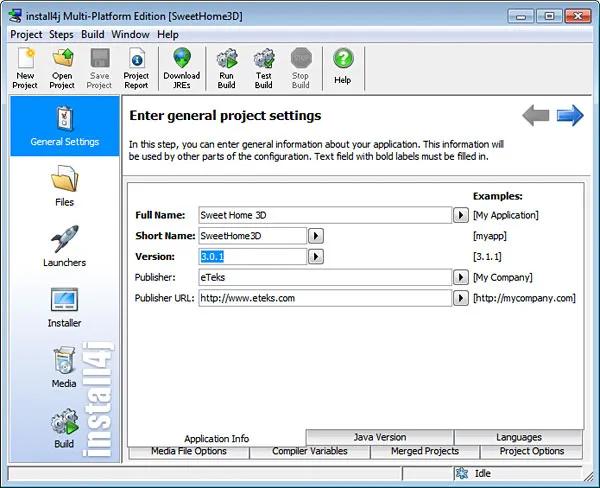
and upload SweetHome3D-3.0.1-windows.exe and updates.xml to http://www.sweethome3d.com/download after adding a small comment in default language to updates.xml file.
<?xml version="1.0" encoding="UTF-8"?>
  <updateDescriptor baseUrl="">
  <entry targetMediaFileId="80" updatableVersionMin="" updatableVersionMax=""
    fileName="SweetHome3D-3.0.1-windows.exe" newVersion="3.0.1" newMediaFileId="80"
    fileSize="27427328" bundledJre="windows-x86-1.6.0_23" archive="false">
  <comment>Fixed minor bugs</comment/>
  </entry>
  </updateDescriptor>
Then, a few seconds after I launch Sweet Home 3D version 3.0, the updater is launched and offers to download Sweet Home 3D version 3.0.1.
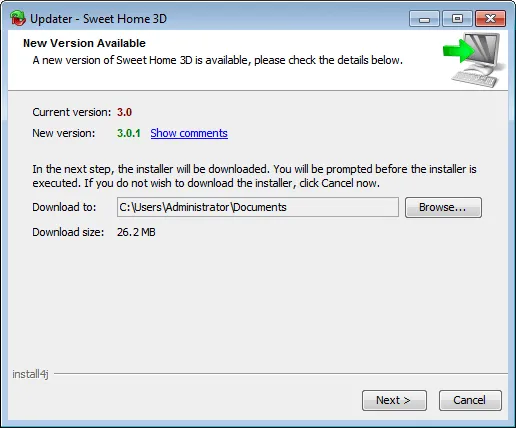
If I click on the Show comments link, I get the comments entered in the updates.xml file.
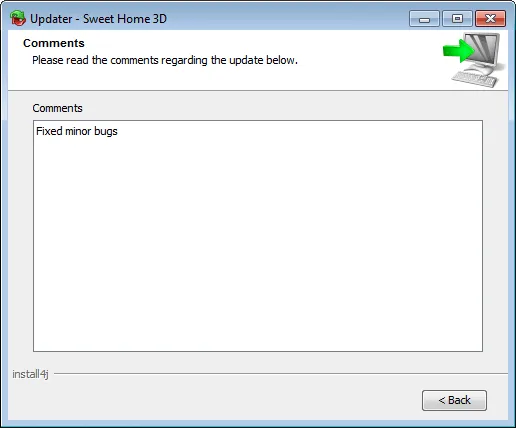
Otherwise the download of the new version is started.
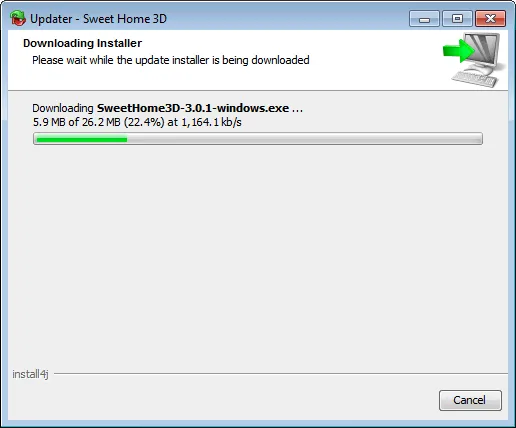
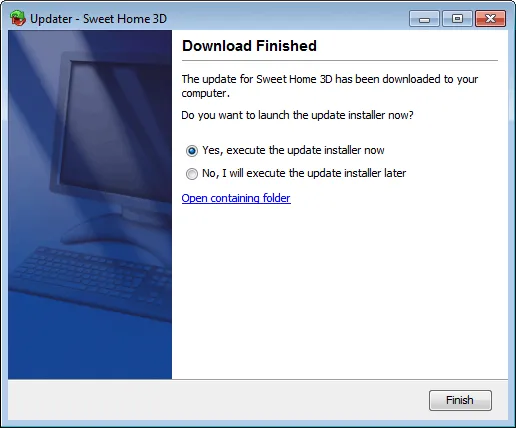
Once downloaded, I choose to execute the downloaded installer.
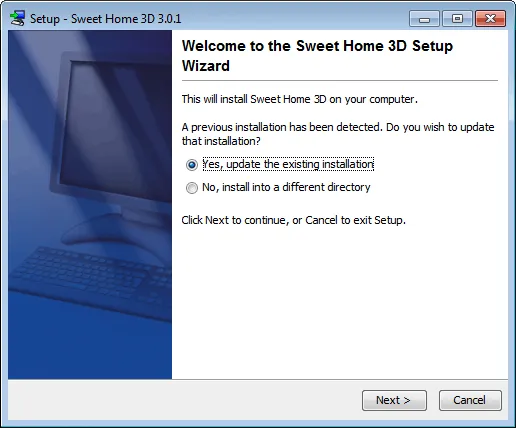
Because the installer detects that a previous version is installed on my computer, it asks me whether to update or to install it in another location before performing the installation.
Managing cross platform installers
Since install4j is a Java program itself, it's easy to prepare installers for each operating system where JVMs are available. If an application shares the same list of files (which is generally the case), I would just have to create a different media for each targeted operating system with its dedicated JRE. It's a little more complicated for Sweet Home 3D since it requires different Java 3D DLLs for different platforms. Therefore, I download Java 3D zip binaries for Mac OS X, Linux 32 bits and Linux 64 bits at Java 3D release builds page. Each of these zipped files contains a j3d-jre.zip file, and each j3d-jre.zip file contains the three j3dcore.jar, vectmath.jar and j3dutils.jar files which are the same as the Windows ones I have already, plus some DLLs like libj3dcore-ogl.so under Linux that I have to keep. Under Mac OS X, Java 3D works thanks to JOGL library, that I download too.Once I retrieve all these files, I copy the ones required by Java 3D in a lib subdirectory of Install directory and reorganize them to avoid any name conflict.
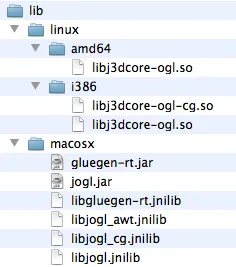
These files will have to be copied in the lib subdirectory of the destination directory where program will be installed. To copy only the Java 3D files required for a given operating system, I'm going to create one file set for each system in install4j. In the Files screen, I click first on the Insert button and choose the New File Set option.
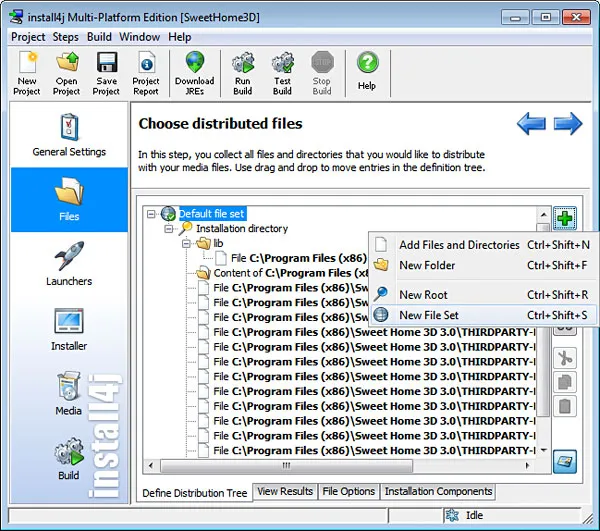
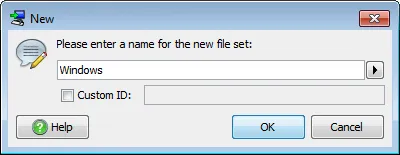
I enter the general name "
Windows
",
and renew the New File Set operation for Mac OS X, Linux 32 bits and Linux 64 bits.
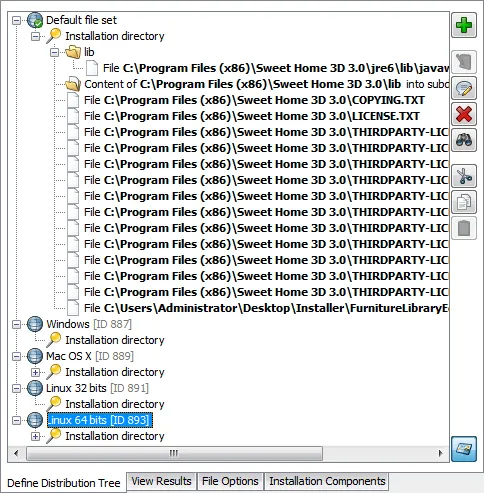
Then, for each of these file sets, I create a new lib folder by clicking on the Insert button and choosing the New Folder option.
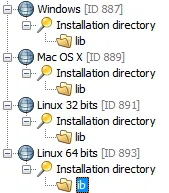
Once the lib subdirectories are ready, I select the one in Windows file set, click on the Insert button and choose Add Files and Directories option.
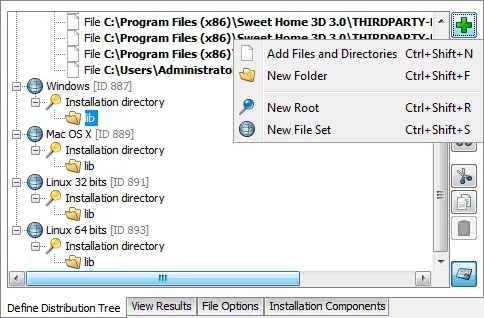
In the Add Files and Directories dialog box, I choose the Single files option,
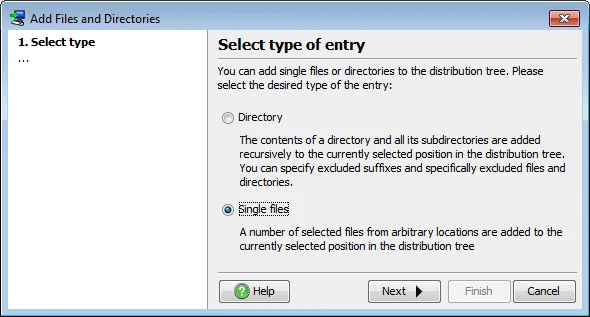
click on the Next button, and select the four Java 3D DLLs for Windows in C:Program Files (x86)Sweet Home 3D 3.0lib directory.
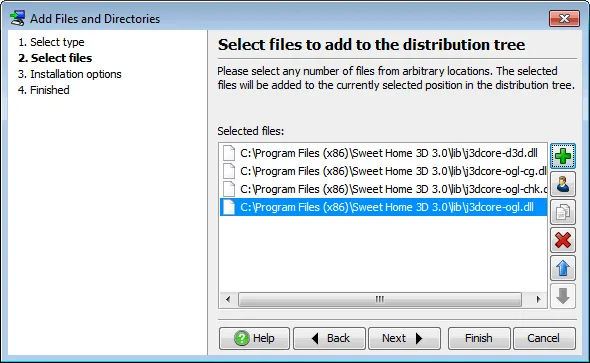
I confirm my choice, and repeat the same operation to add the Java 3D files that depends on Mac OS X, Linux 32 bits and Linux 64 bits.
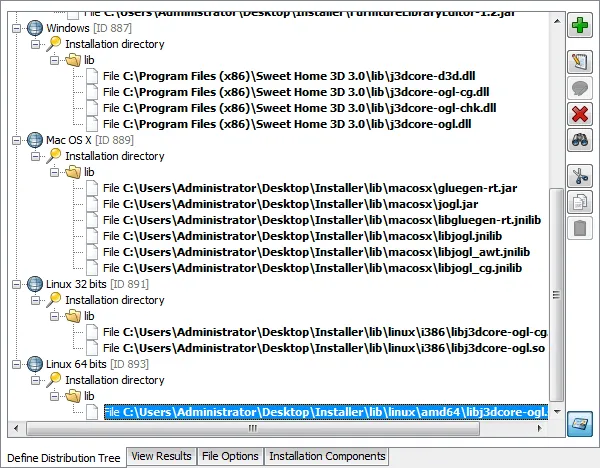
To get consistent file sets, I also have to remove the Java 3D DLLs from Default file set : I select the Content of C:Program Files (x86)Sweet Home 3D 3.0lib into subdirectory lib node, click on the Edit Entry button,
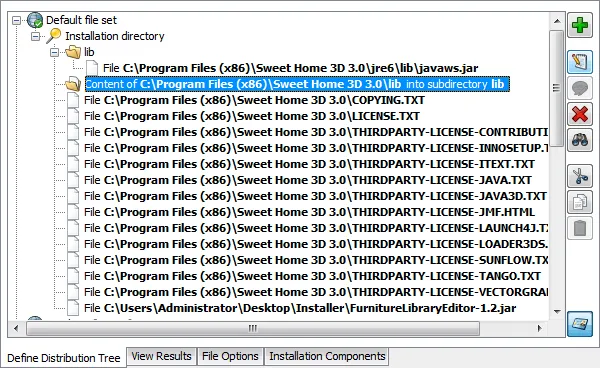
and in the Modify Entry in the Distribution Tree dialog box, I change the entry type to Single files and select all the files in C:Program Files (x86)Sweet Home 3D 3.0lib directory except the four DLLs.
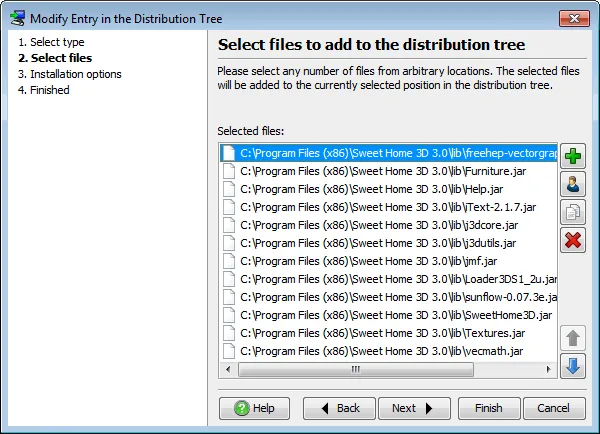
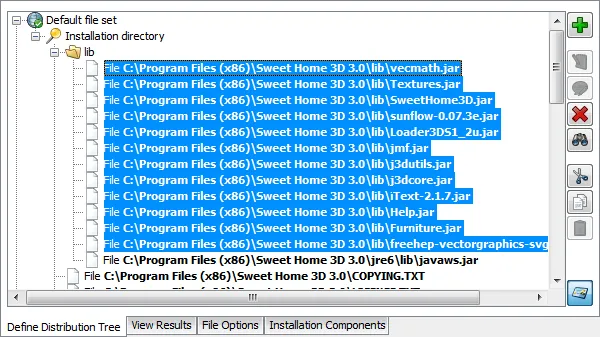
Once I chose these JAR files, I move them to the lib subdirectory of the installation directory.
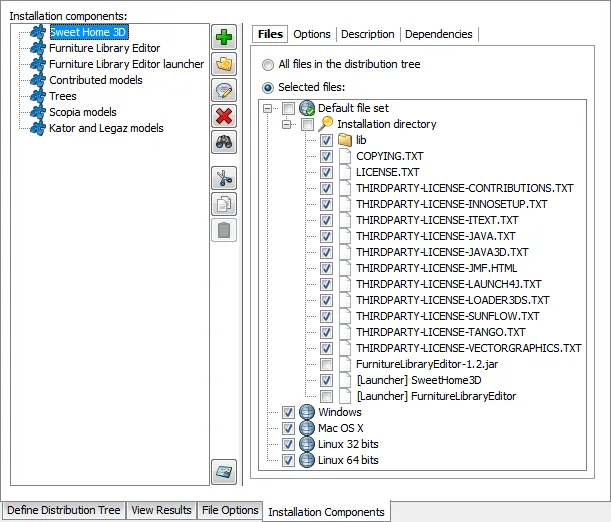
Finally, I click on the Installation Components tab, select the Sweet Home 3D component and include Windows, Mac OS X, Linux 32 bits and Linux 64 bits file sets.
Now that file sets are ready, I'm going to use them in the Windows existing media file and in the new media files for Mac OS X and Linux. I go to the Media screen,
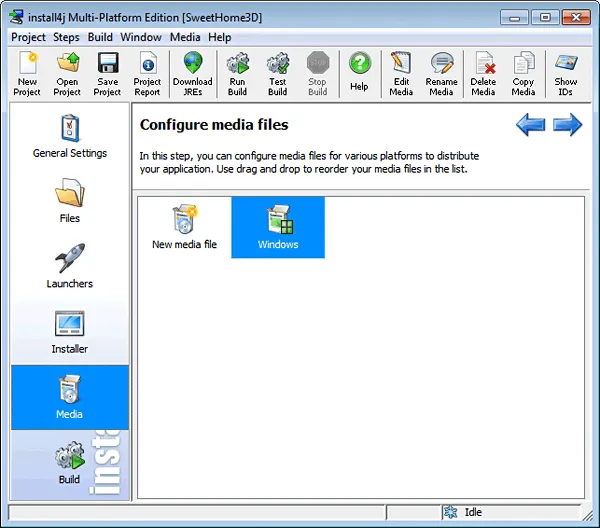
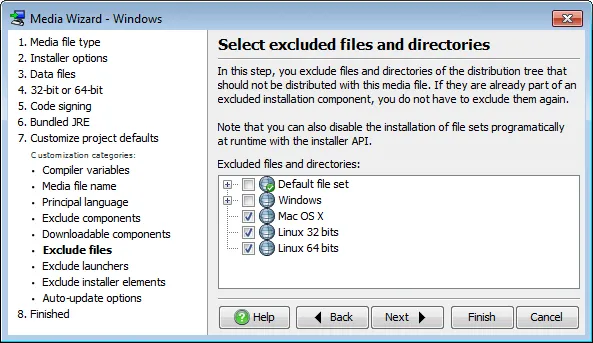
and double-click on the Windows media file to exclude the file sets that are not needed for Windows.
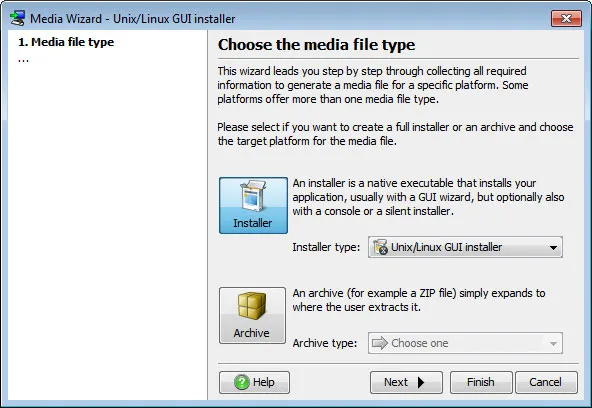
Then, I click on New media file icon to create Linux 32 bits media file. In the Installer type combo box, I choose Unix/Linux GUI installer,
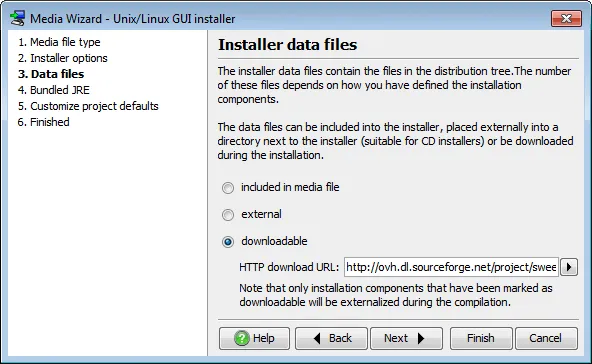
and click on the Next button until the Data files step where I enter the same download URL http://ovh.dl.sourceforge.net/project/sweethome3d/FurnitureLibraryEditor/ for the Furniture Library Editor as I did for Windows media.
In the Bundled JRE step, I click on the Download JREs button,
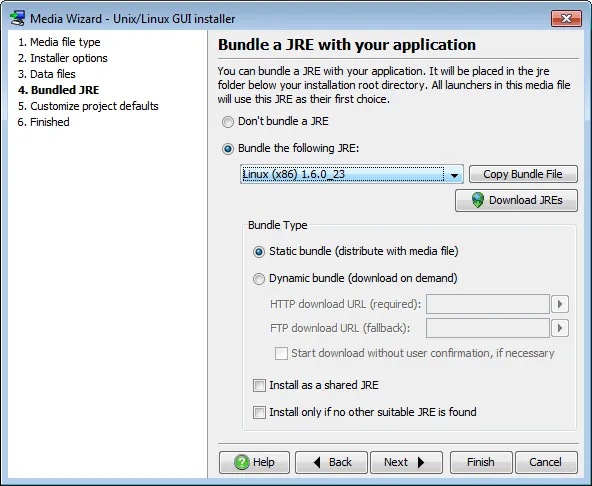
to download Linux (x86) 1.6.0_23 JRE.
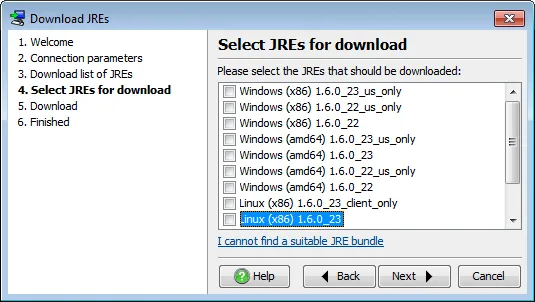
Once downloaded, I choose this JRE,
customize the installer by setting the media file name to "
${compiler:sys.shortName}-${compiler:sys.version}-linux-32bits
"
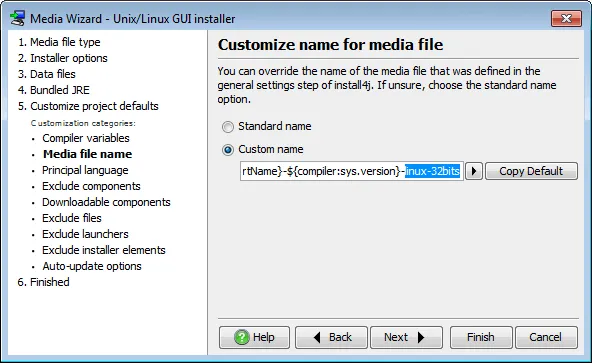
and by excluding the file sets of the other operating systems.
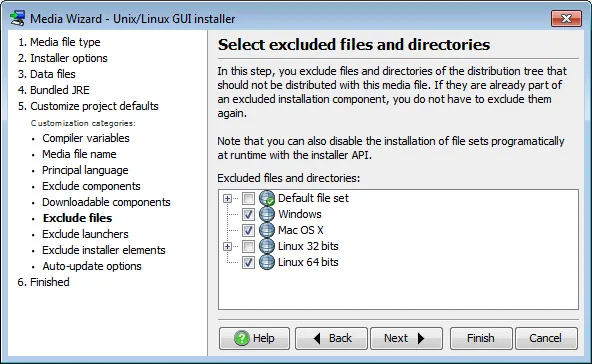
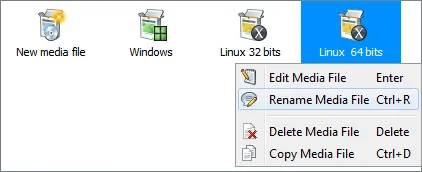
Once the Media wizard is finished for Linux 32 bits, I create similarly the media file for Linux 64 bits, and rename them as Linux 32 bits and Linux 64 bits with the Rename Media File menu item available in their contextual menu, to be able to distinguish more easily.
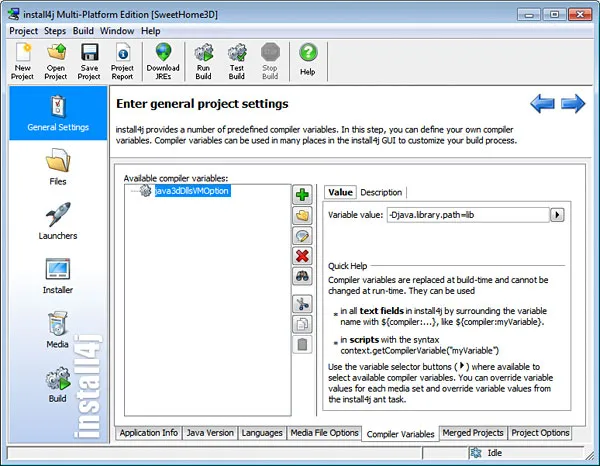
Mac OS X installer is very similar to the other installers except it doesn't need to download a JRE and it requires an additional VM option to run: as Mac OS X provides its own JRE with the Java 3D 1.3.1 library in extension directory, I have to change the java.ext.dirs system property to ensure the Java 3D 1.5.2 library installed with Sweet Home 3D will have a higher priority. To set this VM option that should replace the -Djava.library.path=lib existing one, I create the java3dDllsVMOption compiler variable by clicking on the Insert button in the Compiler Variables tab of the General Settings screen and enter "
-Djava.library.path=lib
" as its default value.
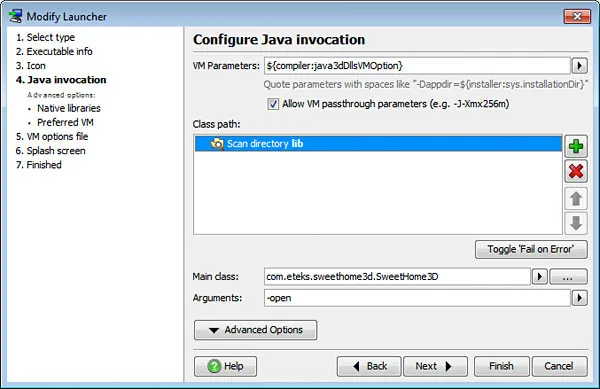
Then in the Java invocation step of SweetHome3D launcher, I update the text of the VM Parameters field with ${compiler:java3dDllsVMOption}.
Finally, I click on New media file icon, choose Mac OS X folder Installer type,
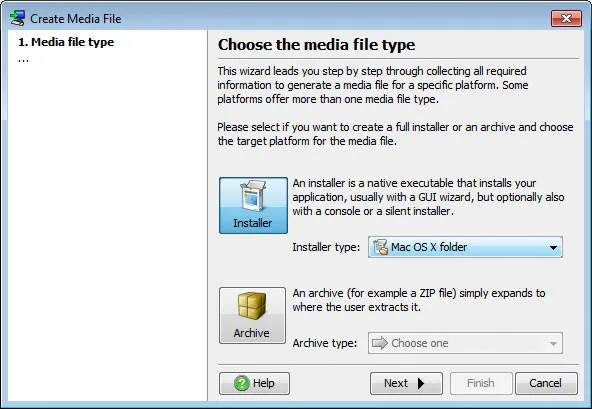
update the download URL, exclude the file sets of the other operating systems and in Compiler variables step, override java3dDllsVMOption variable with the value
-Djava.ext.dirs=lib:/Library/Java/Extensions:/System/Library/Java/Extensions:

    /System/Library/Frameworks/JavaVM.framework/Versions/1.5/Home/lib/ext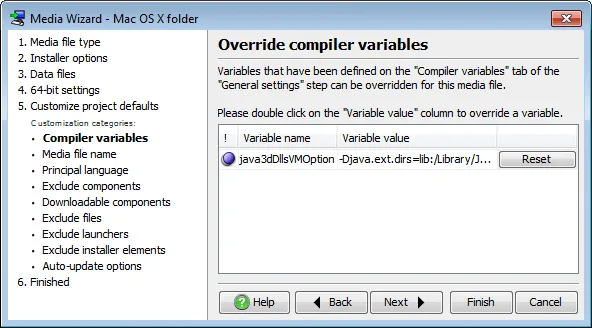
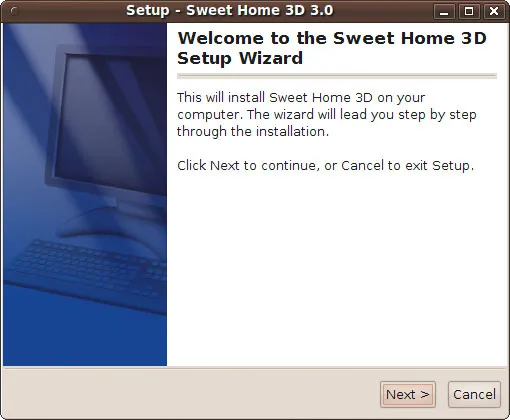
I can now build the 4 installers and test them on each operating system.
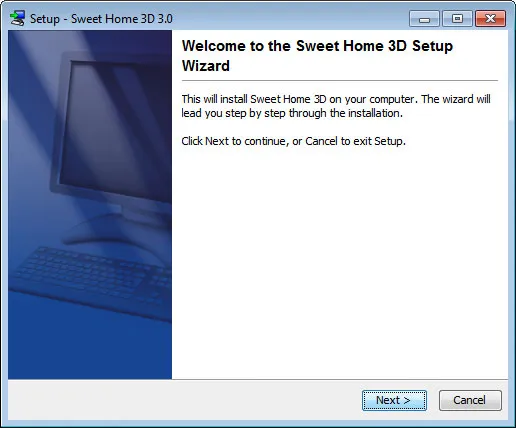
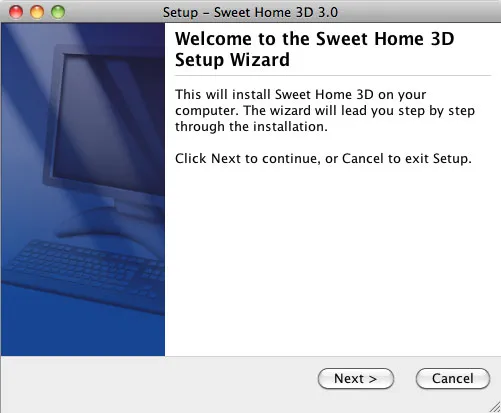
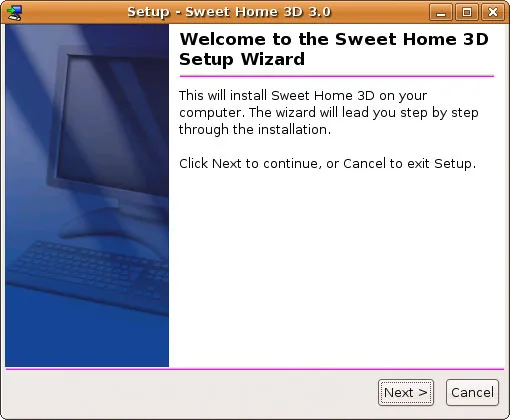
Conclusion
install4j offers many options to help with auto-updating installed software and to deliver Java cross platform installers and uninstallers. install4j can create installers for all supported platforms on any supported platform, so on a Linux build server you can create installers for Windows and Mac OS X as well.아카이브
11월/1
9월/3
2025/20
HotSpot의 반격: JEP 544, GraalVM 시작 성능 독점의 끝인가?SBOM이 15개월 후 의무화됩니다. 당신의 SBOM은 아마 잘못되어 있을 것입니다.Apache Fory JSON을 4.5배 더 빠르게 만든 방법
8월/3
Java vs. Kotlin: 누가 (역)직렬화를 더 빠르게 할 수 있을까?Apache Fory는 왜 그렇게 빠른가? Java 직렬화 프레임워크 5종 프로파일링jvmguard 소개: 자동 프로덕션 프로파일링
7월/2
4월/3
JProfiler MCP로 jclasslib 성능을 두 배로 개선한 방법Claude가 코드를 읽고서는 절대 찾을 수 없었던 핫스팟JProfiler 16.1: 이제 AI 에이전트가 Java 애플리케이션을 프로파일링할 수 있습니다
3월/2
2월/1
10월/1
8월/1
7월/2
2024/5
2023/7
The power of async tracking in JVM profilingWebsite refresh: Visual updates, dark mode, and semantic search for docs
6월/4
All our artifacts are now published on Maven CentralJEP 493 follow-up: install4j 11.0.4 is ready for separate JMOD bundles in Eclipse Temurin 24.0.2JProfiler tips roundup May 2025JVM performance watch roundup May 2025
5월/3
JProfiler tips roundup April 2025JVM performance watch roundup April 2025Heap Walker scripting for snapshot analysis
4월/8
Capturing and comparing MBean states with JProfilerAdvanced SSH remote profiling with JProfilerProfiling Java applications in VS Code with JProfilerAdvanced Kafka probe configuration in JProfilerProfiling Kafka #1 – Message Flow & Hot SpotsBringing JProfiler to VS Code with Kotlin Multi-PlatformCaching auto-provisioned install4j distributions in CI pipelinesCross-platform JRE bundle creation under threat from JEP 493
1월/1
9월/5
2022/10
Garbage collector analysis in JProfilerRecording JFR snapshots with JProfilerEnhanced JFR snapshot analysis with JProfilerWorking with probe events in JProfilerCustomizing telemetries in JProfiler
3월/1
1월/1
12월/2
11월/3
2021/2
2020/1
2019/1
2018/3
2017/5
2016/1
2015/10
Using sunburst diagrams for understanding Java memory consumptionUsing flame graphs when profiling Java applicationsProfiling a Netty server
10월/1
9월/1
8월/2
7월/1
11월/5
2014/3
2013/3
2012/5
2011/13
Analyzing specific parts of the call treeAnalyzing incoming and outgoing calls of a methodCollapsing recursions in the call treeRemote profiling through an SSH tunnelFinding JDBC connection leaks
6월/5
12월/1
10월/2
9월/5
2010/8
2009/14
Using the "Run interceptor script" trigger actionCreating a custom probeInspections in the heap walkerHeap walker graph: Finding paths between selected instancesFiltering in the reference view of the heap walker
8월/4
Request trackingAnalyzing long-running AWT events with JProfilerProbes overviewCPU profiling: Sampling and instrumentation
2월/1