Auto-Update Functionality
install4j can help you to include auto-updating functionality to your application. Auto-updating includes two tasks: First, there must be a way to check if there is a newer version available for download. This check can be initiated by the user in various ways or the check can be triggered automatically by your application. Secondly, there must be a way to download and execute an appropriate installer for the new version.
install4j creates a special file named updates.xml in the media output directory when you
build the project. This file describes the media files of the current version. If you want to
use install4j's auto-update functionality, you have to upload this file to a web server.
The file is then downloaded by deployed installations and delivers information about the current version.
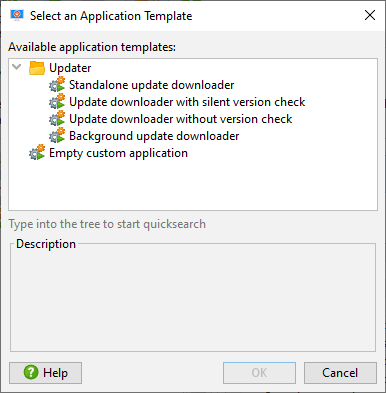
Downloading and installing the new version is done with a custom installer application. install4j offers several templates for update downloaders that correspond to the update strategies outlined below.
Quick start
To get basic auto-update functionality for a GUI application, you can follow these instructions:
-
Upload the file
updates.xmltogether with your media files to a directory on your web server. -
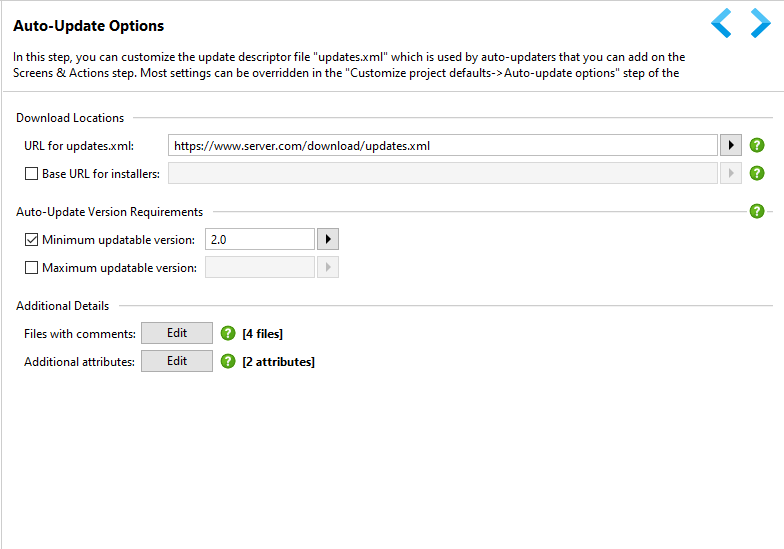
Go to the "Installer->Auto-Update Options" step and enter the download URL for the
updates.xmlfile. This must be the full URL for the file, likehttps://www.server.com/download/updates.xmland not just for the containing directory. - Go to the "Installer->Screens & Actions" step, click on the add button, choose Add application from the popup menu and select the "Update downloader with silent version check" template.
-
For the added update downloader application, enter the "Executable name" property, for example
automaticUpdater. - Activate the "Launcher integration" tab for the new update downloader application and select the "Start automatically when launcher is executed" check box. Leave all other settings at their default.
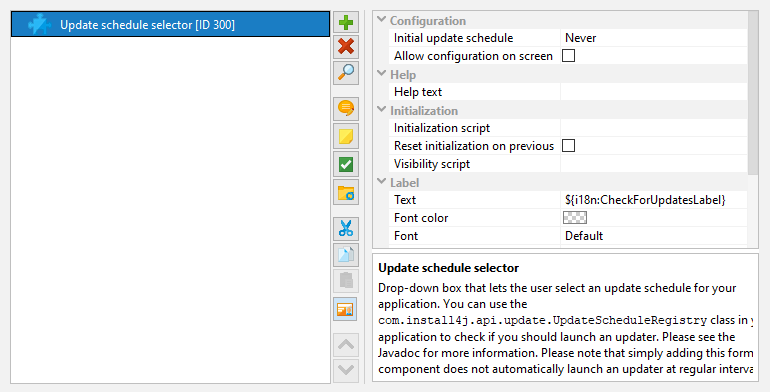
- In your installer, add a "Configurable form" and add an "Update schedule selector" form component to it.
In the installer, the user will get the possibility to choose the frequency of the update checks. When the user executes a launcher after you publish an update, the update downloader will be shown after the application window is displayed and tell the user about the new version. If the user accepts, the new installer is downloaded and installed.
Of course your ideas for auto-update might be different. Maybe you do not have a GUI application and you want to perform unattended updates, or you want to notify your users about updates directly in your application. That is why the auto-update functionality has to be extremely flexible, with the unavoidable downside that its configuration is somewhat involved and there are a couple of concepts that you have to understand in order to be successful. The bulk of this flexibility comes from the fact that the update downloader is not a monolithic entity, but is composed of standard form components and actions that can be adjusted according to your particular requirements.
The updates.xml file
The updates.xml file is created in the media output directory
each time you build the project. For advanced use cases, you can modify this file before uploading it to the
web server. The file looks like the sample below:
<?xml version="1.0" encoding="UTF-8"?>
<updateDescriptor baseUrl="">
  <entry targetMediaFileId="8" updatableVersionMin="" updatableVersionMax="" fileName="hello_windows_4_0.exe"
         newVersion="4.0" newMediaFileId="8" fileSize="2014720" bundledJre="" myCustomAttribute="showWarning">
    <comment language="en">Hello world</comment>
    <comment language="de">Hallo Welt</comment>
    <comment language="it">Ciao mondo</comment>
  </entry>
  <entry targetMediaFileId="9" updatableVersionMin="" updatableVersionMax="" fileName="hello_linux_4_0.rpm"
         newVersion="4.0" newMediaFileId="9" fileSize="817758" bundledJre="">
    <comment />
  </entry>
  <entry targetMediaFileId="10" updatableVersionMin="" updatableVersionMax="" fileName="hello_macos_4_0.dmg"
         newVersion="4.0" newMediaFileId="10" fileSize="1359872" bundledJre="">
    <comment />
  </entry>
</updateDescriptor>
Its contents are derived from your input on the "Installer->Auto-Update Options" step where you define global options and common options that are replicated on all media file entries.
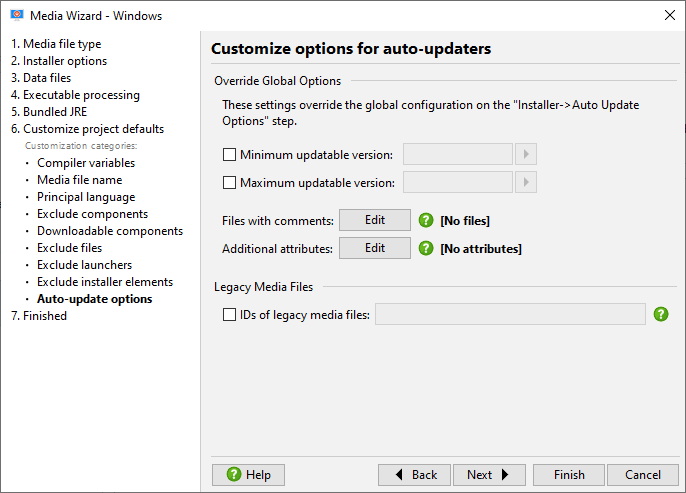
On the "Customize project defaults->Auto-update options" step of the media wizard you can override settings with specific values for the each media file.
The root of the updates.xml file is the updateDescriptor element. It has a
baseUrl attribute that can be used to specify an alternate download URL for the installers and
contains the value of the "Base URL for installers" setting on the "Installer->Auto-Update Options" step.
By default, it is empty which means that the installers must be located in the same directory as the
updates.xml file.
The updateDescriptor element contains one or more entry elements that correspond
to the media files that were created by the build.
When install4j determines whether an entry in the update descriptor is a match for the current installation,
it looks at three attributes of the entry element: Most importantly, the
targetMediaFileId attribute has to match the media file ID of the current installation.
You can show media file IDs by toggling the "Show IDs" tool bar button
Another criterion is the installed version of the application. Depending on that version, you might want to
offer different updates. The updatableVersionMin and the updatableVersionMax
attributes can set lower and upper limits for the installed versions that should
download the associated entry in the update descriptor. By default, these attributes are empty, so no
version restrictions apply. On the "Installer->Auto-Update Options" step, these versions can be set
for all media files.
Attributes that describe the update installer include fileName which is necessary to
construct the download URL, and fileSize which contains the size of the file in bytes.
newVersion contains the available version while newMediaFileId is the media
file ID of the update installer which is the same as targetMediaFileId. Lastly,
bundledJre contains the original file name of the JRE bundle without the .tar.gz
extension or the empty string if no JRE is bundled in the installer.
If you discontinue a media file, you can migrate users of that media file to a different media file with the
legacy media file setting on the "Customize project defaults->Auto-update options" step of the media wizard.
For each specified legacy ID, the entry for the current media file is duplicated.
For more complex scenarios, you can modify the updates.xml file yourself and
add additional entry elements as required.

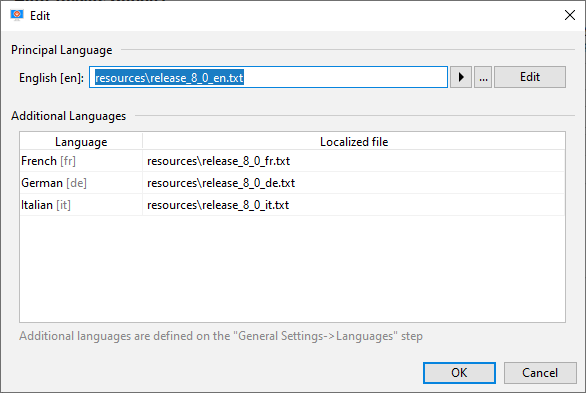
In addition to the above attributes, the nested comment elements can contain a localized
description that should be displayed to the user. You can populate these elements for all media files by
configuring the "Files with comments" setting in the "Installer->Auto-Update Options" step. The main
use case for this feature is to display release notes in the update downloader.
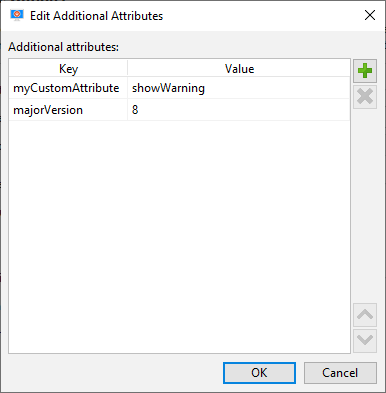
Finally, you can add any number of arbitrary attributes to the entry element.
This is configured with the "Additional attributes" setting in the "Installer->Auto-Update Options" step.
Additional attributes are useful for custom logic to select a suitable update installer in the update downloader.
The update descriptor API and up-to-date checks
The install4j runtime API contains the
com.install4j.api.update.UpdateChecker utility class that can download the updates.xml
file and translate it to an instance of com.install4j.api.update.UpdateDescriptor. From there, you
can get a suitable com.install4j.api.update.UpdateDescriptorEntry with a single method call.
See the Javadoc for more detailed
information.
This API is primarily intended for use in your application. The "hello" sample project shows how to use
it in a complex example, see the source file hello/gui/HelloGui.java in your install4j installation
and look for the checkForUpdateWithApi method.
In a custom installer application, you would rather use a "Check for update" action that performs the same
actions as UpdateChecker and saves the downloaded UpdateDescriptor to an
installer variable. All update downloader templates included with install4j execute the "Check for update"
action at some point. Its URL is set to ${installer:updatesUrl?:${compiler:sys.updatesUrl}}
by default. If you start the update downloader with the argument -VupdatesUrl=<URL>, it
will define the installer variable "updatesUrl" and that value will be used as the URL. Otherwise it falls back to
the compiler variable "sys.updatesUrl" that contains the URL for updates.xml that you have entered
on the "Installer->Auto-Update Options" step.
Instances of UpdateDescriptorEntry expose all attributes of the corresponding
entry element in the updates.xml file. They also provide access to any additional
attributes that were added to the entry element so you can implement custom logic to find a
suitable update. The most important method of the UpdateDescriptorEntry class is the
getUrl()method that constructs the full URL from which the update installer can be downloaded.
If no baseUrlhas been specified on the updateDescriptor root element, the
URL starts with the parent directory from which the updates.xml file has been downloaded.
Strategy 1: Standalone update downloader
The easiest way to provide auto-update functionality to your users is to create a self-contained update downloader application. This is done by adding an application on the "Installer->Screens & actions" step and choosing the "Standalone update downloader" application template. Such an auto-updater can by invoked manually by the user. On Windows, it can also be added to the start menu. No changes in in your application code are required so far.
If you have a GUI application, you could provide integration with the update downloader by offering a
"Check for update" menu item or similar that invokes the update downloader. One problem in this scenario is that
if the updater downloads and executes the update installer, your application will still be running and the user
will receive a corresponding warning message in the installer. The solution to this problem is to use the
com.install4j.api.launcher.ApplicationLauncher class to launch the update downloader. With this
utility class, you can launch the update installer by passing its ID as an argument. IDs of installer applications
can be shown by toggling the "Show IDs" tool bar button.
If you launch an installer application such as an update downloader that way, the "Shut down calling launcher"
action will be able to close your application. To react to the shutdown and perform cleanup operations,
you can pass a callback to the ApplicationLauncher.launchApplication(...) call. After you
are notified through the call back, your application will be terminated with a call to System.exit().
For example, for an update downloader with ID 123:
import java.io.IOException;
import com.install4j.api.launcher.ApplicationLauncher;
try {
ApplicationLauncher.launchApplication("123", null, false, new ApplicationLauncher.Callback() {
public void exited(int exitValue) {
//TODO update check complete, no update available
}
public void prepareShutdown() {
//TODO update installer will be executed, perform cleanup before process is terminated
}
}
);
} catch (IOException e) {
e.printStackTrace();
//TODO handle invocation failure
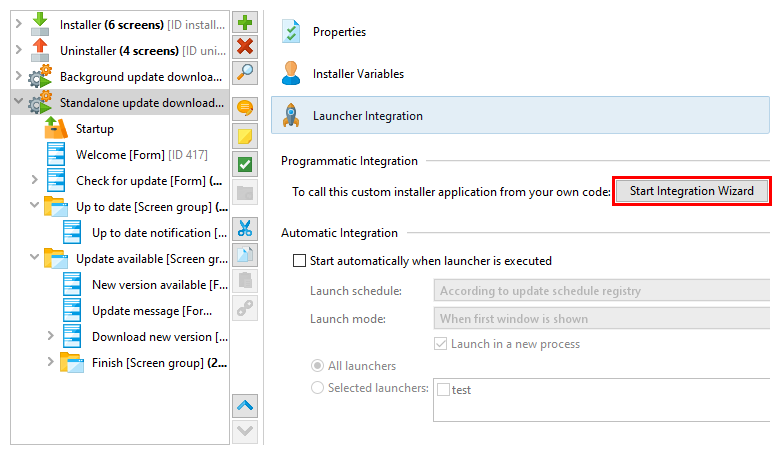
}To easily get such a code snippet for invoking the update downloader, select the update downloader application and click on the Start Integration Wizard button on the right.
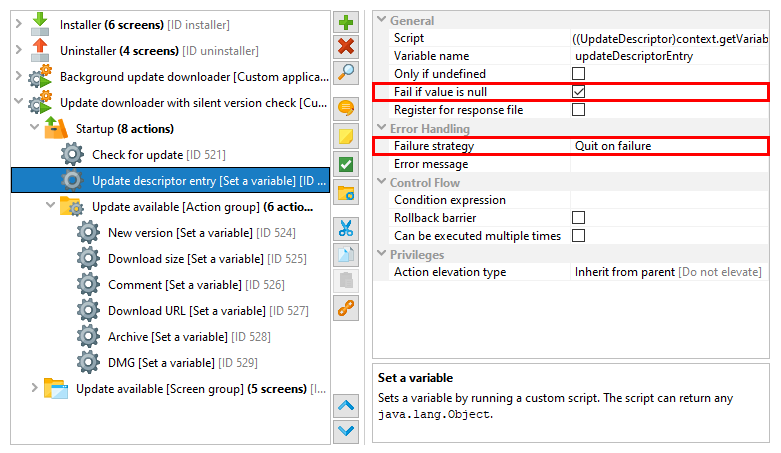
Strategy 2: Update downloader with silent version check
In this scenario, you invoke the update downloader like in strategy 1, but rather than offering a "Check for update" menu item, you do so on a regular schedule. For example, you automatically check for updates every week or each time the user starts the application. In that case, the standalone update downloader template is not suitable because you only want to give the user feedback if a new version is actually available. However, the standalone update downloader always starts with a "Welcome" screen, verbosely checks for updates and informs the user that no new version is available. This behavior is only appropriate if the user explicitly requested an update check.
The "Update downloader with silent version check" application template is intended for automatic update checks. It looks for an update in the startup sequence and terminates the update downloader if no new version is available. This means that if there is no new version available, your users will not see that a check has taken place. Only if a new version is available will the update downloader display its window and inform the user of the possibility to download the update installer.
For such an automatic check you will likely want to invoke the update downloader in a blocking fashion. If you
call ApplicationLauncher.launchApplication(...) with the blocking argument set to
true, the method will not return until the update installer has exited. If the user
decides to run the installer on the "Finish" screen, your application will terminate as explained in strategy 1.
Strategy 3: Update downloader without version check
If you want to take the integration one step further and display the availability of a new version
in your application yourself, you can use the com.install4j.api.update.UpdateChecker
class in your code:
import com.install4j.api.launcher.Variables;
import com.install4j.api.update.*;

String updateUrl = Variables.getCompilerVariable("sys.updatesUrl");
UpdateDescriptor updateDescriptor = UpdateChecker.getUpdateDescriptor(updateUrl, ApplicationDisplayMode.GUI);
if (updateDescriptor.getPossibleUpdateEntry() != null) {
    // TODO an update is available, execute update downloader
}
In this way, you can display your own notification that announces the new version and lets the user decide whether to download it or not. The "hello" sample project shows how this is done.
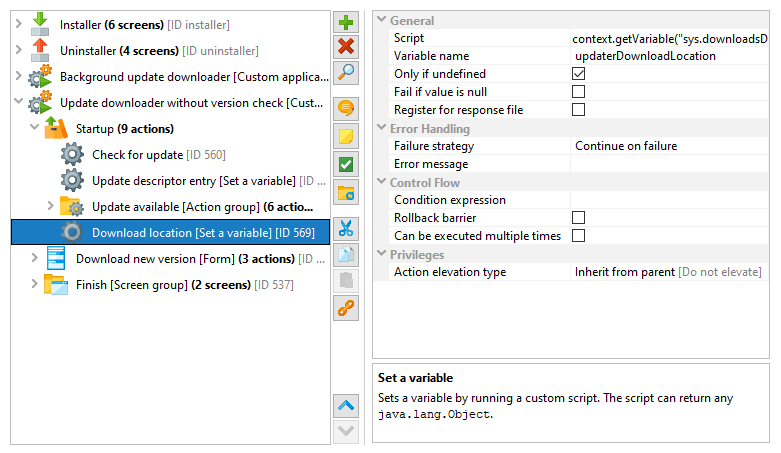
If the user decides to download, the "Update downloader with silent version check" template is not suitable because it informs the user about the new version once more. Instead, you should use the "Update downloader without version check" application template. It immediately starts downloading the new version and then proceeds to the "Finish" screen where the user can decide to start the downloaded installer.
This template does not offer the user a directory selection for the downloaded installer, but downloads to
the user-specific download directory by default. You can change this default directory by passing the argument
-DupdaterDownloadLocation=[directory] to the ApplicationLauncher.launchApplication(...)
call. Again, the update downloader will terminate your application if the user starts the installer as explained for
strategy 1.
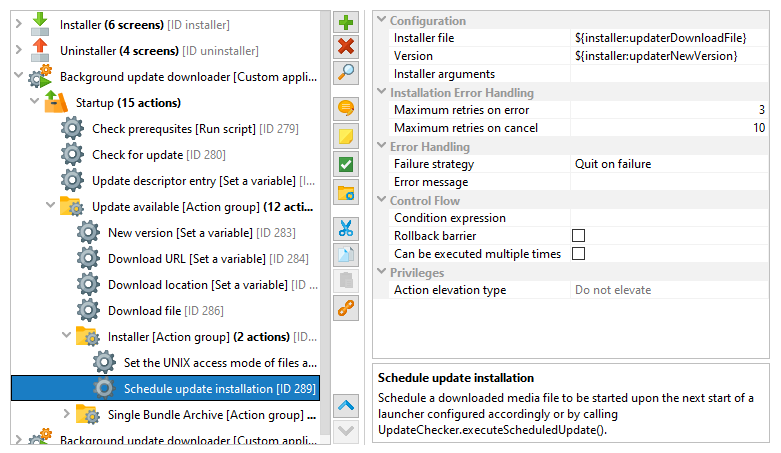
Strategy 4: Background update downloader
A background update downloader has no UI, and automatically downloads an update installer if available. It will not execute the downloaded update installer because that would disrupt the work of the user. Instead, it executes a "Schedule update installation" action to register the downloaded update installer for later execution.
There are two options to execute an update installer that is scheduled for execution:
Programmatic invocation
By calling
com.install4j.api.update.UpdateChecker.executeScheduledUpdate(...);
you can execute the downloaded update installer programatically, usually after checking the result of
com.install4j.api.update.UpdateChecker.isUpdateScheduled()
to determine whether such a download has been completed. You can do that while the launcher is running or at startup. Notifying the user about this event or letting the user defer the installation is handled by your own code. For GUI and server launchers, this is the only option.
The "HelloGui" class the in the "hello" sample contains a complete demonstration of how to use the API to check for updates programatically and uses a background update downloader to download and install updates.
Automatic invocation
For GUI launchers, you can edit the launcher, go to the "Executable info->Auto-update integration" step and select the
Execute downloaded update installers at startupcheck box. When the GUI installer is started and a downloaded update installer has been scheduled for installation, the update installer will be executed. See the help topic on launchers for more information.
Update schedule registry
A common requirement is to check for an update on a regular schedule. install4j comes with a standard implementation of an update schedule registry that frees you of the task to implement one yourself. This update schedule registry is fully integrated with the launcher integration that starts update downloaders when launchers are executed, but it is also available in the API.
The com.install4j.api.update.UpdateScheduleRegistry class is intended to be used in your
application. You configure a particular UpdateSchedule by calling
import com.install4j.api.update.*;

UpdateScheduleRegistry.setUpdateSchedule(UpdateSchedule.DAILY);
and call
boolean shouldCheckForUpdate = UpdateScheduleRegistry.checkAndReset();
each time your application is started. If you get a positive response, you can start a suitable update downloader
with the ApplicationLauncher class as explained above.
To facilitate the configuration of the update schedule in your installer, install4j offers a special "Update schedule selector" form component whose initial value is set to the current setting (if any) and automatically updates the setting for the installed application when the user clicks "Next".