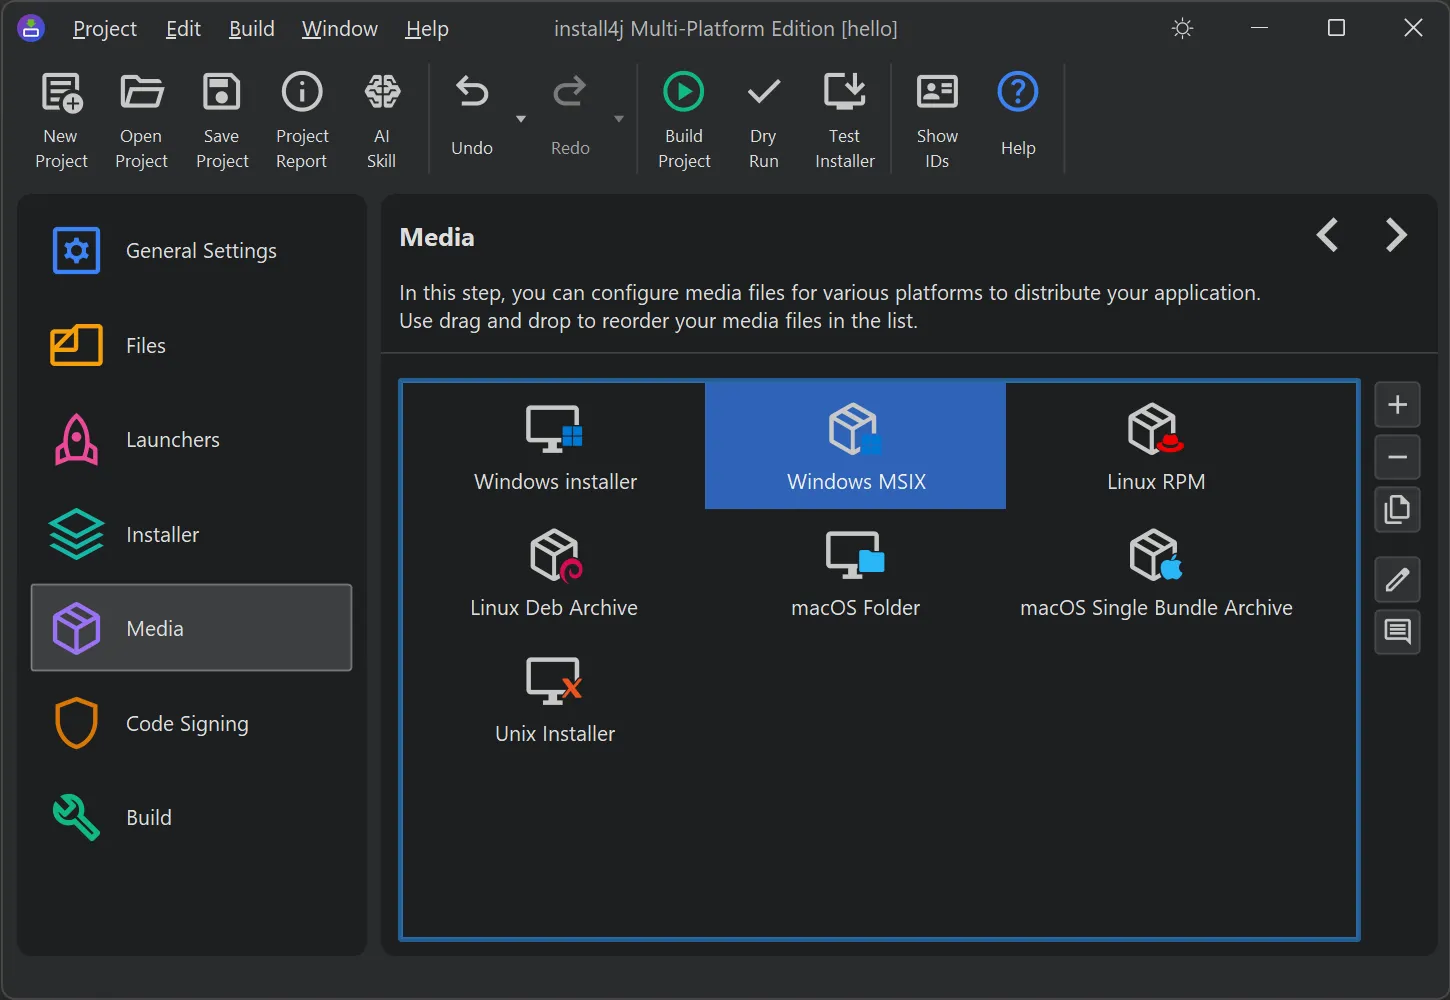
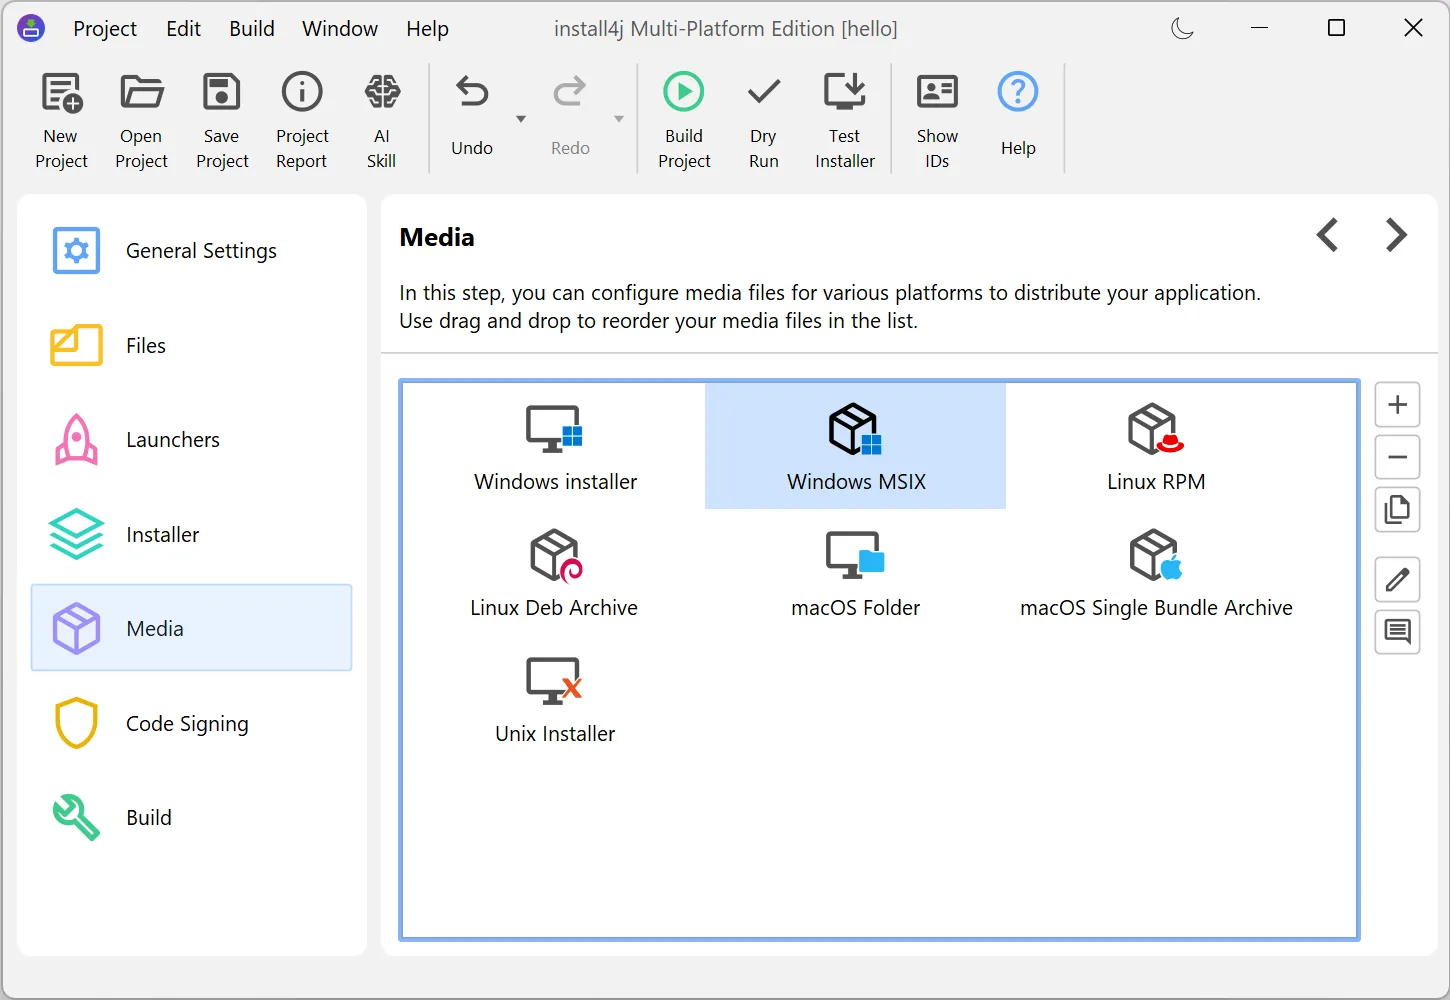
install4j 13 can now build Windows MSIX media files.
MSIX is the modern packaging format for Windows applications. It is also the native package format for the Microsoft Store and
integrates with managed deployment tools such as Microsoft Intune. An MSIX package is installed and uninstalled by
Windows itself in a fully reversible way, and it can be installed by a standard user without administrator rights.
MSIX is completely separate from MSI. For MSI, install4j only generates a wrapper around the installer generated by install4j.
This is because install4j concepts such as screens, actions, and scripts cannot be mapped seamlessly into the MSI model.
MSIX, on the other hand, is declarative, so concepts like services, file associations, and startup tasks are translated directly into
manifest entries.
An MSIX package is installed by double-clicking the .msix file or by running Add-AppxPackage in PowerShell,
and no install4j installer wizard runs at install time.
Note that Code signing is mandatory for distribution of this media file type, because unsigned MSIX packages can only be
installed in Windows' development mode.
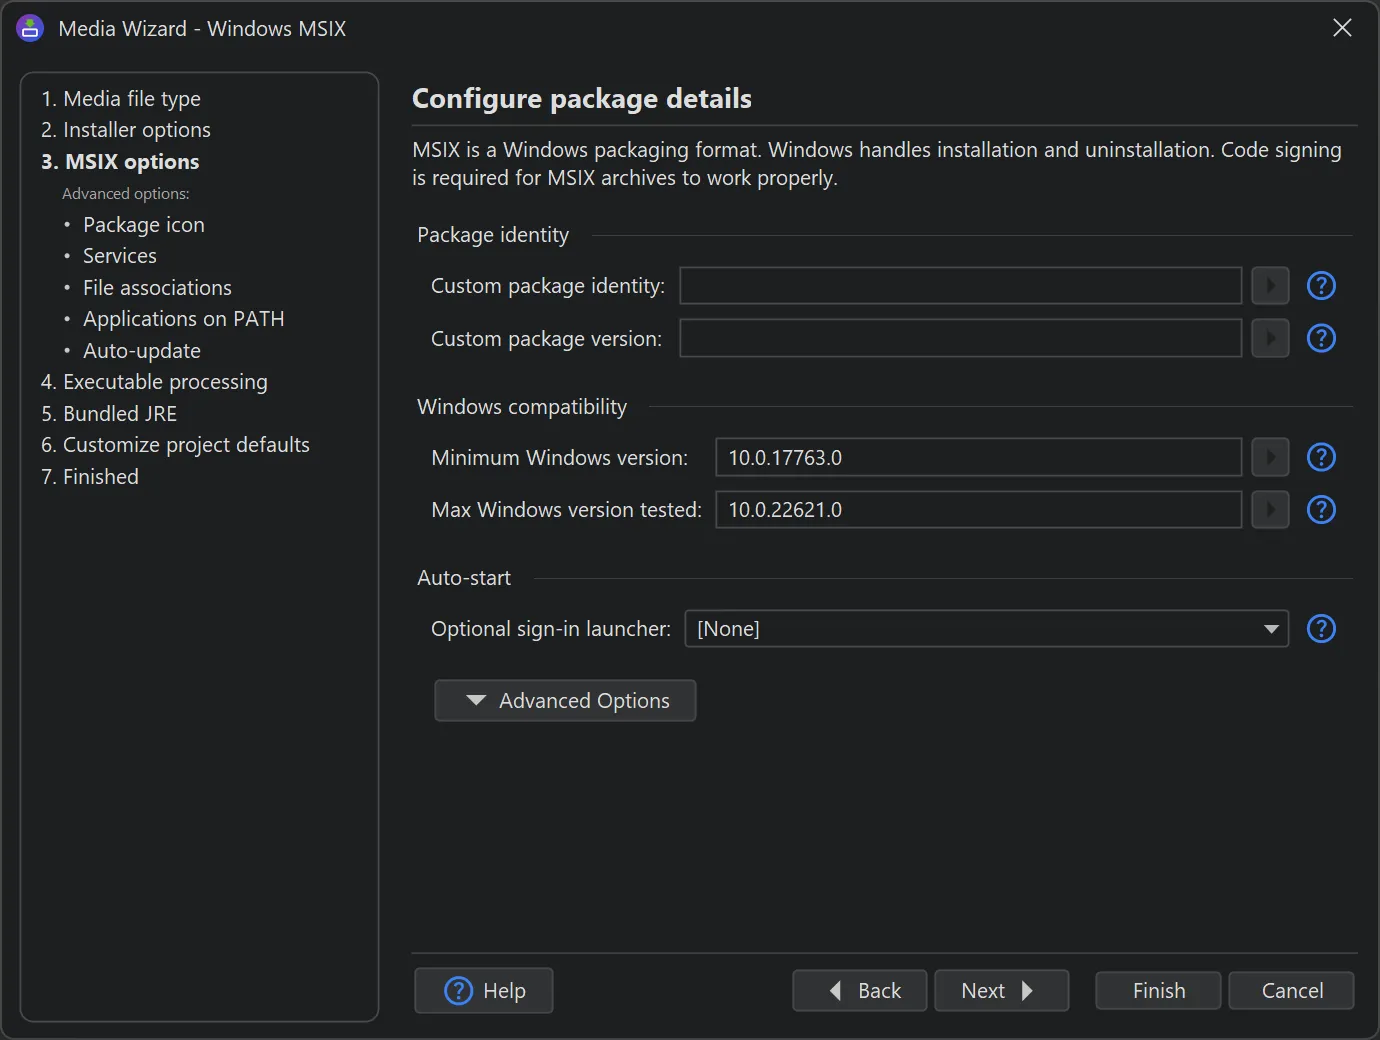
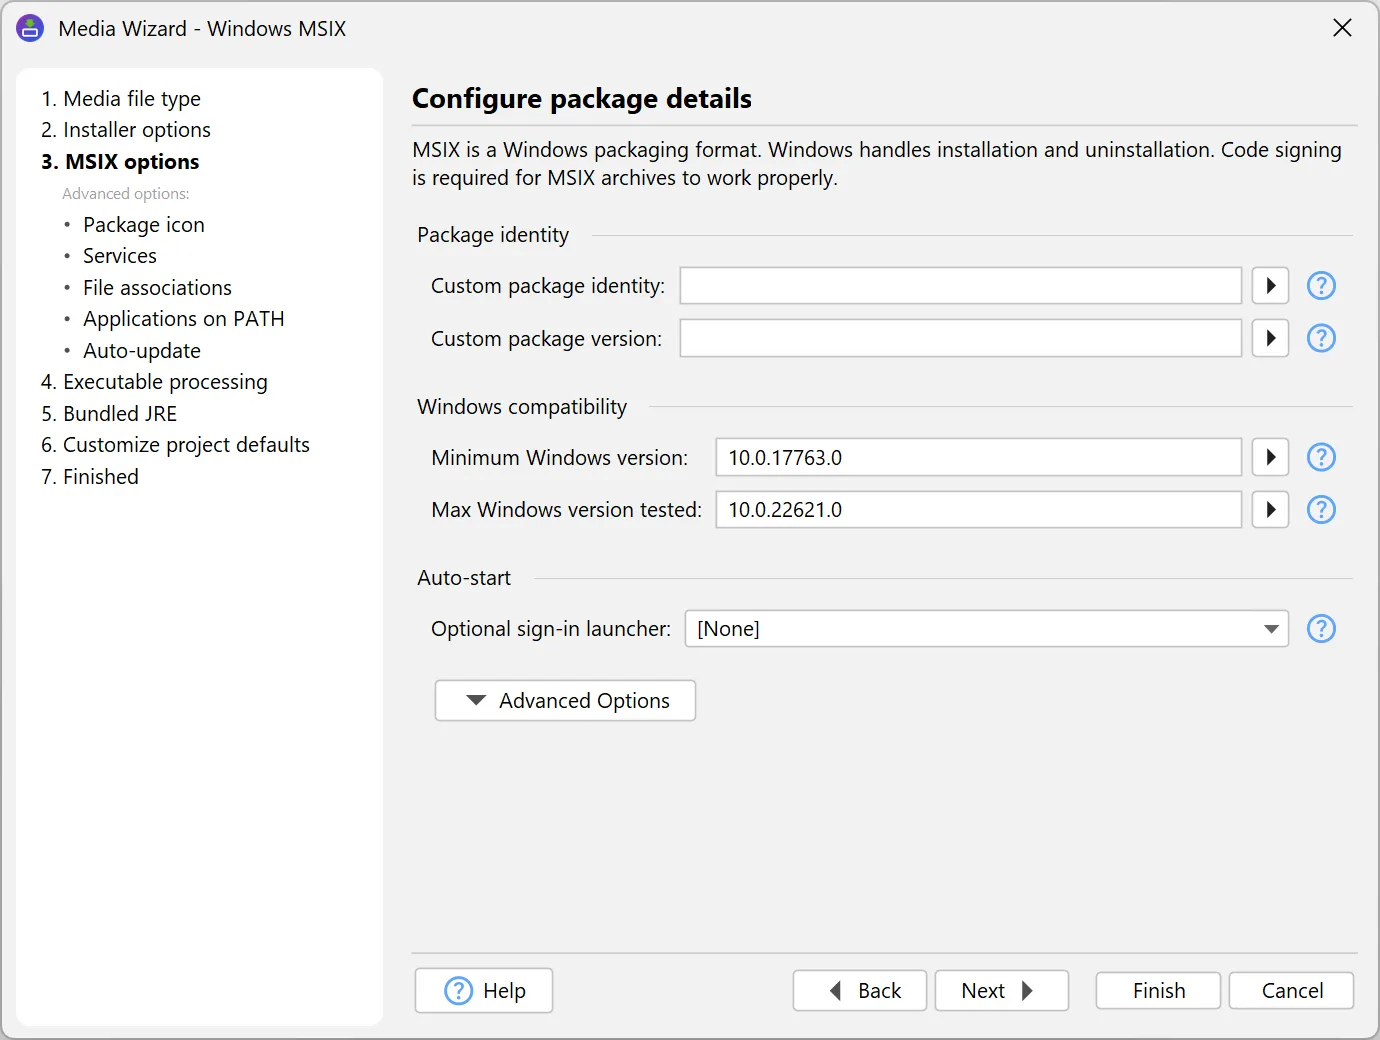
All MSIX-specific settings are configured in dedicated sub-steps of the media file wizard. On the "MSIX options"
step, the package identity name, the package version, and the minimum and maximum tested Windows versions
are set. You can also set a launcher as a sign-in launcher that runs automatically when the user logs on
and that the user can later disable in the Windows "Startup apps" settings.
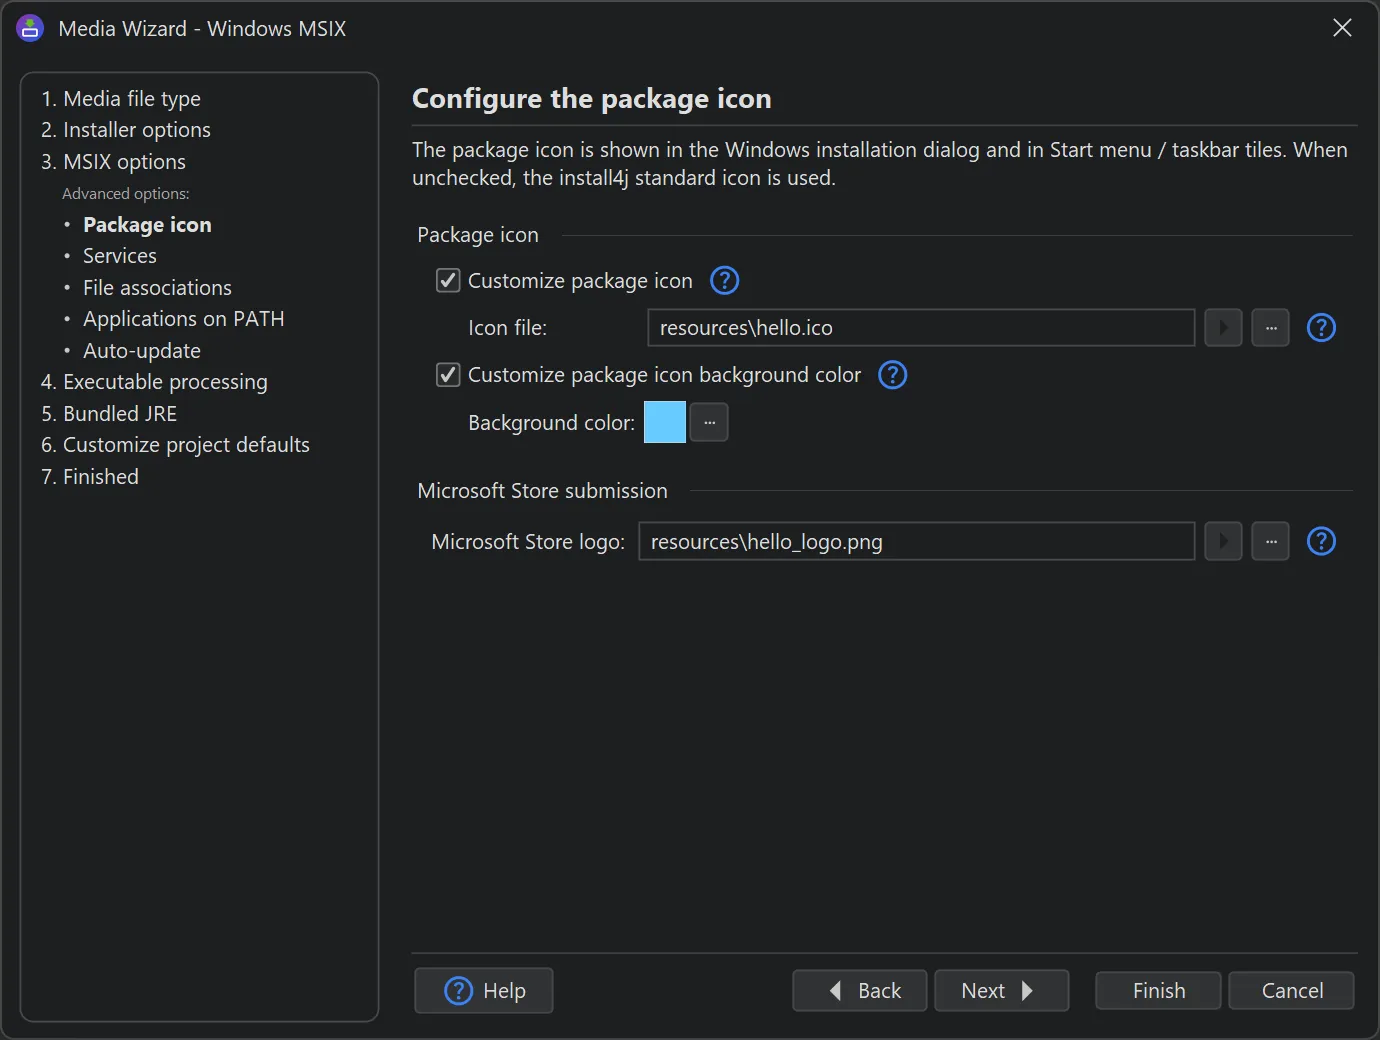
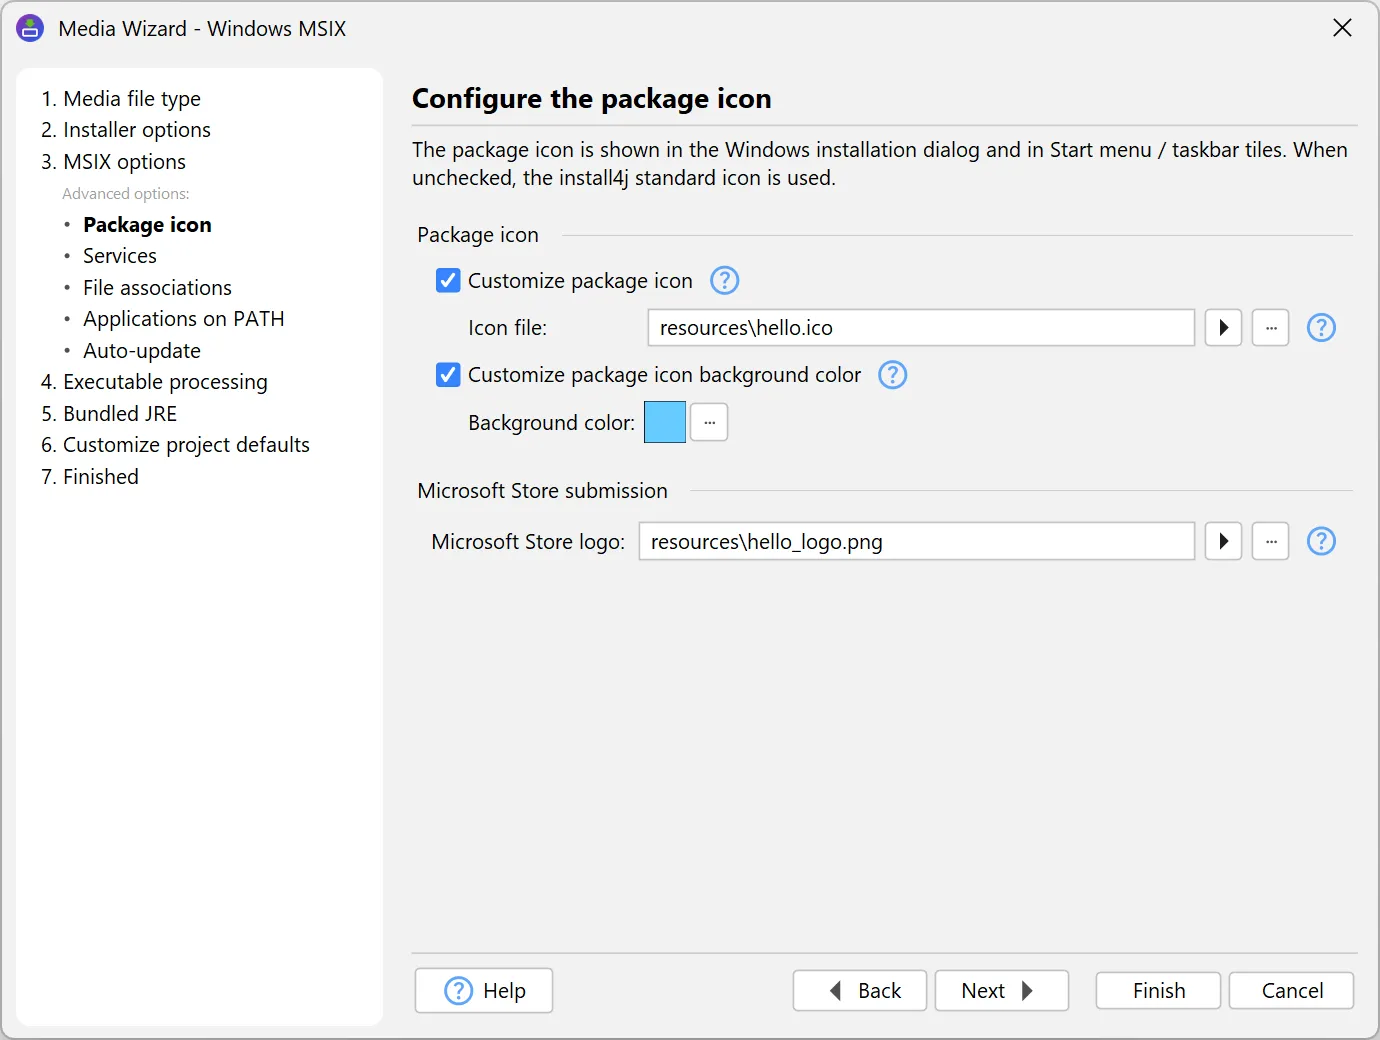
The package icon is customized on the "Package icon" sub-step. It is shown in the Windows installation
dialog. A background color can be set for it so that icons with transparency are given an opaque tile. For the start menu
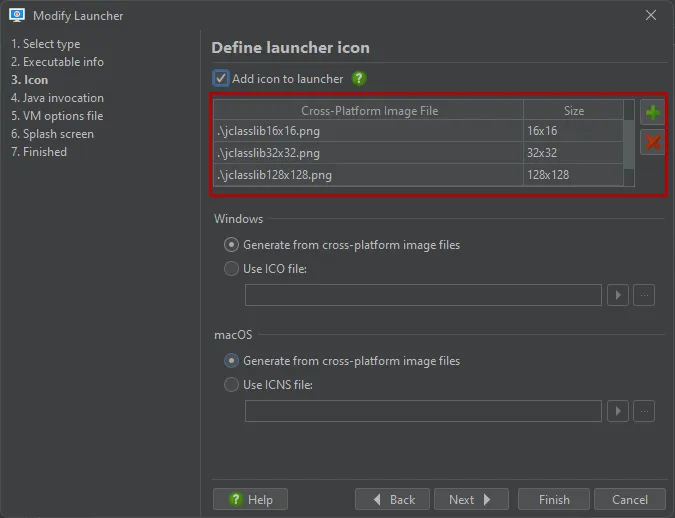
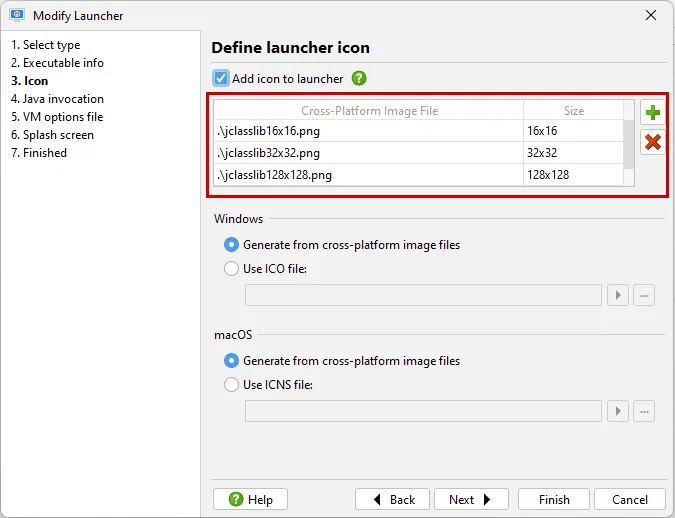
and the task bar, the icons configured in the launcher wizard are used.
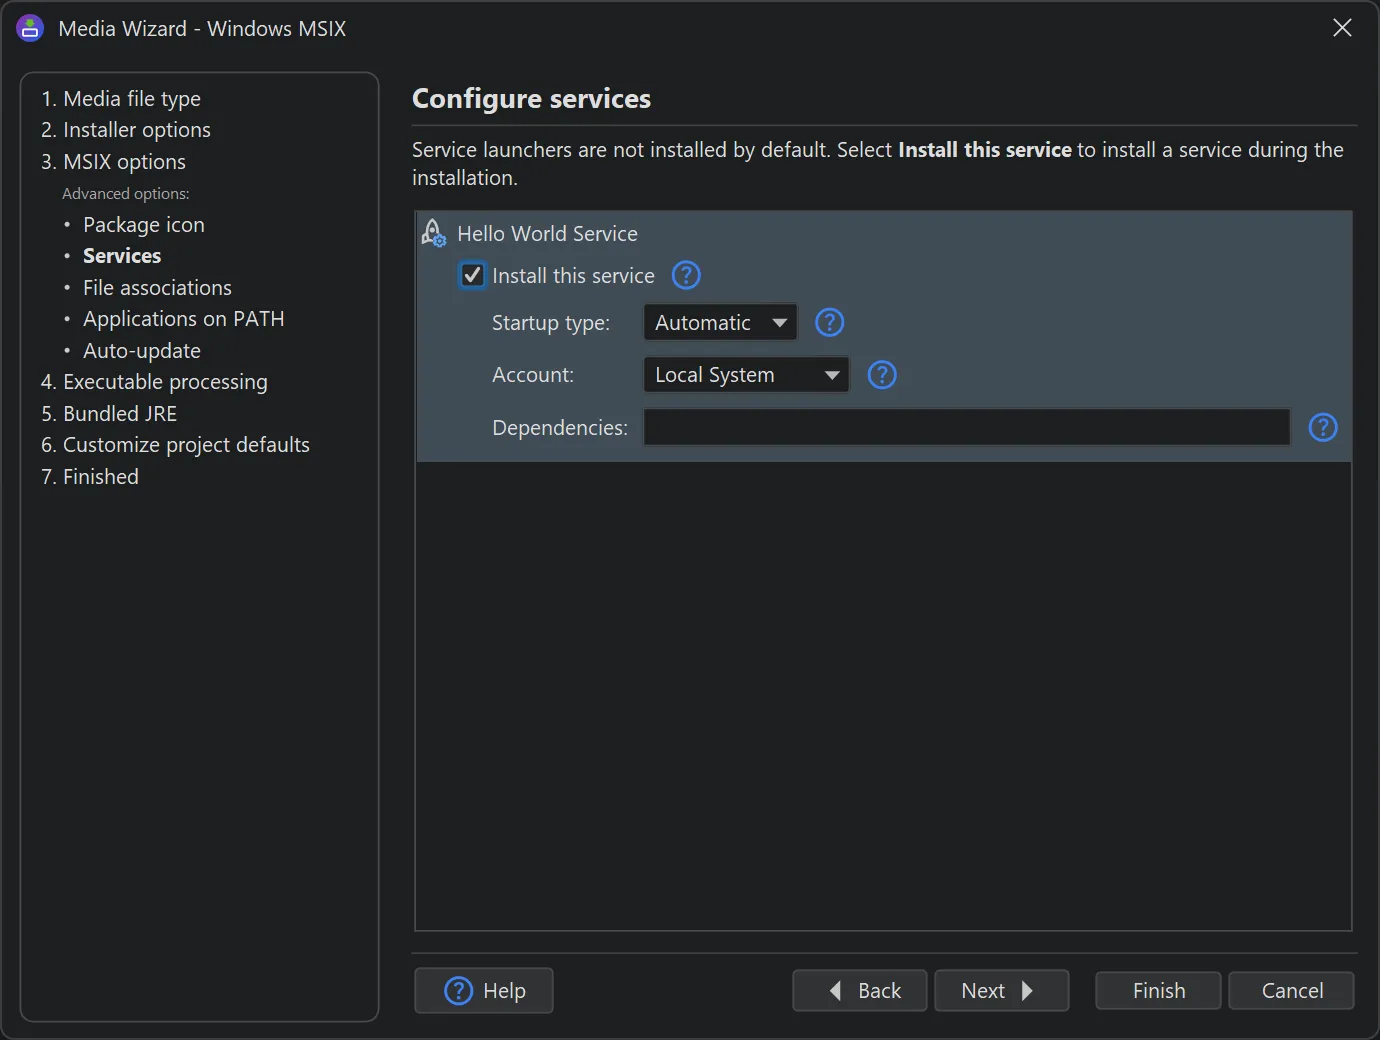
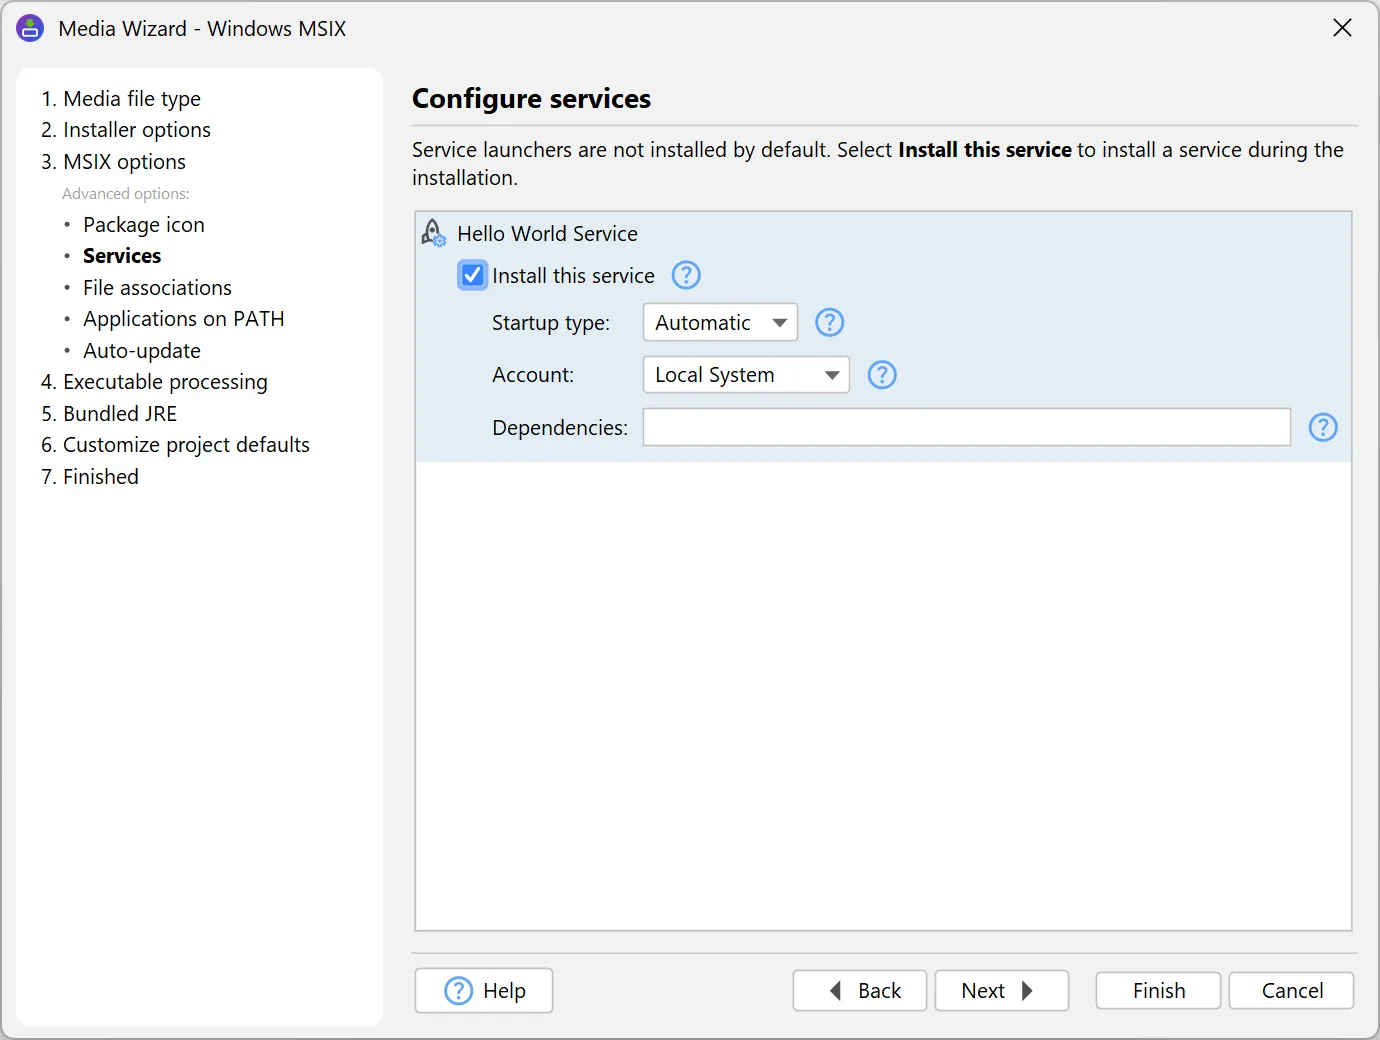
Services are chosen from the generated service launchers and are registered as Windows services through the manifest. The startup
type and the service account are configured per launcher on the "Services" sub-step.
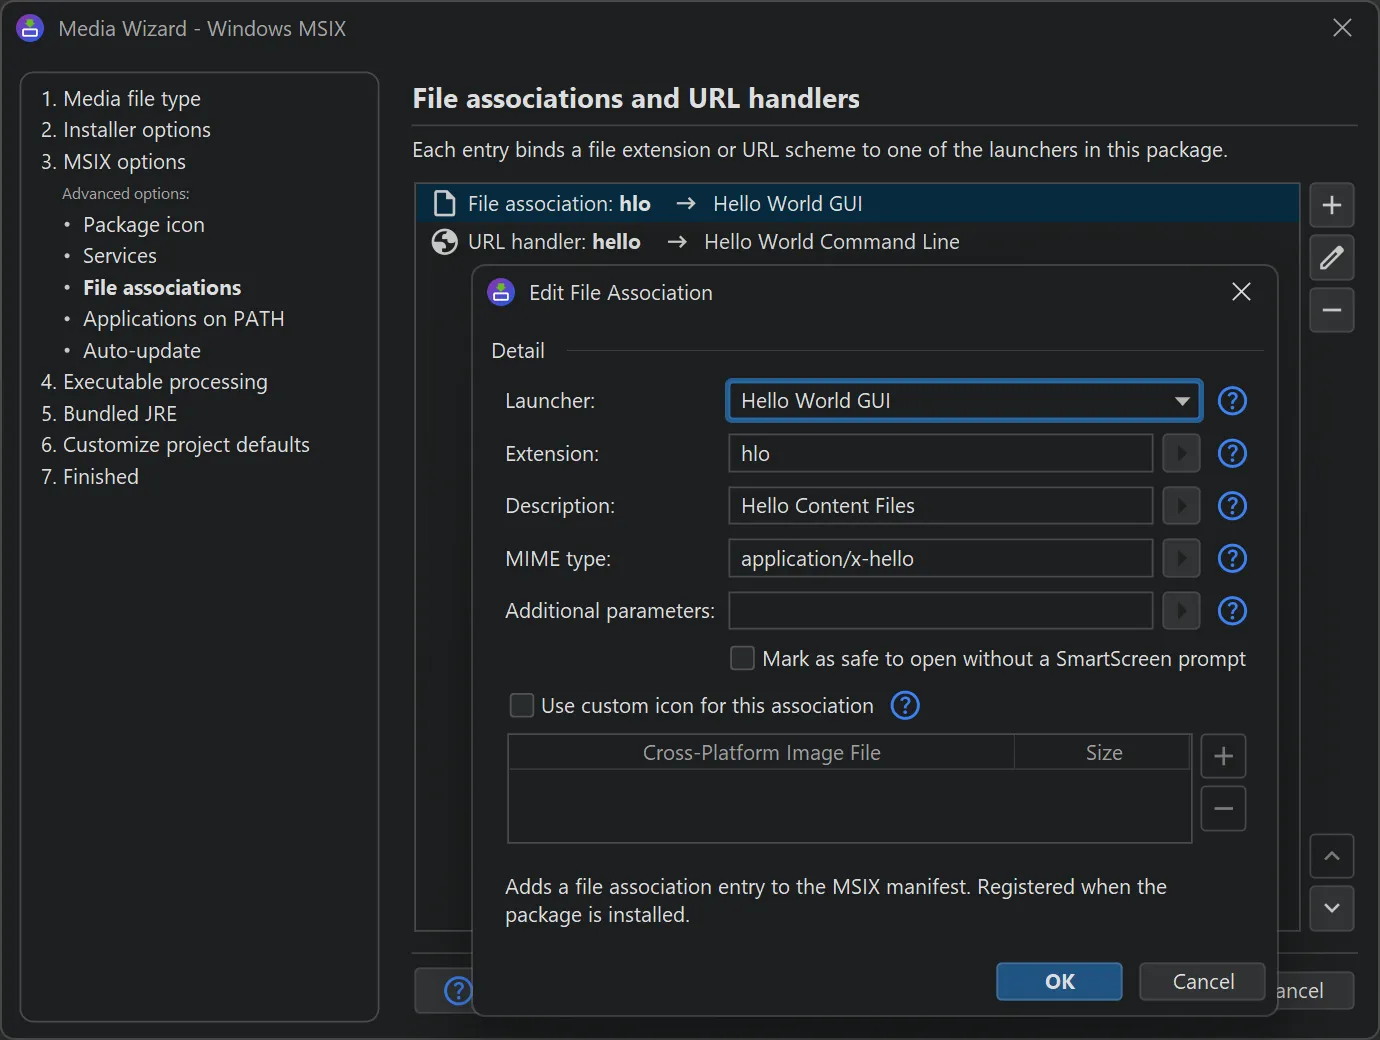
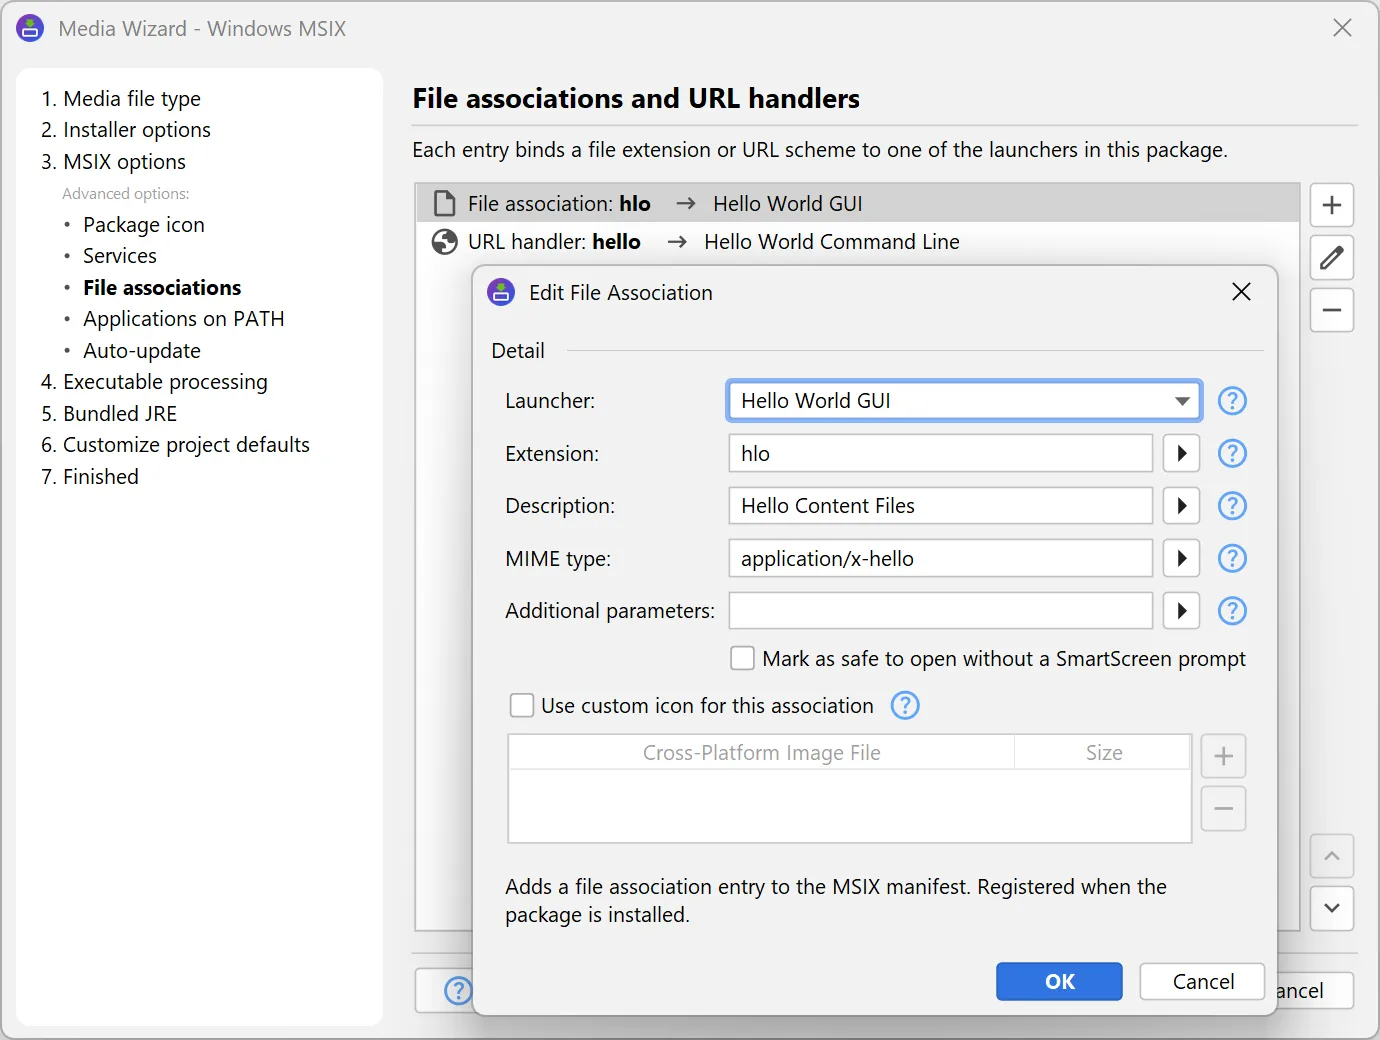
File associations bind one or more file extensions to a launcher, so that double-clicking such a file opens your
application. For each association, a description, an optional MIME type, and a custom icon can be configured.
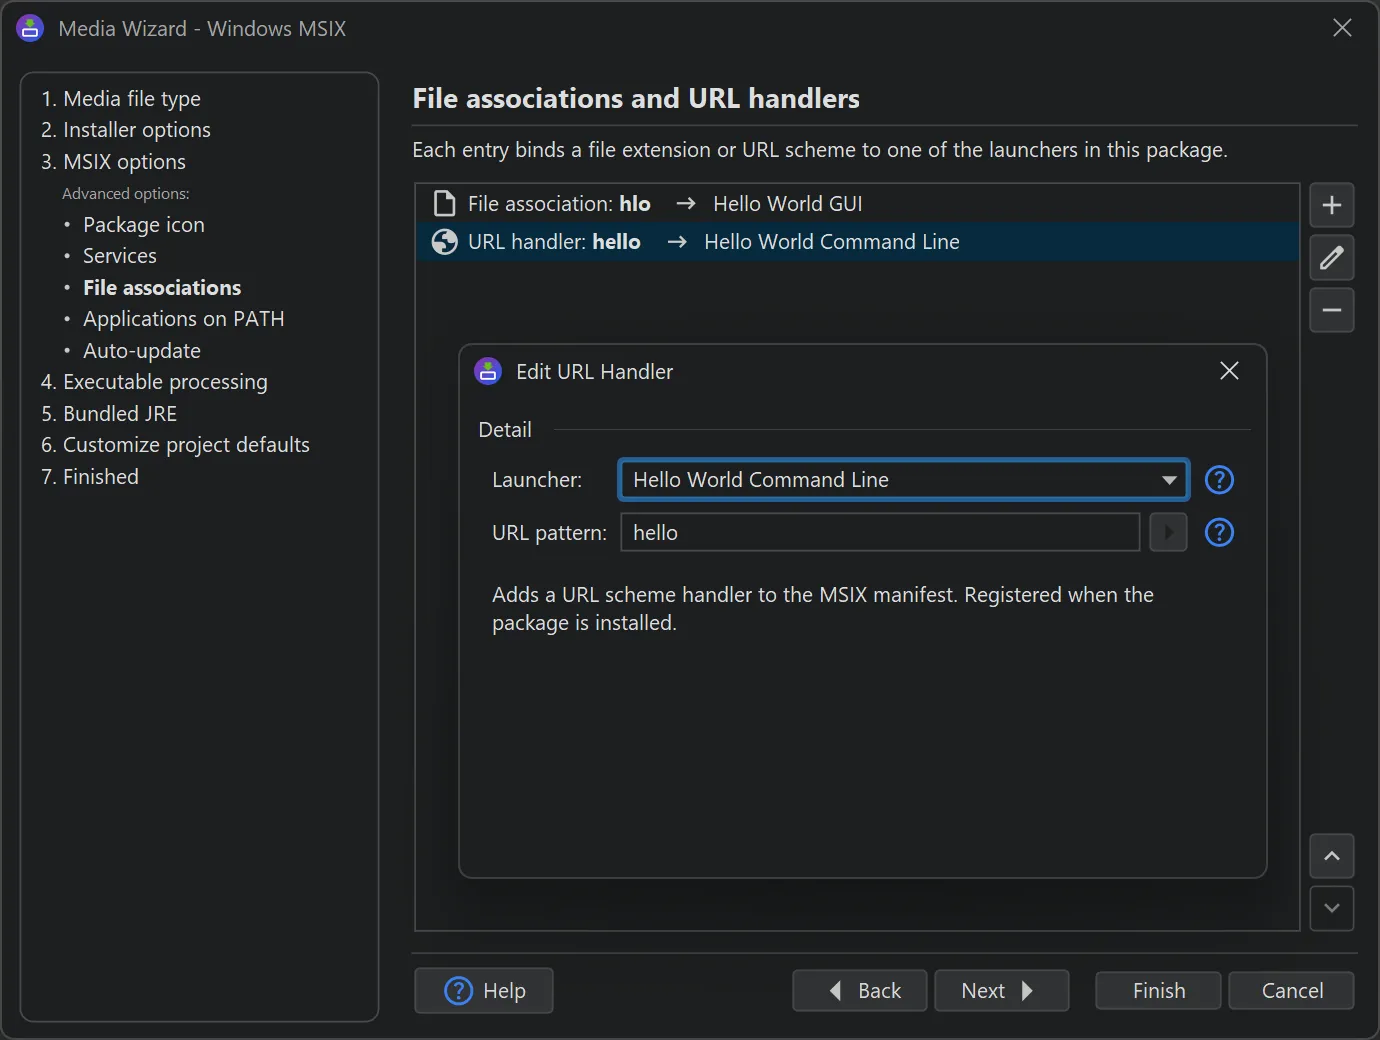
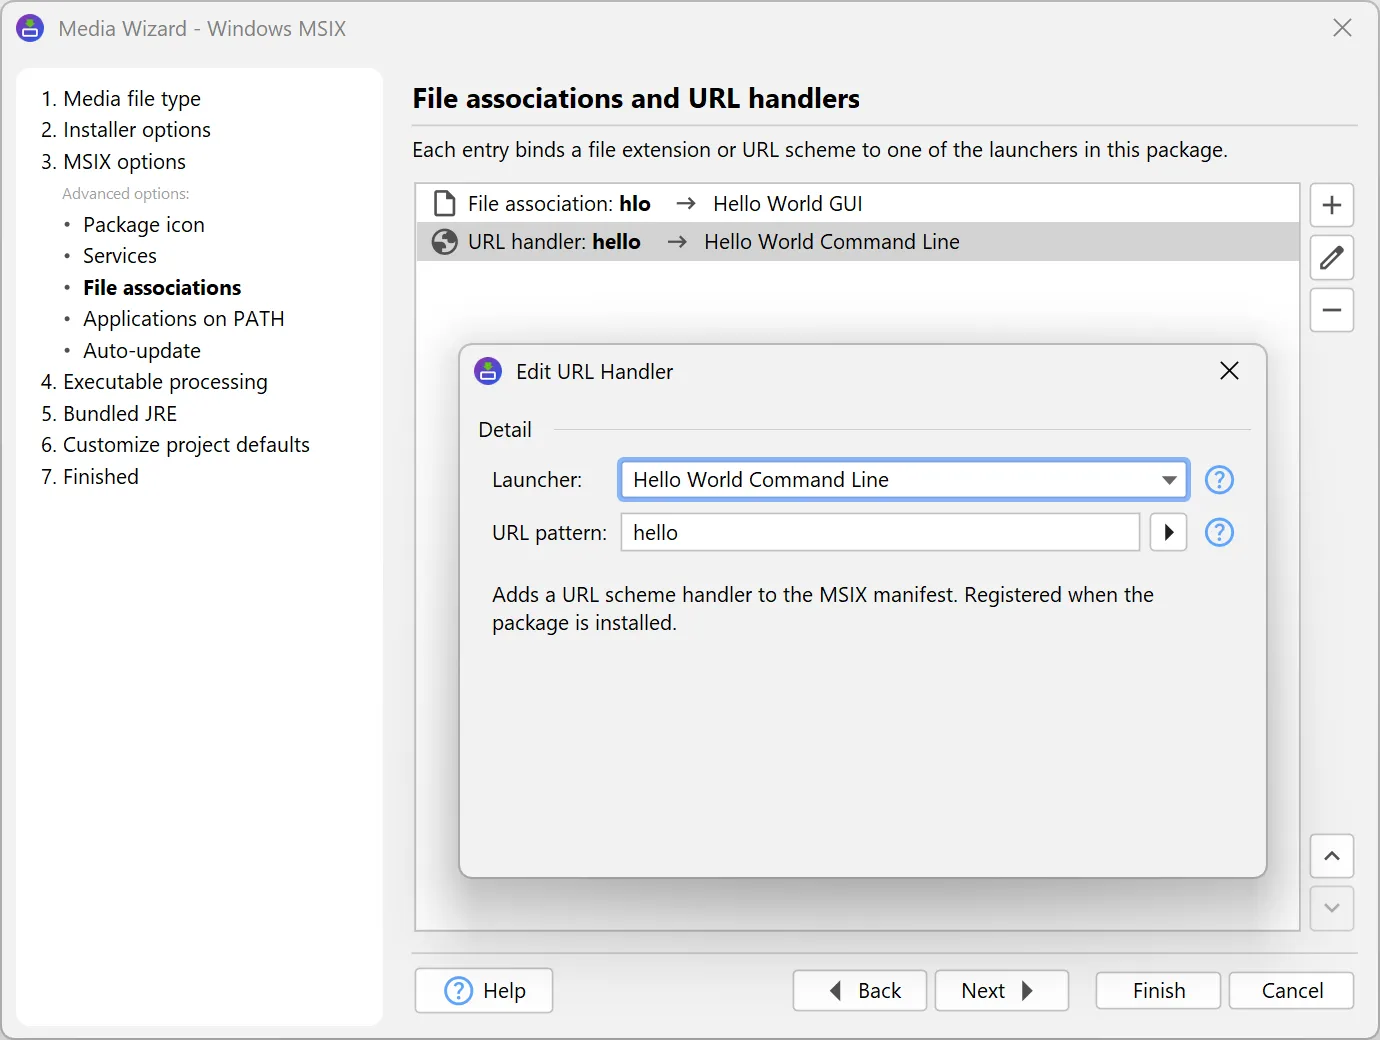
URL scheme handlers are declared in the same way, so that a custom scheme such as myapp:// is routed
to the launcher. Both are set up on the "File associations and URL handlers" sub-step.
App URI handlers let a launcher handle ordinary https:// links for a specific
host. When a matching link is opened, Windows can route it to your application instead of the browser. Because a site's
links cannot be claimed without its consent, the host must publish the generated windows-app-web-link.json file under
/.well-known/ that lists your package.
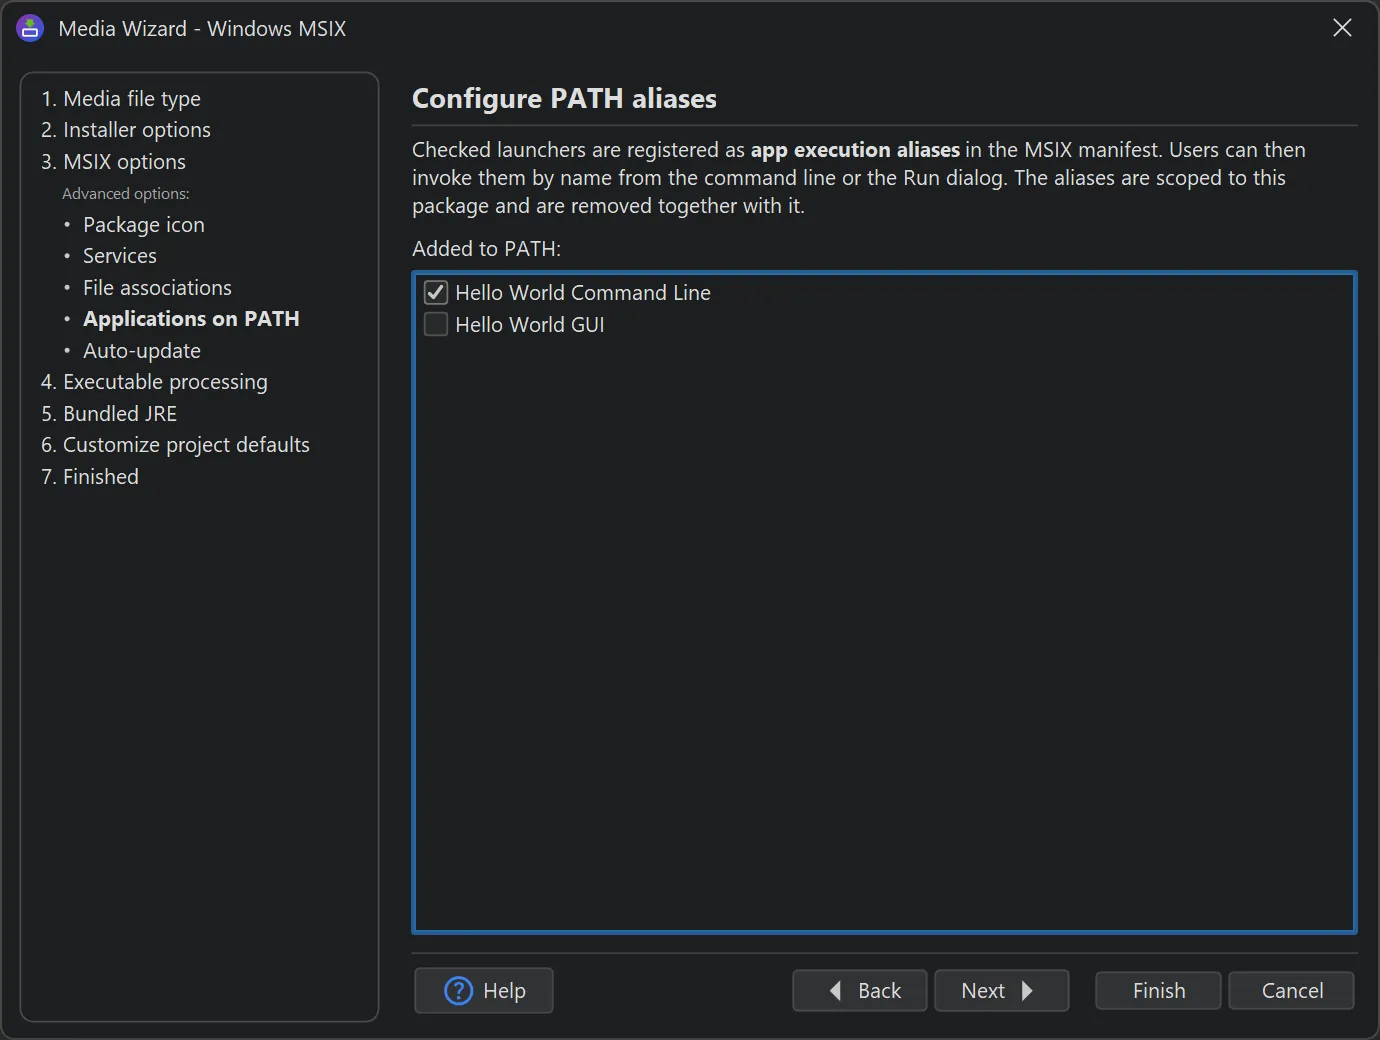
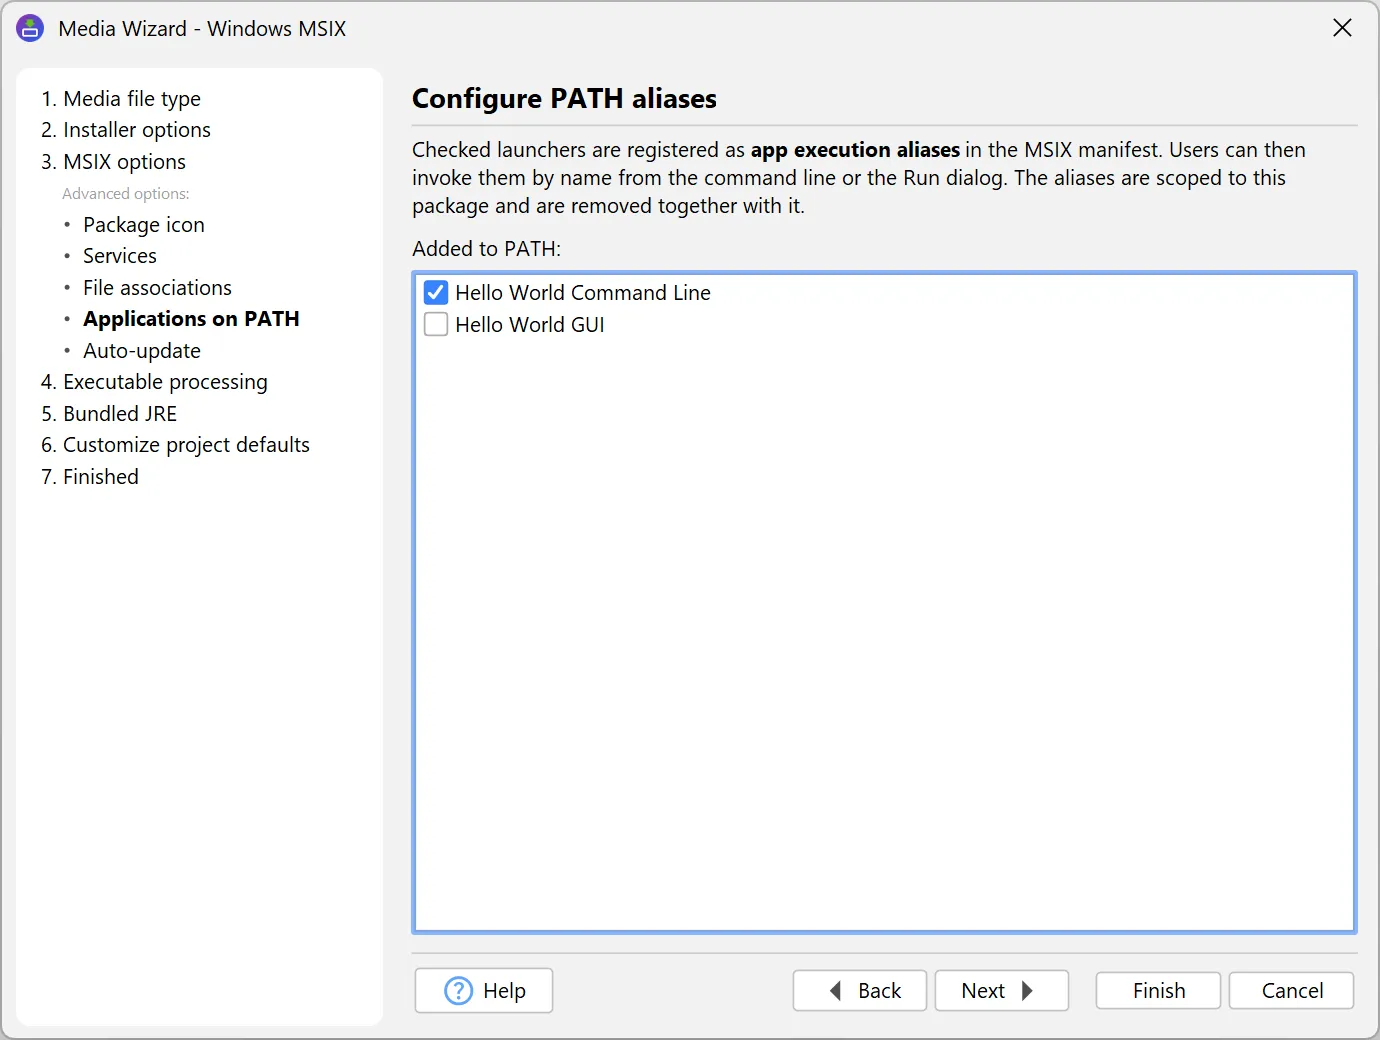
App execution aliases expose selected launchers under their executable name on the user's PATH, so that
they can be invoked by name from a command prompt or the Run dialog. The aliases are scoped to the package and are removed
together with it. They are selected on the "Applications on PATH" sub-step.
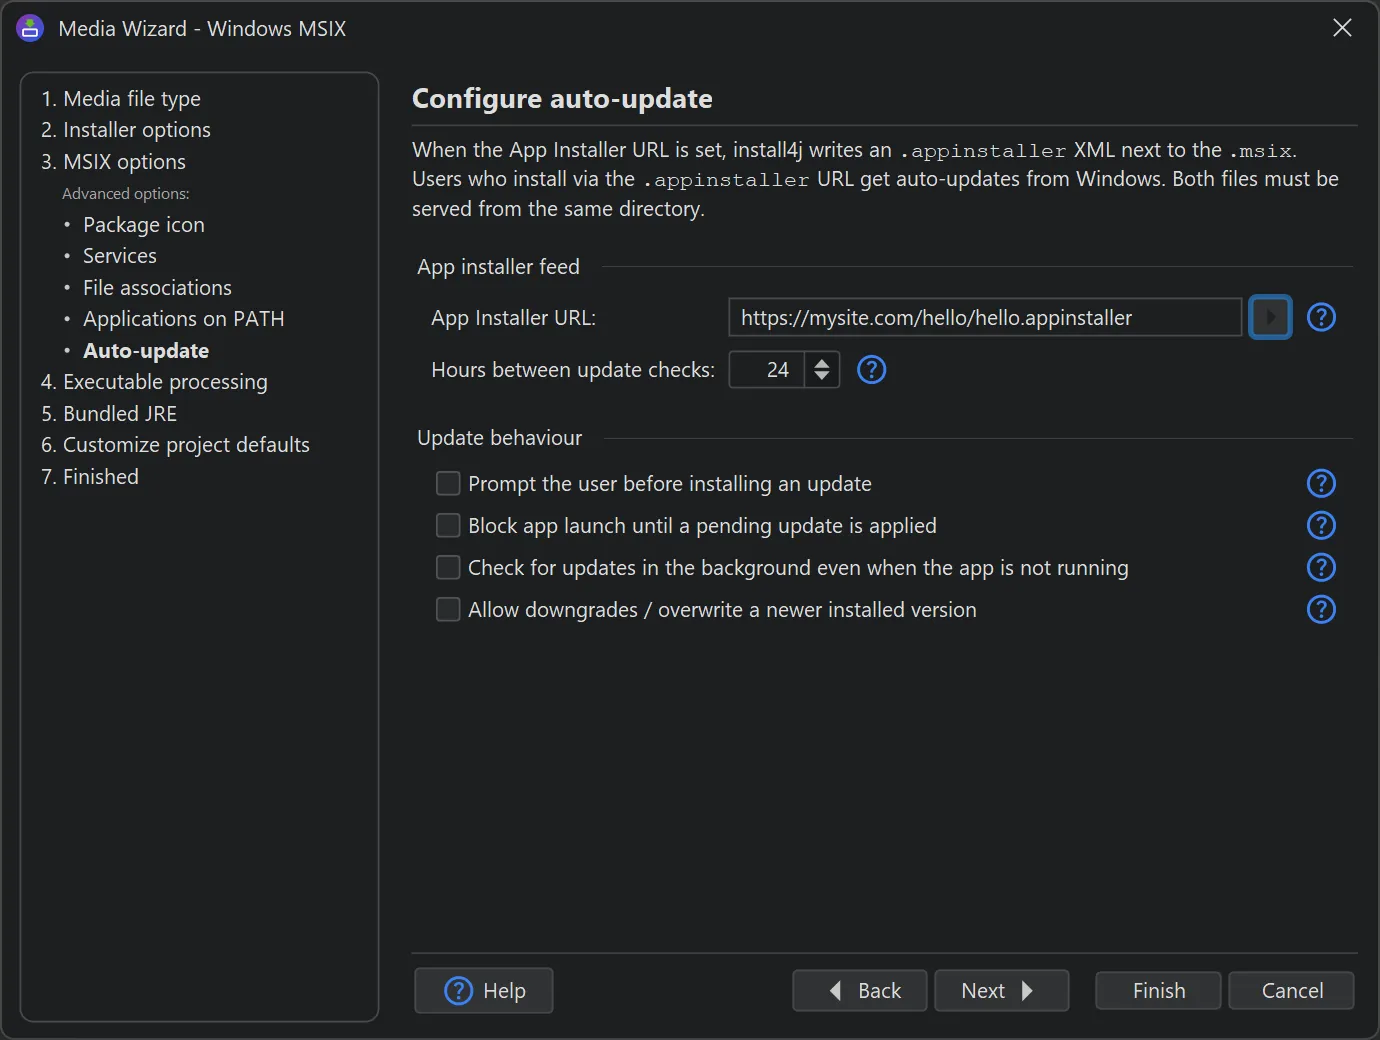
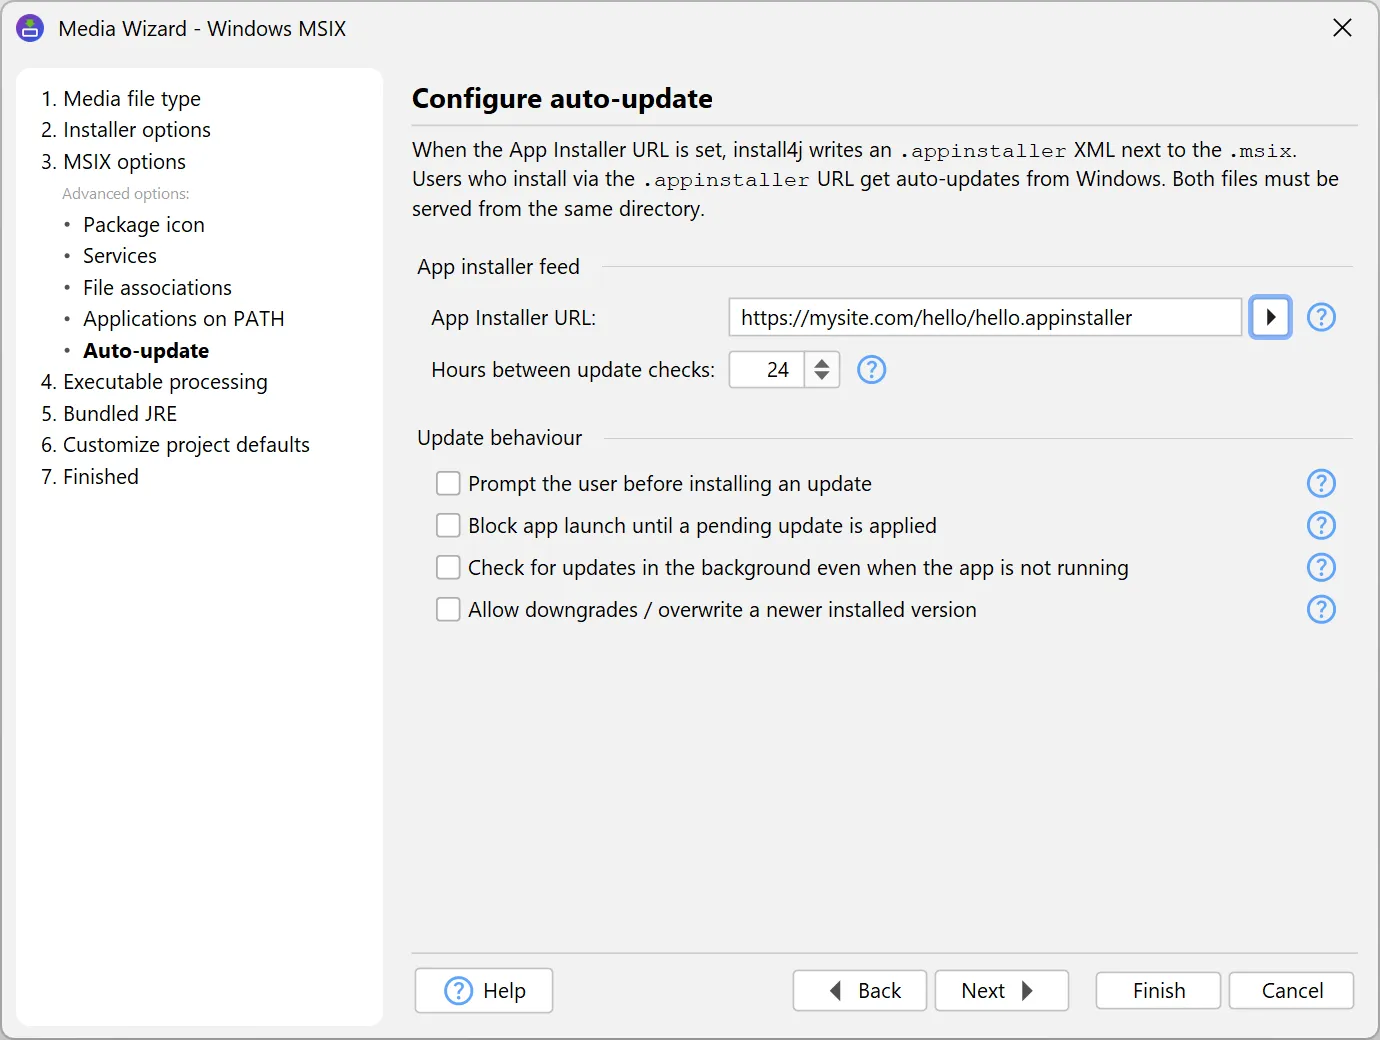
For auto-updates, MSIX packages rely on the App Installer mechanism built into Windows rather than on the install4j
update architecture. The required .appinstaller file is generated by install4j, and the hosted URL is then checked
periodically by Windows so that new package versions are installed in the background. The hosting URL and the update
behavior, such as how often to check and whether to prompt the user, are configured on the "Auto-update" sub-step.
All languages configured for the project are declared in the manifest automatically.
Software development is quickly becoming agentic, with much of the day-to-day work now driven through AI coding
assistants. install4j 13 brings installer authoring into that workflow. It ships with an AI agent skill that lets a
coding assistant read, edit, and create install4j project files, so a change can be described in natural language and
applied directly to the project. This lowers the barrier to building and maintaining an installer, and the project file
becomes just another part of the codebase that the agent works on.
The skill is a self-contained knowledge package. It bundles the project file schema, a catalog of every available bean class
(screens, actions, form components, screen and widget styles), runnable sample projects, the install4j API, and the complete
documentation, all in an AI-friendly format together with instructions for common workflows. With it, the assistant can verify
against accurate information and does not have to guess.
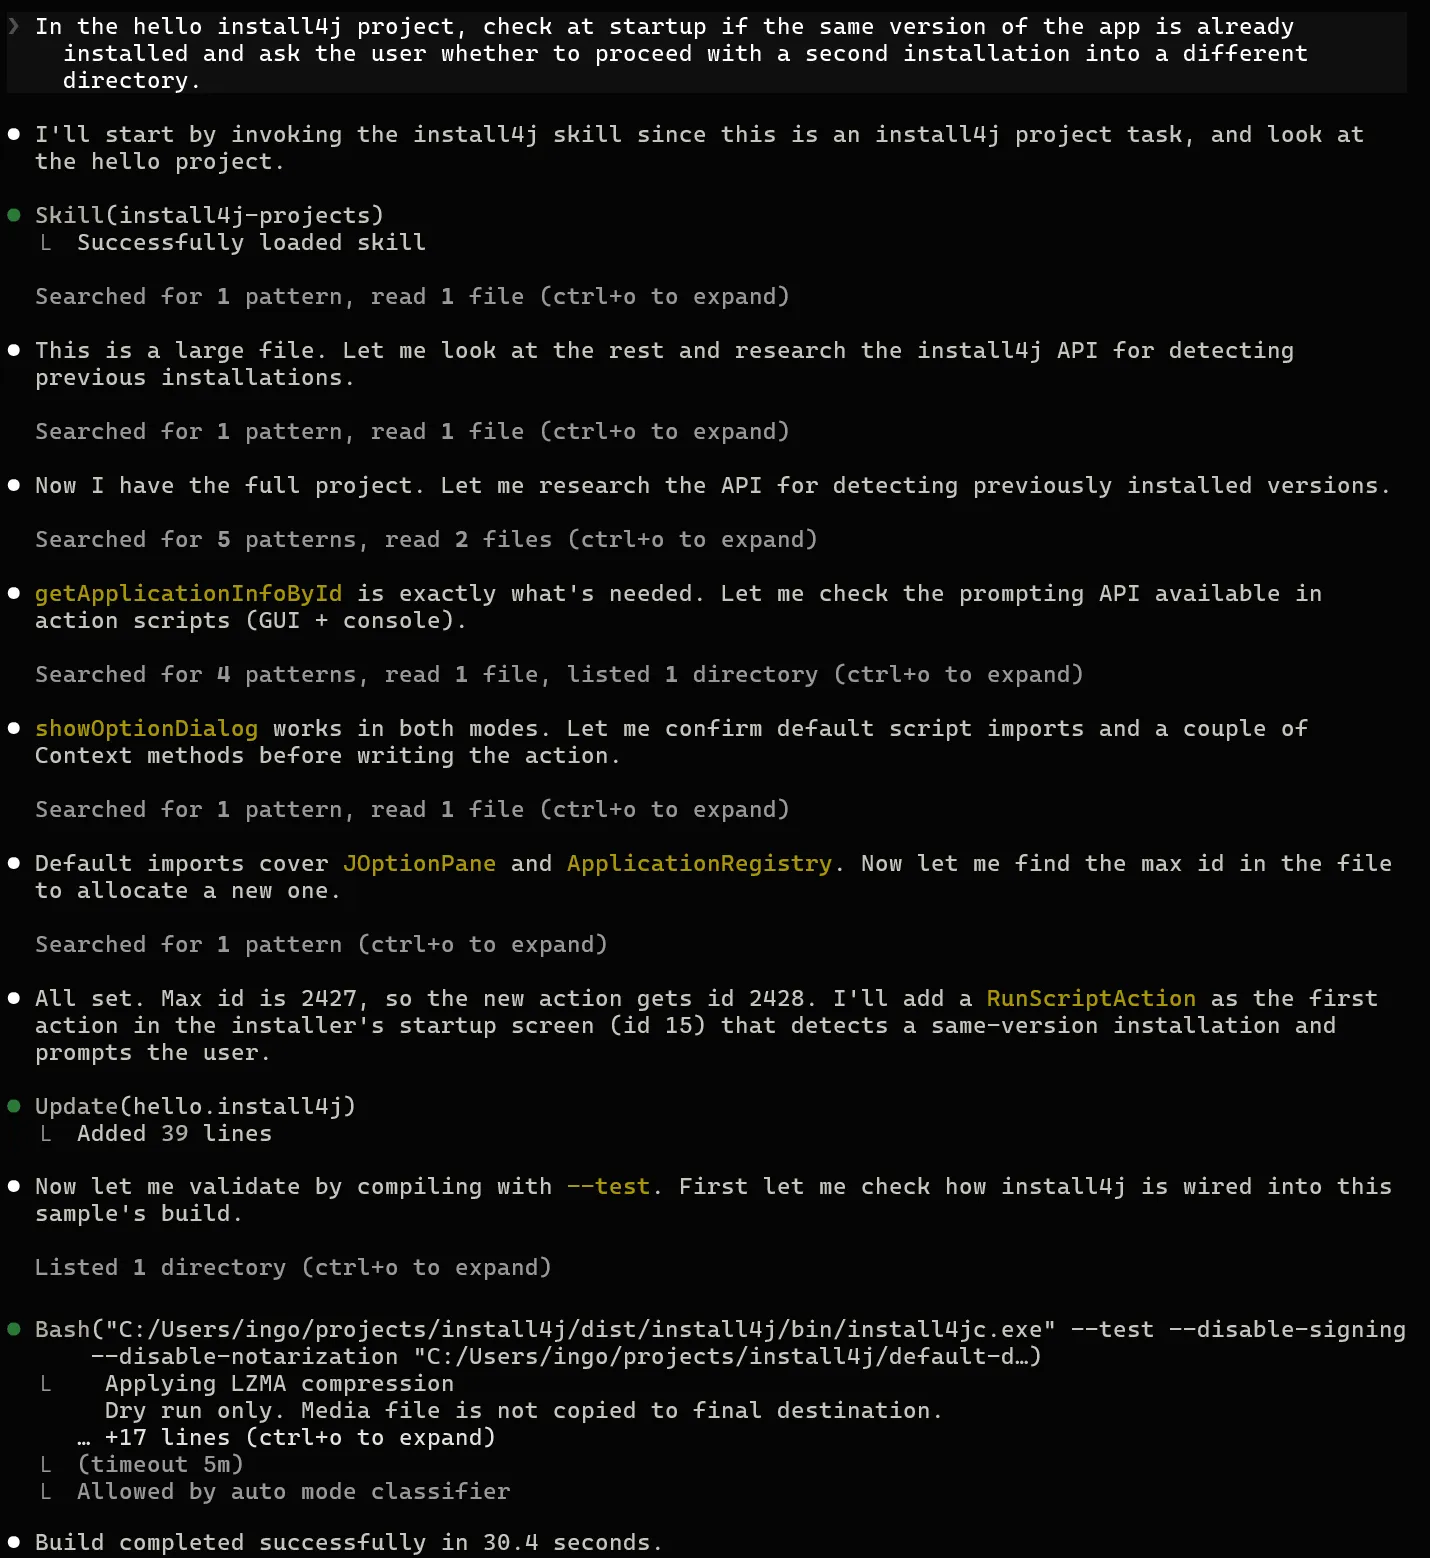
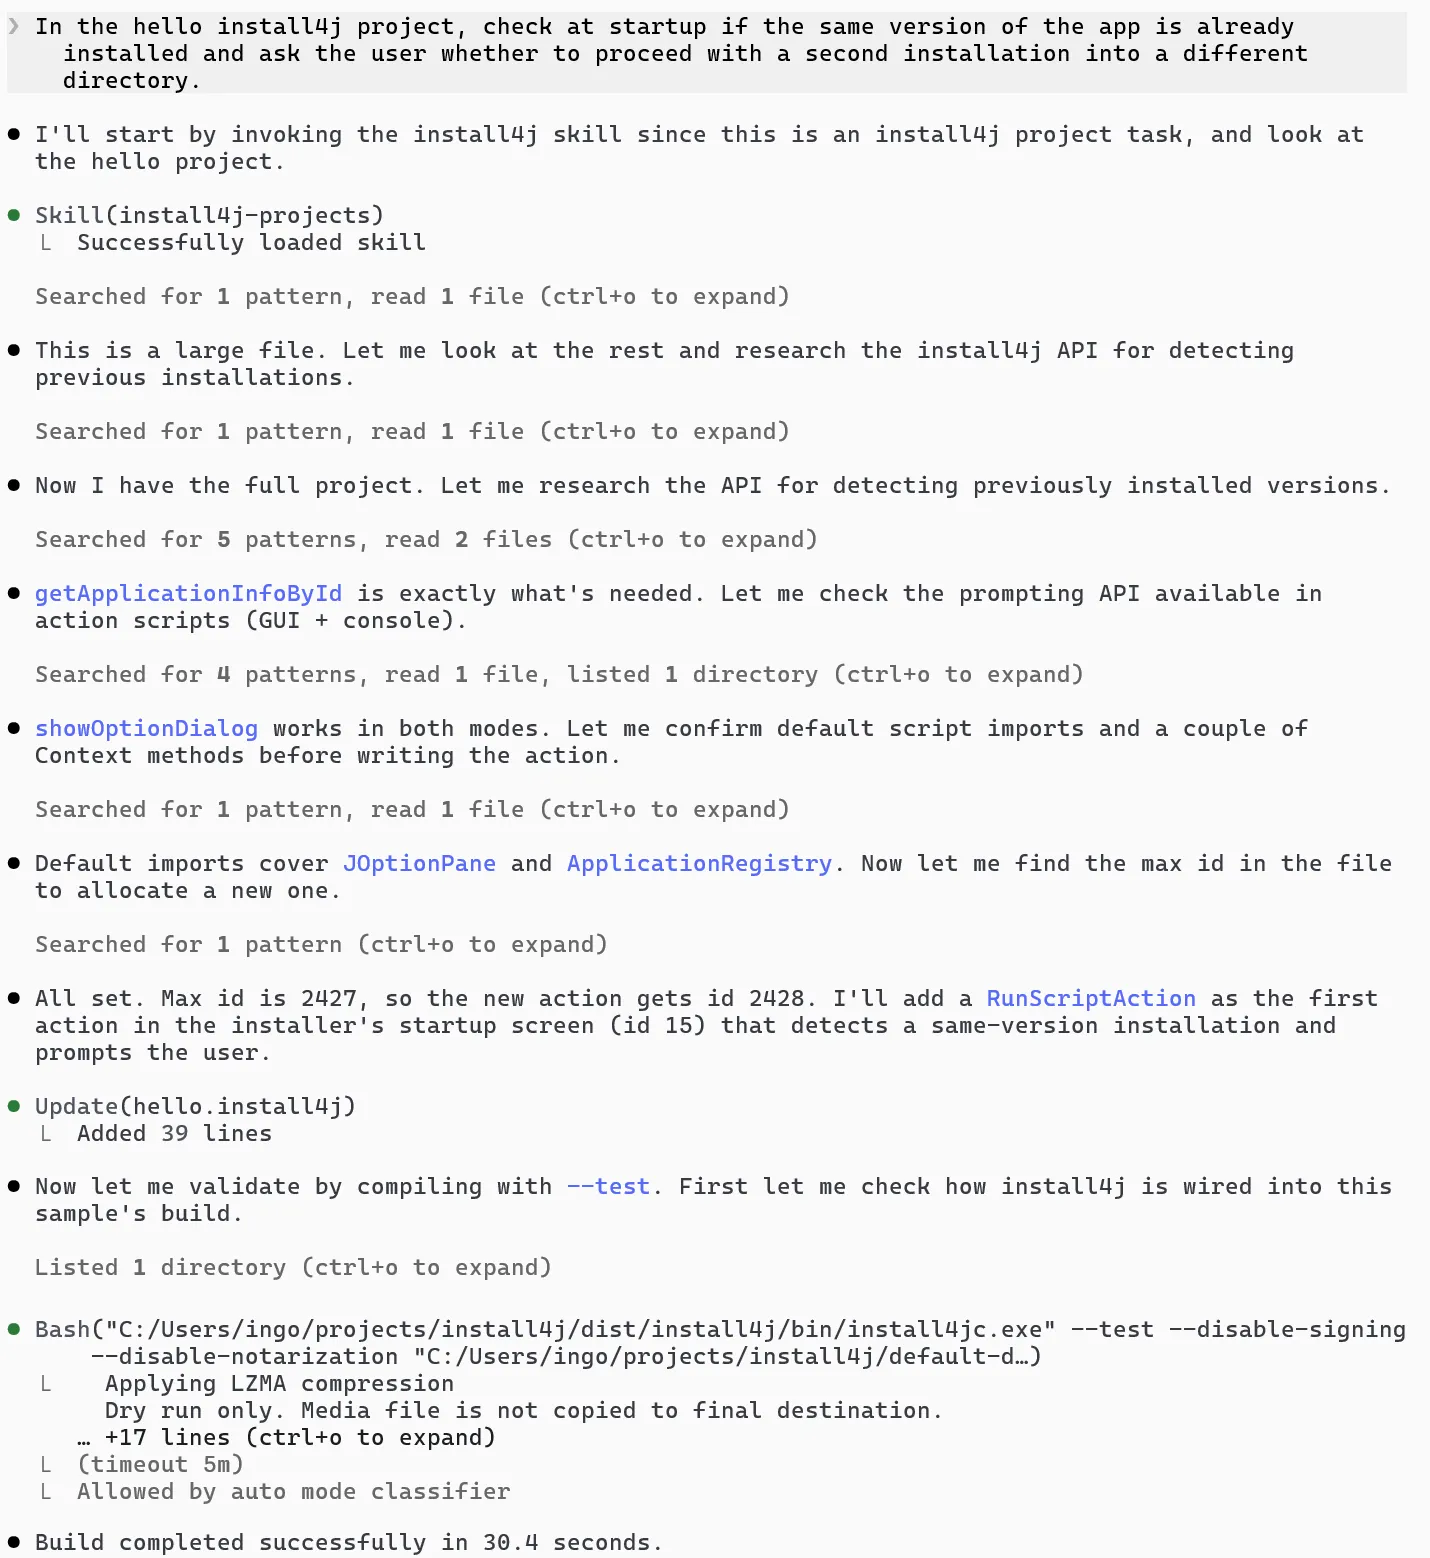
A compatible assistant loads the skill on its own whenever you give it a task related to install4j. For example, when it
is asked to add a startup check to the hello sample that detects an already installed version and prompts before a second
installation, the assistant locates the right registry API, inserts the new action into the project file, and confirms
that the project still compiles.
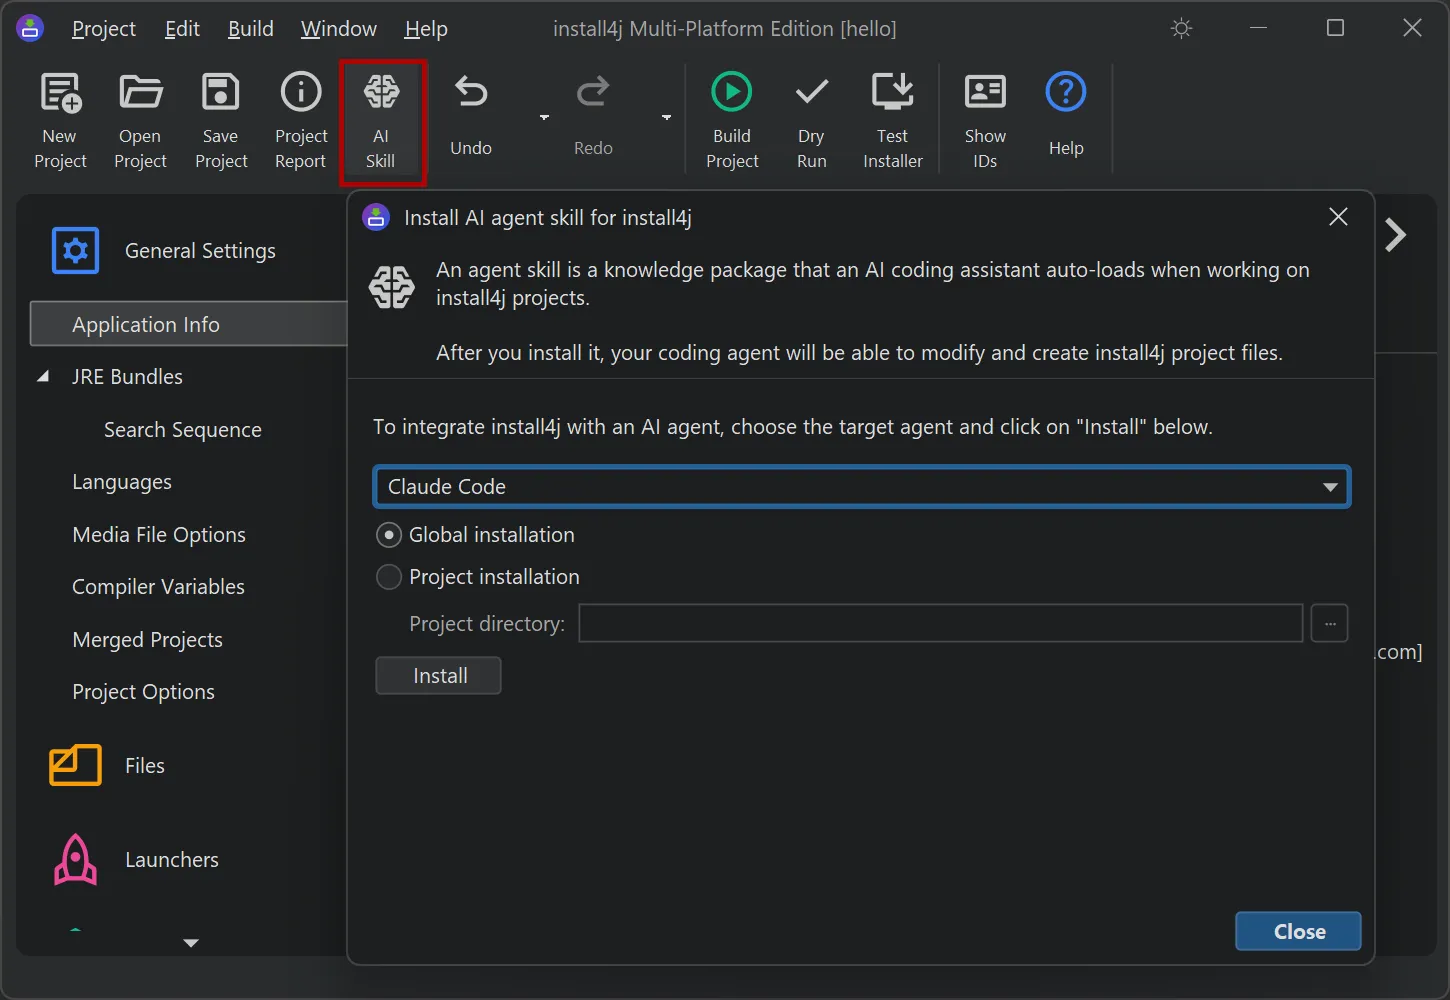
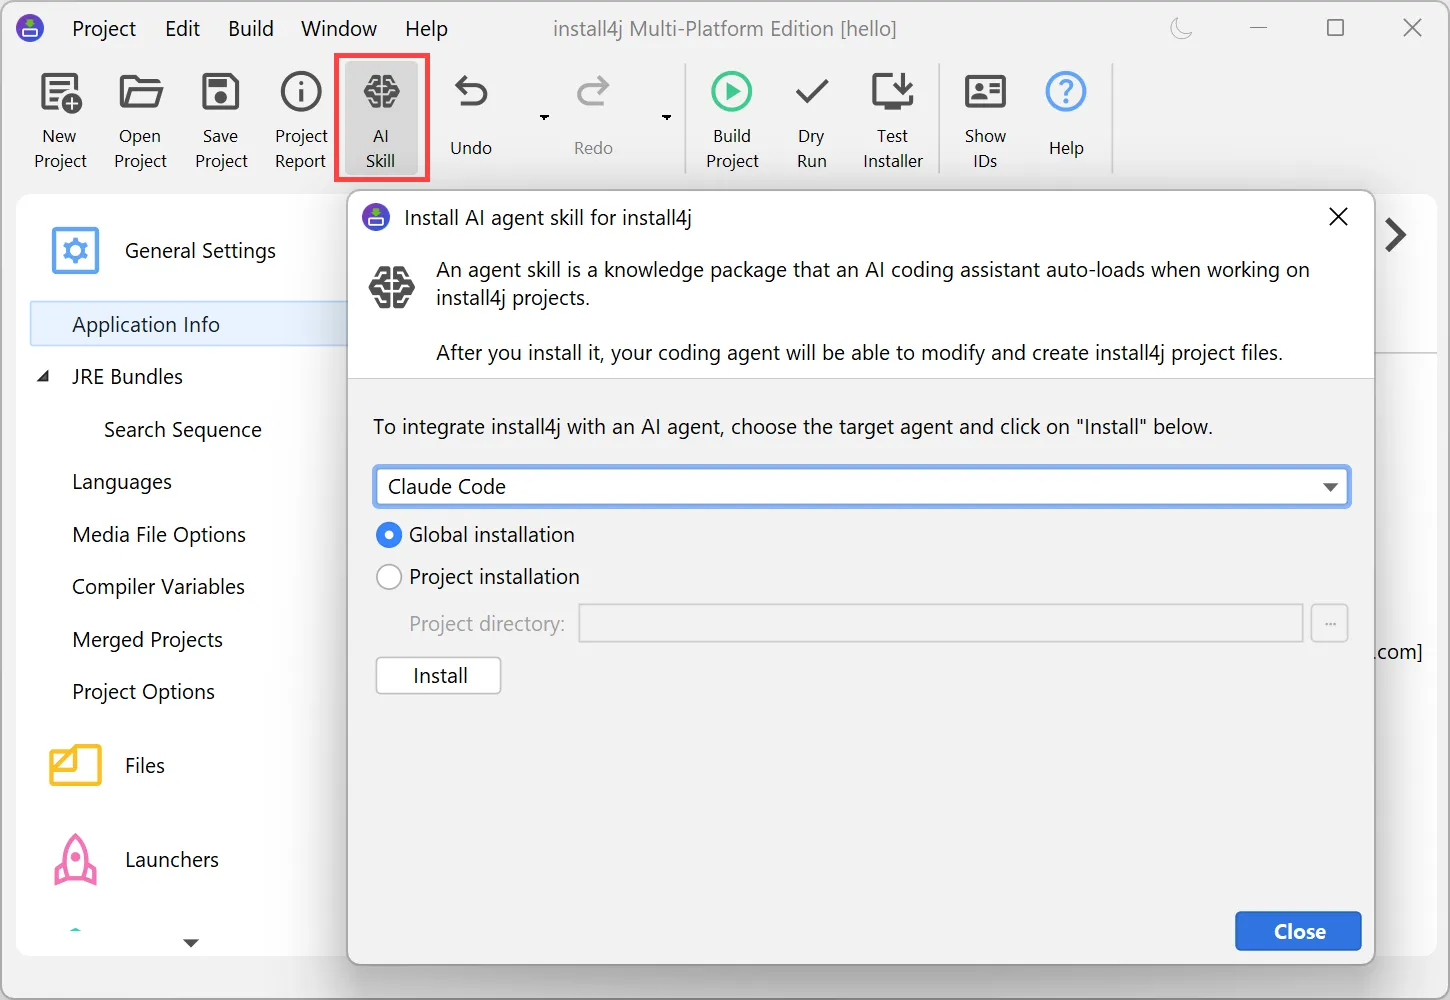
To install the skill, click the "Install AI Skill" button in the toolbar. From the dialog, it can be written into
the skills directory of your AI agent. Supported agents include Claude Code, Claude Desktop, Cursor, Codex CLI, Gemini
CLI, OpenCode, and Junie.
It can be installed globally, so it is available in every project on your machine, or
per project, where it is only available when the agent runs from that project. The skill is generated from your exact
install4j version, so its schema, bean catalog, and samples always match the compiler in your installation.
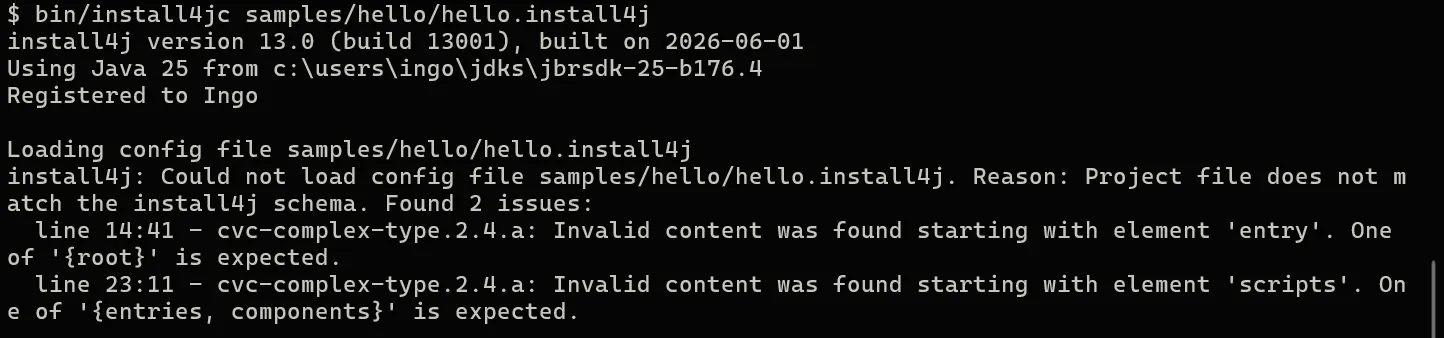
install4j 13 introduces an XML schema for install4j project files. The schema (install4j.xsd) is shipped in
the resource directory of your install4j installation and documents every element, attribute, and enumeration
value of the .install4j file format with inline descriptions. It is comprehensive, covering more than 230
elements, 450 attributes, and 150 enumeration values, with around 600 documentation entries describing them.
When you associate the schema with your .install4j files in an XML editor, you get auto-completion, inline
documentation, and validation as you edit. In addition, the project file is now validated against the schema
whenever you compile from the command line, so structural errors are caught early with precise messages.
A new install4j Test API lets you write automated, end-to-end tests that drive an installer UI in GUI mode from
inside a test JVM. The API is framework-agnostic, so you can use it from JUnit, TestNG, Spock, or a plain main
method.
A session is started with one of the session builders: InstallerSessionBuilder.forMediaFile(...) to test
a generated installer, UninstallerSessionBuilder.forInstallation(...) to test an uninstaller, or
InstallerApplicationSessionBuilder.forInstallation(...) for custom installer applications such as update
downloaders. Builder options include a timeout, additional command line arguments, system properties, a working directory,
a log file, and a debug mode that runs the installer in process for easy breakpoint debugging.
Within a session you wait for screens by id, navigate with the Next, Previous, Cancel, and Finish buttons, interact with
strongly typed handles for form components and dialogs, and finally verify installer variables, the installation directory,
the log, and the exit code:
InstallerSession session = InstallerSessionBuilder
    .forMediaFile(new File("media/myApp_windows-x64.exe"))
    .installationDirectory(targetDirectory)
    .start();

session.waitForScreenId("welcome").nextScreen();

// Accept the license, then fill in a custom form screen
session.currentScreen().checkBox("acceptCheckBox").setSelected(true);
session.currentScreen().nextScreen();
session.currentScreen().textField("port").setText("8443");
session.currentScreen().nextScreen();

// Modal dialogs can be handled when they appear
session.alert().clickYes();

session.currentScreen().finish();

// Verify the outcome after the installer has exited
int exitCode = session.awaitExit(Duration.ofMinutes(2));
assertEquals(0, exitCode);
For Kotlin users, extension functions are included to make the API more idiomatic.
A useSession { } block starts the session and closes it automatically,
helpers like onScreen and onAlert run a code block on a screen or dialog, and a
session["name"] accessor reads installer variables:
InstallerSessionBuilder
    .forMediaFile(File("media/myApp_windows-x64.exe"))
    .useSession {
        onScreen("welcome") { nextScreen() }
        onCurrentScreen {
            checkBox("acceptCheckBox").setSelected(true)
            nextScreen()
        }
        onAlert { clickYes() }
        onCurrentScreen { finish() }
        awaitExit()
    }
The Test API is published to Maven Central as com.install4j:install4j-test and is also bundled as
install4j-test.jar in the resource directory of your installation.
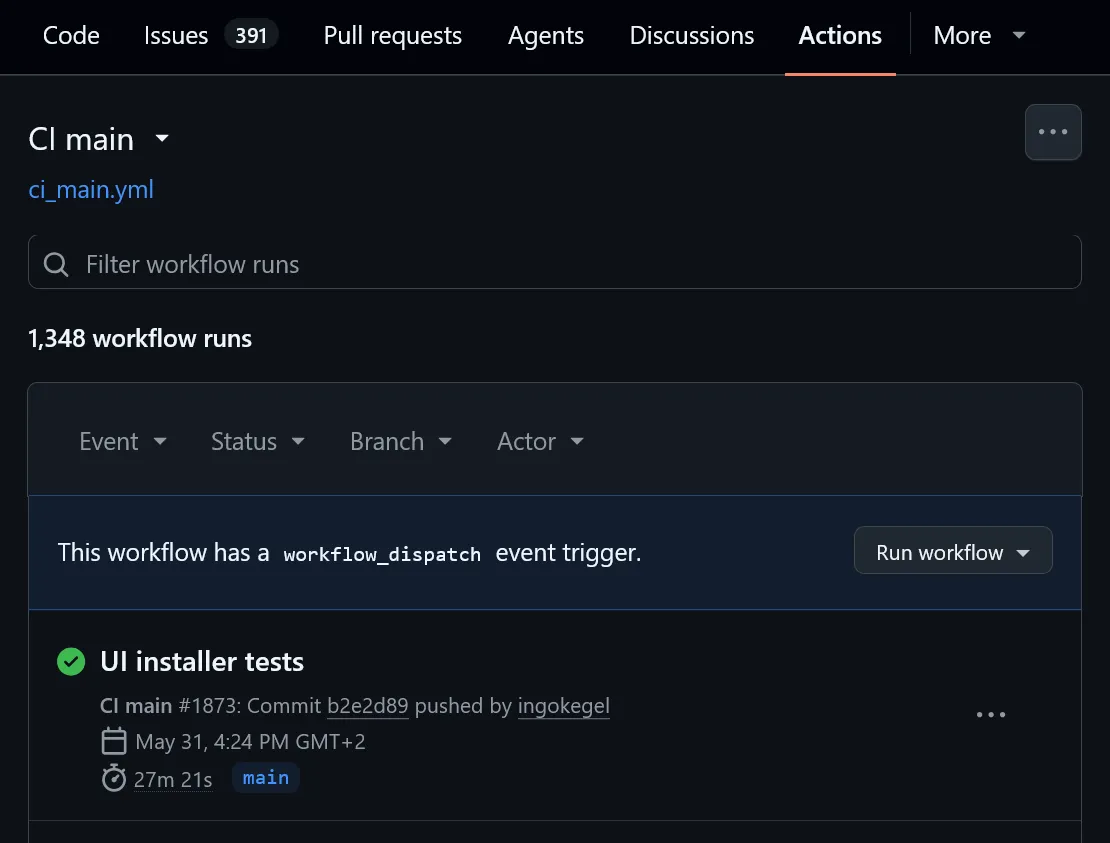
These GUI tests can even be run headless in CI. On Linux without a display, such as a GitHub Actions runner, the
installer subprocess is automatically wrapped in xvfb-run together with a lightweight window manager, so the
installer is rendered into a virtual framebuffer and the tests run without any physical screen. All that is required on the
machine is xvfb-run and one of the supported window managers (metacity, mutter, openbox, fluxbox, or marco).
A rich terminal UI has been added for console mode. Console mode is how an install4j installer runs when
there is no graphical display. Previous versions of install4j supported a plain console mode only.
When the installer runs with Java 25 or later in an ANSI-capable terminal, console mode now renders a modern, interactive UI:
-
Colored output so that success and error messages stand out.
-
A live progress bar with a percentage, with status and detail rows that update in place instead of scrolling past.
Long files paths are shortened in the middle so that the beginning and the end stay visible.
-
A spinner for work whose duration is not known.
-
Single-choice lists navigated with the arrow keys, used for option menus and for Yes/No and OK/Cancel confirmations.
-
Multi-selection from a checkbox list.
-
Text and masked password input, and file and directory prompts with
tab completion.
-
A built-in pager for long text such as license agreements, optionally requiring the user to scroll to the end.
The rich renderer falls back to the plain console automatically when running on an older Java version or
when there is no terminal with sufficient capabilities, for example when output is redirected to a file or piped to another process.
The plain renderer can be forced by passing -J-Dinstall4j.plainConsole=true to the installer.
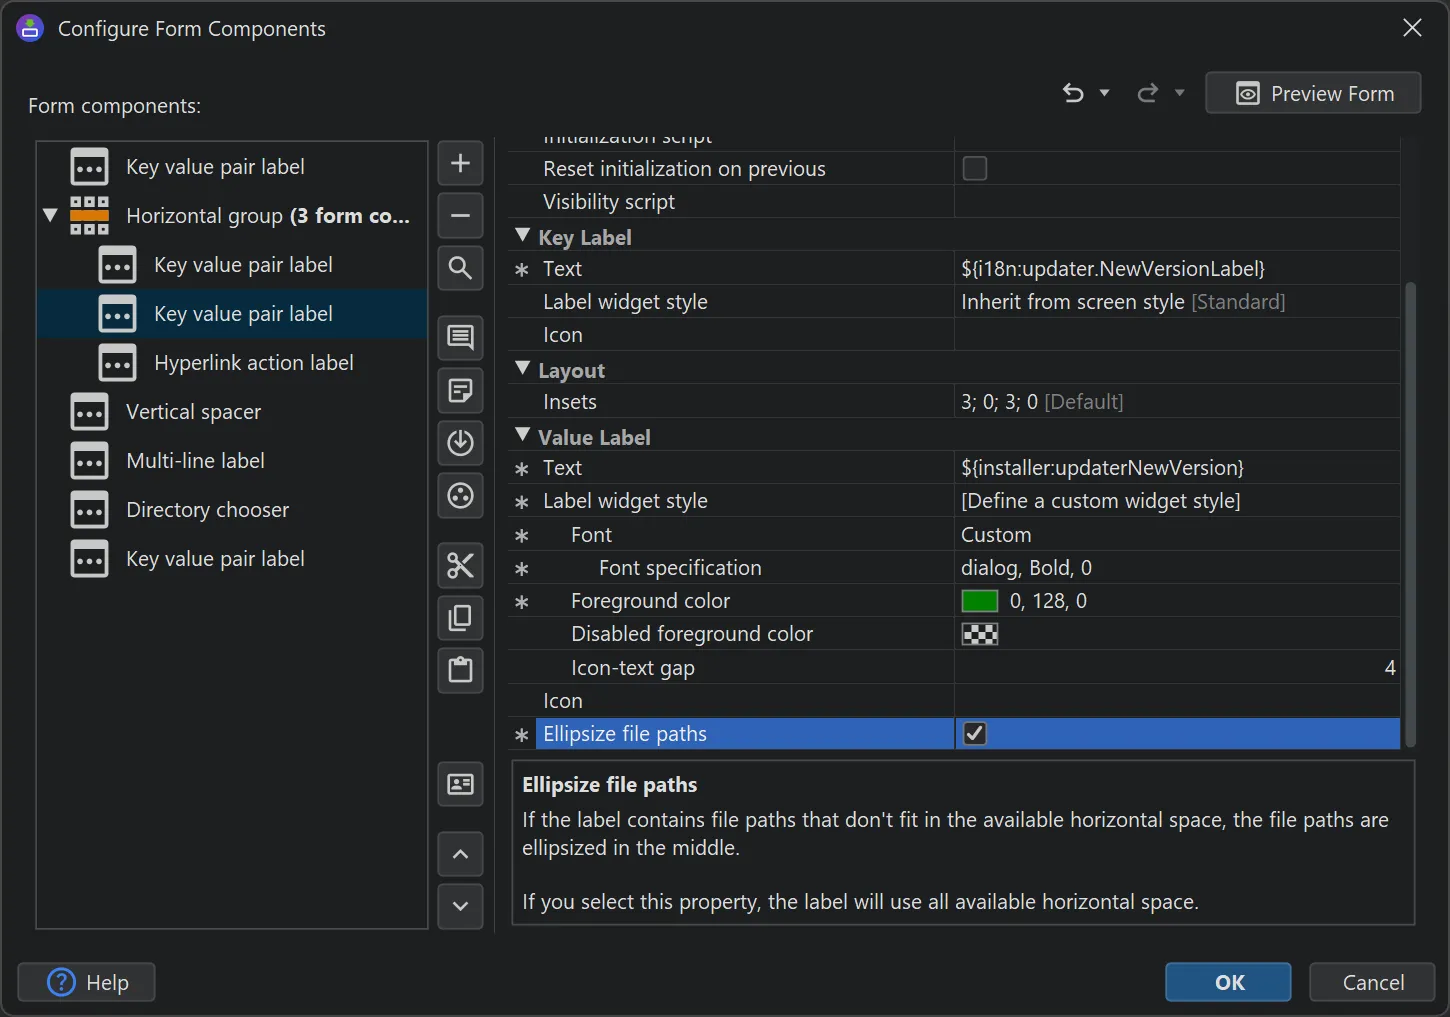
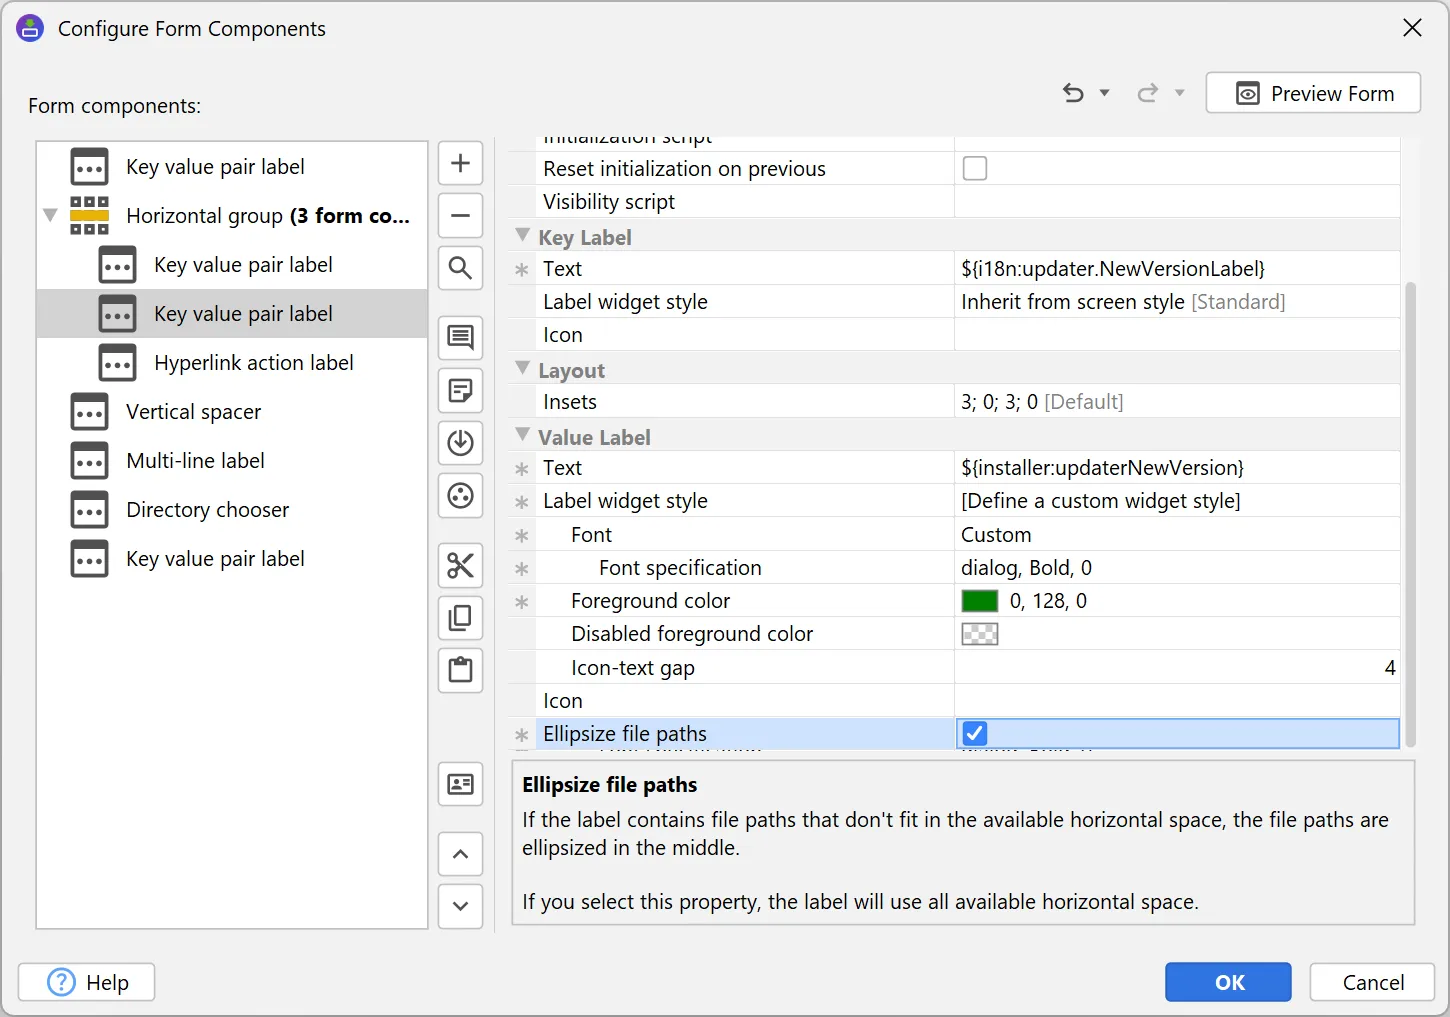
The "Label" and "Key-value pair" form components have a new "Ellipsize file paths" property. When the label
contains a file path that does not fit the available horizontal space, inner path components are replaced with an ellipsis
so that the beginning and the end of the path remain visible.
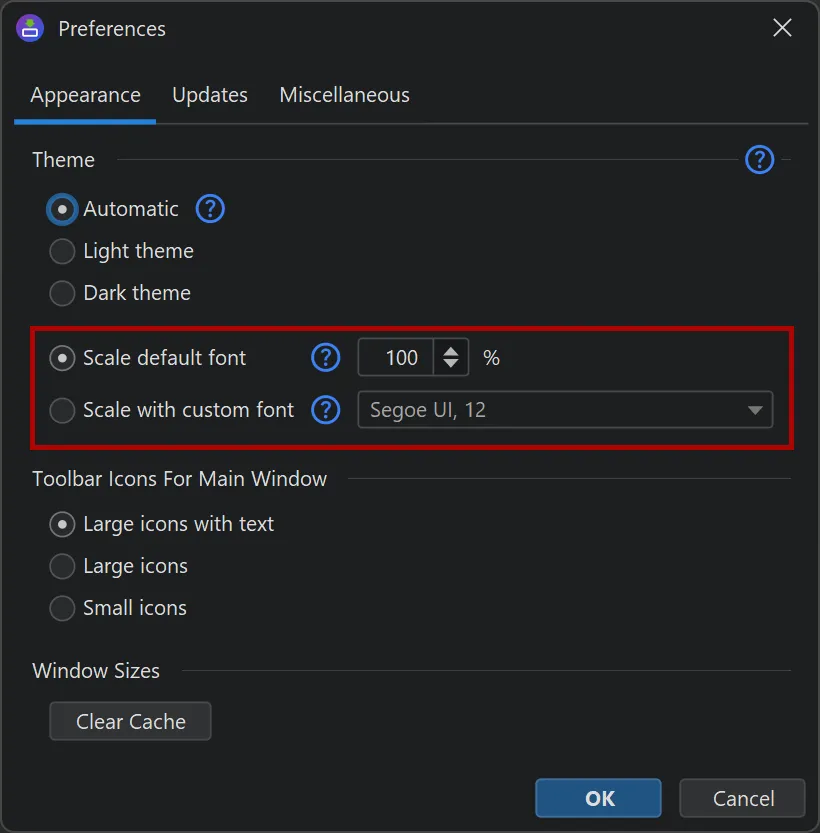
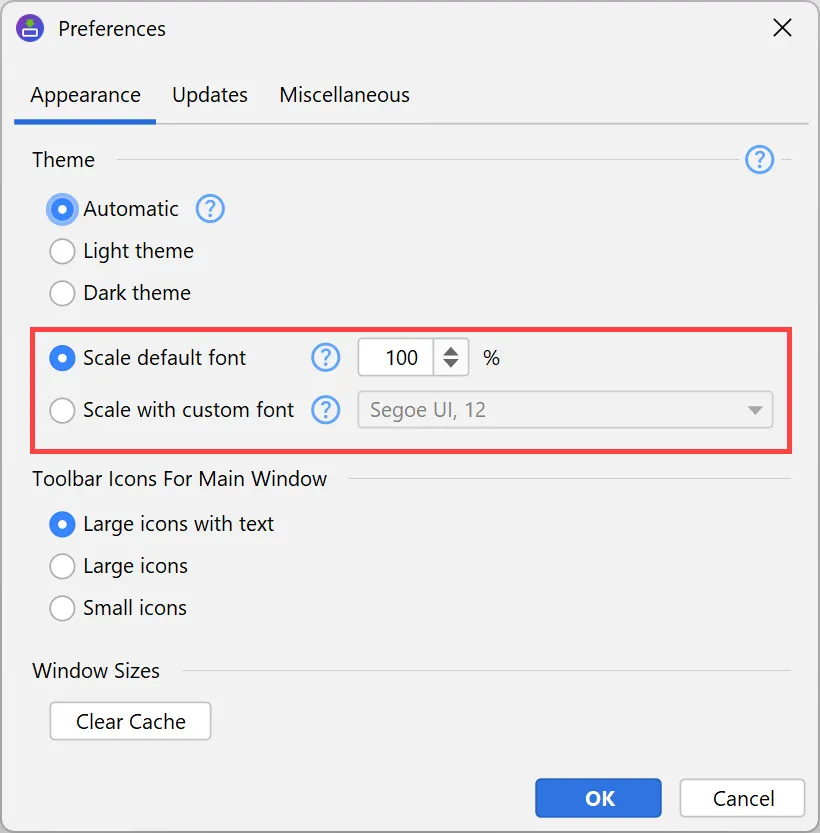
The install4j IDE is now fully scalable. In the general settings, you can either set a scale factor as a percentage, or set a
custom UI font with an arbitrary size, and the UI will be scaled accordingly.
This capability now allows the install4j IDE to run on Linux with all OpenJDK variants and for all HiDPI resolutions.
Previously, only the JetBrains runtime was supported on Linux with HiDPI resolutions.
A new user home launcher variable has been added. Like the other
${launcher:...} variables, it is expanded by the launcher itself when it starts (now also in
.vmoptions files on Linux) and resolves to the home directory of the current user.
This is useful, for
example, to point VM parameters or arguments at a user-specific configuration directory.
Support for the new main methods from JEP 512 has been added. JEP 512 ("Compact Source Files and Instance Main
Methods"), finalized in Java 25, allows a main method to be declared as an instance method and to omit the
String[] parameter.
A launcher can now point at a class whose entry point is, for example, an instance
void main() method, in addition to the classic public static void main(String[] args).
For a discussion of breaking changes when migrating from install4j 11, please see
this blog post.
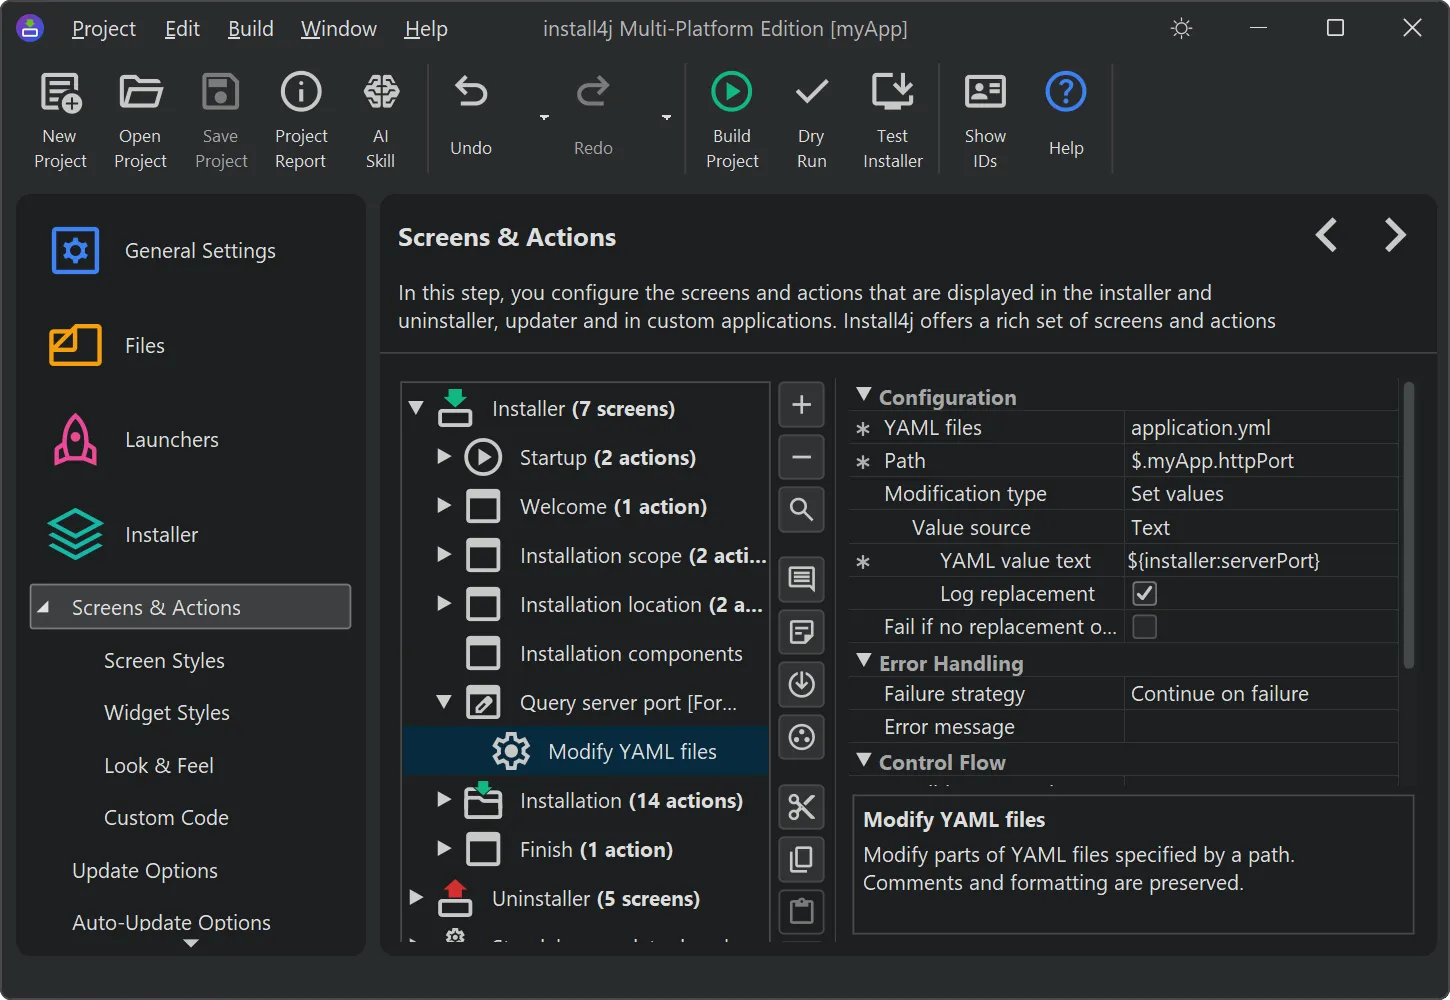
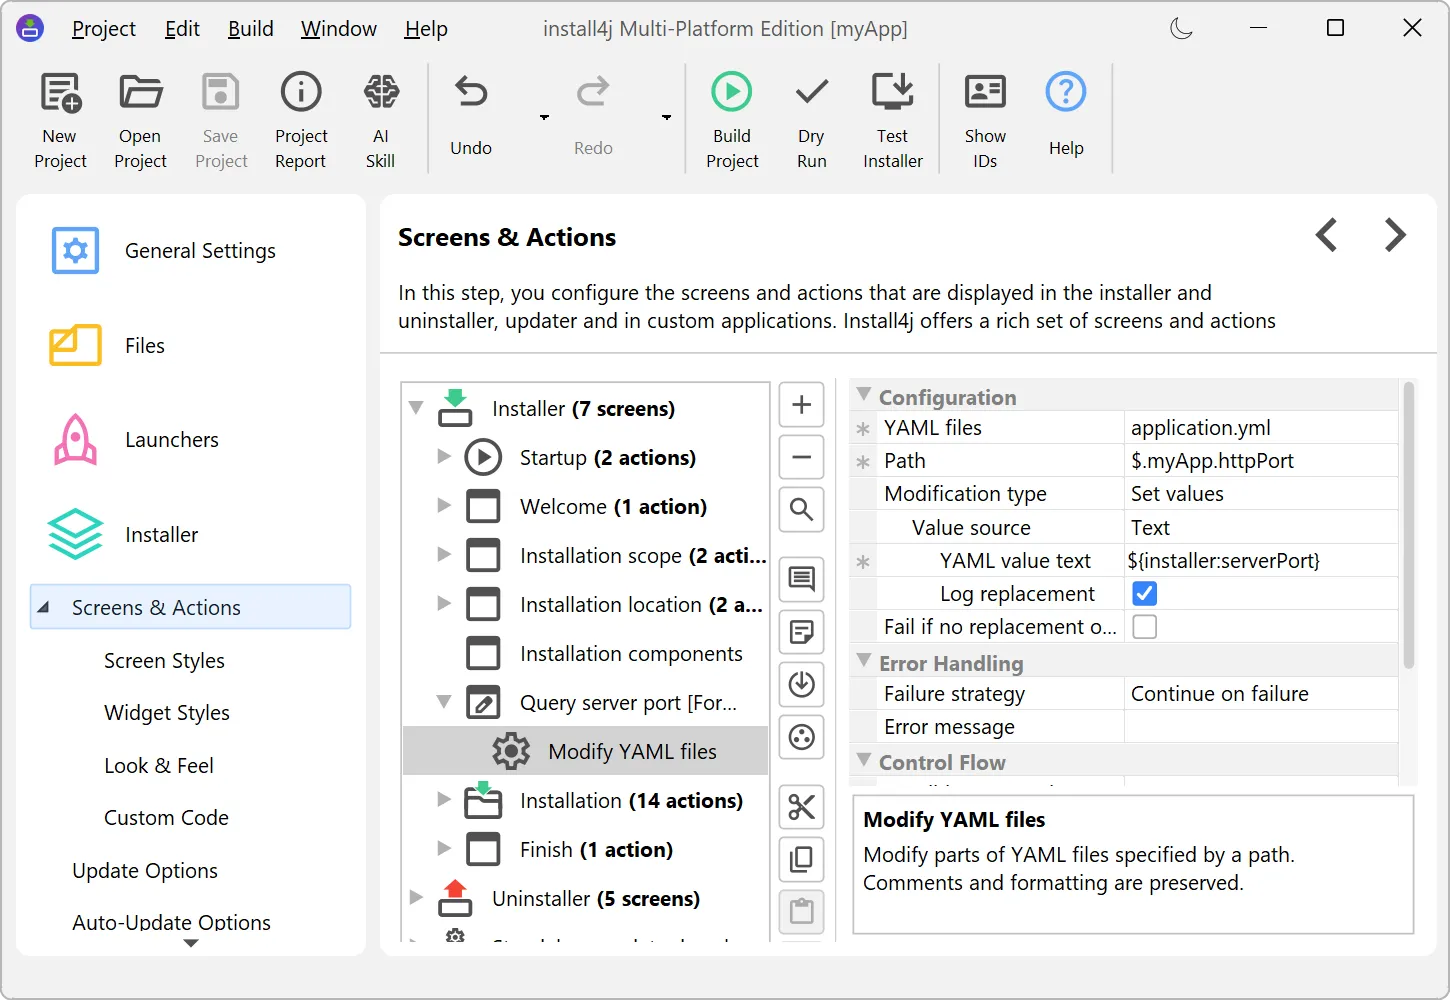
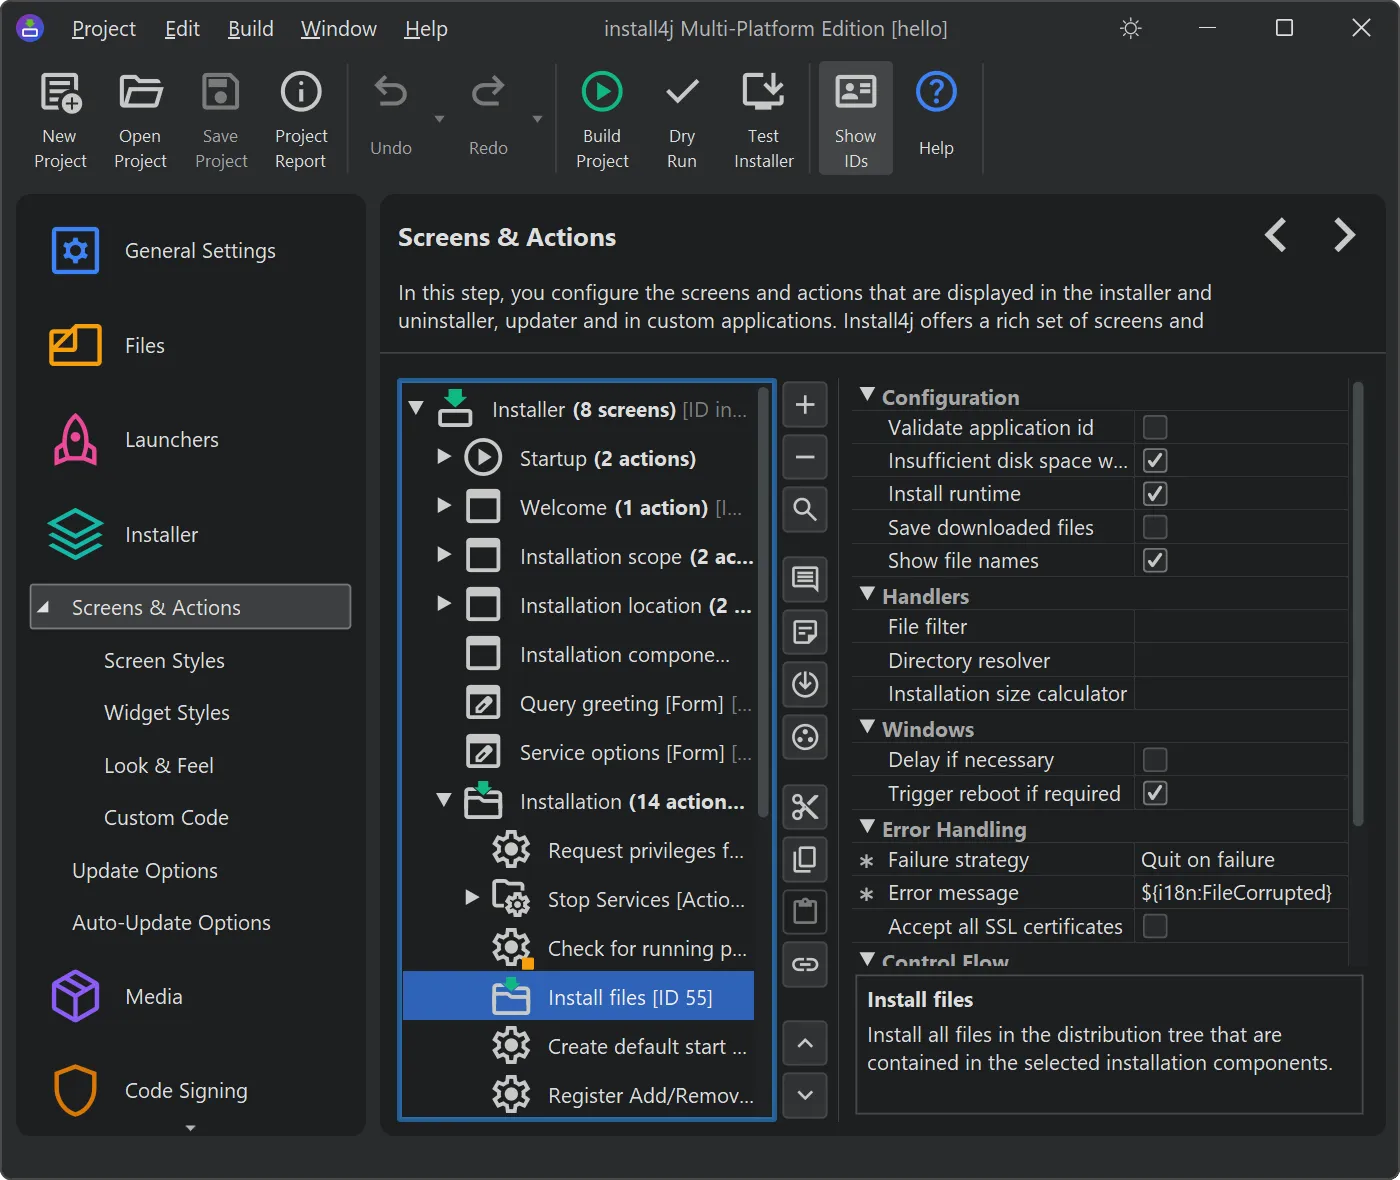
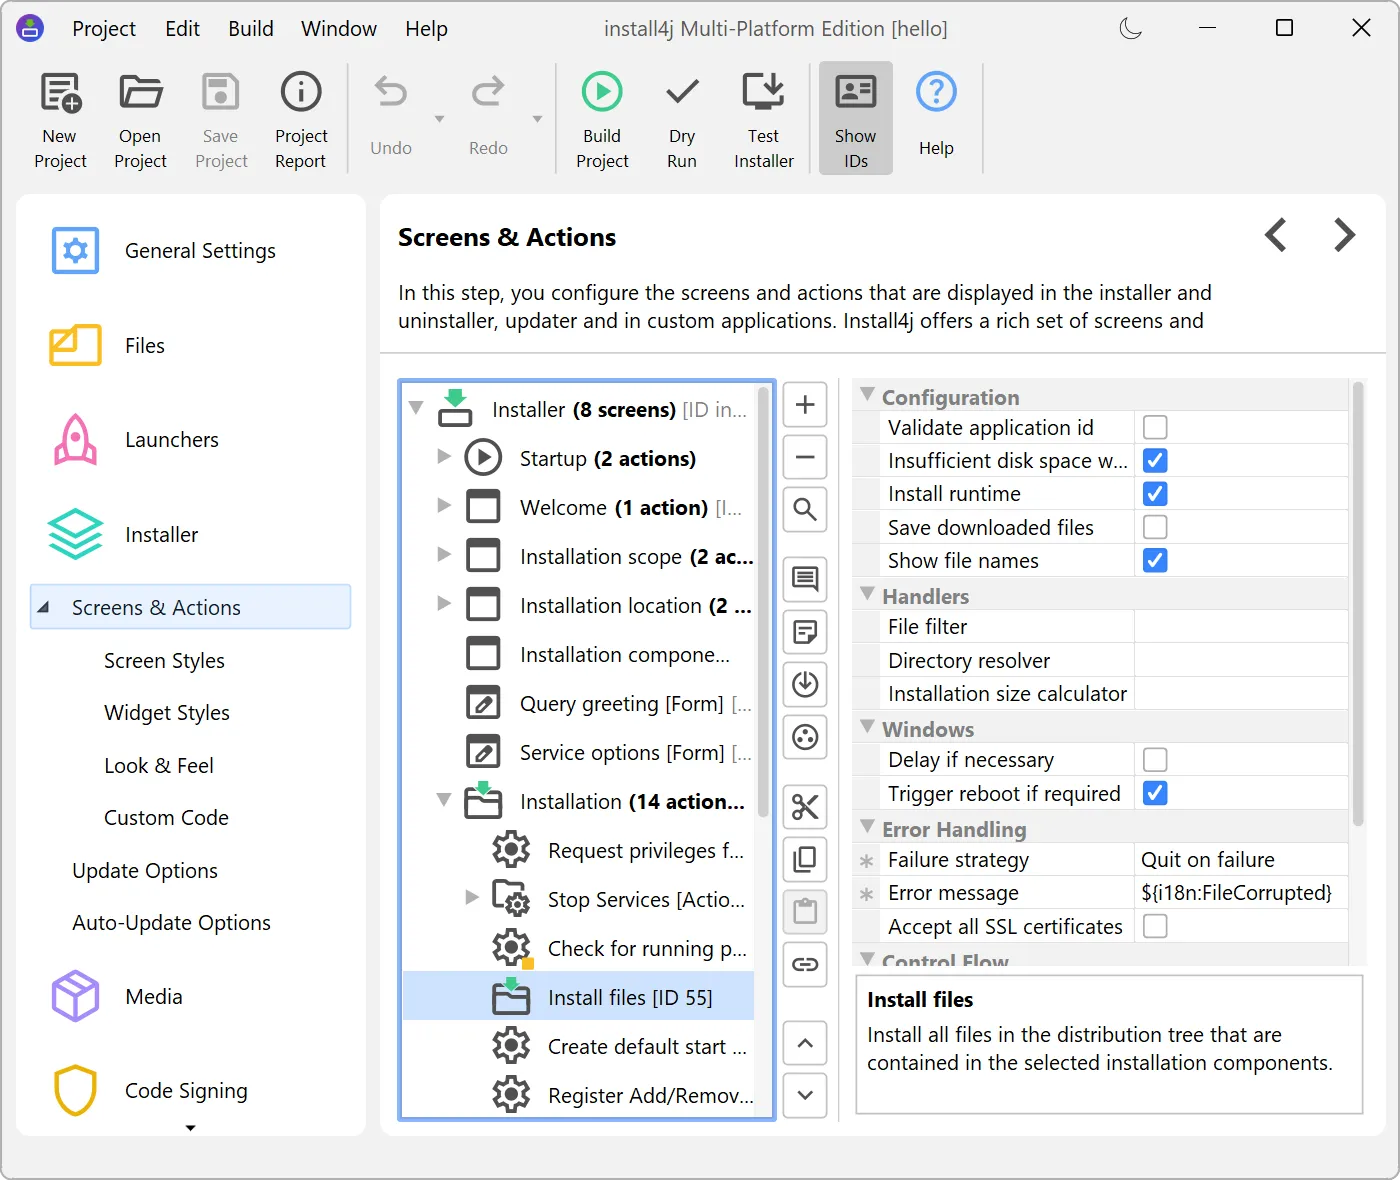
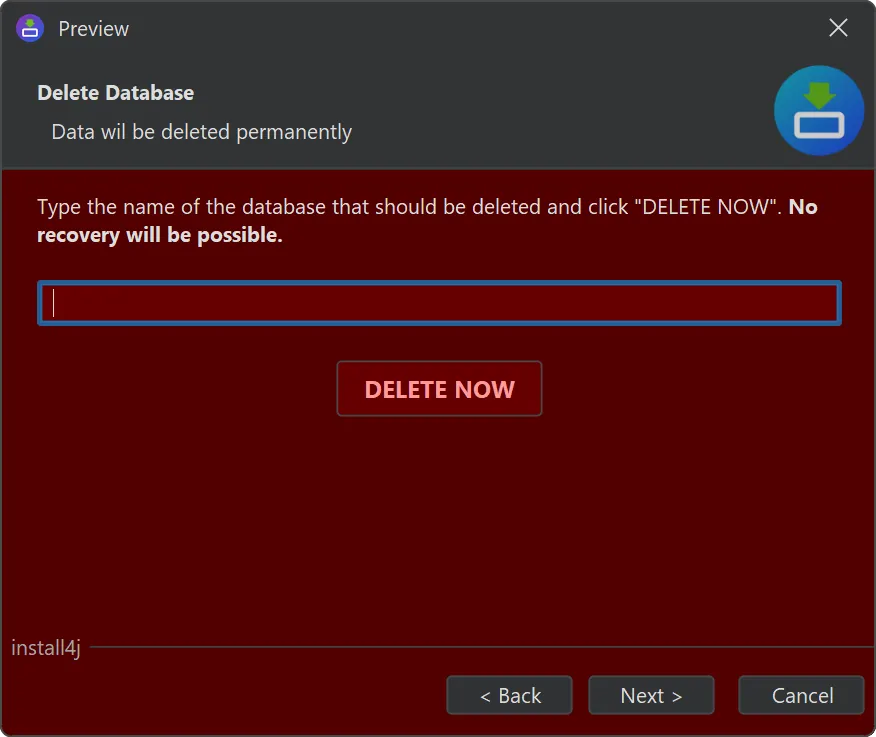
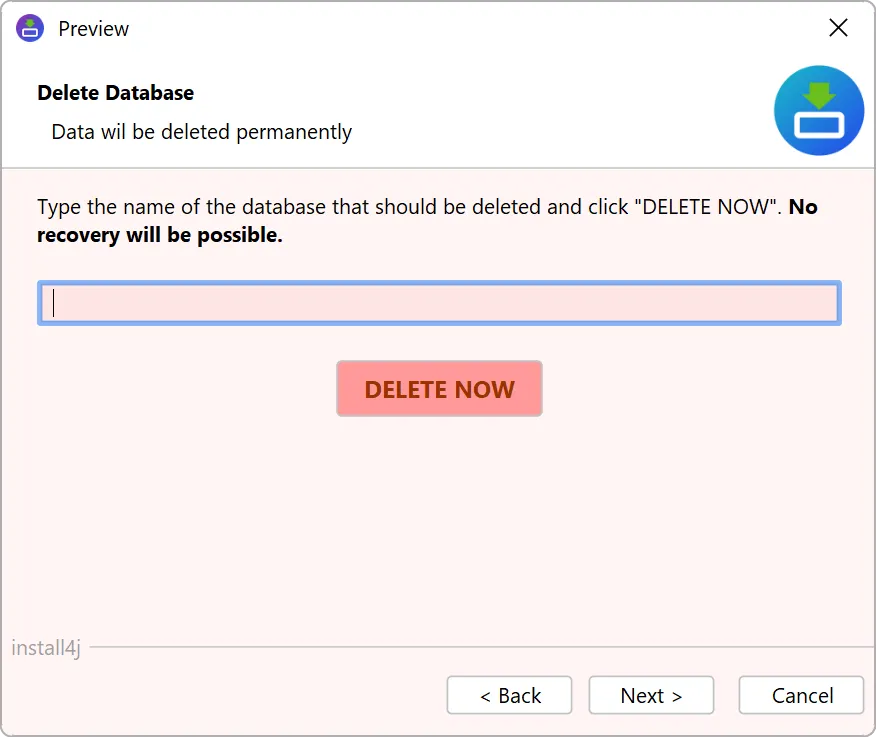
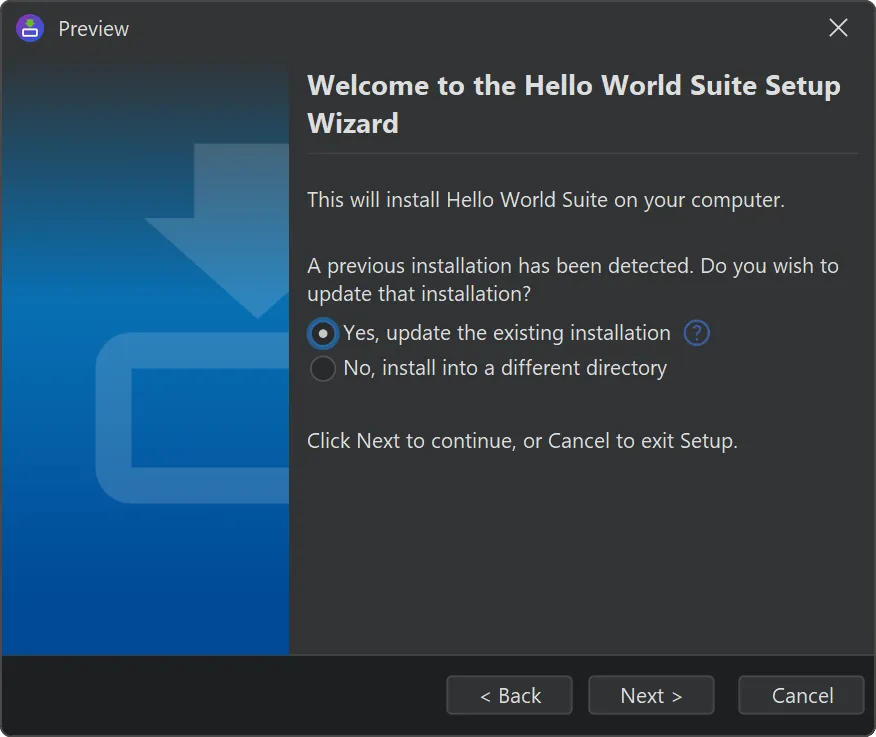
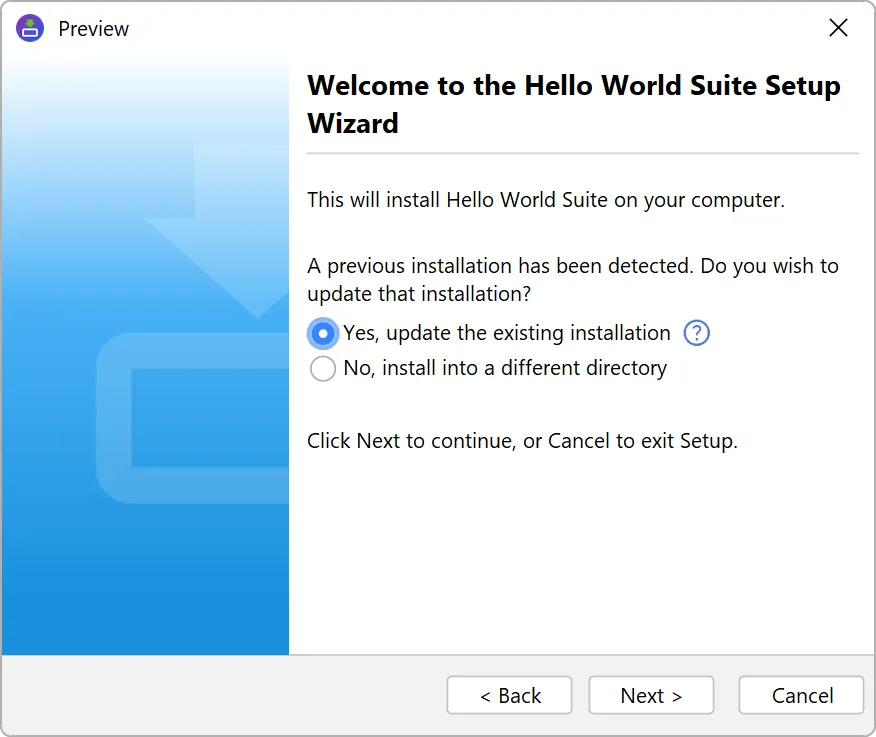
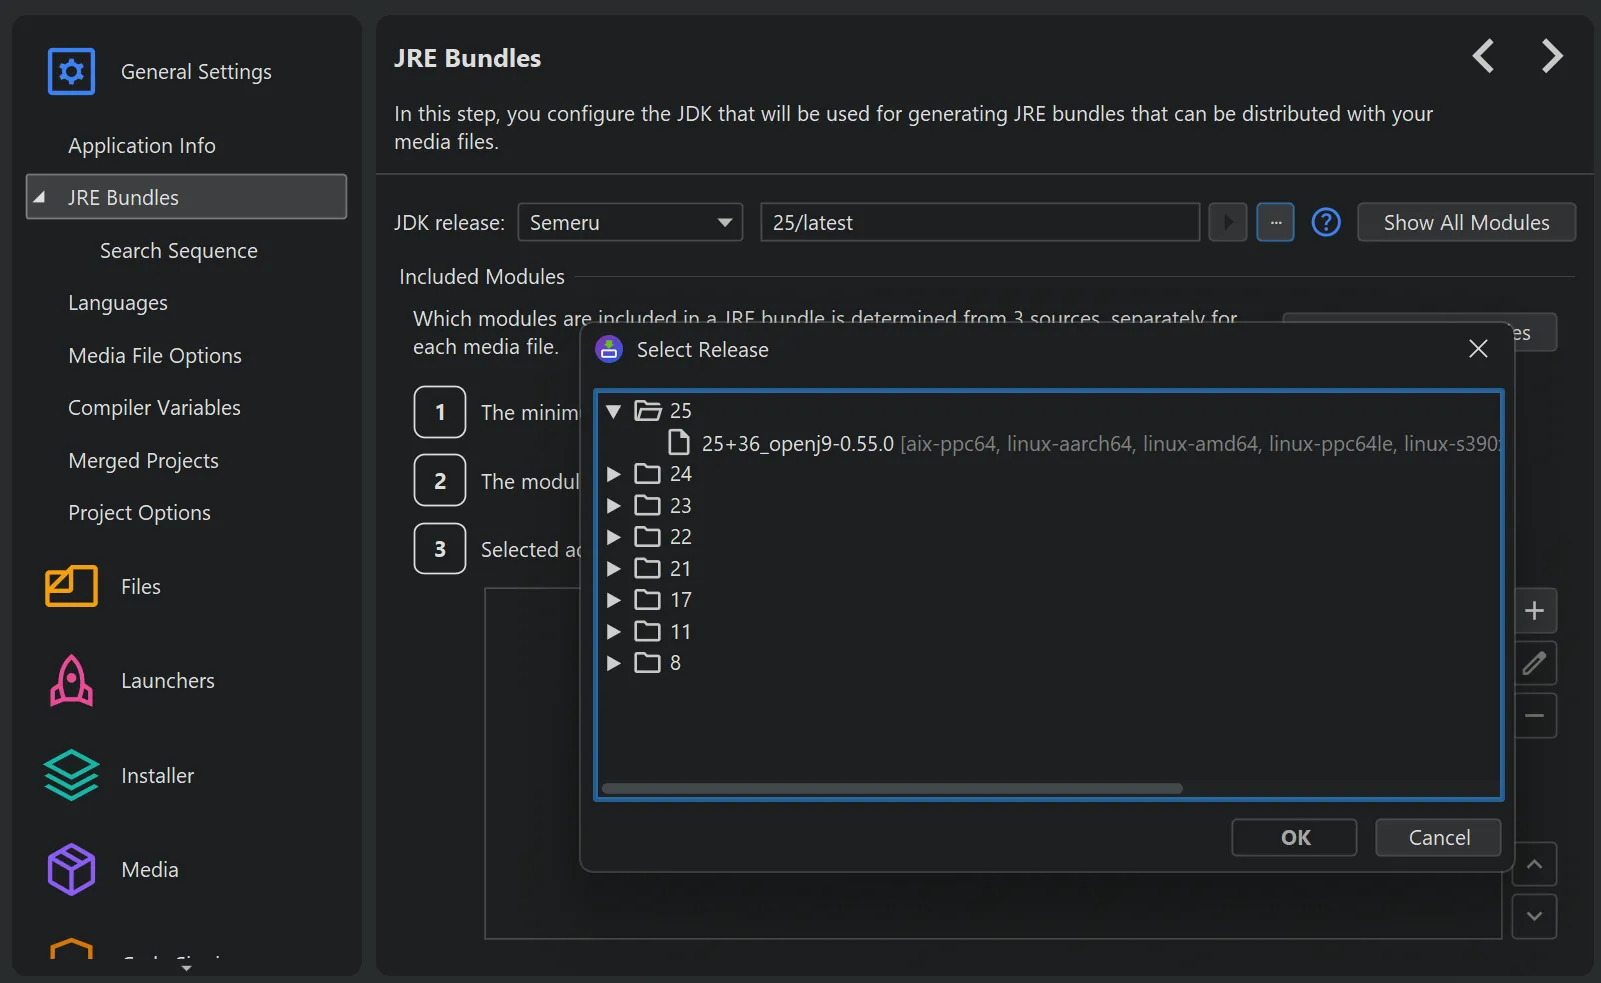
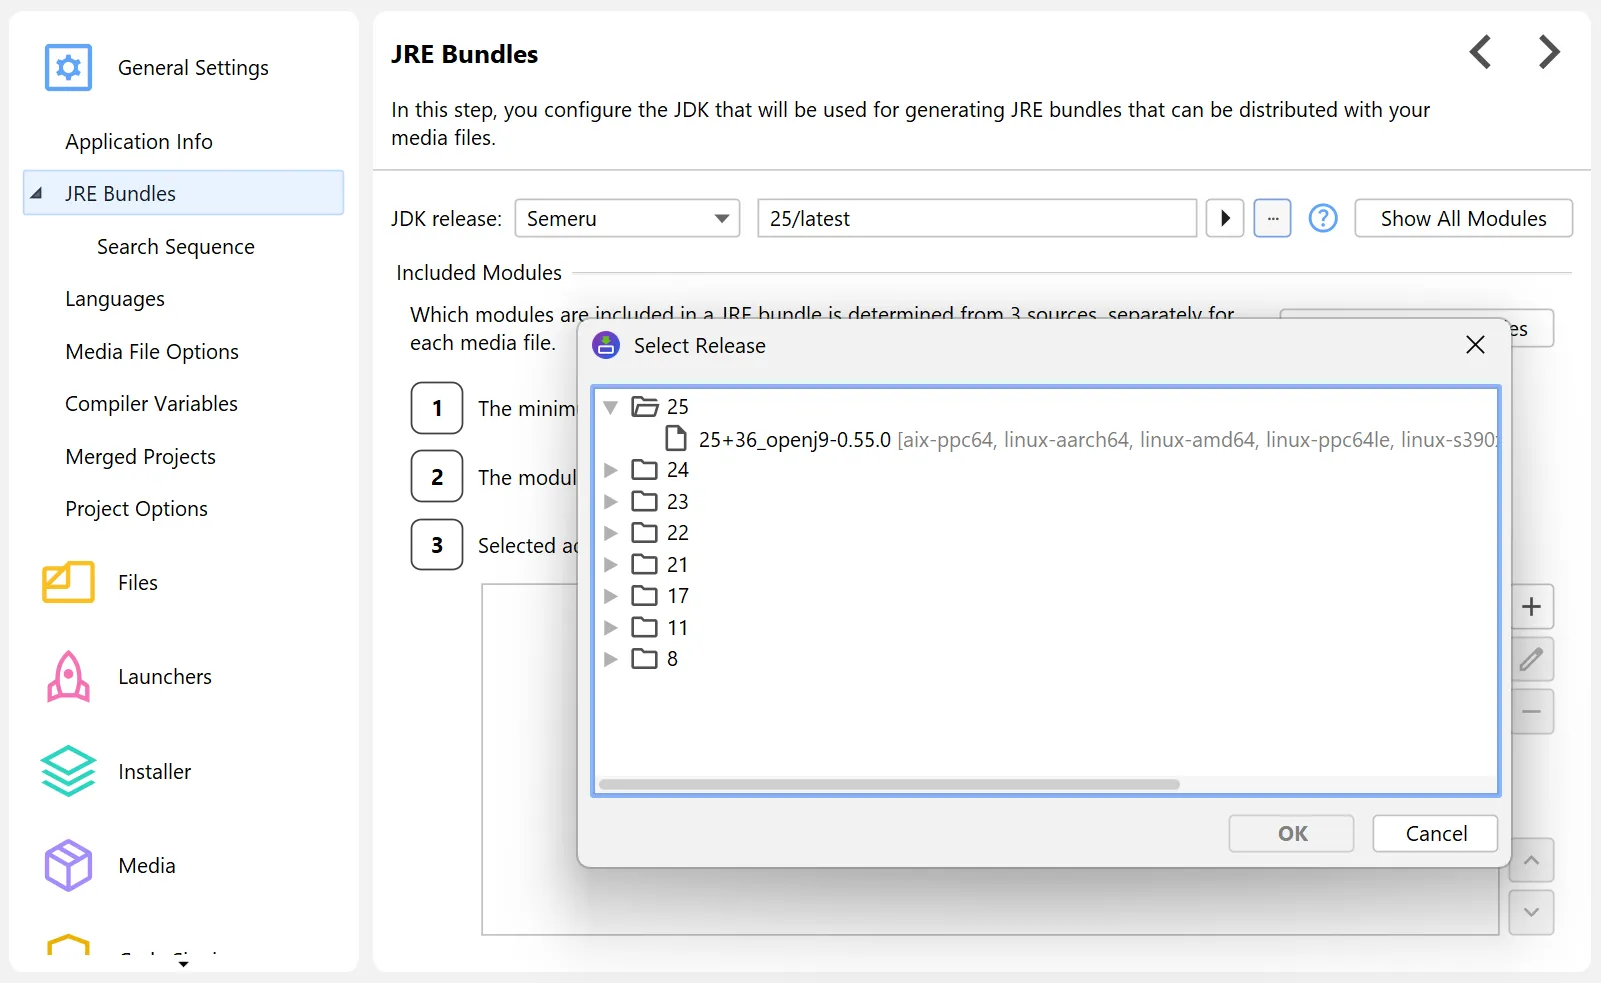
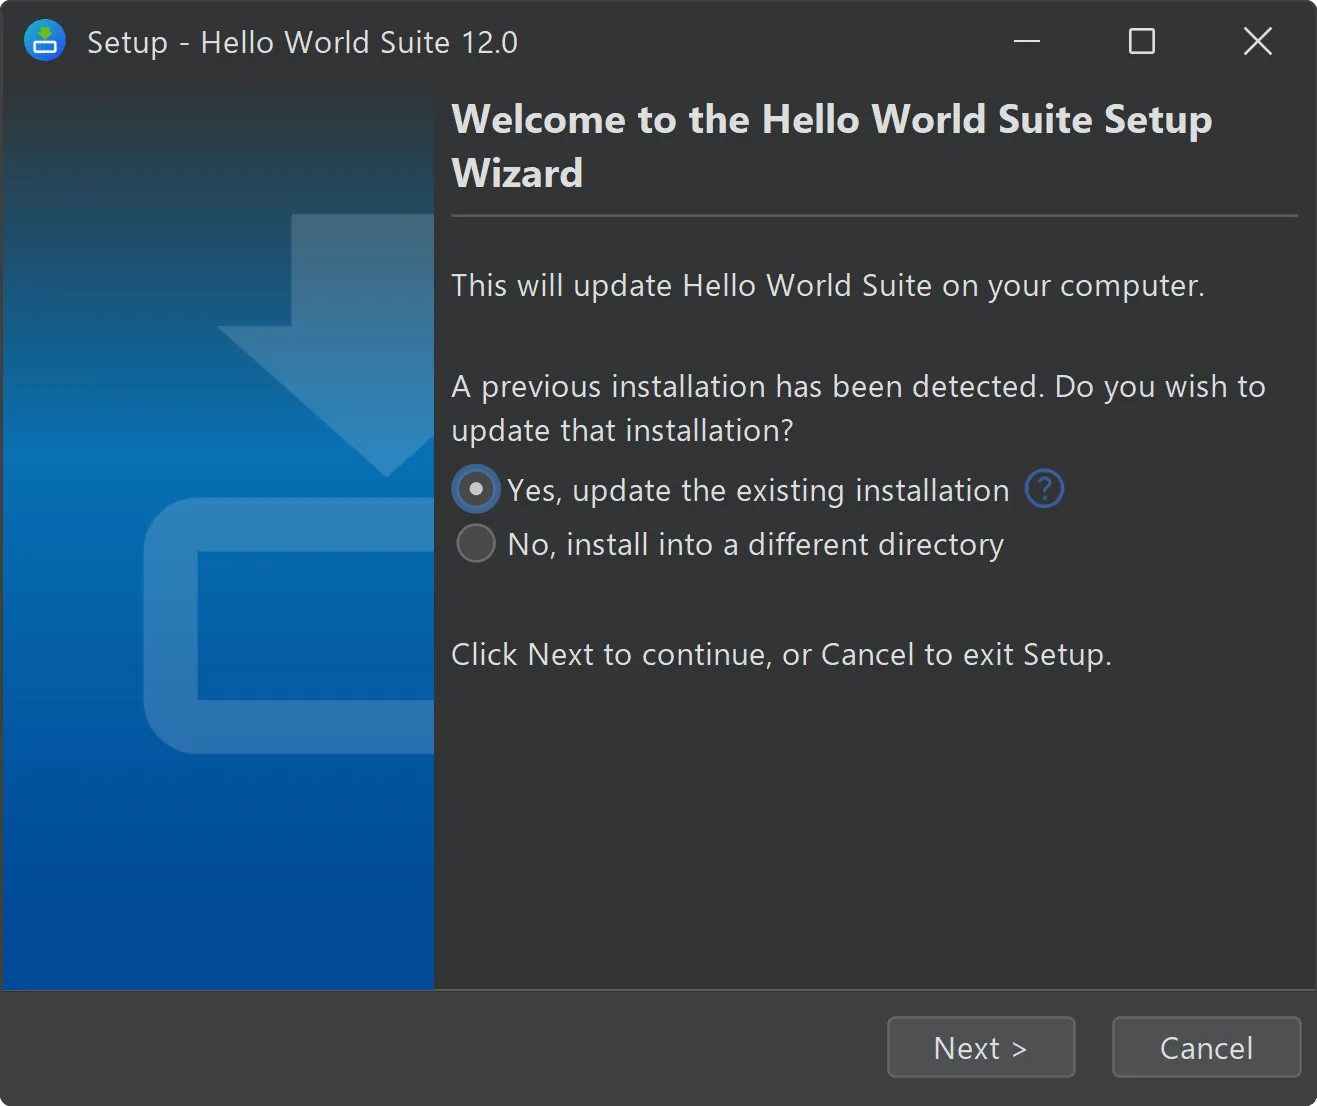
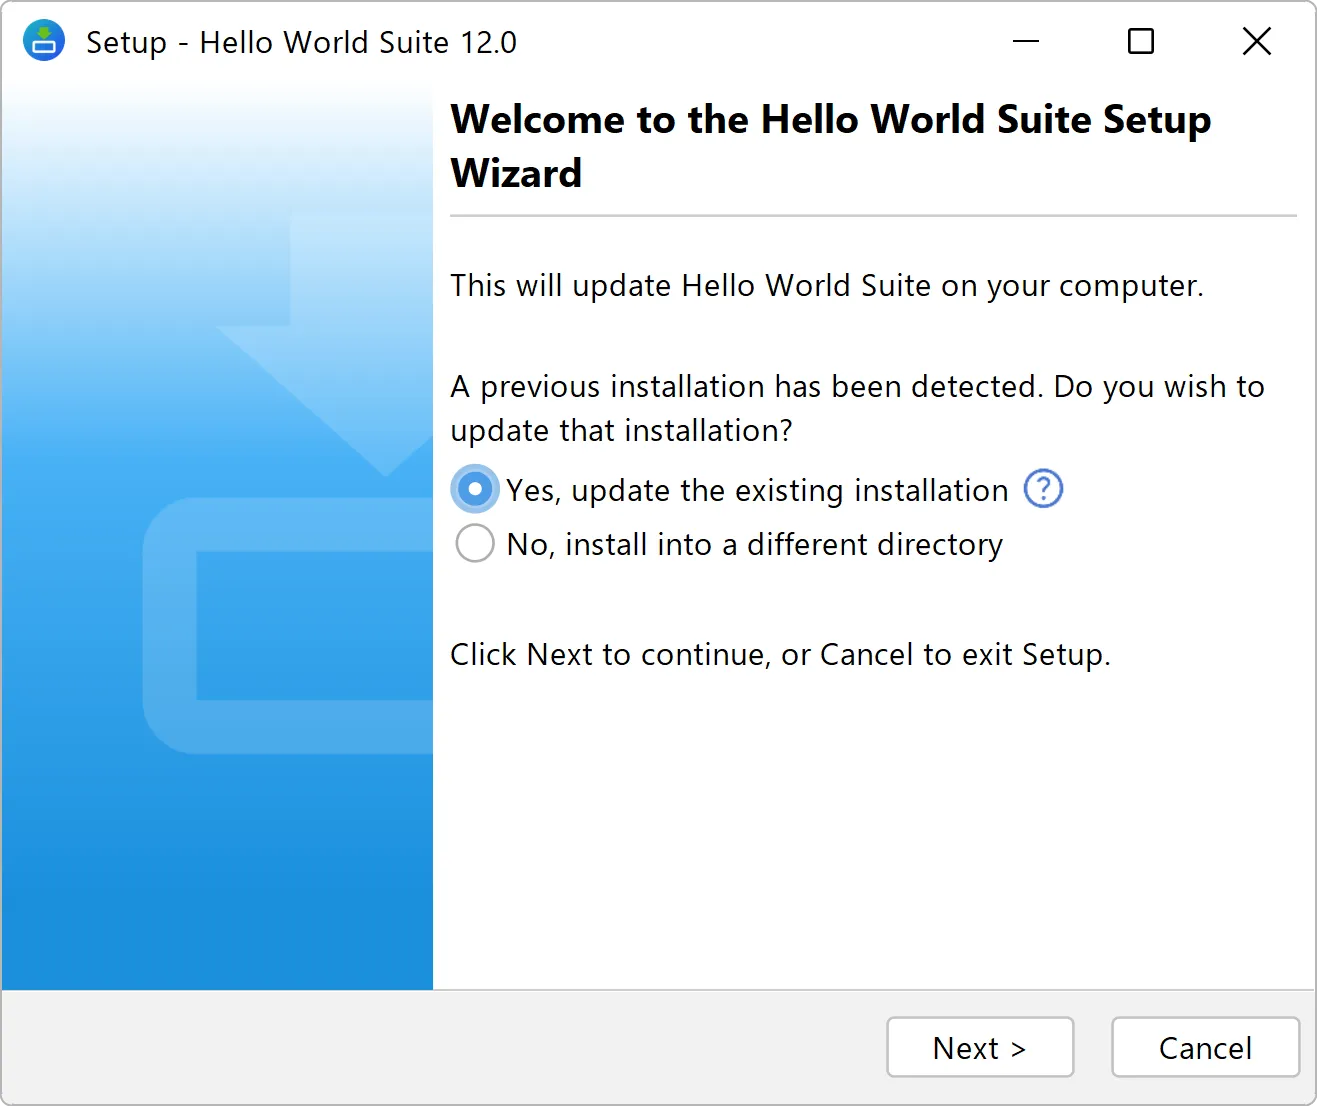
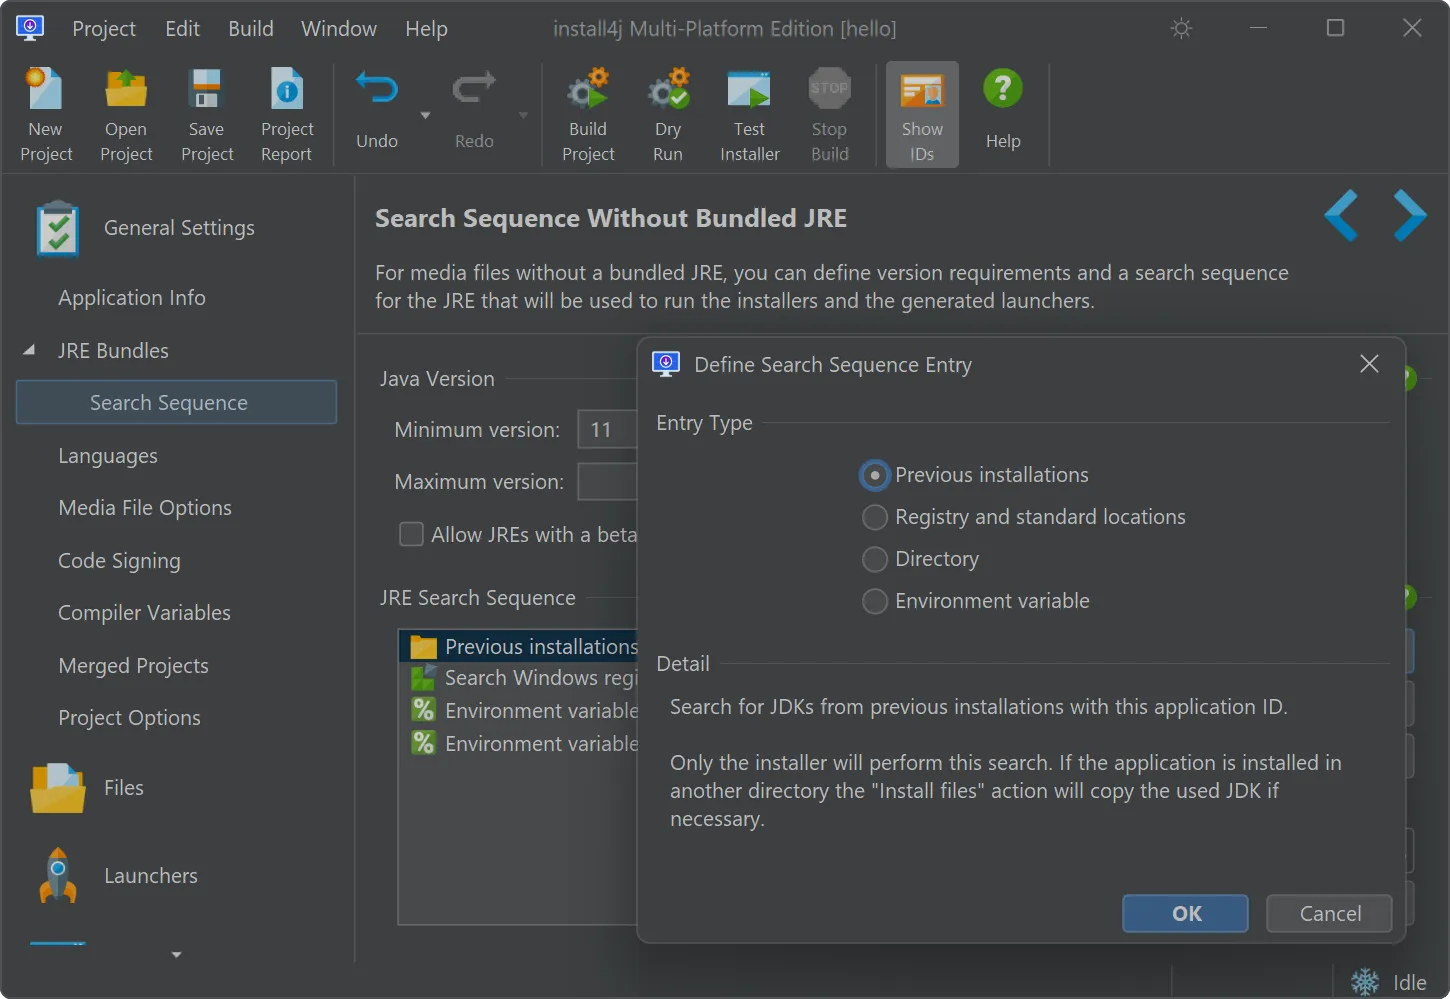
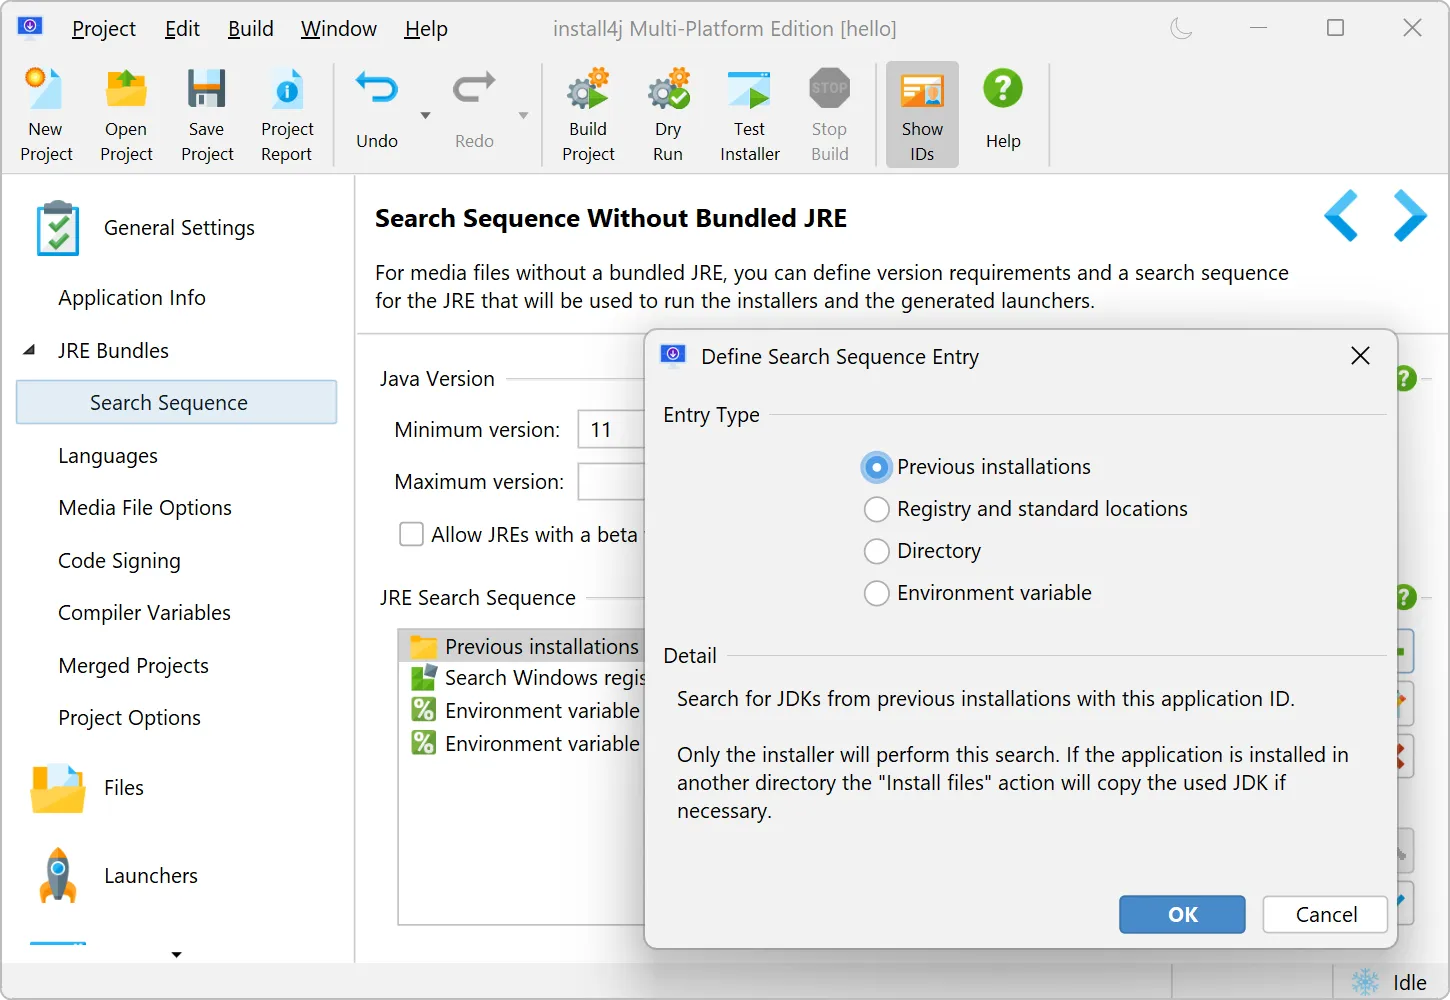
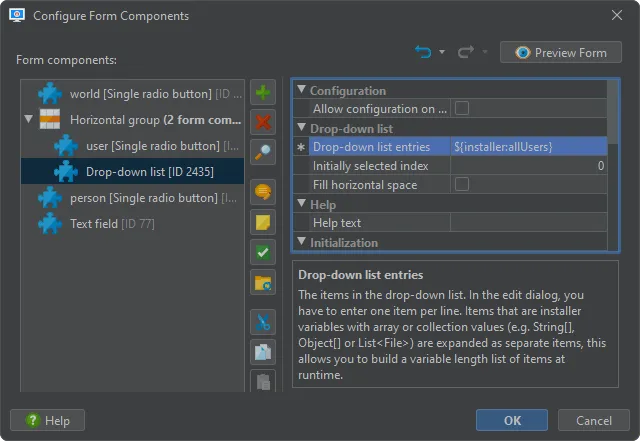
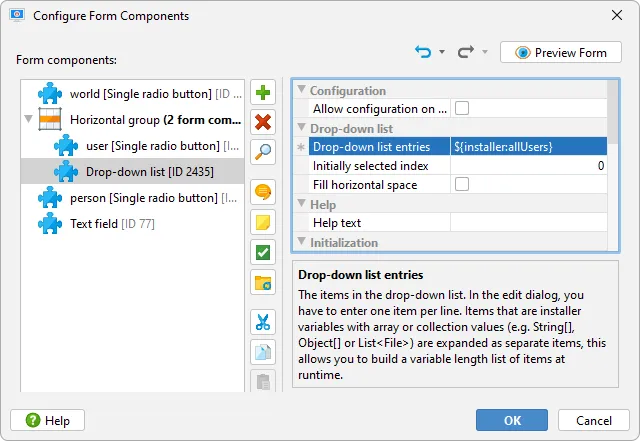
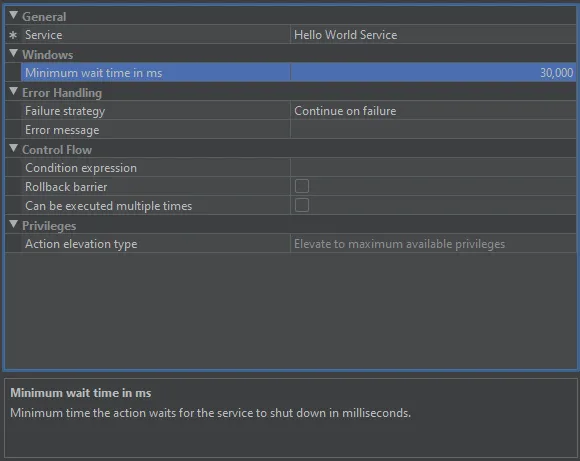
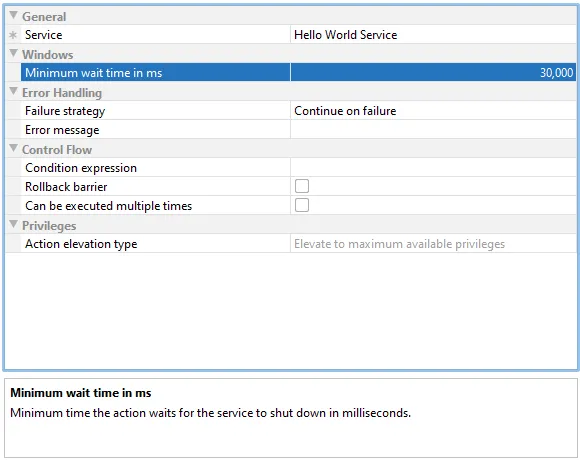
The IDE has a new UI with a refreshed visual appearance and new icons. We hope you like it! We have light and dark themes.
You can see screenshots of them by toggling the dark mode switch at the top of this page.
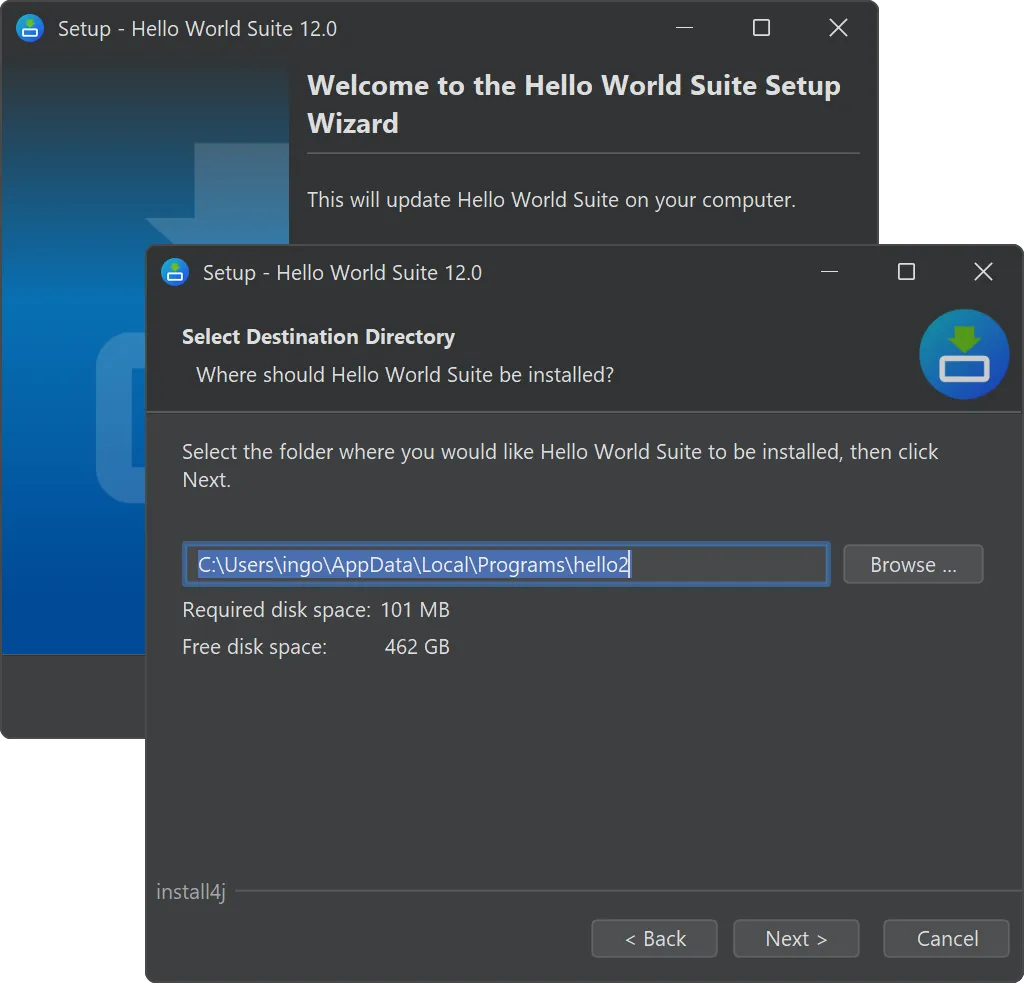
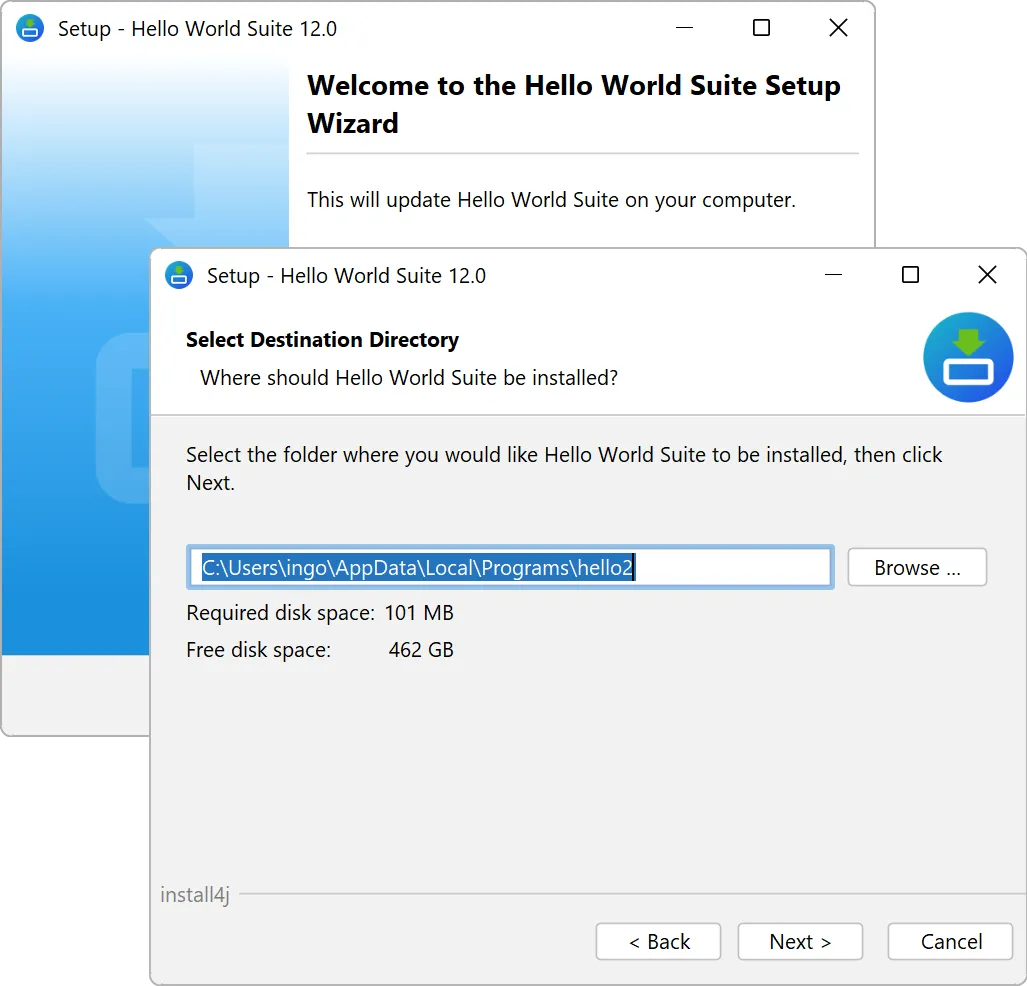
Also, artwork and icons in the generated installers have been updated to a more modern look.
All images and icons in the generated installers remain replaceable, but the default icons and images that are shown by the built-in
screen styles are updated automatically to the new style.
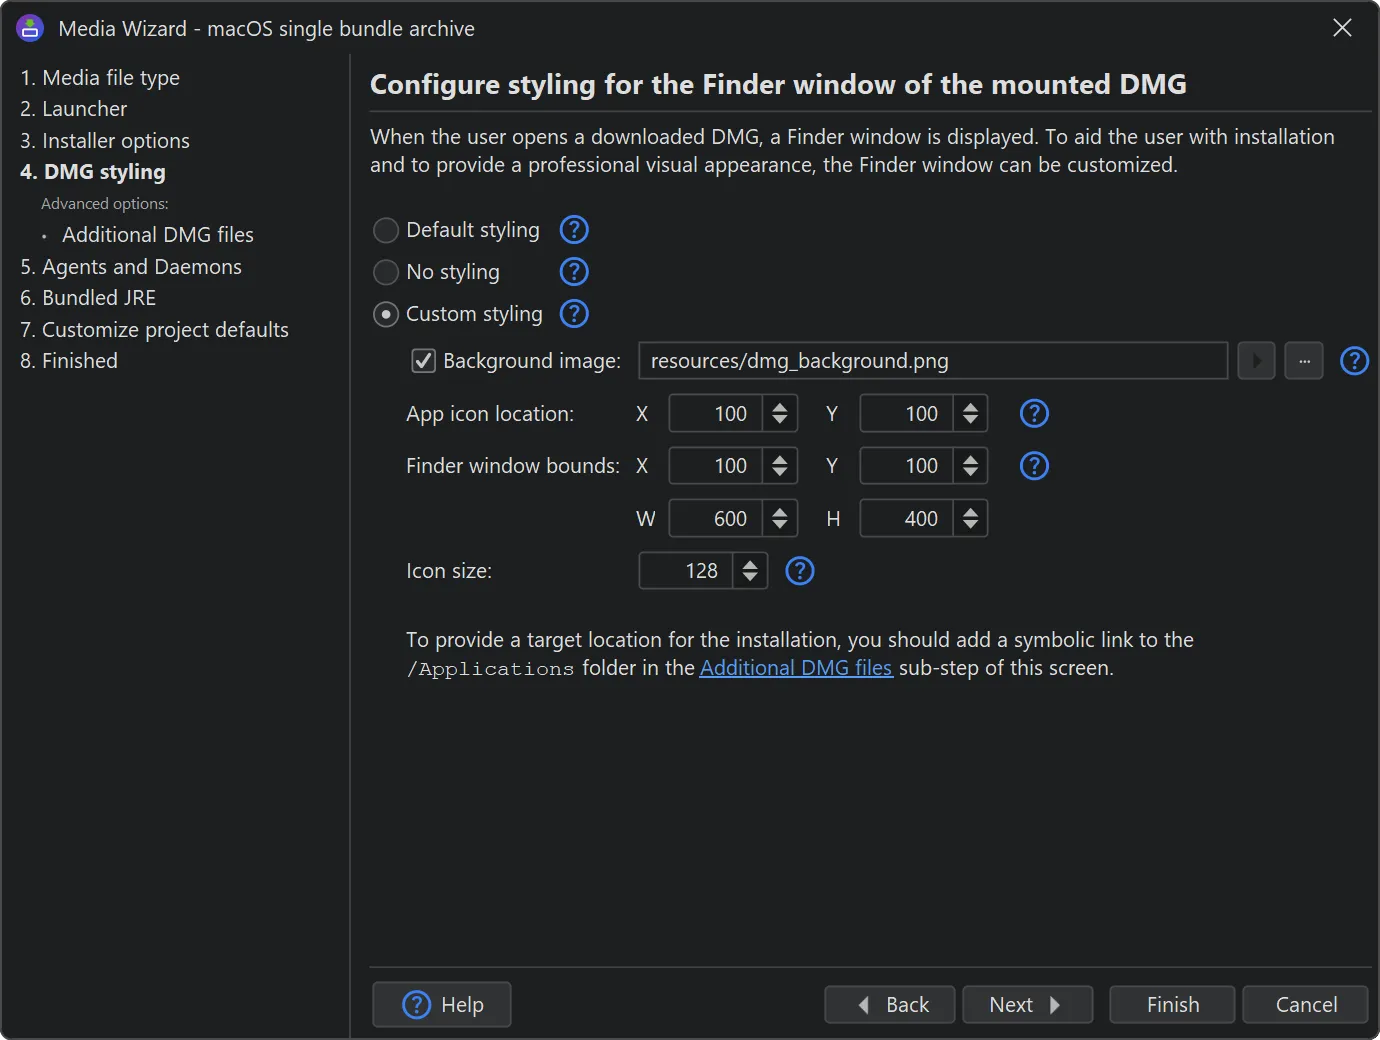
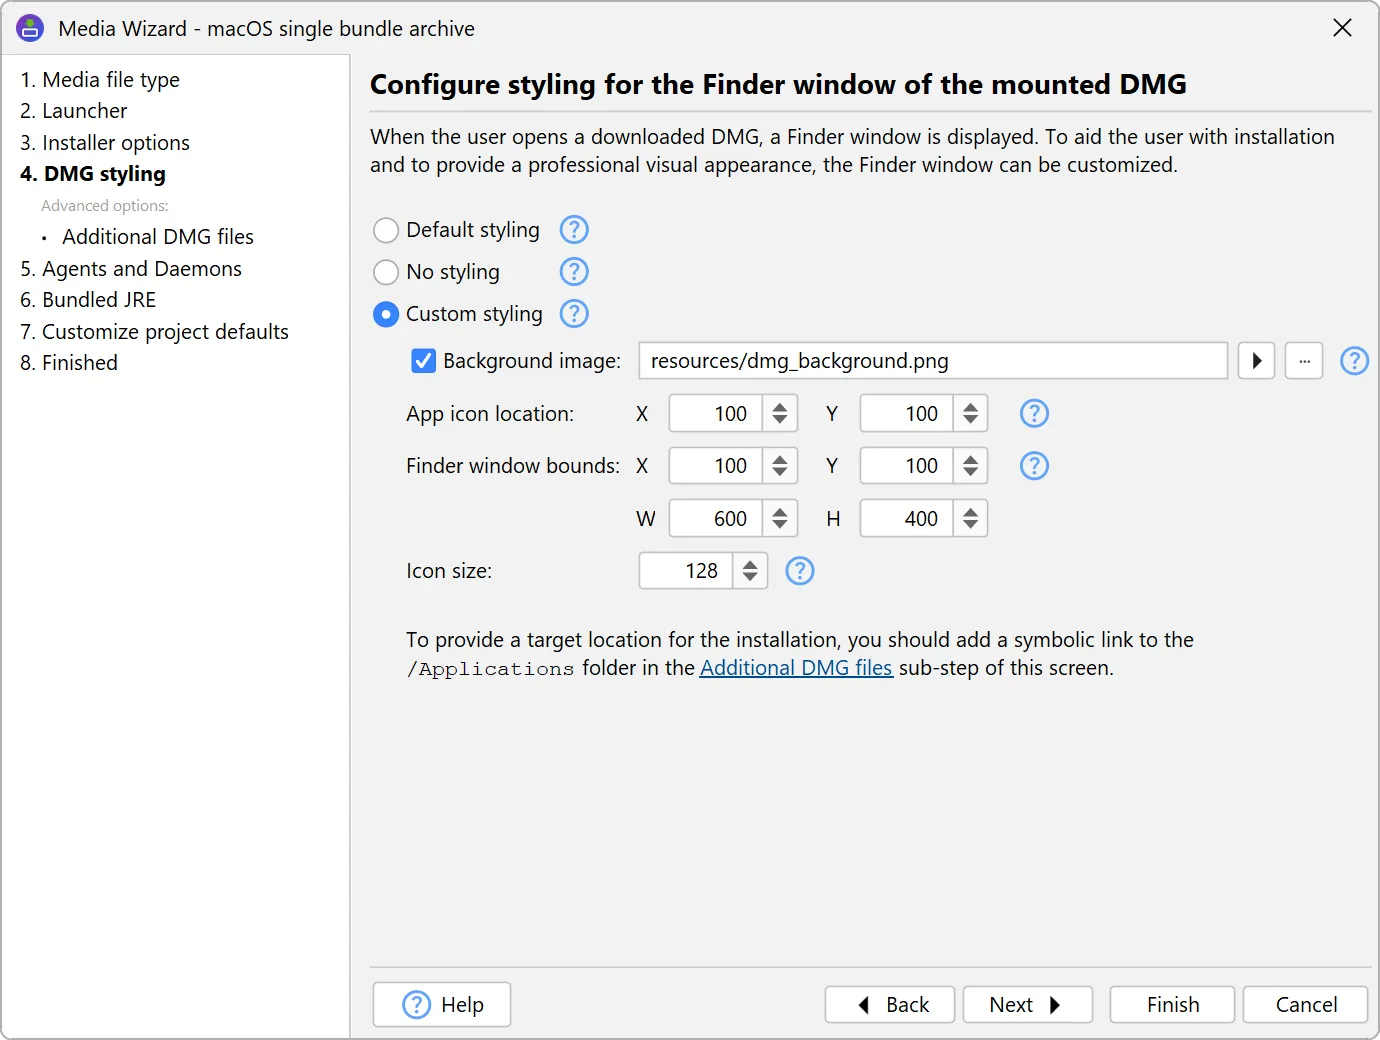
DMGs on macOS can now be styled right in the install4j IDE. You can apply backgrounds, position and size of the app icon manually
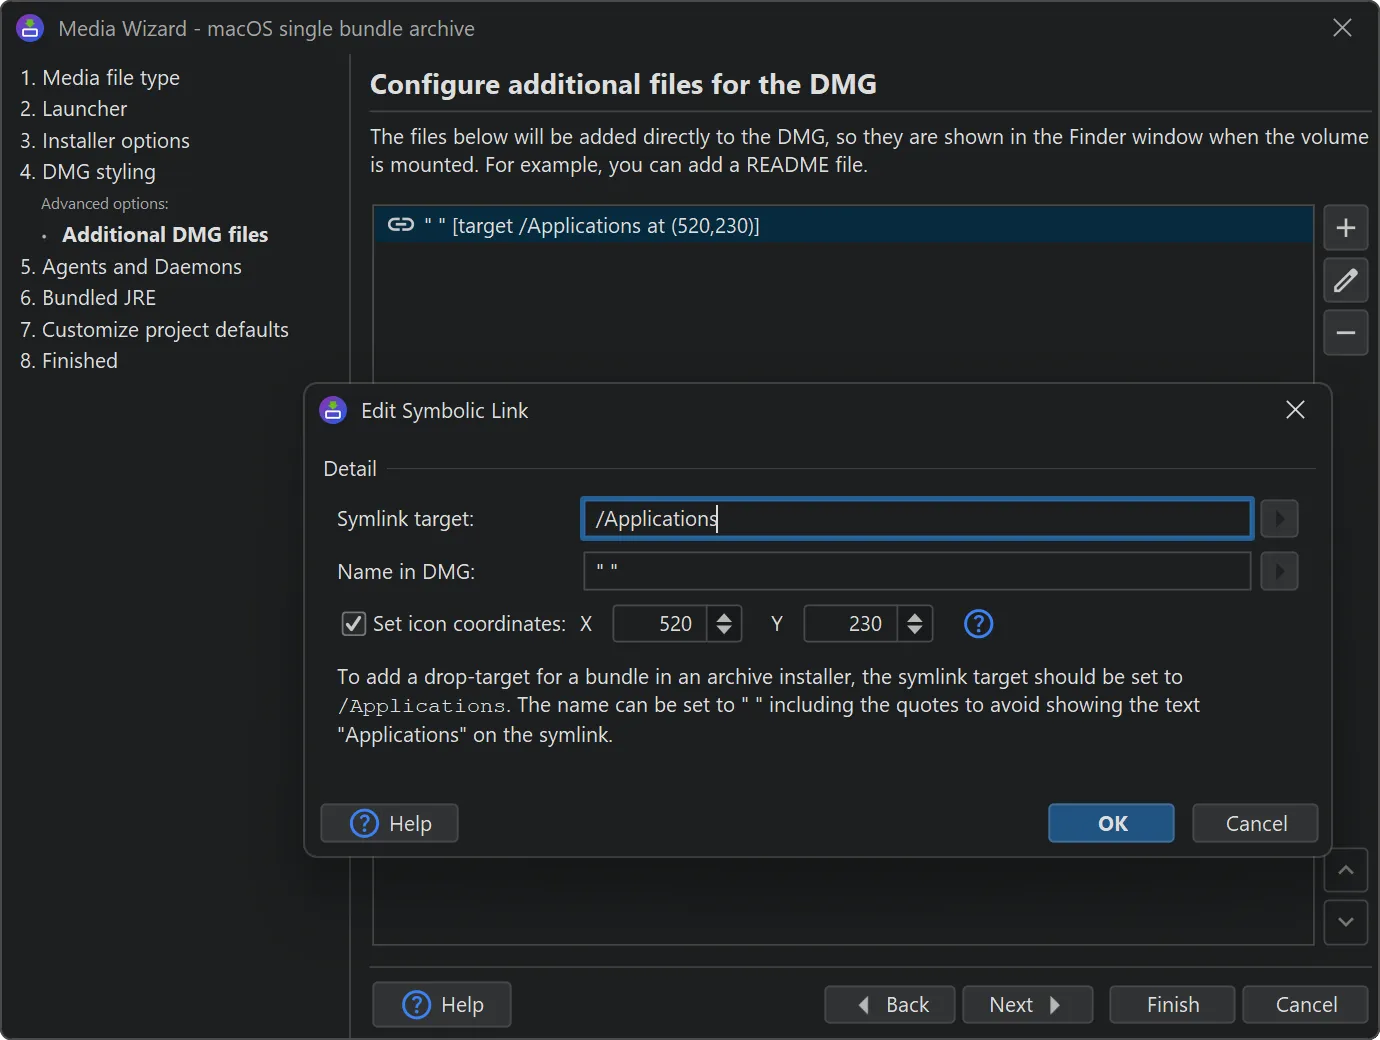
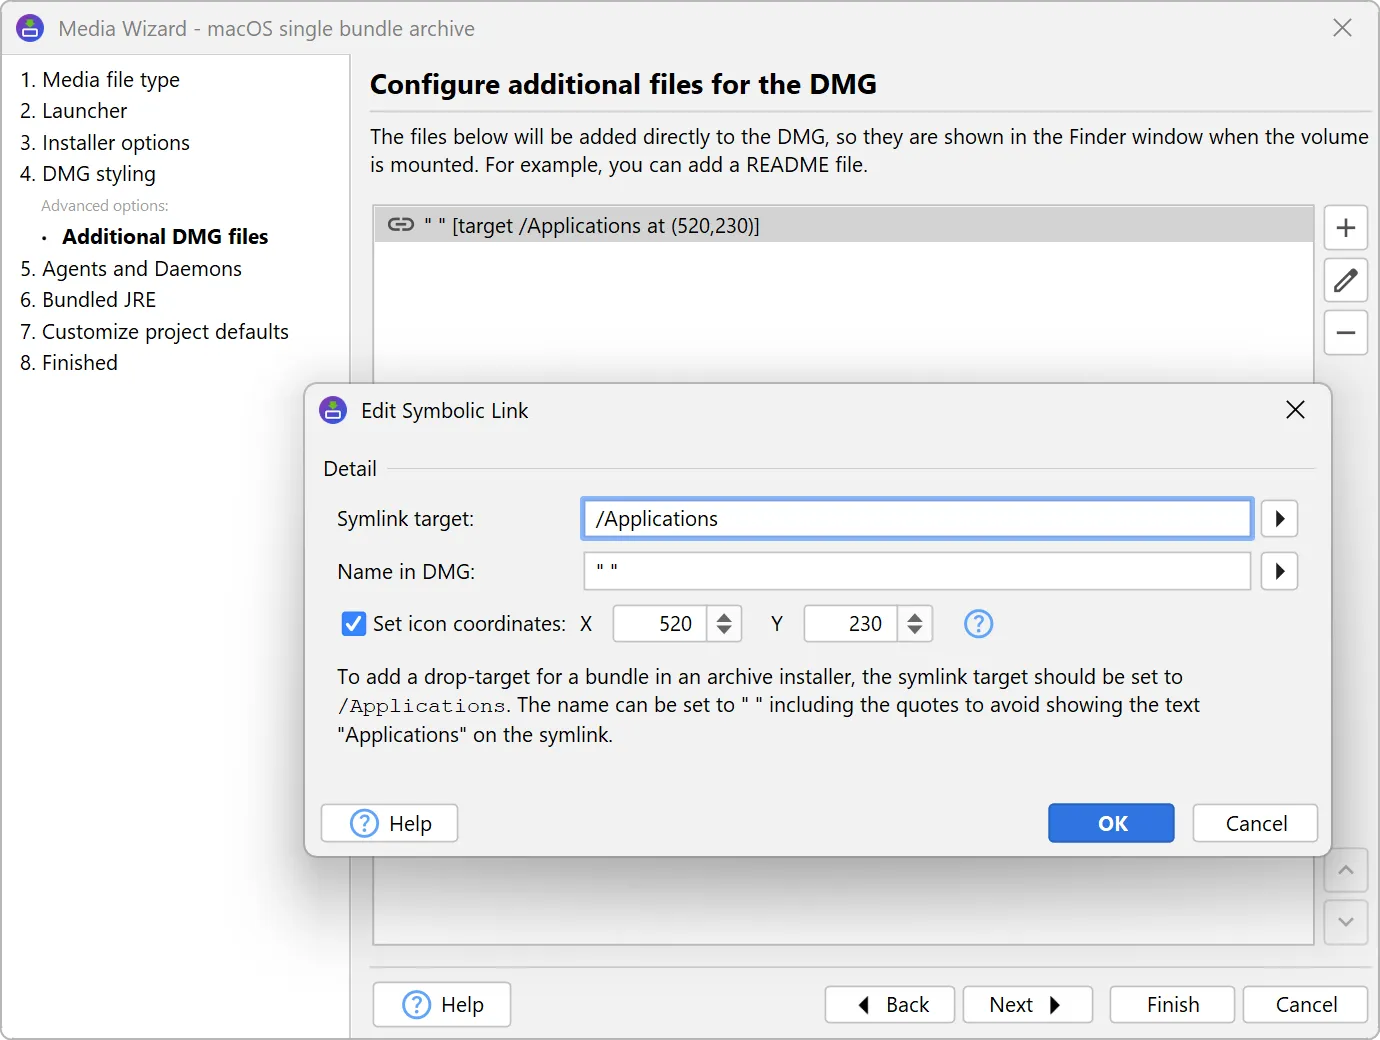
and add symbolic links like the /Applications directory at arbitrary positions. Also, the bounds of the Finder window can be set.
Previously, you would get plain Finder windows with just the app icon unless you followed a cumbersome procedure on macOS to produce
.DSStore files and add them as top-level files to the DMG. Because the file format has now been reverse-engineered, install4j can
generate these files in a cross-platform way.
A default styling is applied with a background image and a drop target for the /Applications directory in the case of single-bundle archives.
You can also choose not to apply any styling, which is the default when migrating install4j projects from previous versions.
Additional top-level files for the DMG can be specified in a sub-step. You can optionally set icon coordinates to arrange items on the
Finder window background.
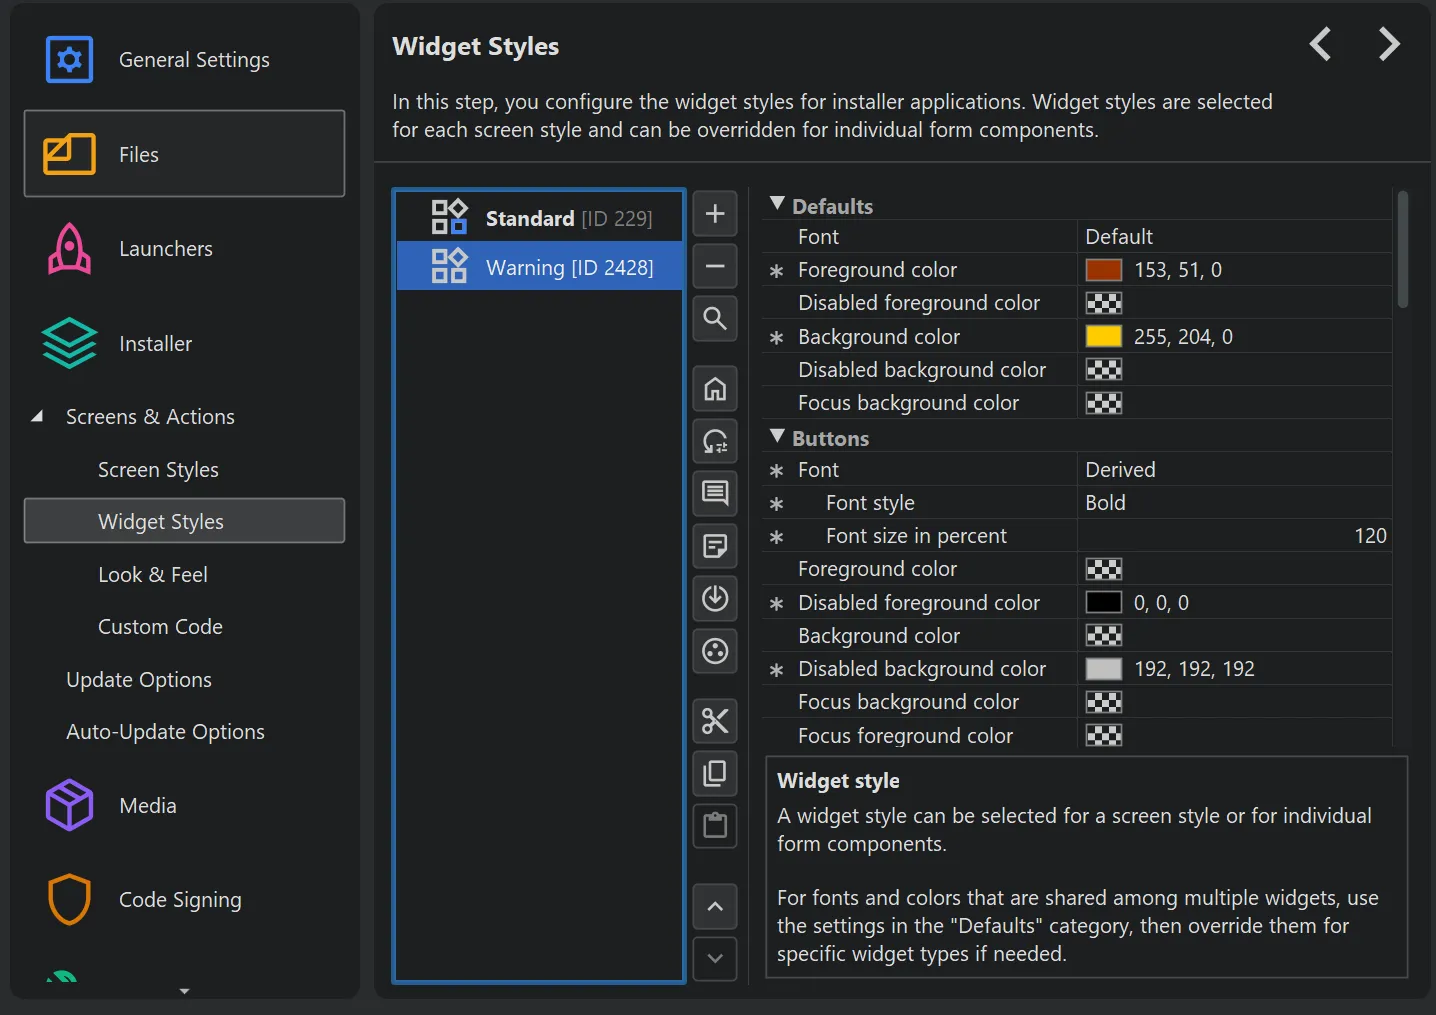
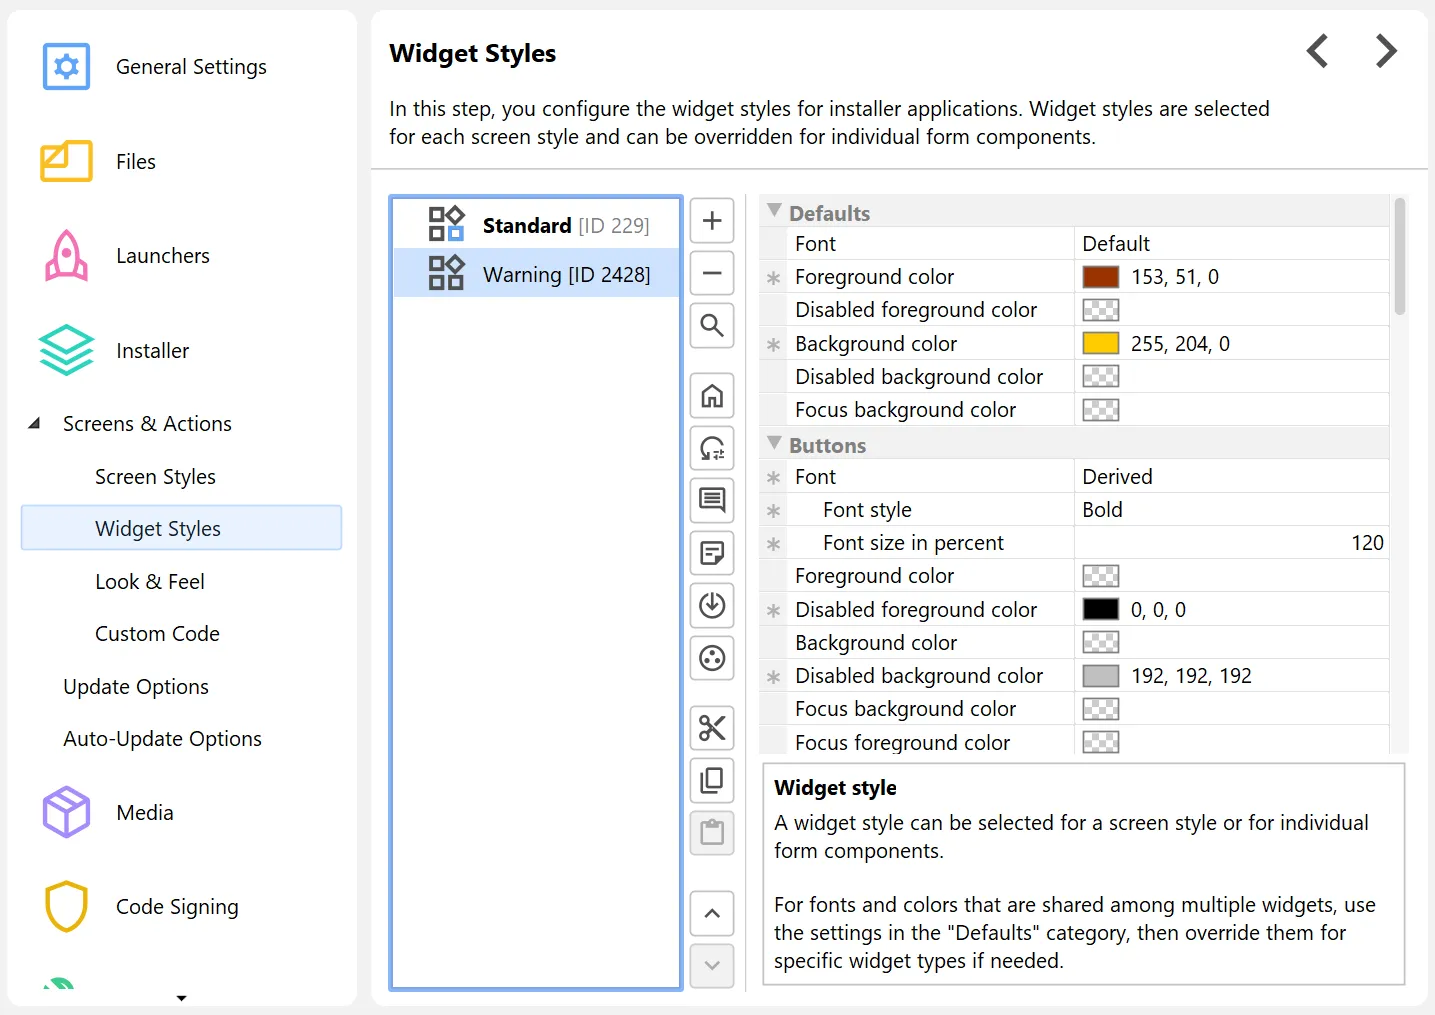
Widget styles have been added to change fonts, colors, and other aspects of all widgets that are shown in installer applications.
Widget styles are defined on the "Installer->Screens & Actions->Widget Styles" step. You can add multiple widget styles for each project. Each widget style
has default colors and font settings that can be overridden for specific widget types.
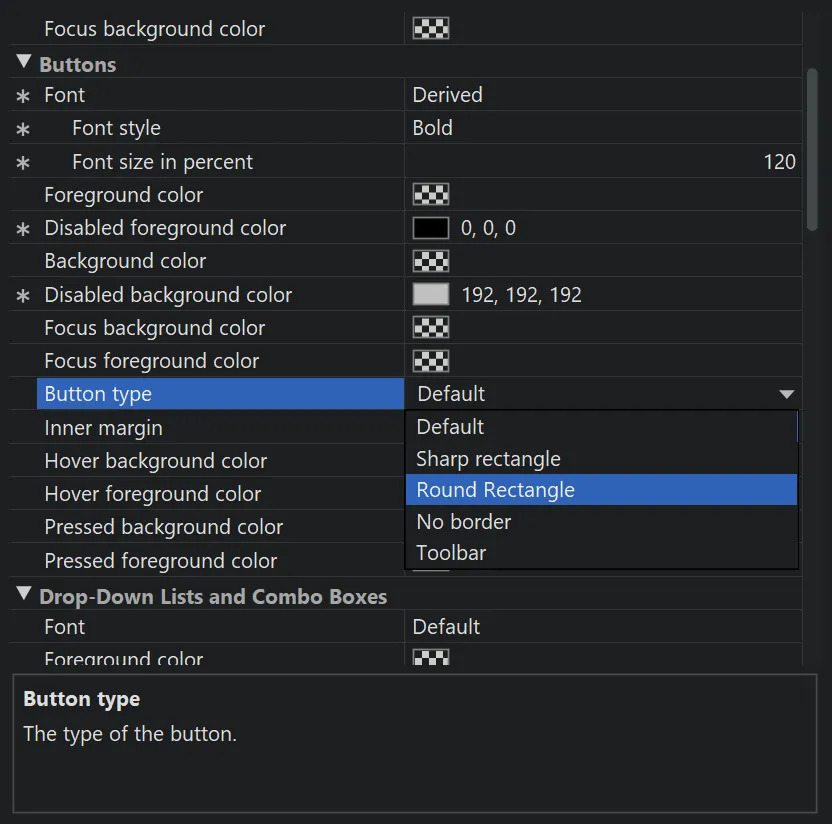
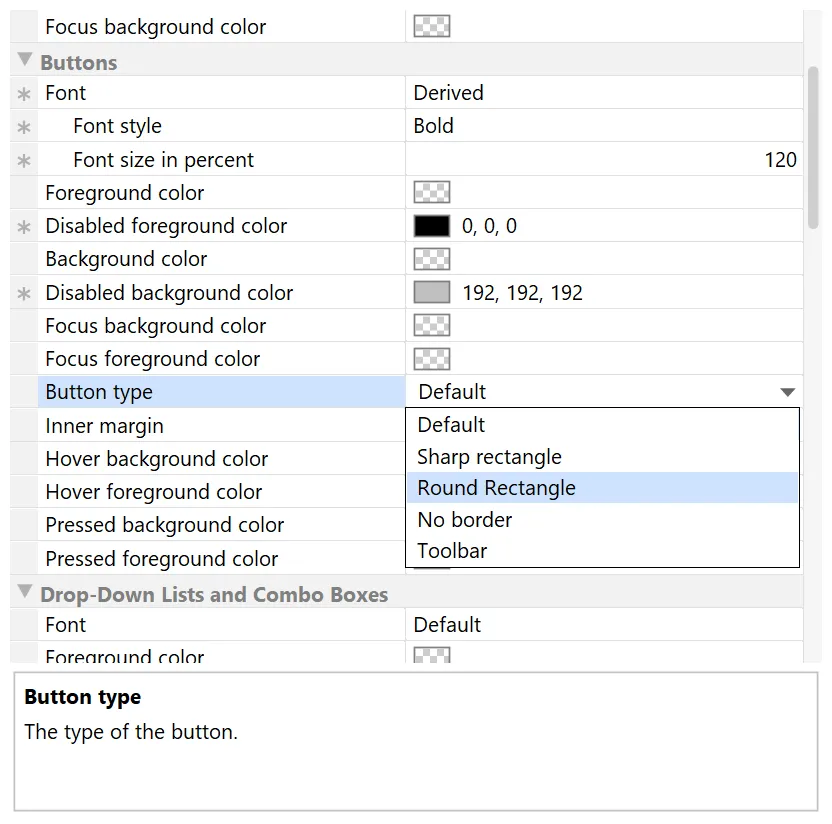
The widgets that are most frequently styled in different ways are buttons. Beyond custom font and custom background and foreground colors,
install4j offers different types of buttons, such as borderless buttons, buttons with rounded rectangle borders, or toolbar-style buttons. Colors
when hovering over or pressing a button and the colors for the focused state can be configured separately if required.
Besides buttons, the list of stylable widget types includes
- Drop-down lists and combo boxes
- Hyperlinks
- Labels
- Lists and trees
- Progress bars
- Sliders
- Text components
- Toggle buttons
Also, the background color for frames and dialogs can be set in the widget style.
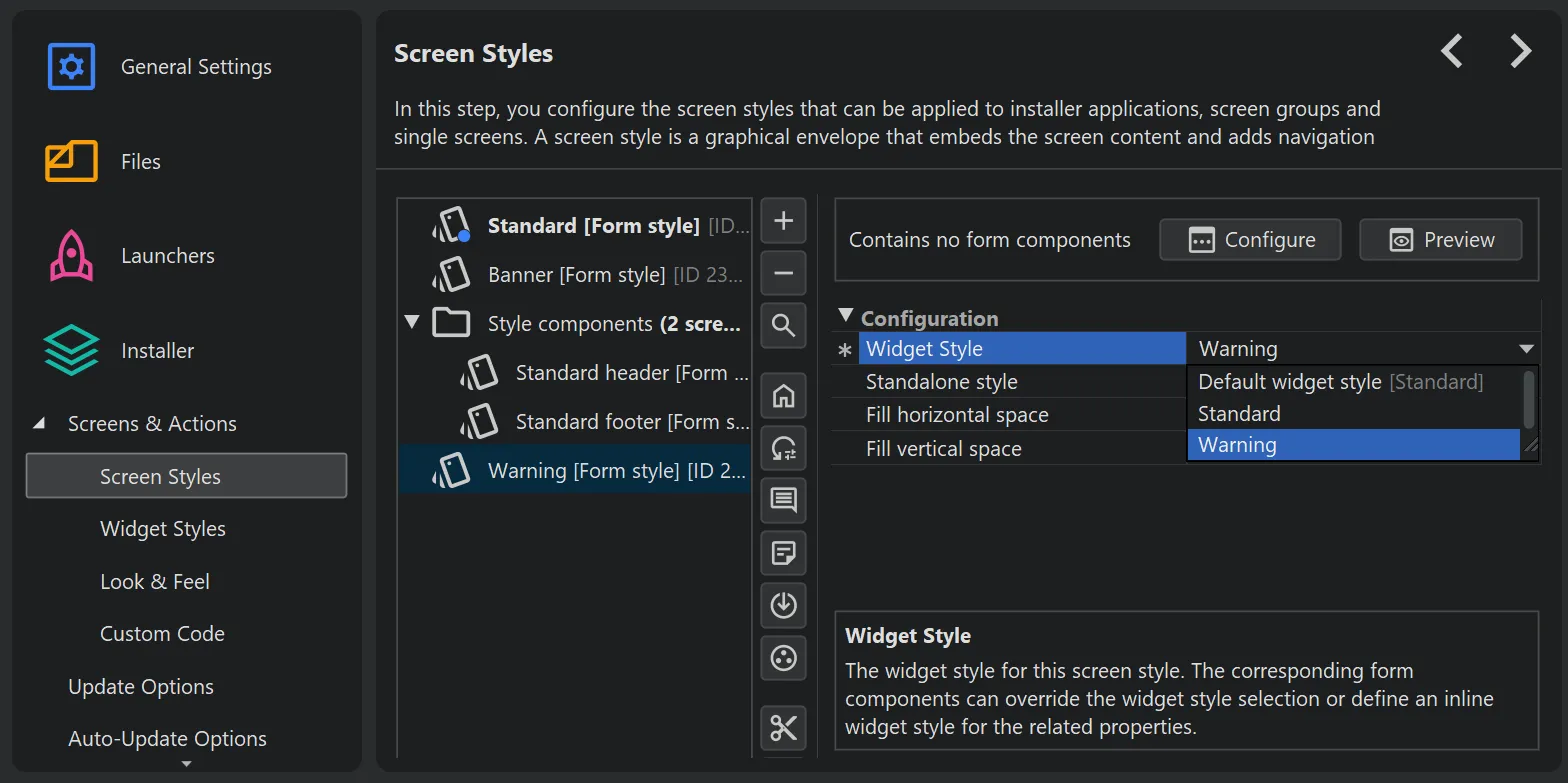
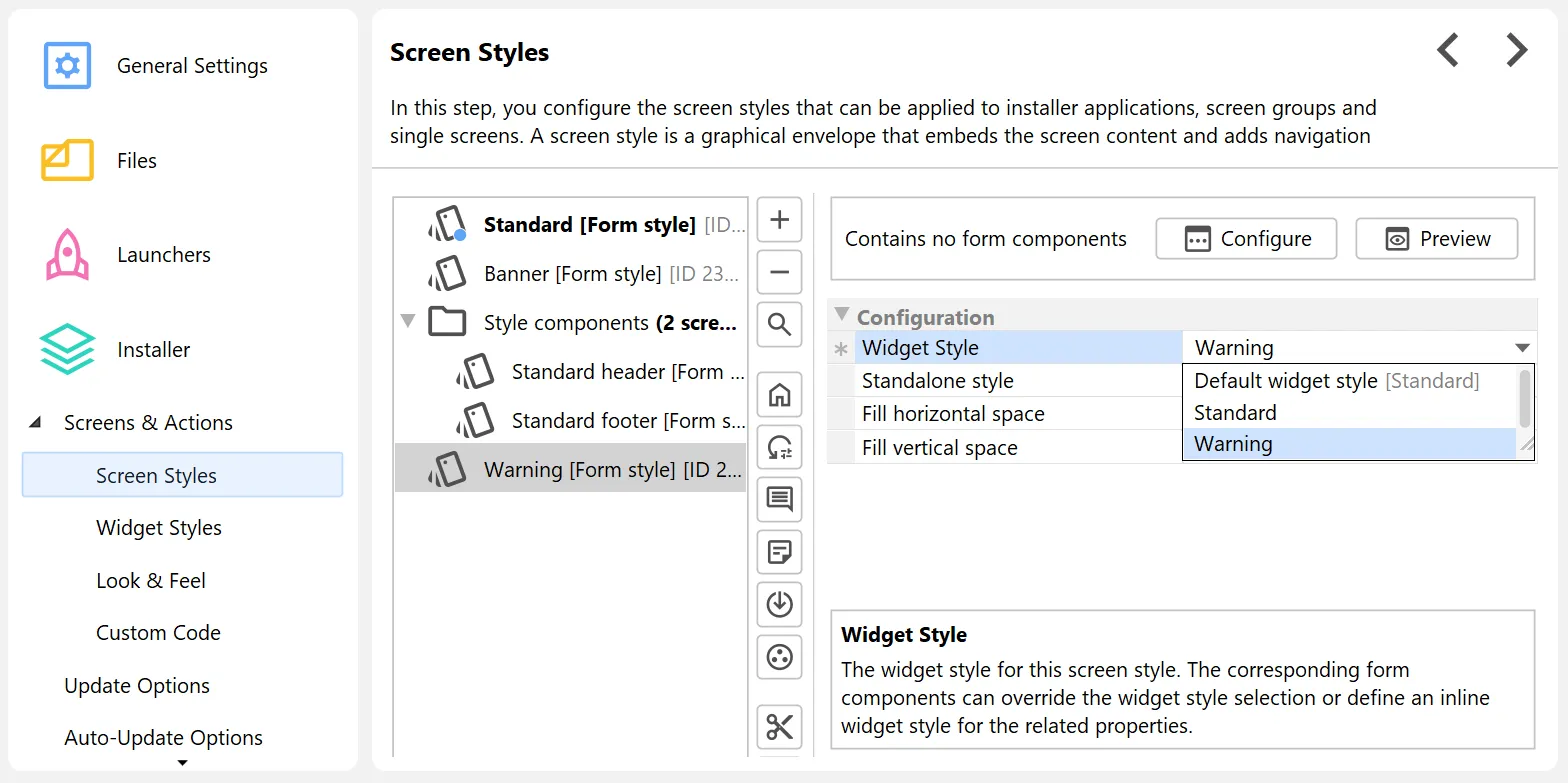
To apply a widget style other than the default style, you can assign it to a screen style.
Screen styles in turn are applied to installer applications, screen groups, and single screens, and
widget styles are cascaded along with them.
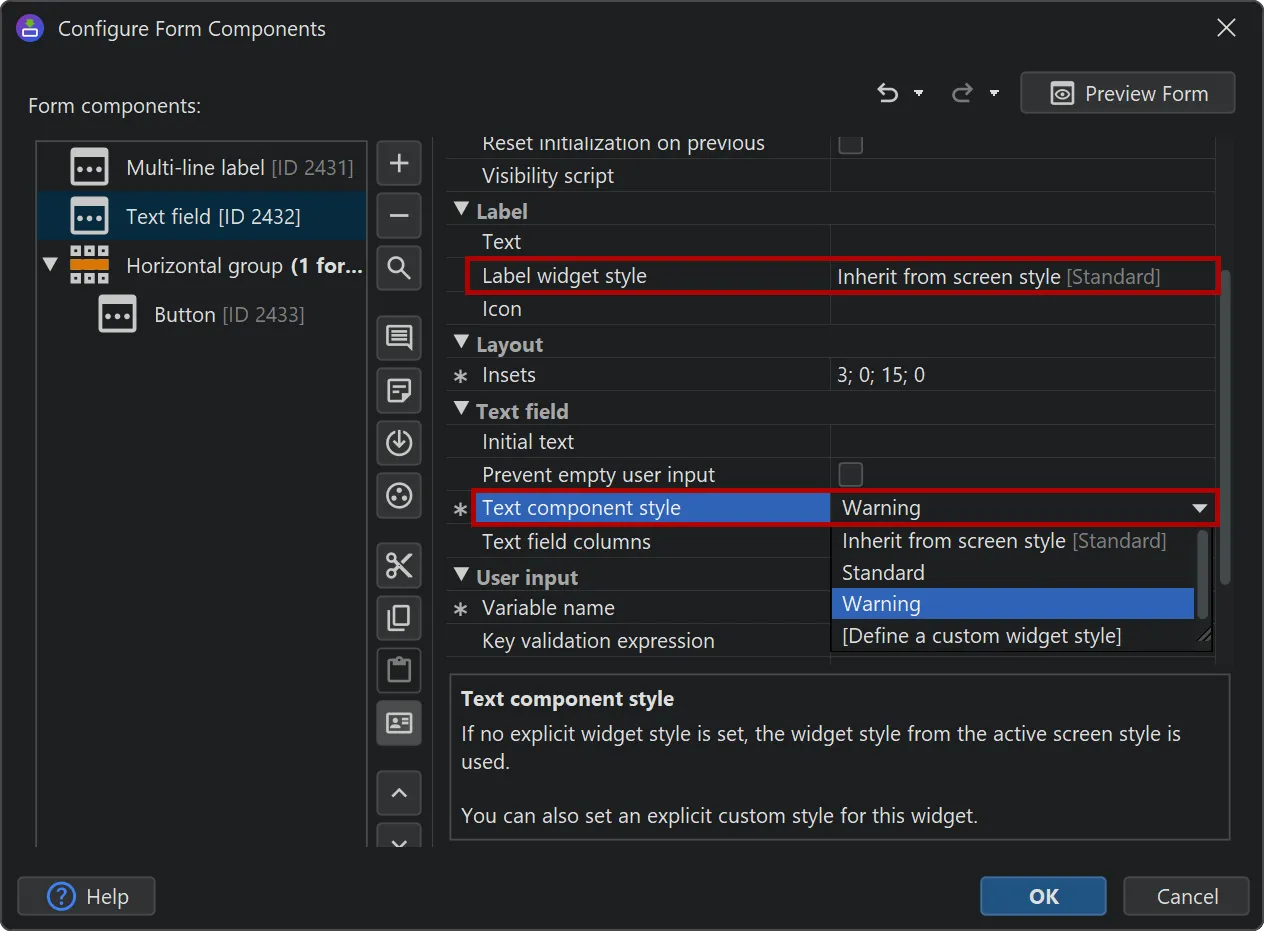
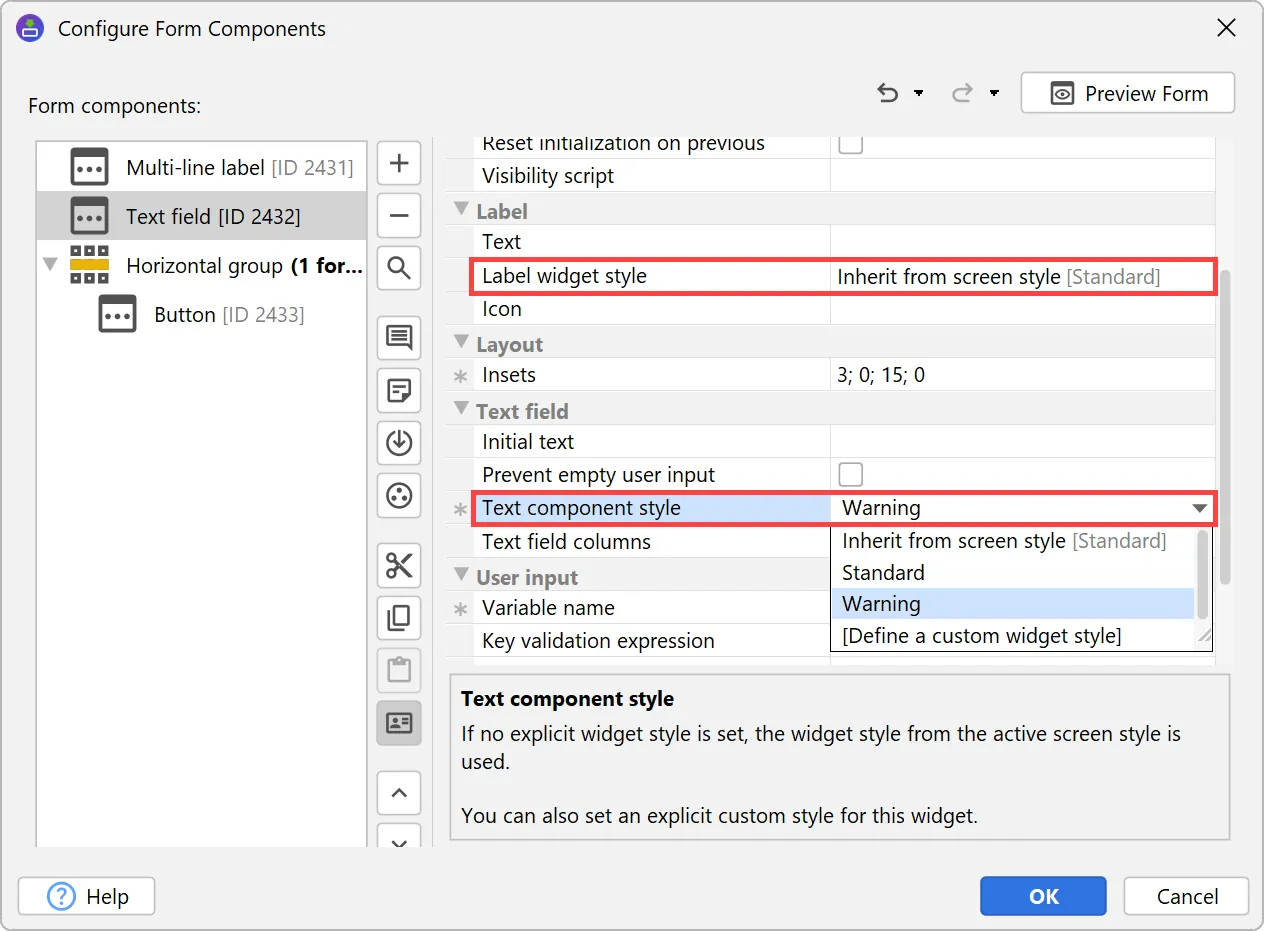
Alternatively, widget styles can be applied on the form component level. Form components can have multiple widget styles for their
contained widgets. For example, most form components have an optional leading label that has a separate widget style property.
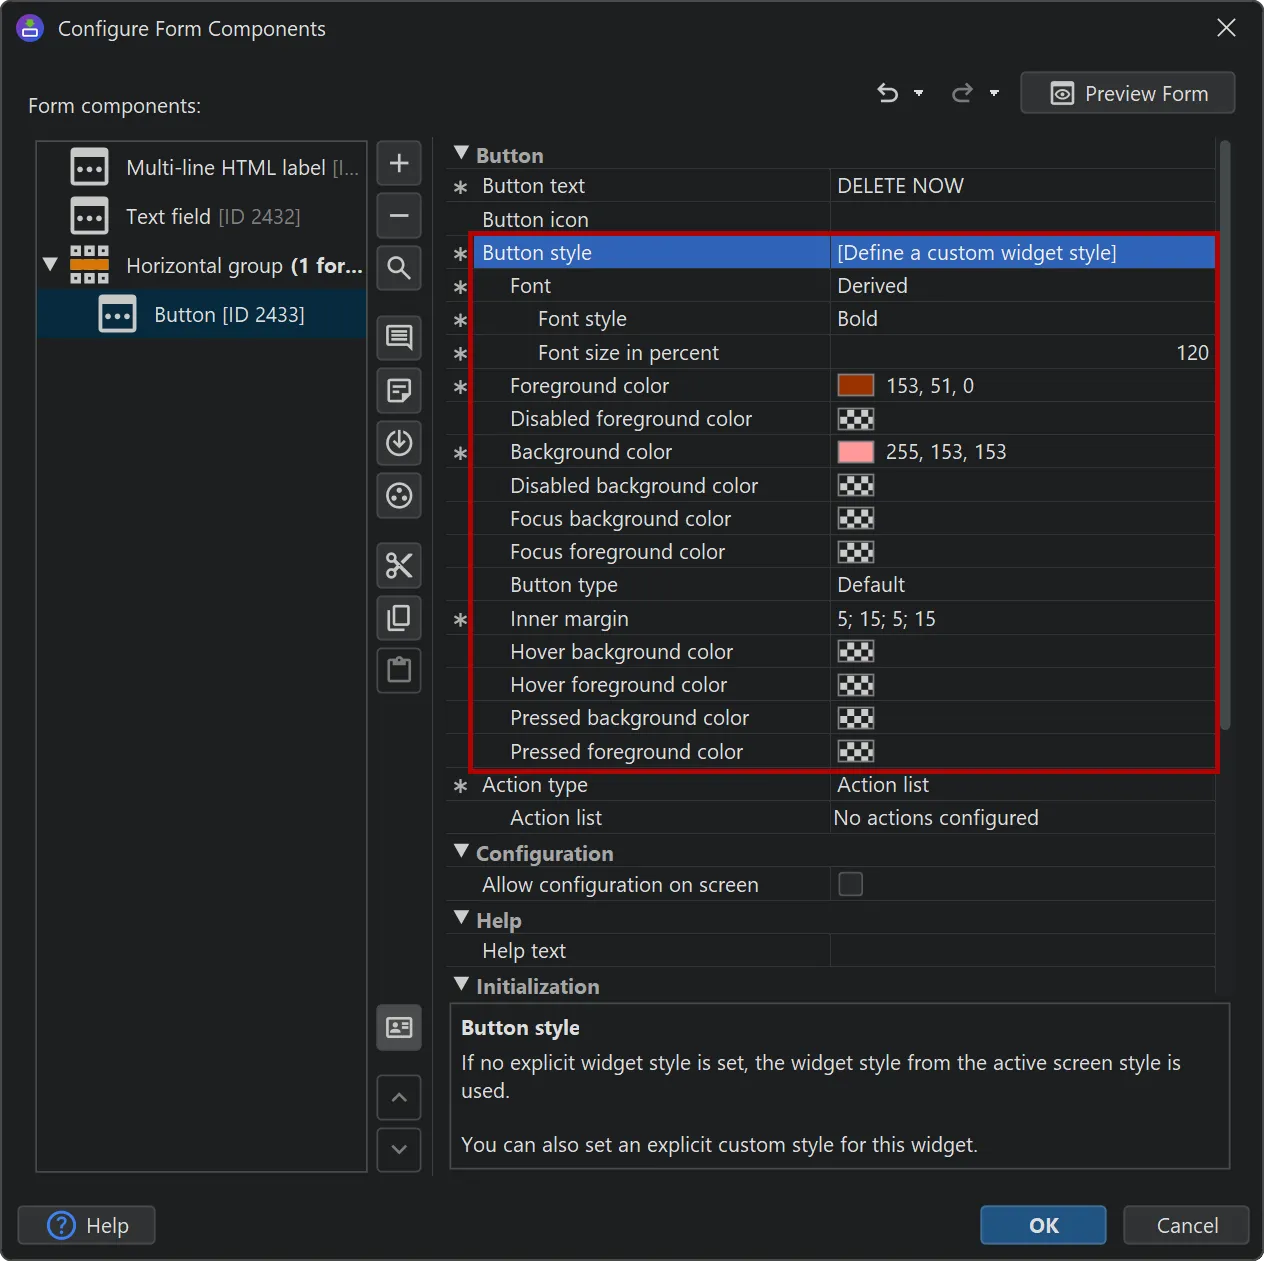
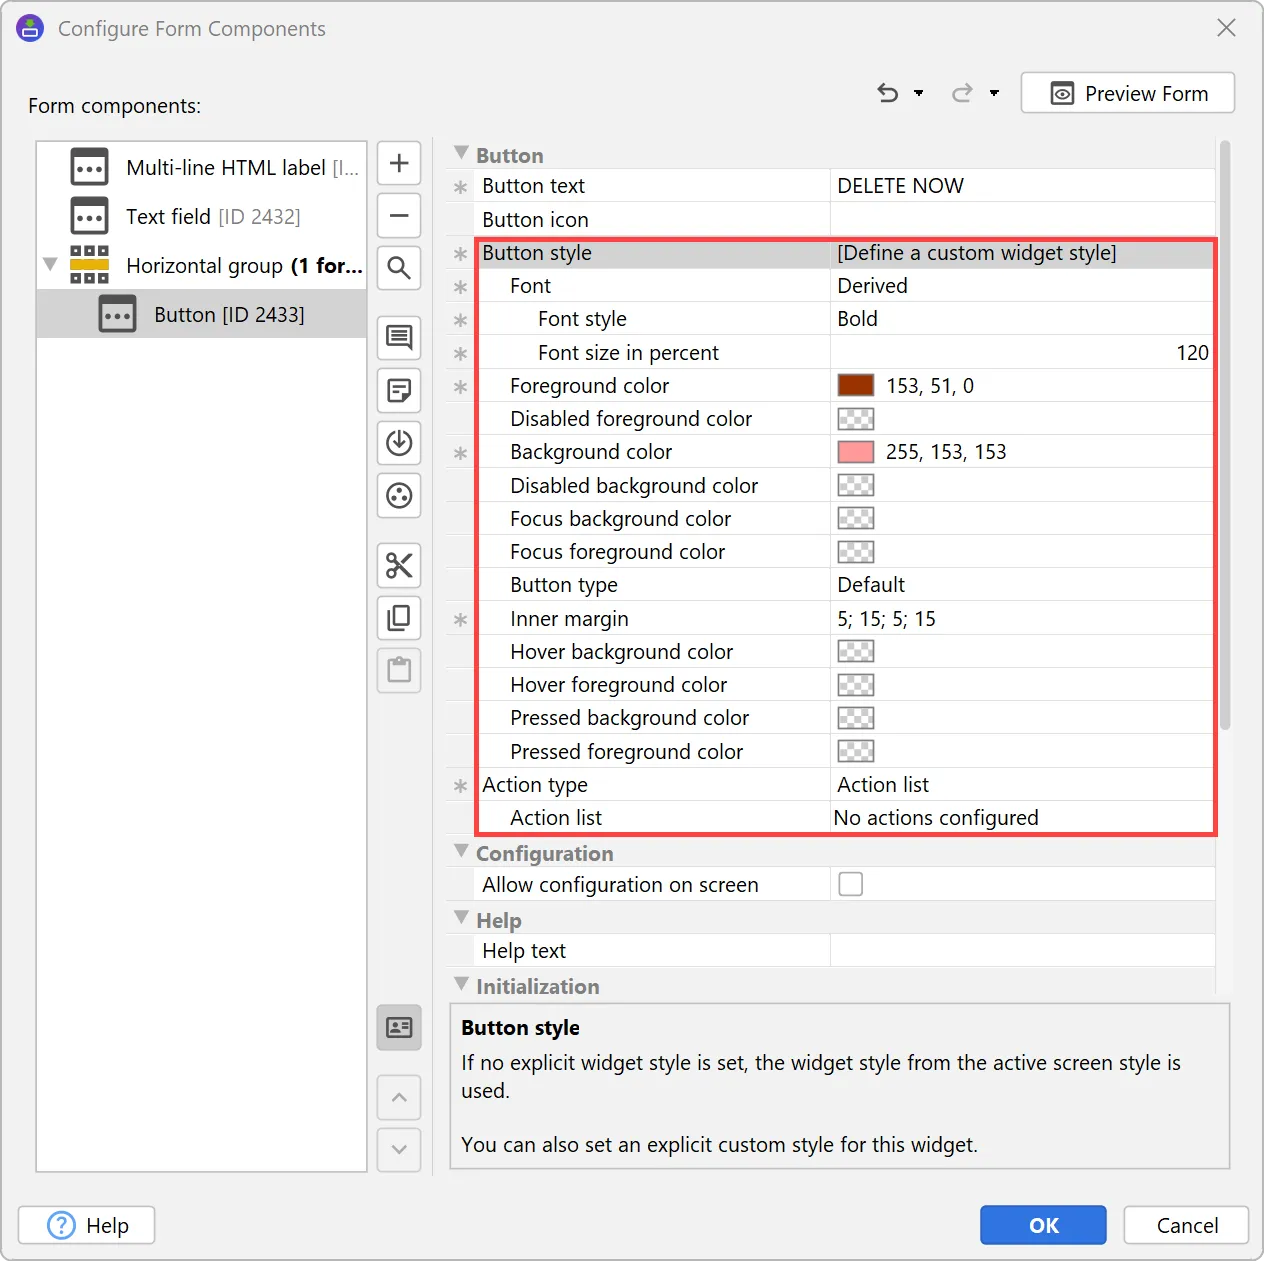
For one-off style changes, a custom inline style can be configured directly in the form component. To do that, choose the
"Define a custom widget style" option and all the relevant style properties will appear as child properties.
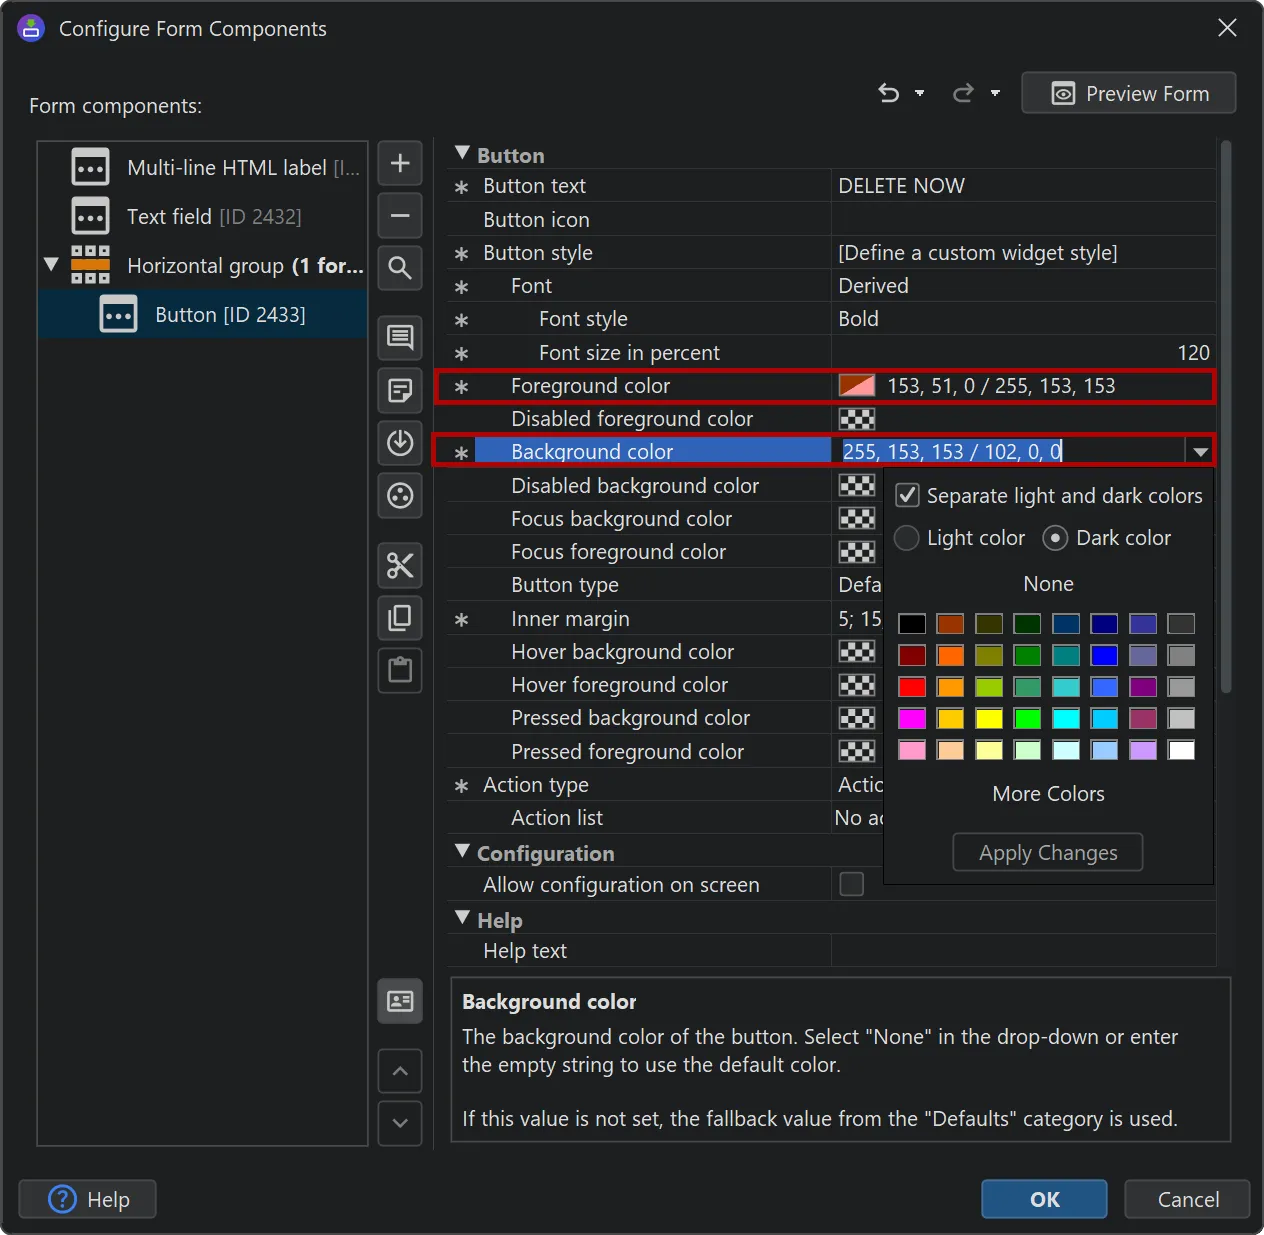
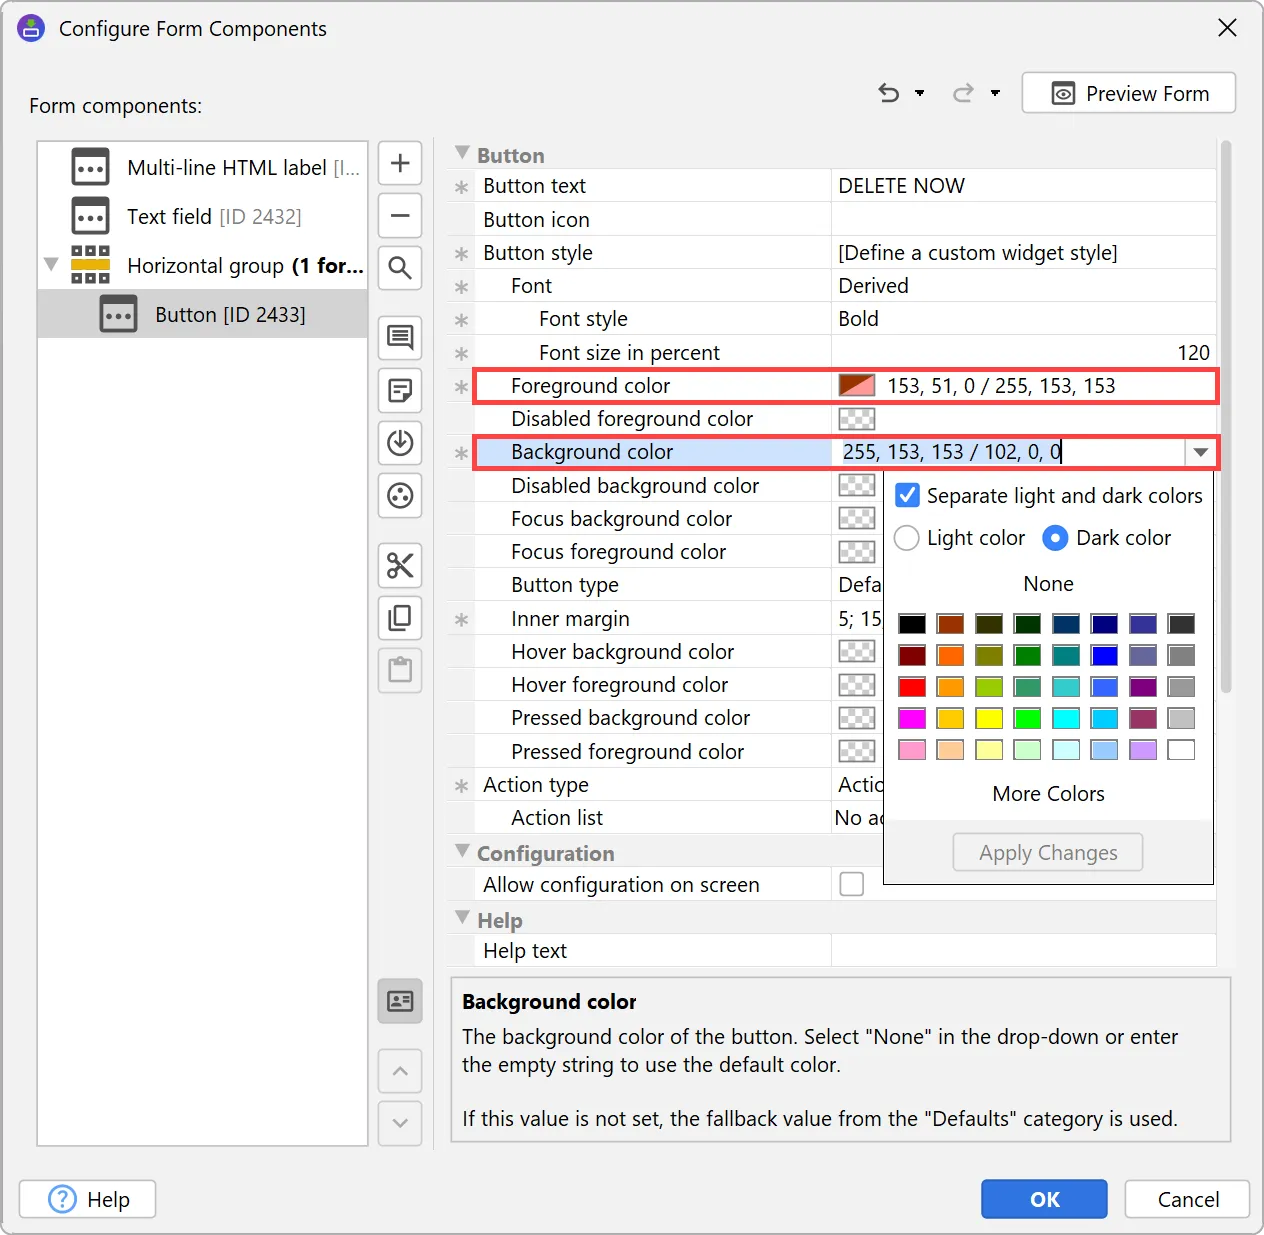
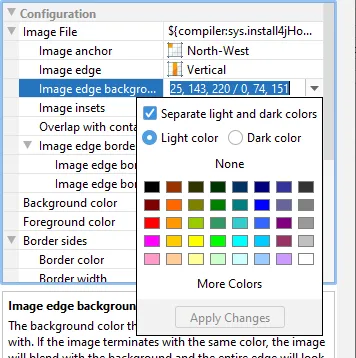
To support different colors in light mode and dark mode, all color properties support a notation with separate colors for both modes.
The property popup also allows you to configure both colors.
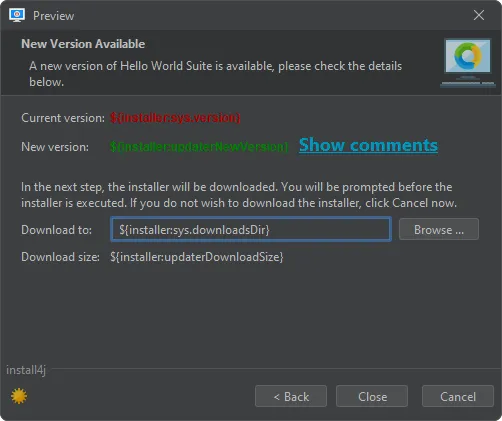
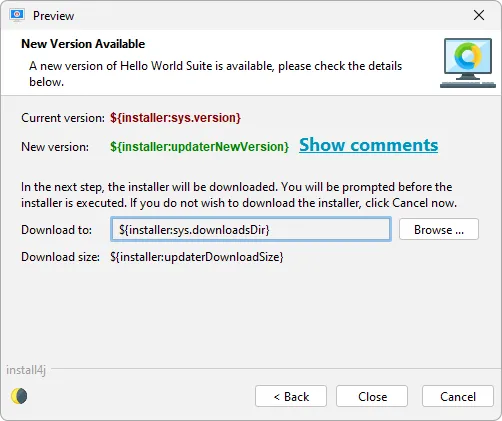
You can preview widget styles directly in the install4j IDE. The preview window also takes screen styles into account.
The binary architecture on macOS has been reworked. Previous versions of install4j used shell scripts for daemons and launchers
and executed the JVM as a separate process for installer applications. Now, all launchers are binary launchers that start the JVM in-process.
This has the following benefits:
-
Command line launchers and services now support entitlements, and do not start a separate "java" process anymore.
-
For macOS installer applications, the JVM is now started in-process, fixing problems with incorrect titles and icons in the Dock.
-
For single-bundle archive media files on macOS, all launchers are now nested as separate application bundles in the main
application bundle. While they are not directly visible to the user, you can now start them as regular applications, for example with
/bin/open /path/to/YourApp.app.
-
For single-bundle archive media files on macOS, out-of-process installer applications are now nested application bundles
and properly show in the Dock. Previously, update downloaders would add invalid entries to the "Recent apps" in the Dock that just
showed a Java executable.
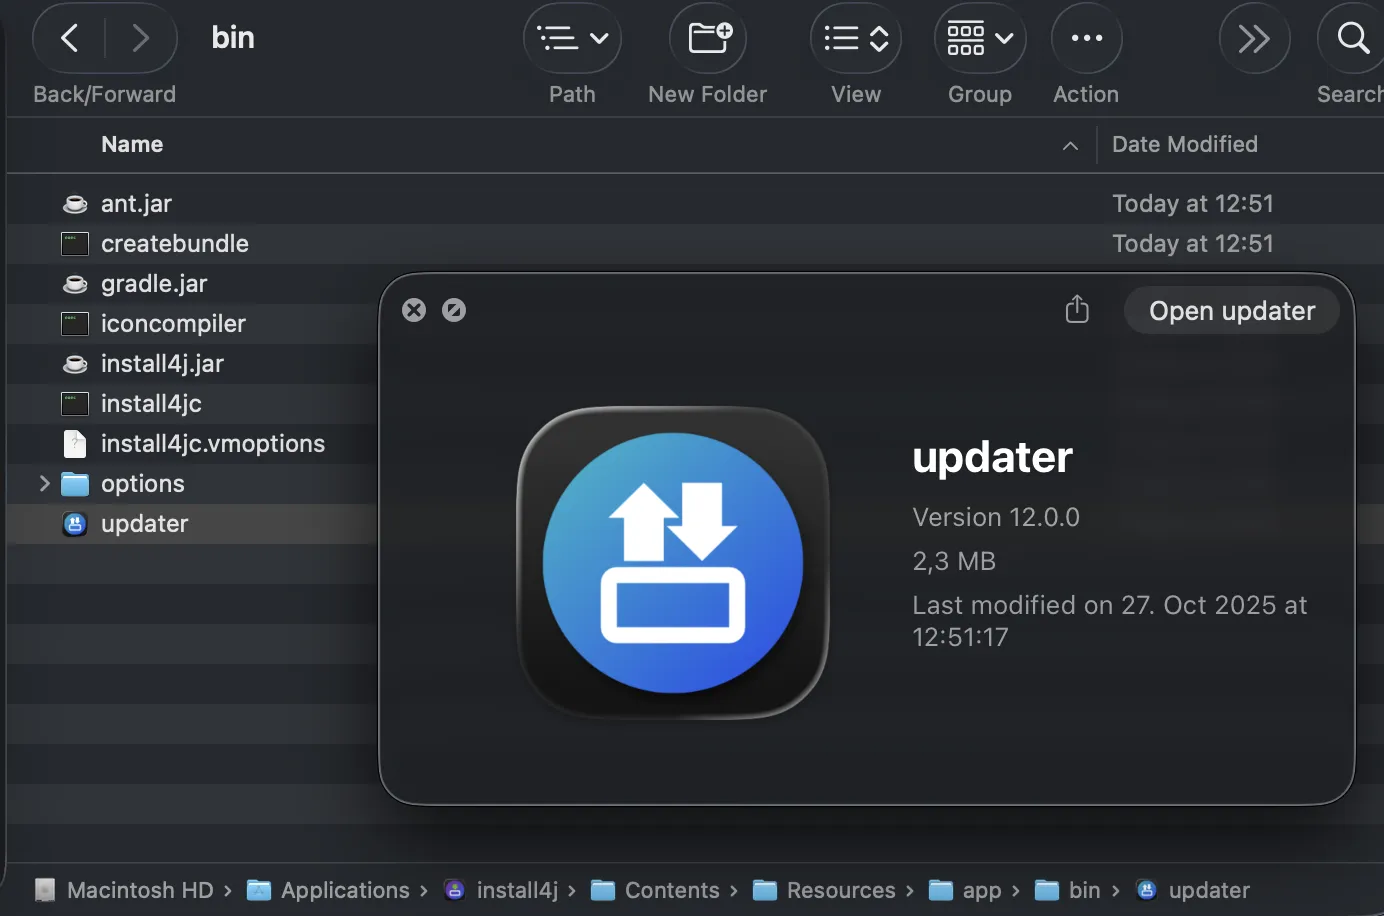
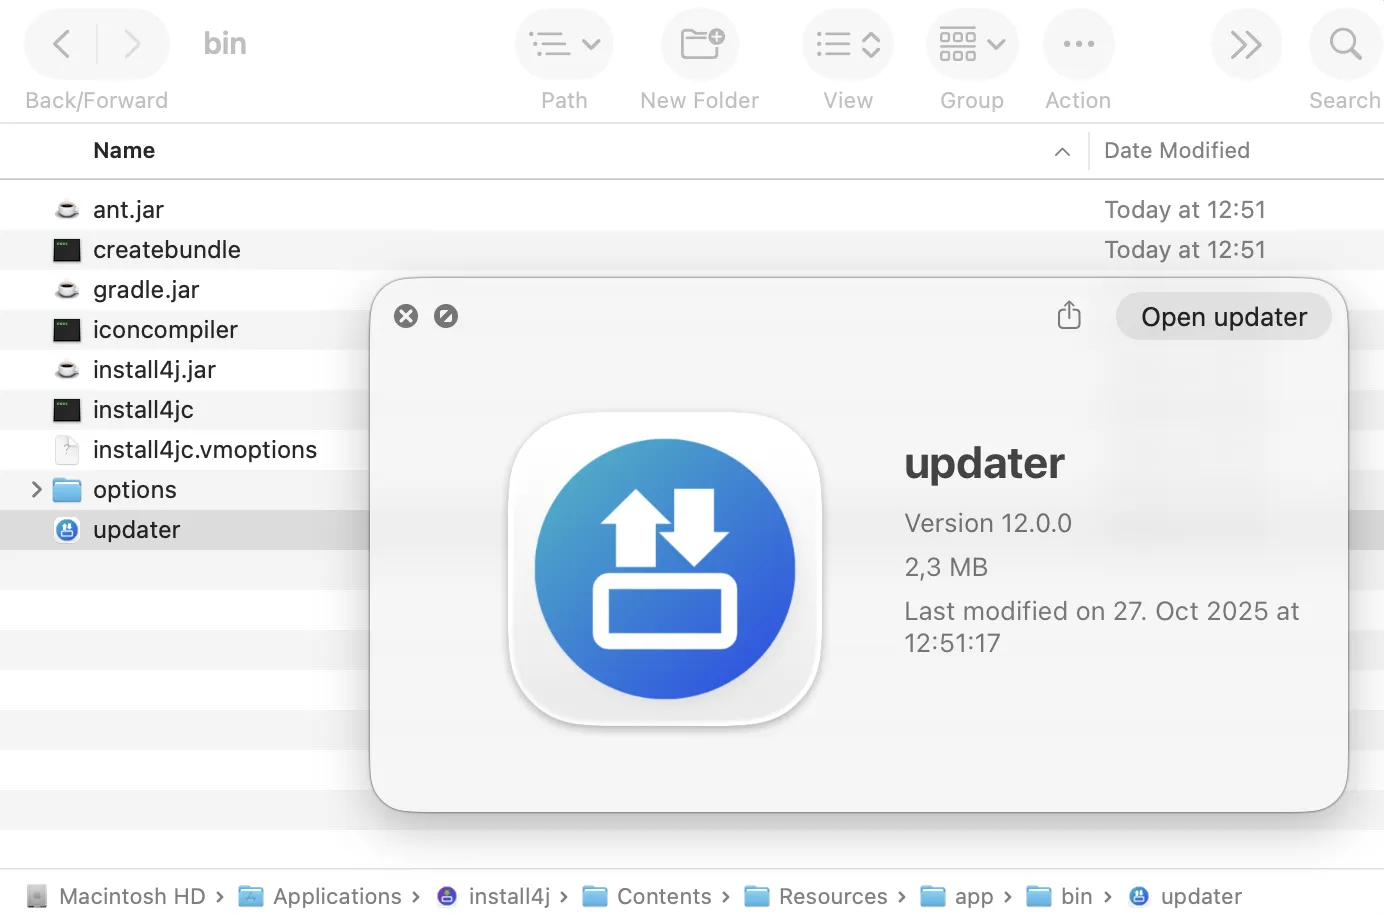
For example, check out the nested bin directory of the install4j app bundle itself. On macOS you can bring this up with the
"Tools" toolbar button. The Finder window shows the command line executables as well as the nested update downloader, which is an
installer application. In previous versions of install4j, the update downloader would not have been generated for a single-bundle archive.
The way installers set their installation directory has been reworked, adding substantial new functionality and greatly
extending flexibility.
Previously, the way that installers determined whether to perform a user-specific or a global installation was a built-in decision,
with only limited opportunities for customization via the "Request privileges" action.
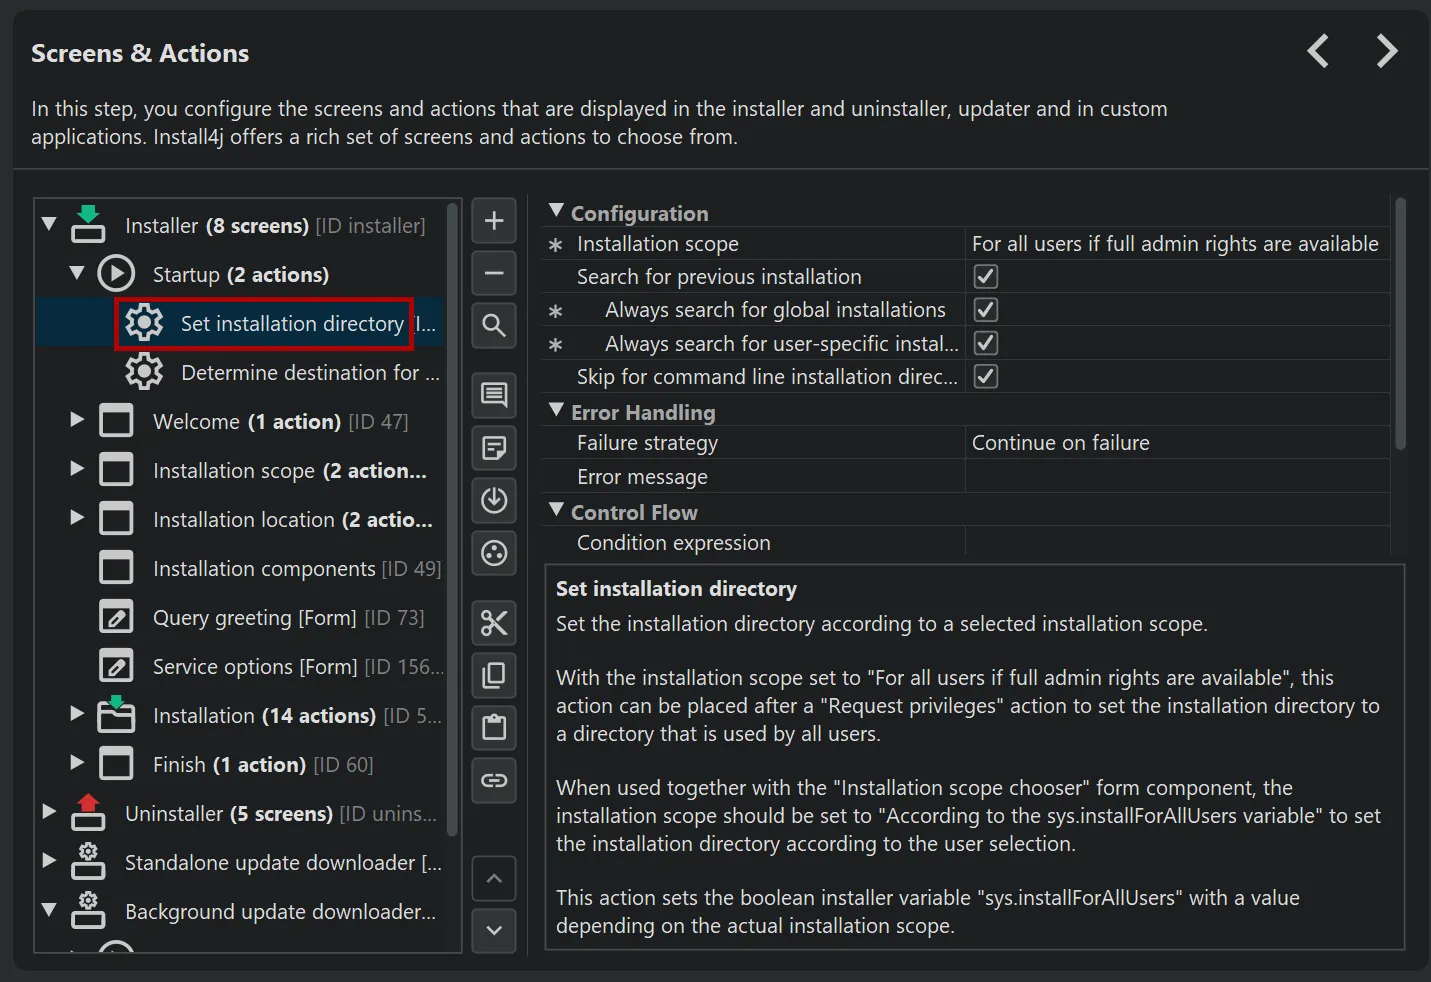
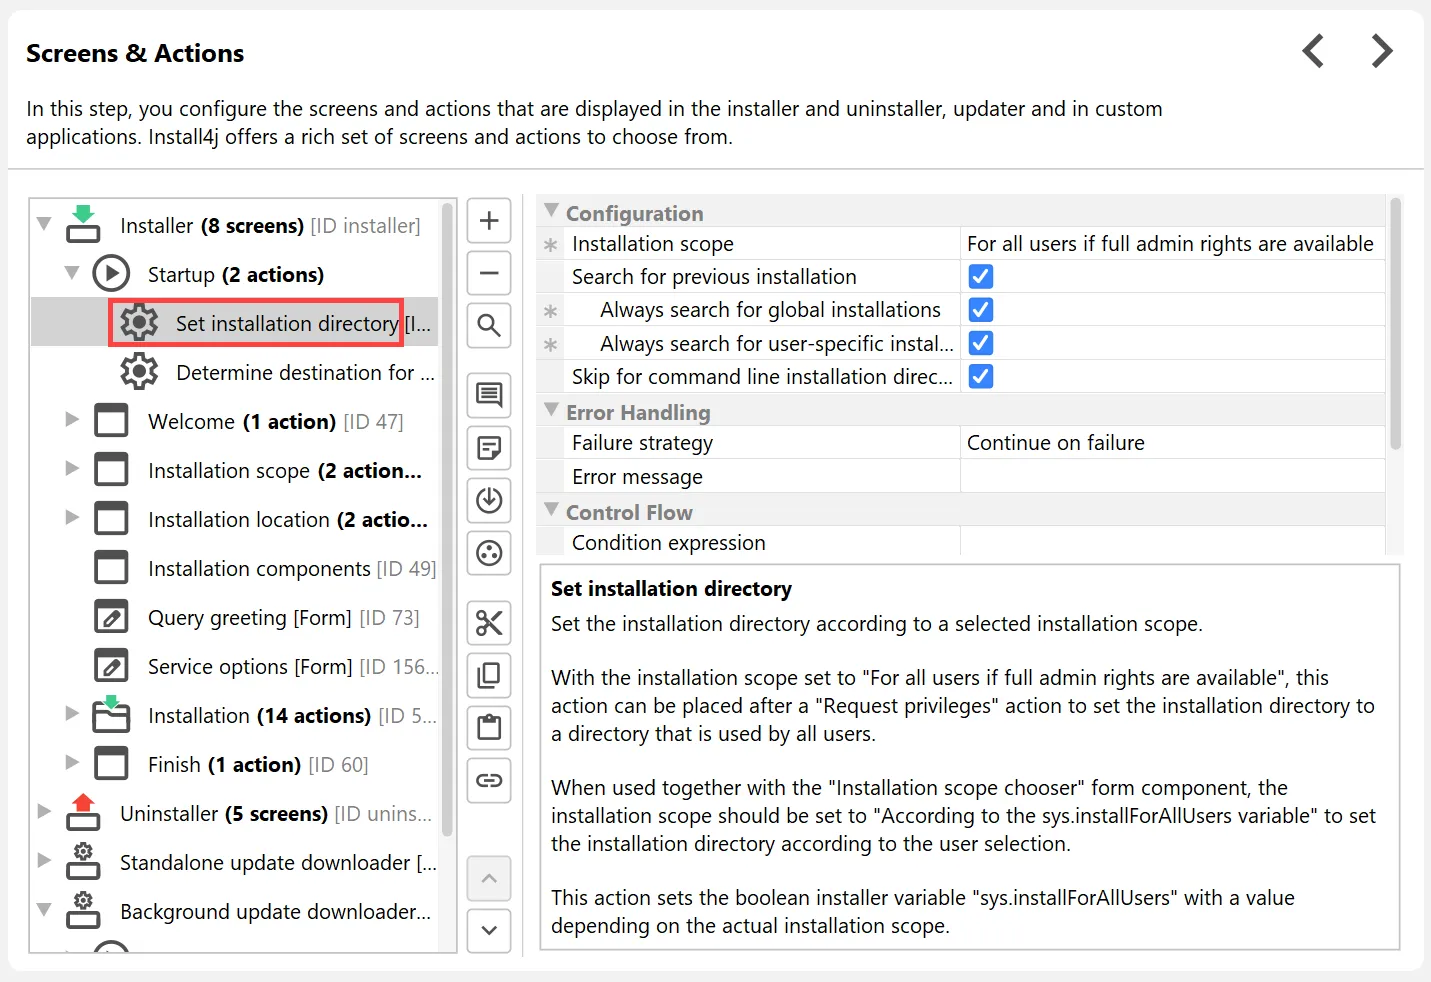
Starting with install4j 12, this process has been made explicit and completely transparent. The core of this functionality is the new
"Set installation directory" action.
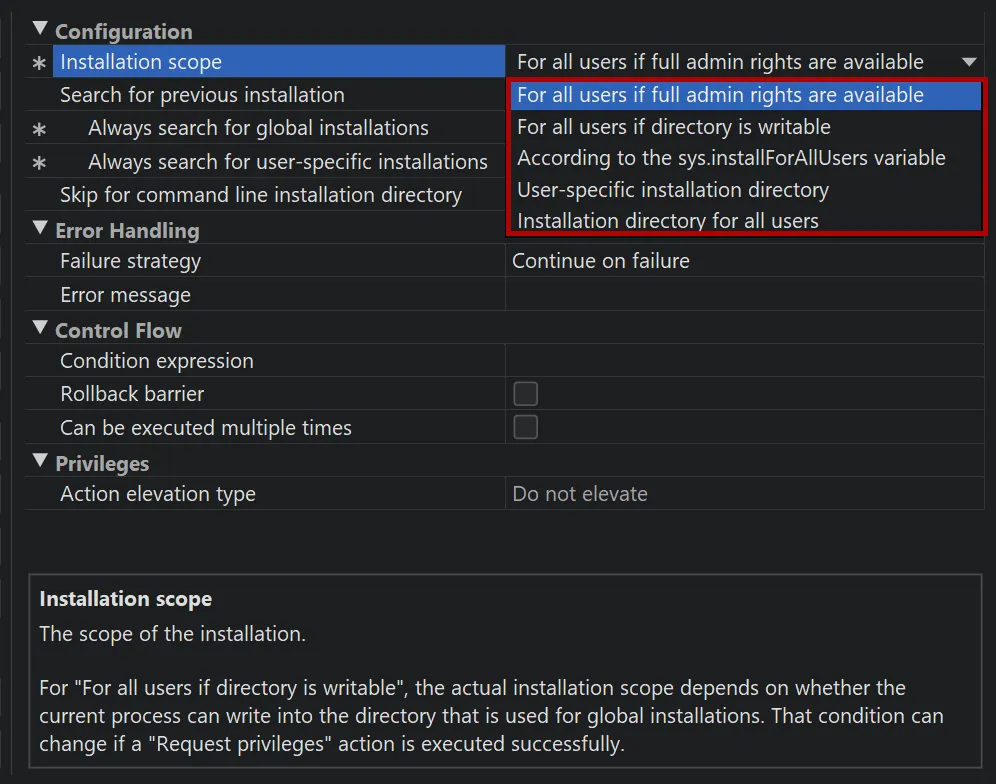
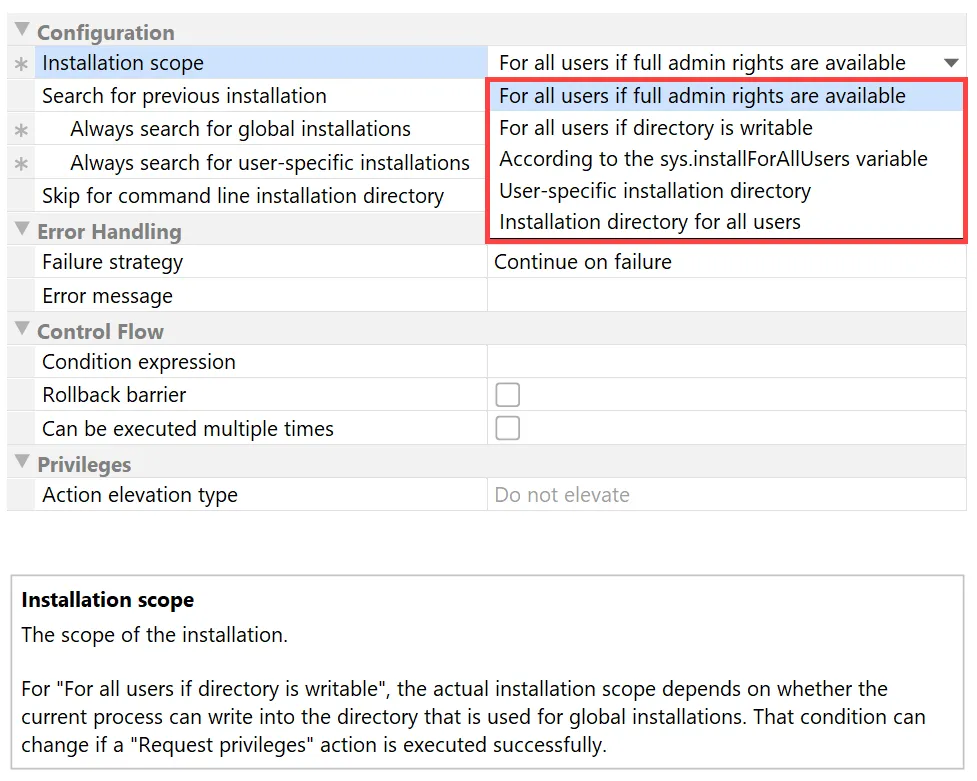
The decision whether to set a user-specific or global installation location is determined by the "Installation scope property". Apart from
the fixed options for global and user-specific installations, the outcome can depend on whether full admin rights are available, whether the
installation directory for all users is writable, or whether the sys.installForAllUsers installer variable is set to
true.
The action can also search for previous installations. This is based on the installation scope by default, but configurable to always include user-specific
or global installations.
The "Set installation directory" action itself sets the boolean sys.installForAllUsers installer variable so that subsequent
actions and screens can be wired together accordingly. For example, you could start with a "Set installation directory"
action in the "Startup" node of the installer, followed by a "Request privileges" action with a condition expression of
context.getBooleanVariable("sys.installForAllUsers").
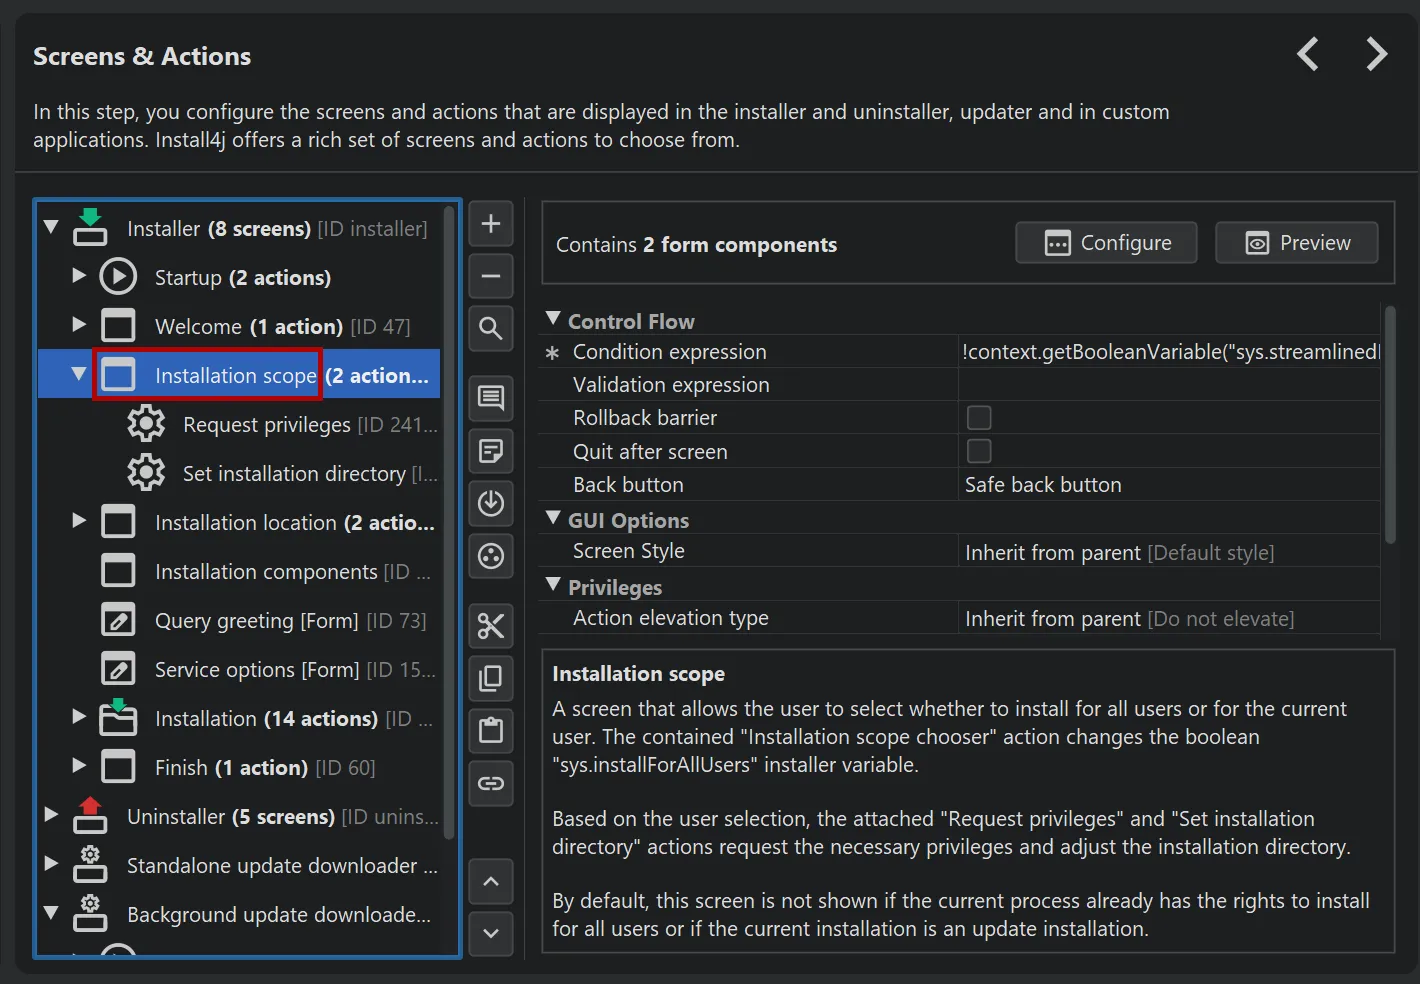
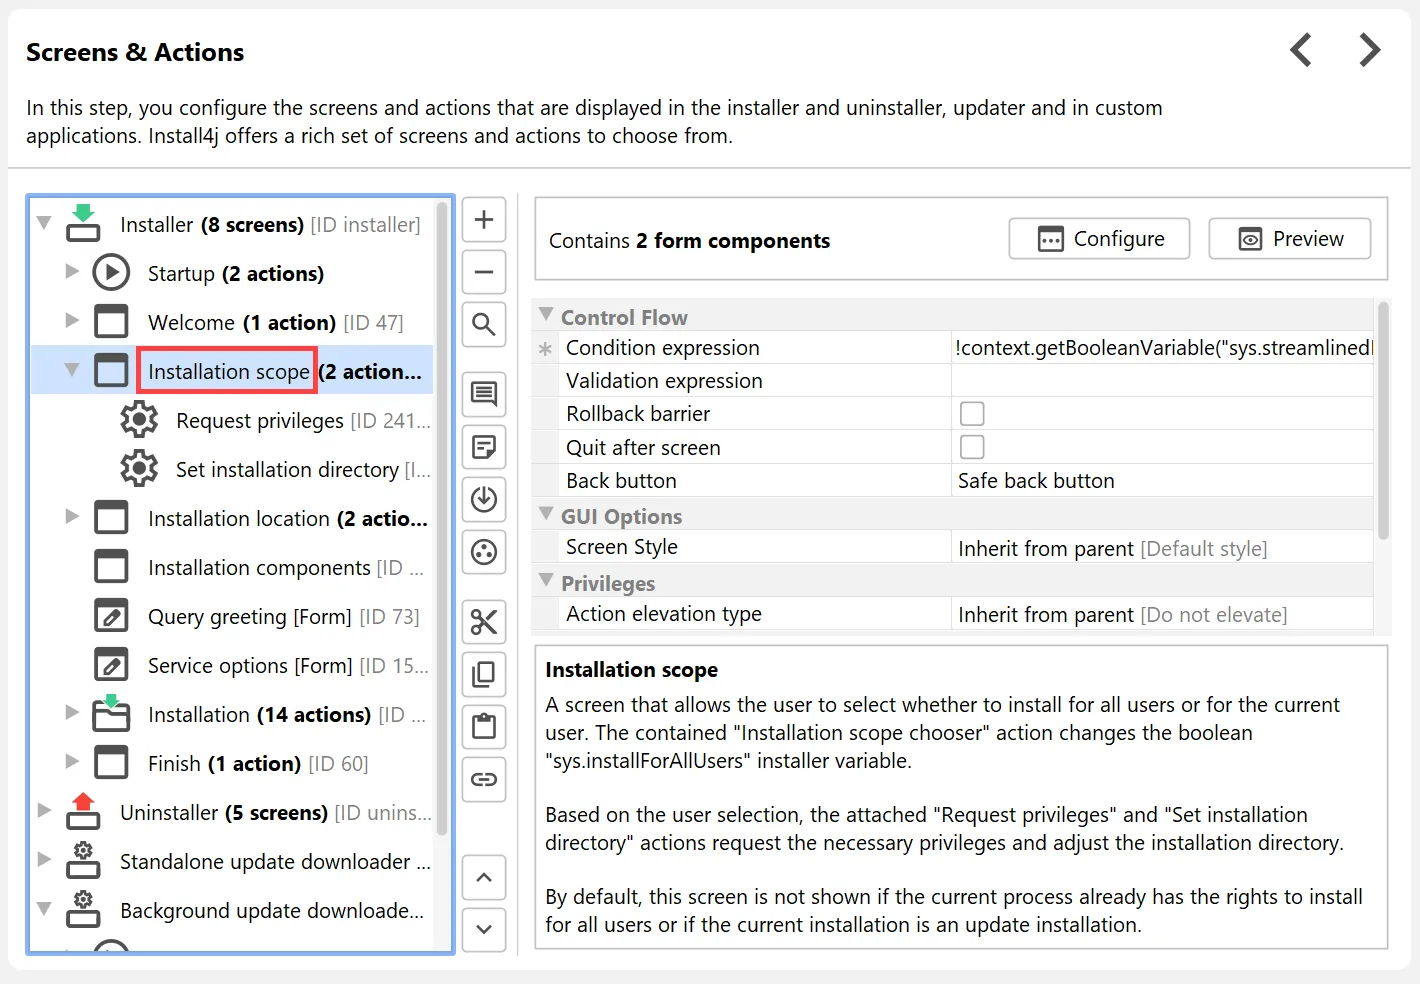
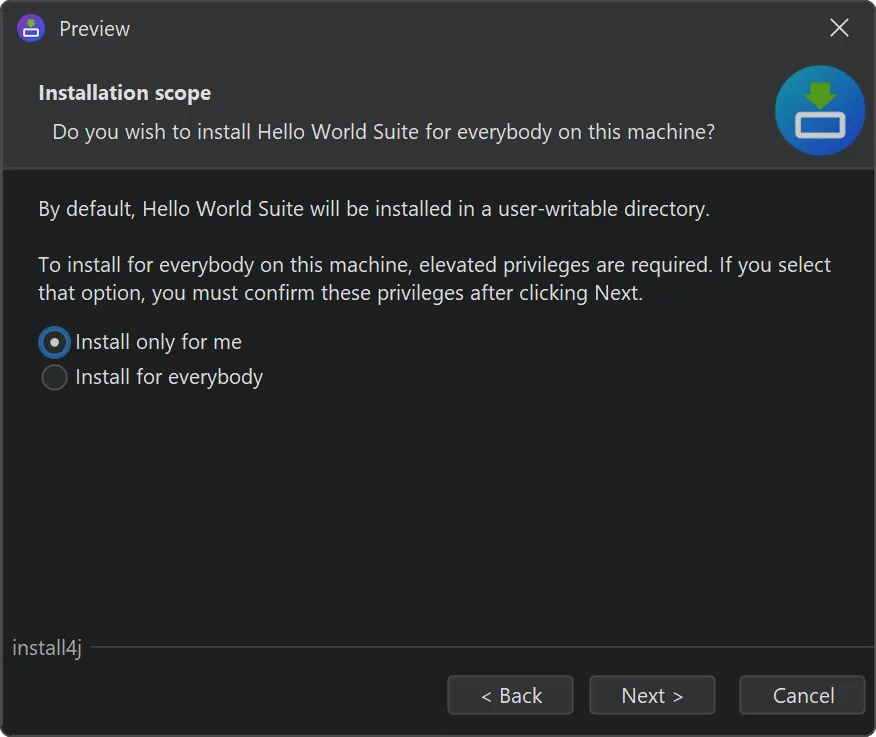
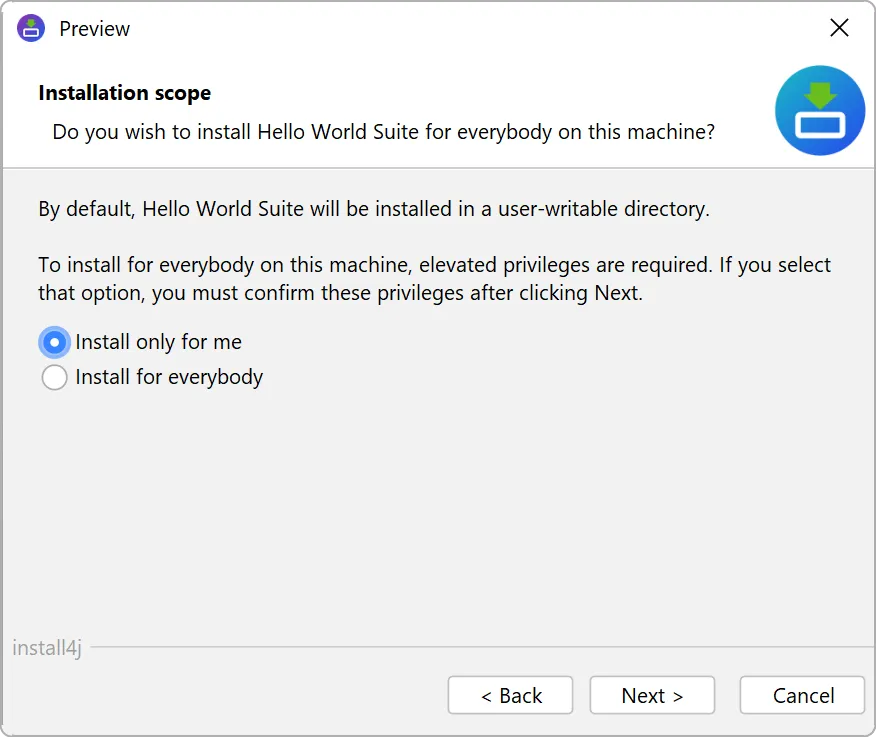
Another component that is coupled to the sys.installForAllUsers installer variable is the new "Installation scope chooser"
form component. It is part of the new "Installation scope" screen and provides a standard way to ask users whether to perform
a user-specific or a global installation.
The "Installation scope chooser" form component consists of two radio buttons, one for each option, and is bound to the
sys.installForAllUsers installer variable.
The "Installation scope" screen combines these radio buttons with default wording and two associated actions: A "Request privileges"
action that is executed conditionally if the sys.installForAllUsers installer variable is set to true
and a "Set installation directory" action with an installation scope of "According to the sys.installForAllUsers variable".
With these new building blocks you can implement different and more complex scenarios for determining the installation directory.
Code signing is now a separate section in the install4j IDE with different steps for Windows and macOS.
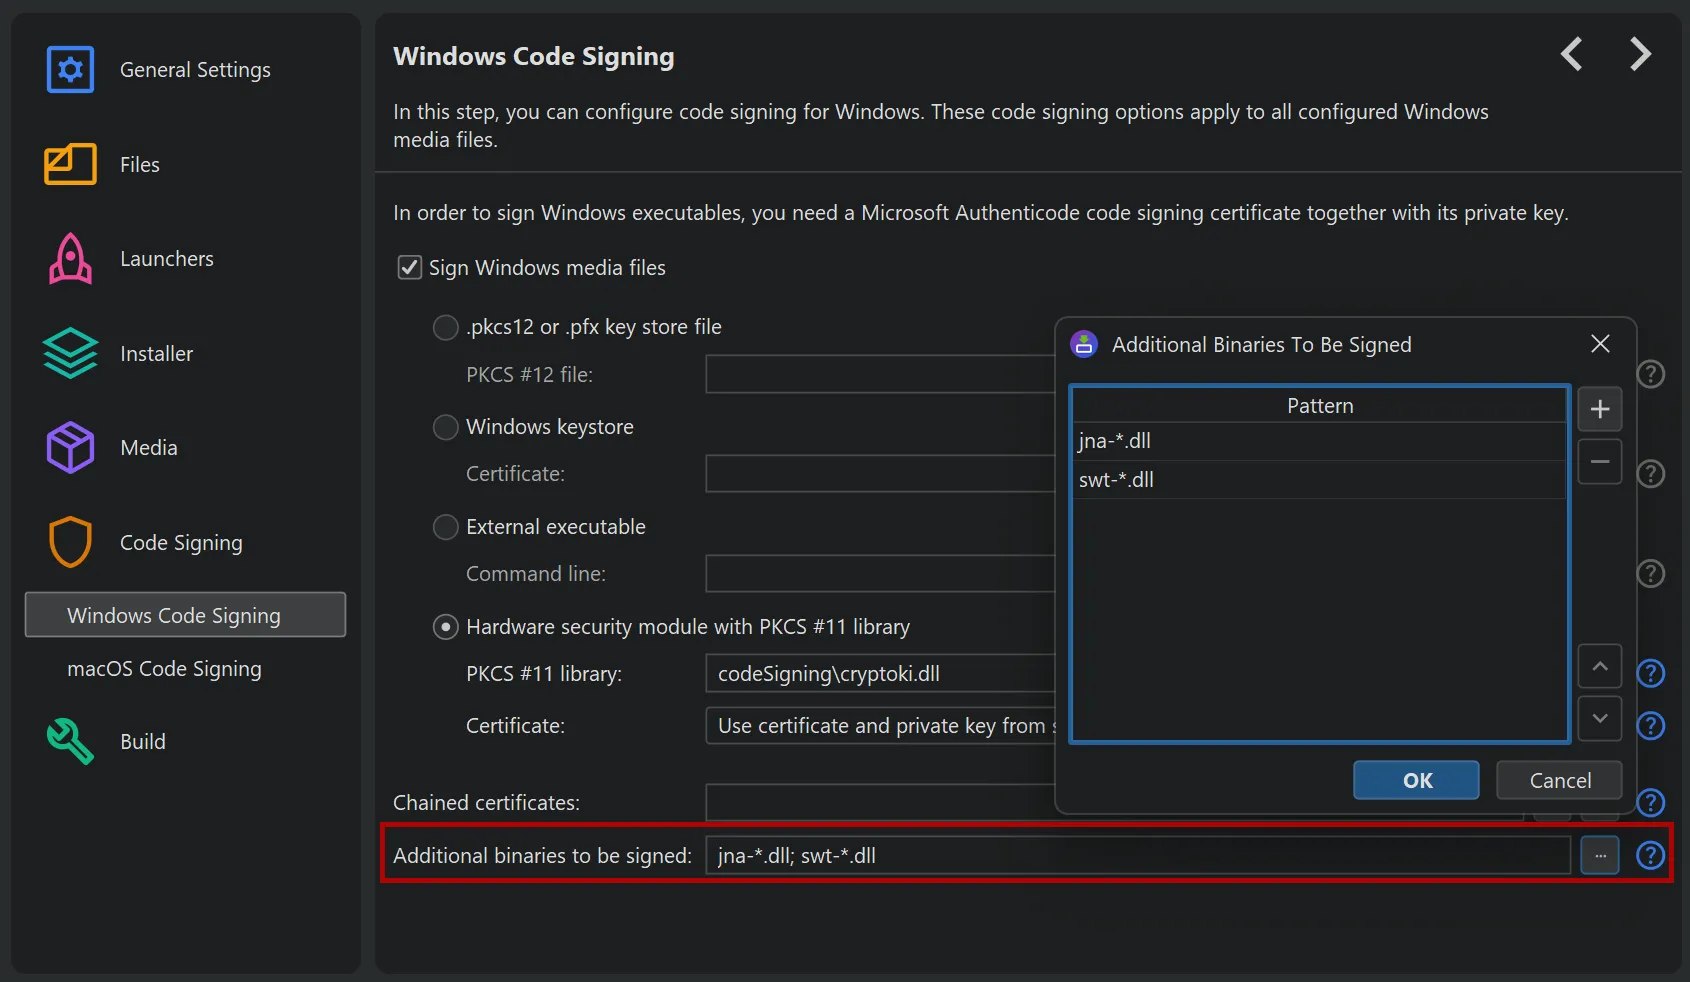
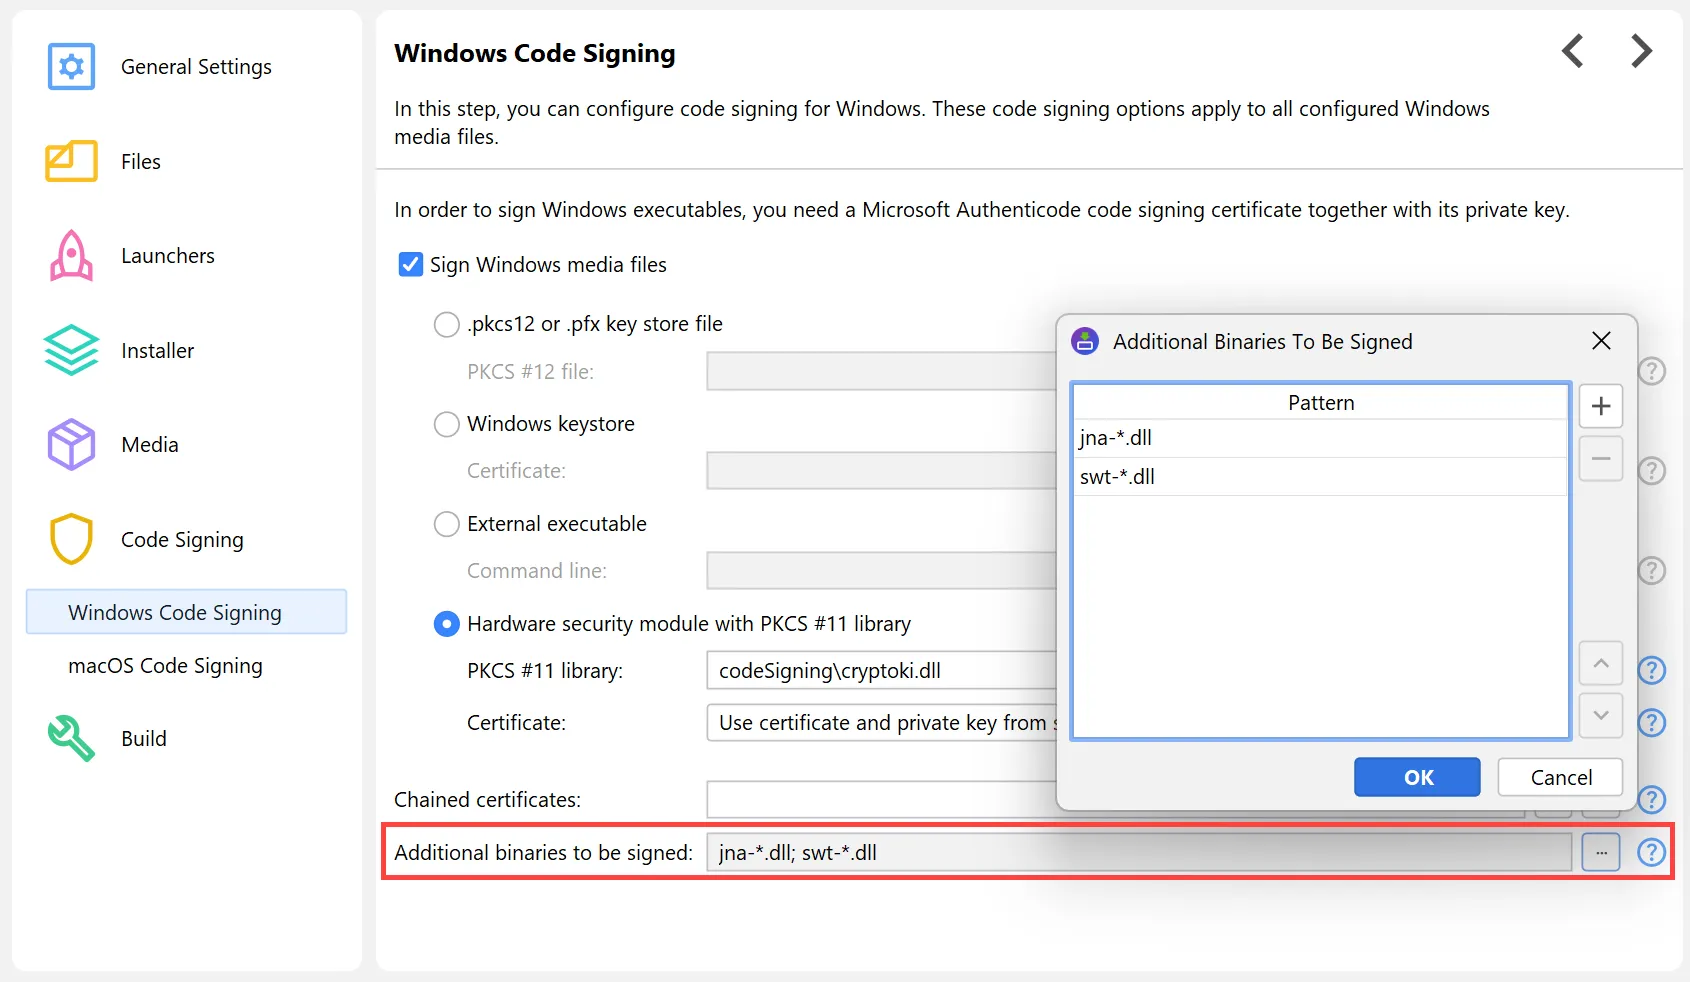
In the Windows code signing step, it is now possible to specify patterns for additional binaries that should be signed by install4j.
Previously, only binaries generated by install4j would be signed.
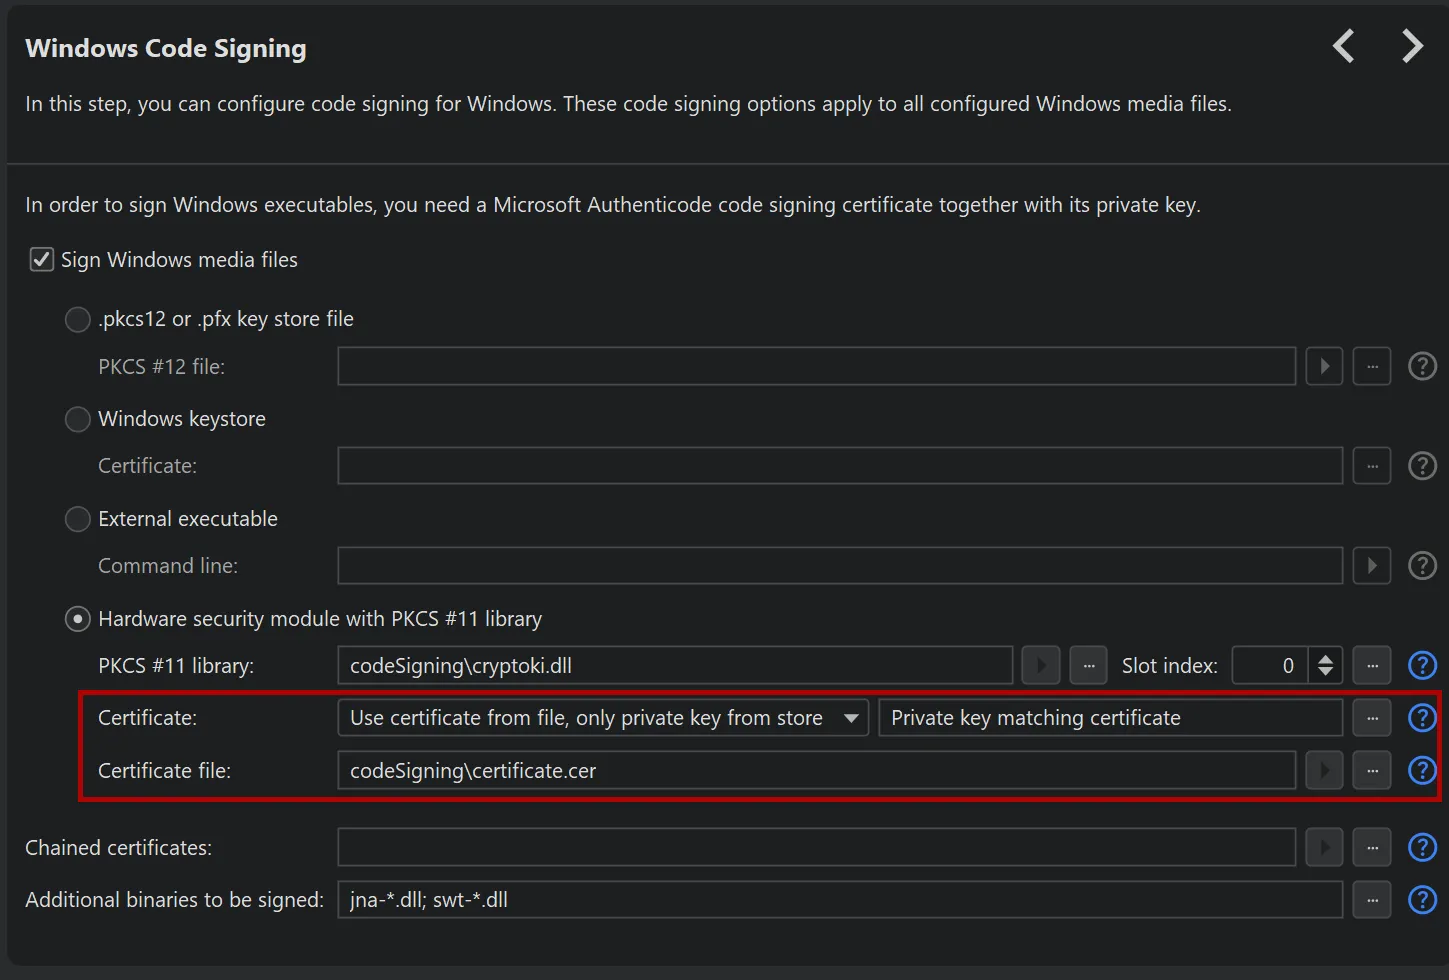
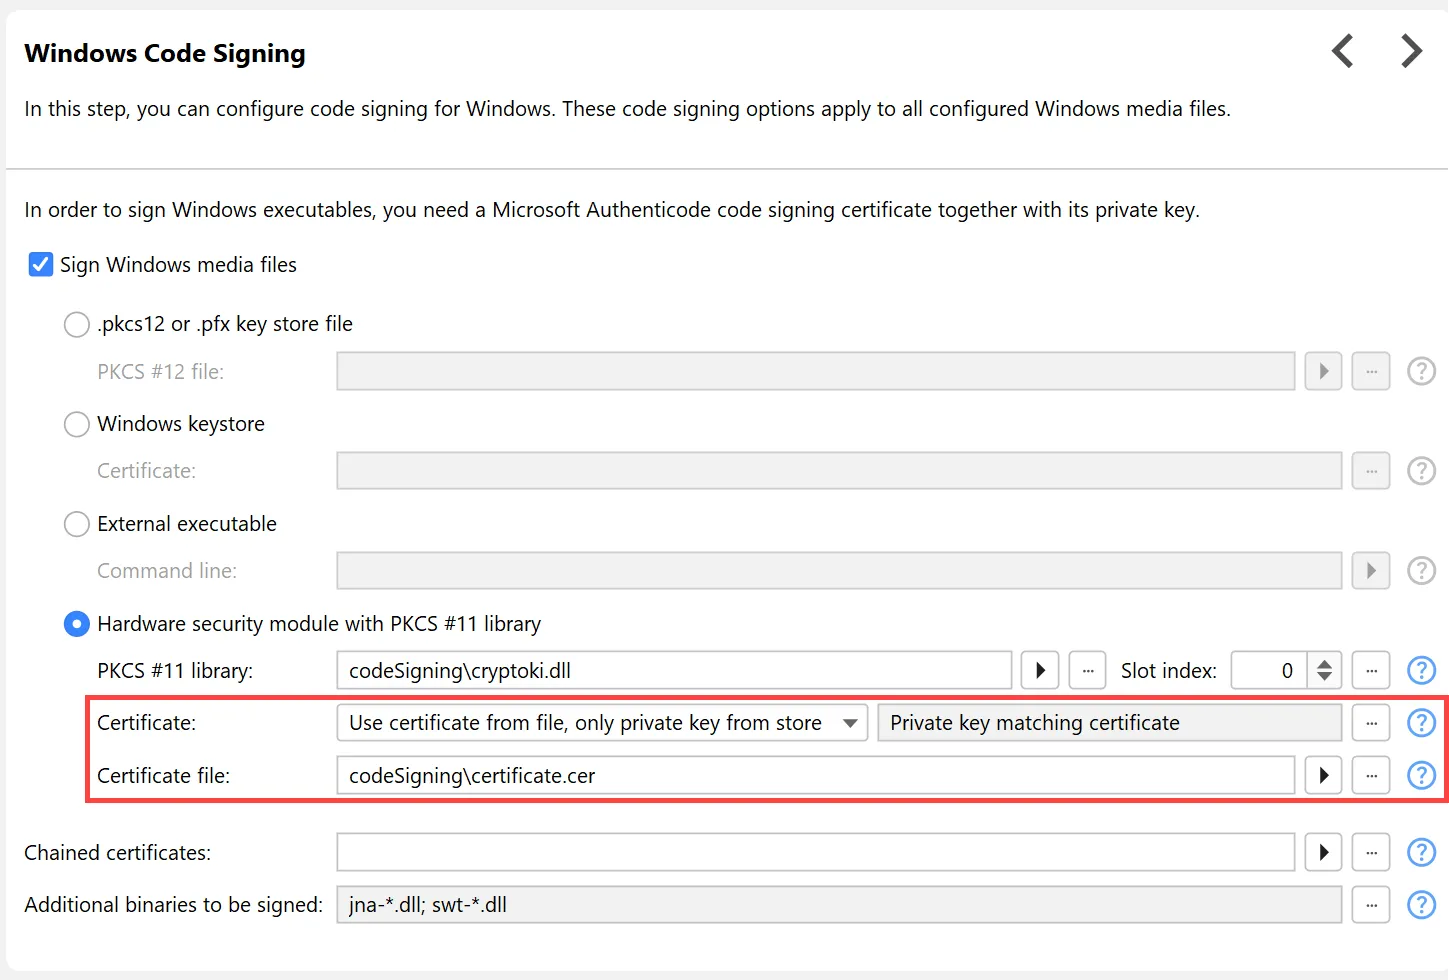
When using PKCS #11, usually both certificate and private key are contained in the keystore. In install4j 12,
matching of private keys and certificates has been improved considerably, leading to fewer code signing errors.
In addition, the PKCS #11 session is now kept alive to speed up code signing.
In incomplete or non-standard setups, code signing can fail when the compiler cannot find the certificate or the full certificate chain.
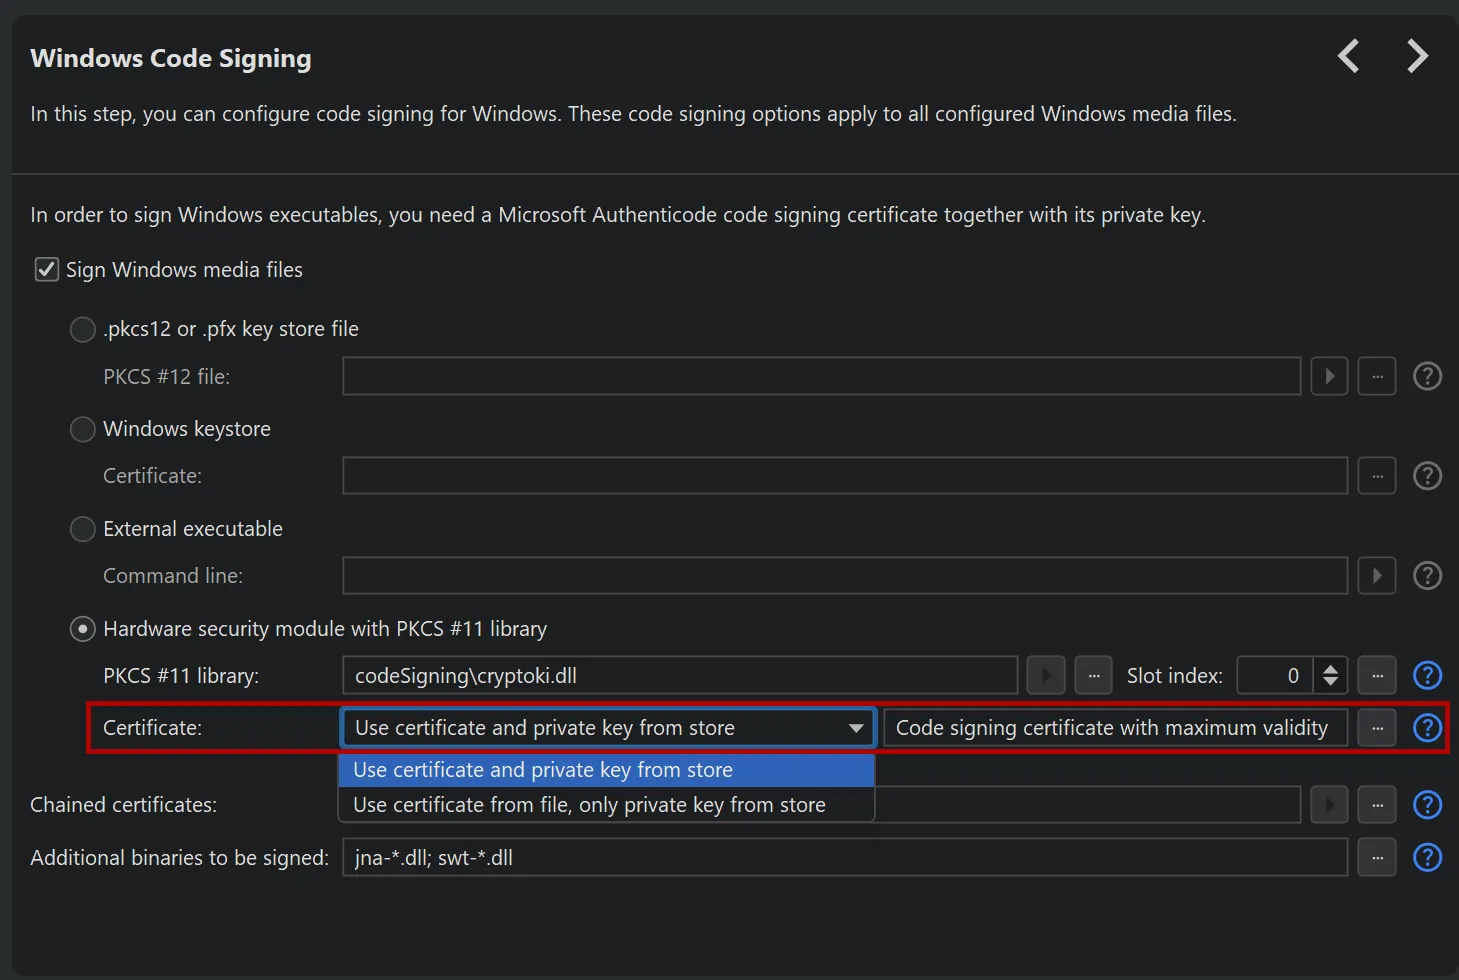
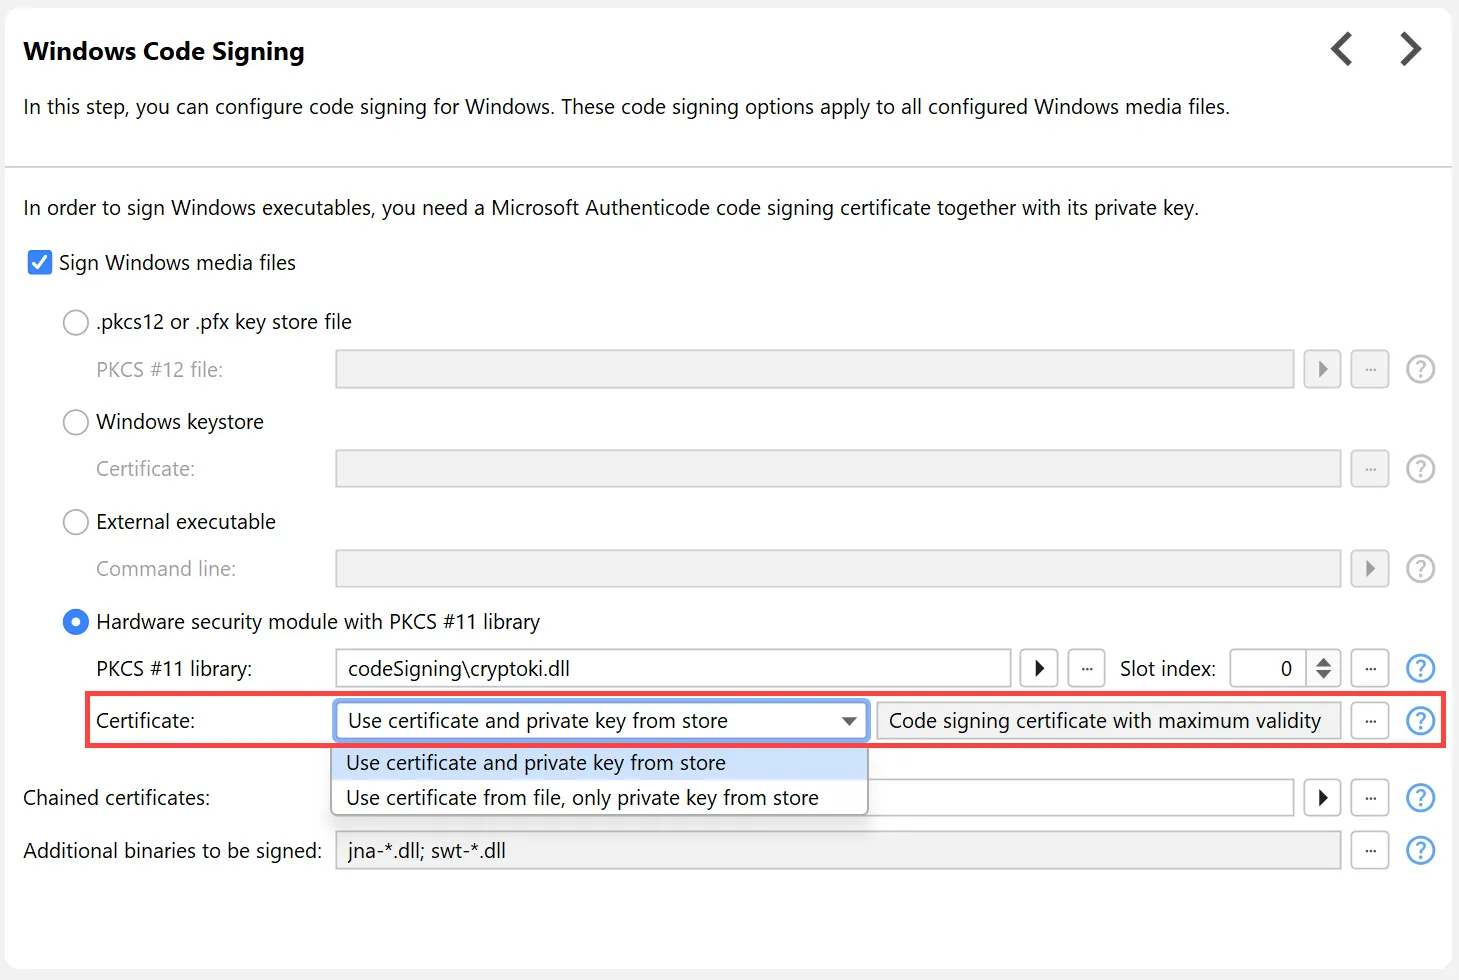
To handle these cases, install4j now offers an optional separate PKCS #11 certificate file entry, both for Windows and macOS code signing.
By default, install4j tries to use the certificate with the maximum validity if you do not select a specific certificate from the keystore.
With the new mode, where a separate certificate file is specified, only the private key is loaded from the keystore and install4j
tries to find a private key that matches the certificate. You can also select a specific private key by label or id manually.
Finally, the environment variable DYLD_LIBRARY_PATH can now be set on macOS for the install4j command line compiler to
load PKCS #11 libraries.
install4j 12 adds support for the Apple Service Management framework.
In single-bundle archives, adding a service that runs for all
users or a startup executable that is executed at login could previously be done with the "Install a service" and the "Add a startup executable"
actions. However, when the user deleted the app bundle, these registrations would not be deleted along with the app bundle which would
cause problems.
The Apple Service Management framework
allows you to manage launch agents and launch daemons in such a way that they are tied to the lifecycle of the single-bundle archive.
However, this requires some extra work.
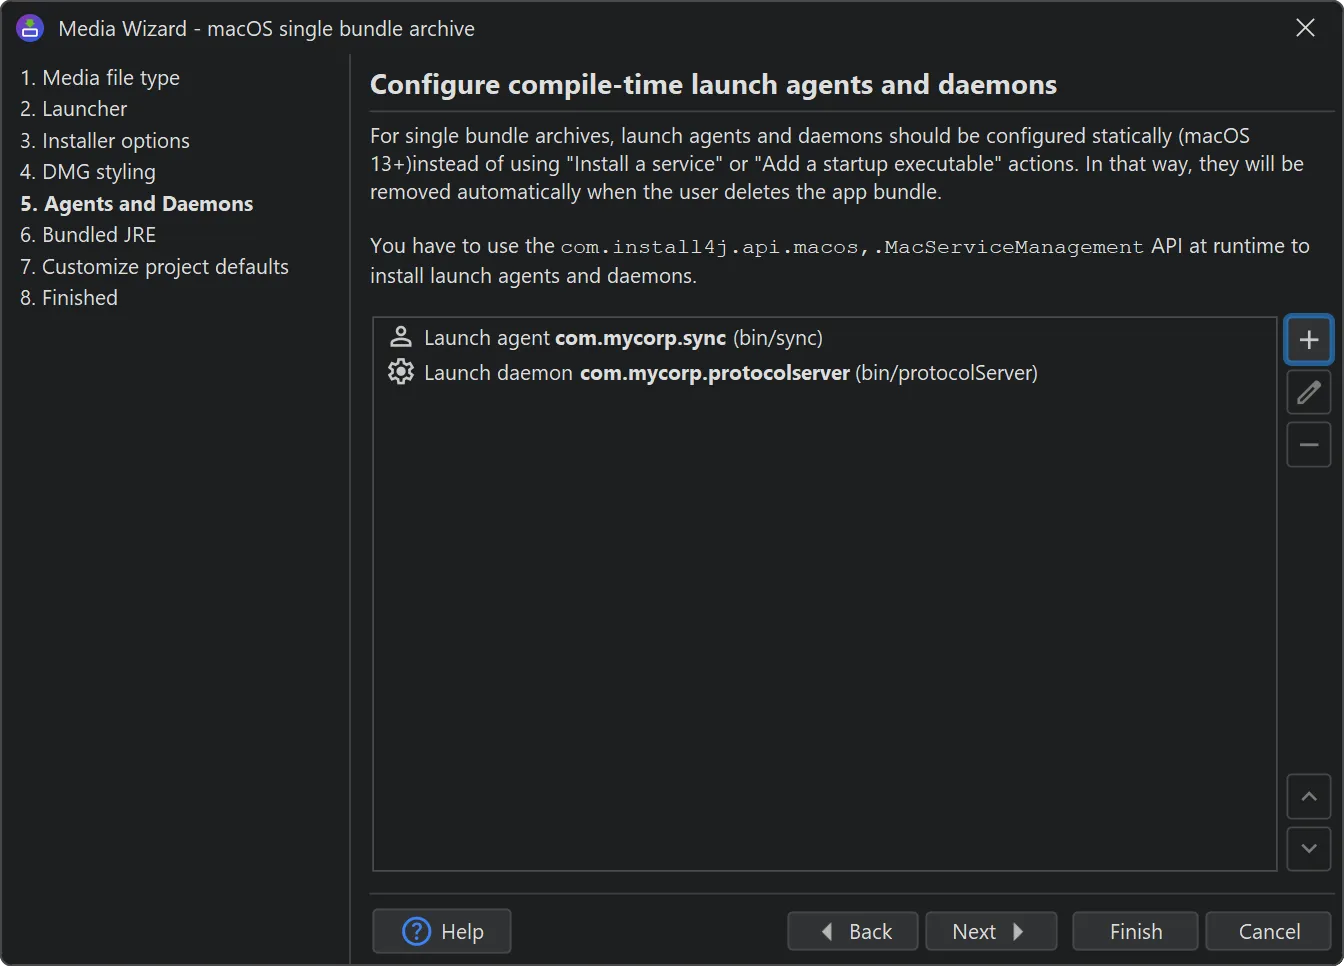
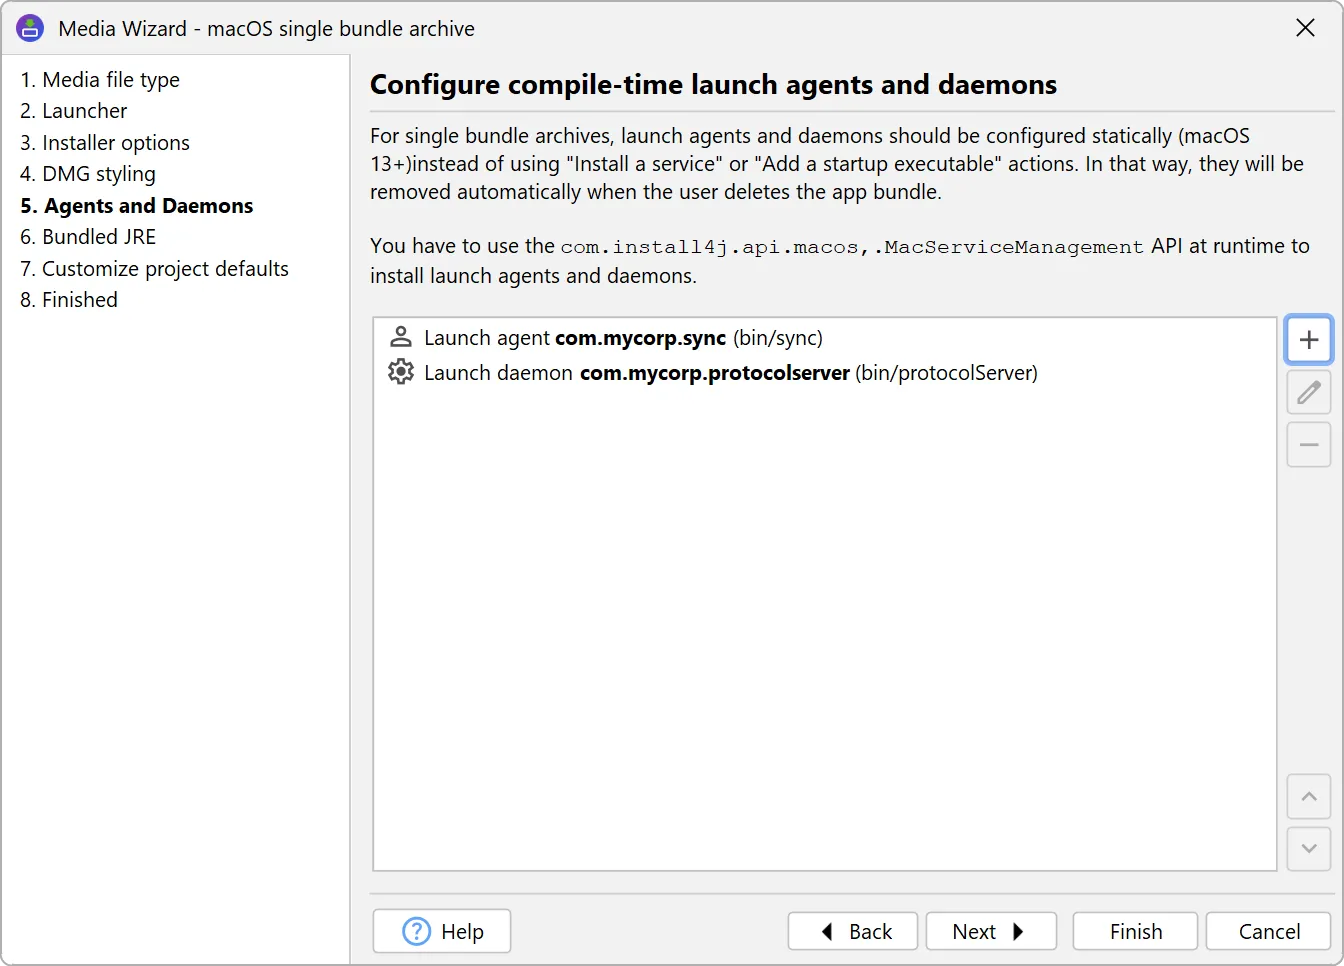
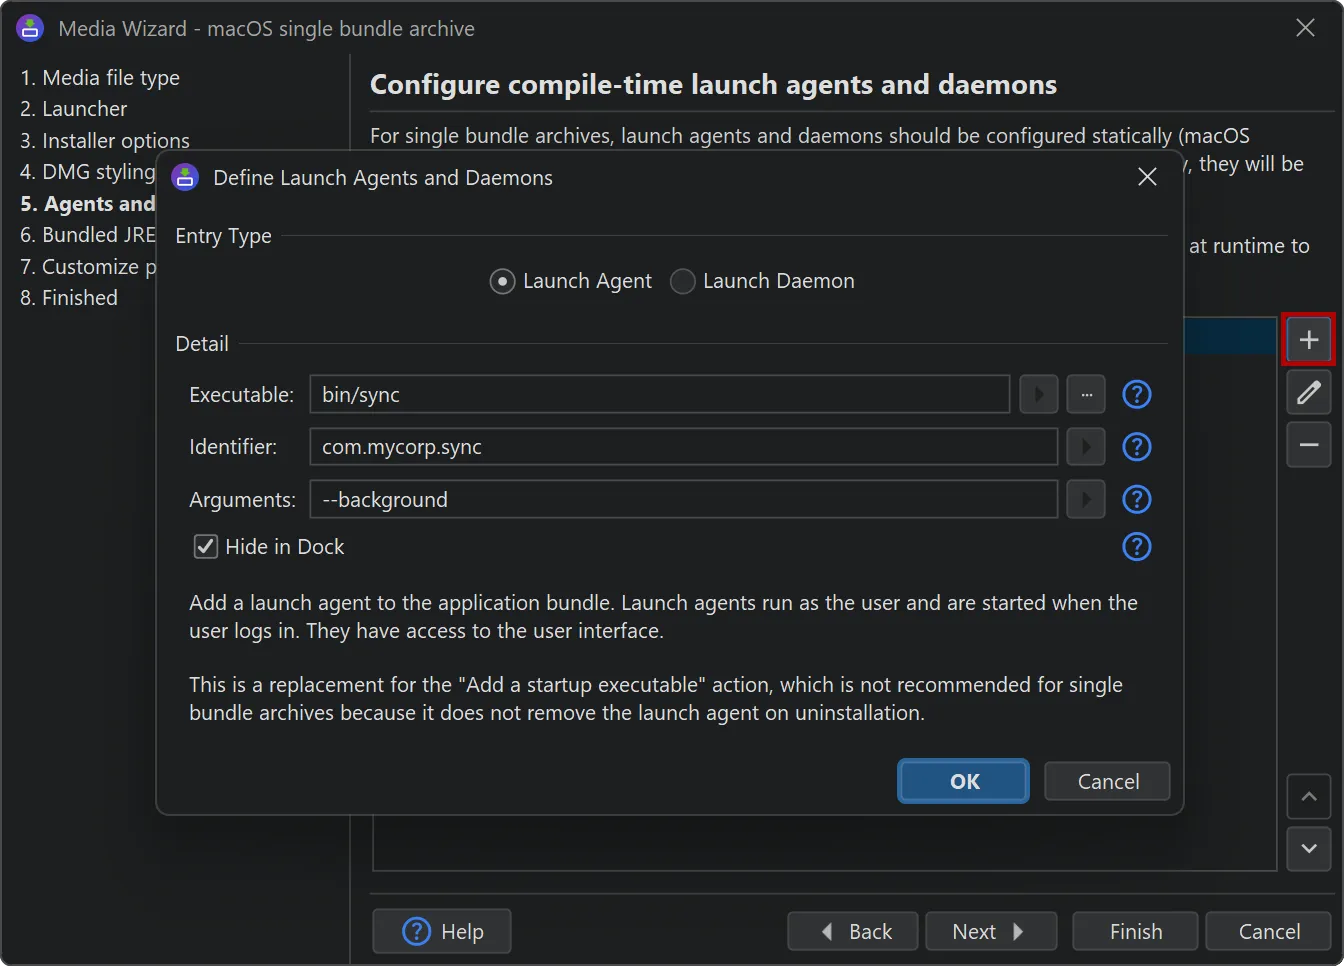
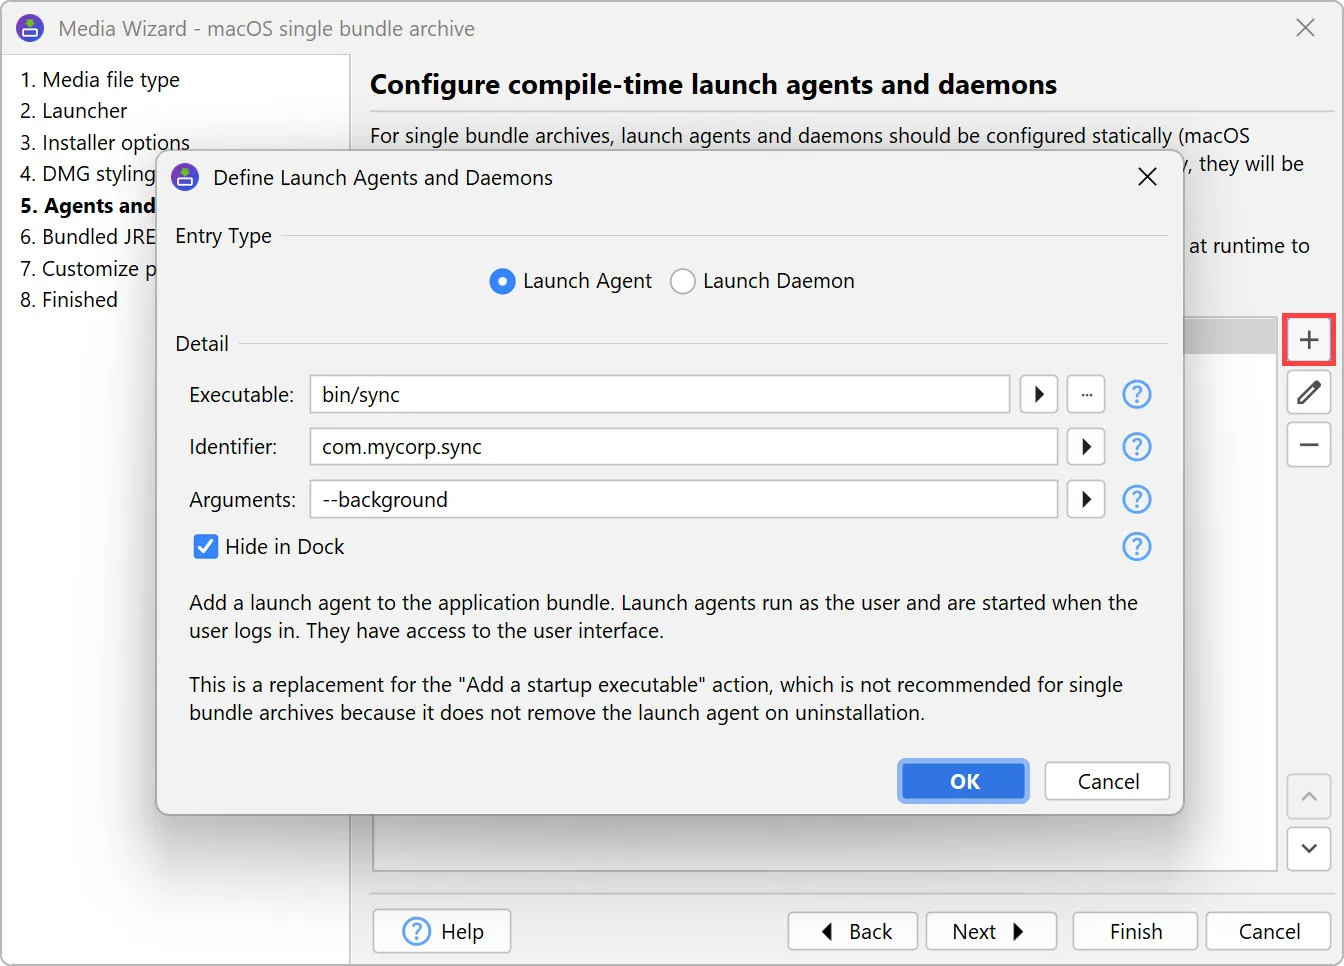
Single-bundle archives now have an additional "Agents and Daemons" step in the media wizard, where you can statically define "launch agents"
and "launch daemons".
In the terminology of install4j, a "launch agent" corresponds to a "startup executable" and a "launch daemon" corresponds
to a "service". We've named them with Apple's terminology because you need to read the Apple documentation to understand what is happening
in the background to use this feature.
Both launch agents and daemons need an identifier. Launch agents additionally support arguments. Because they can show a UI by default,
you can choose to hide them from the Dock when they only perform background operations.
install4j will generate the required files in Contents/Library/LaunchAgents and Contents/Library/LaunchDaemons, but they
will not automatically be registered. You need to add logic to your app to alert the user, and then call the
com.install4j.api.macos.MacServiceManagement API to register them. This will trigger a confirmation from the OS.
The registration is a simple static method call that uses the identifier that you configured for the launch daemon or the launch agent:
MacServiceManagement.registerLaunchAgent("com.mycorp.sync.plist");
MacServiceManagement.registerLaunchDaemon("com.mycorp.protocolserver.plist");
In addition, MacServiceManagement contains methods for checking the status and unregistering launch agents and launch daemons,
opening System Settings in the "Login Items" section, and registering the main bundle itself as a login item.
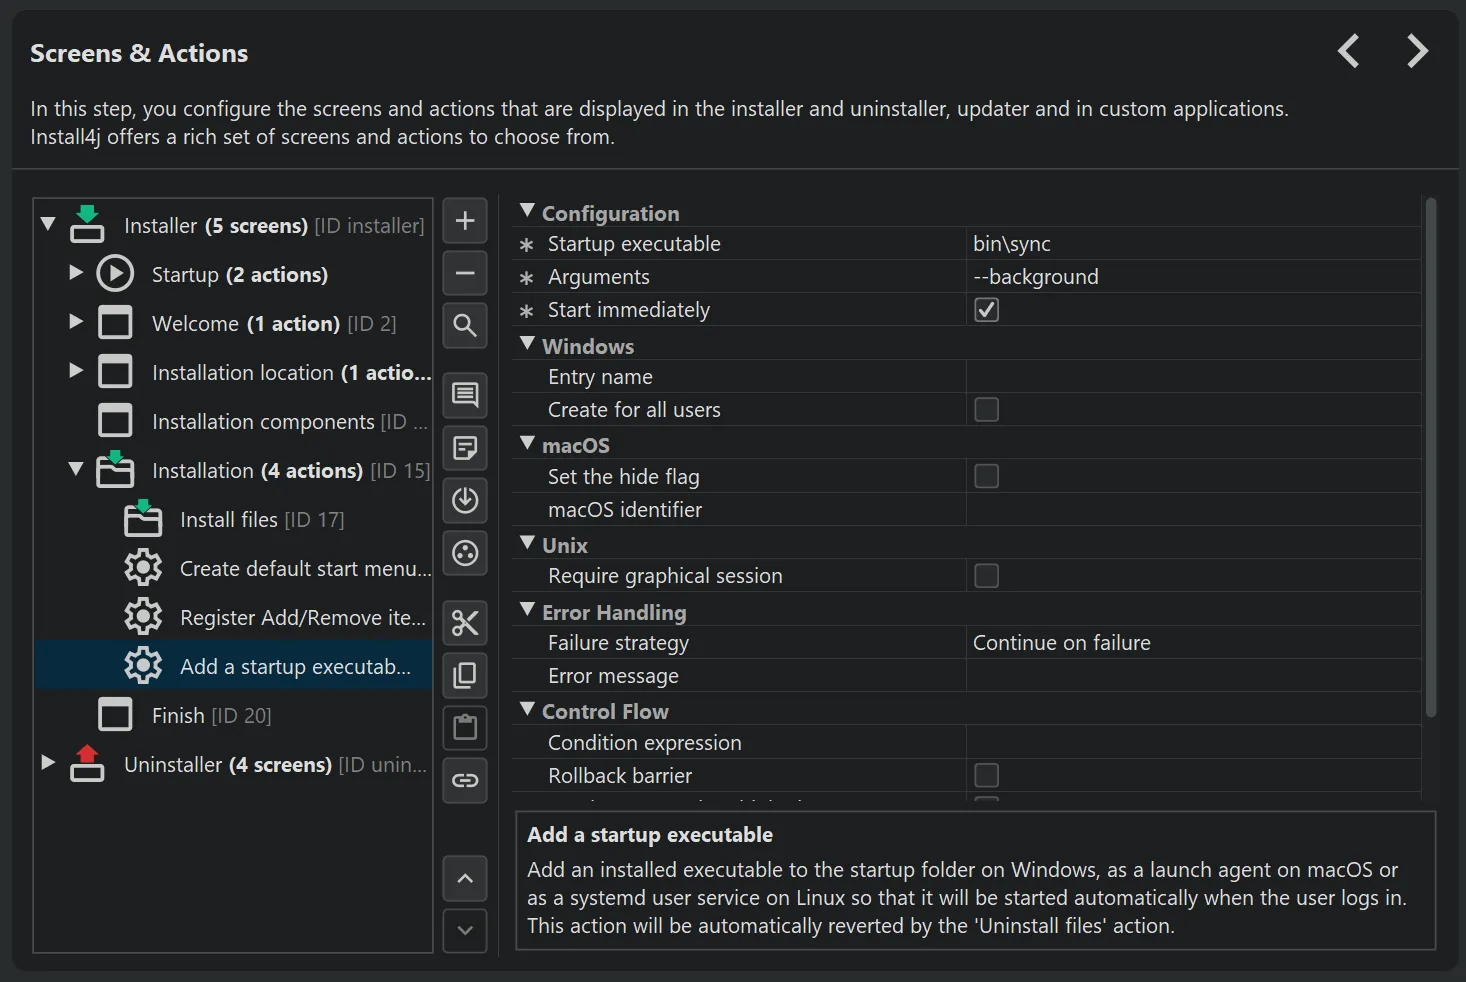
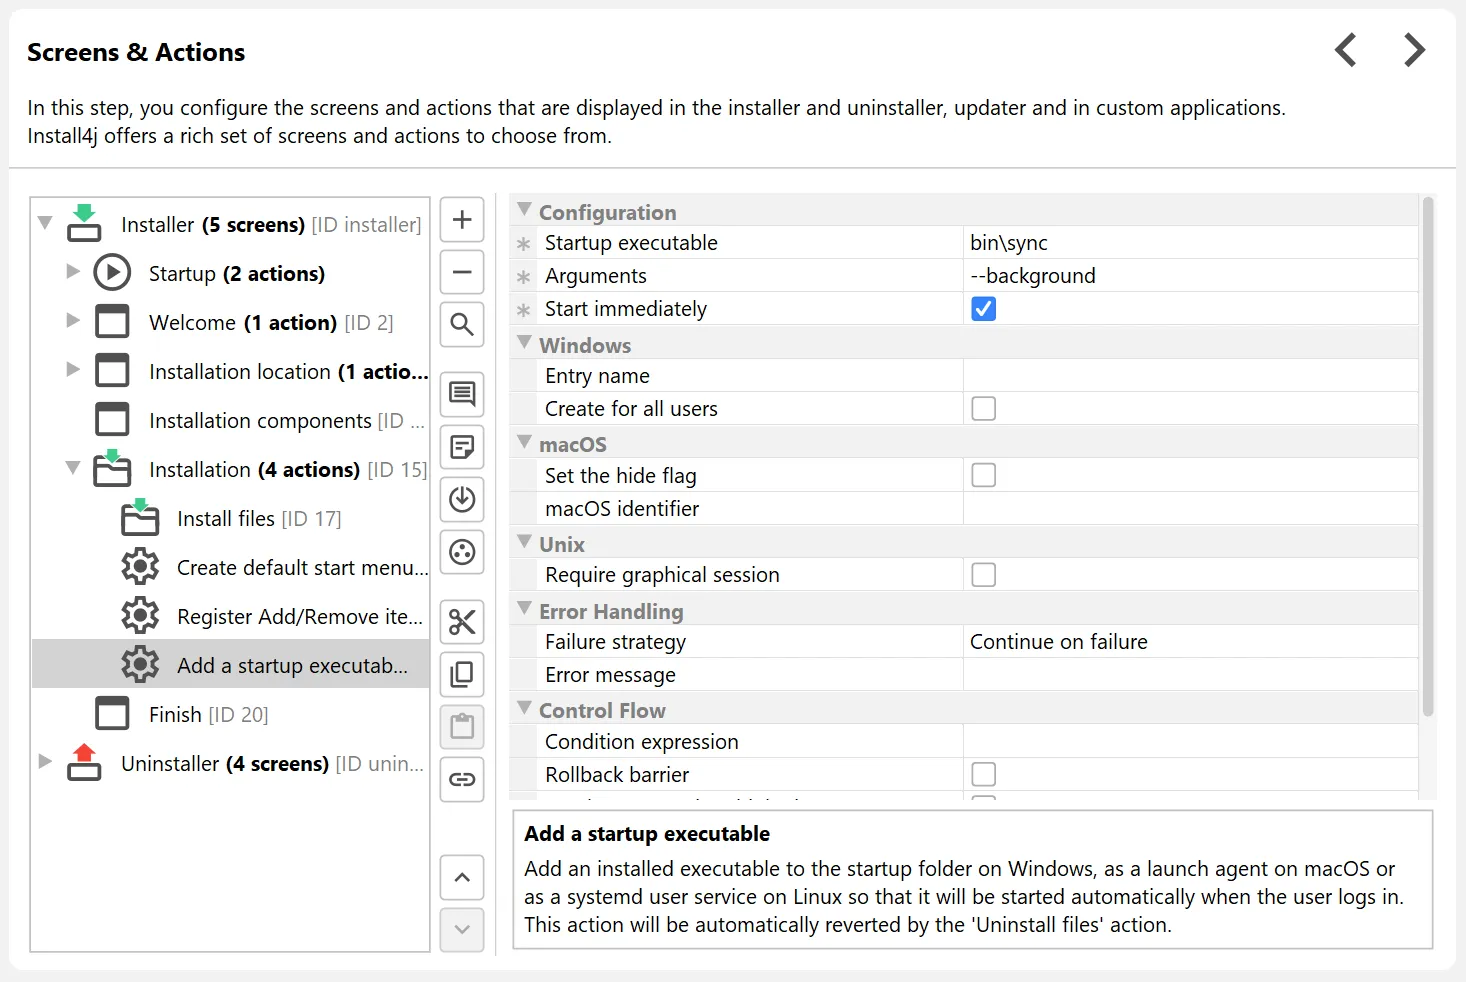
The "Add a Startup Executable" action has been improved in several ways:
-
The action now also works on Linux, using systemd user services.
-
On macOS, the action now uses LaunchAgents instead of LoginItems. This provides a better user experience without questions due to
automation security restrictions.
-
The action now supports setting arguments for the executable.
-
The action now supports starting the launcher immediately.
Support for streamlining installations has been added. This builds on the feature in previous versions where
screens could be skipped for update installations if the user confirmed an update installation in the "Update alert" form component,
typically on the "Welcome" screen.
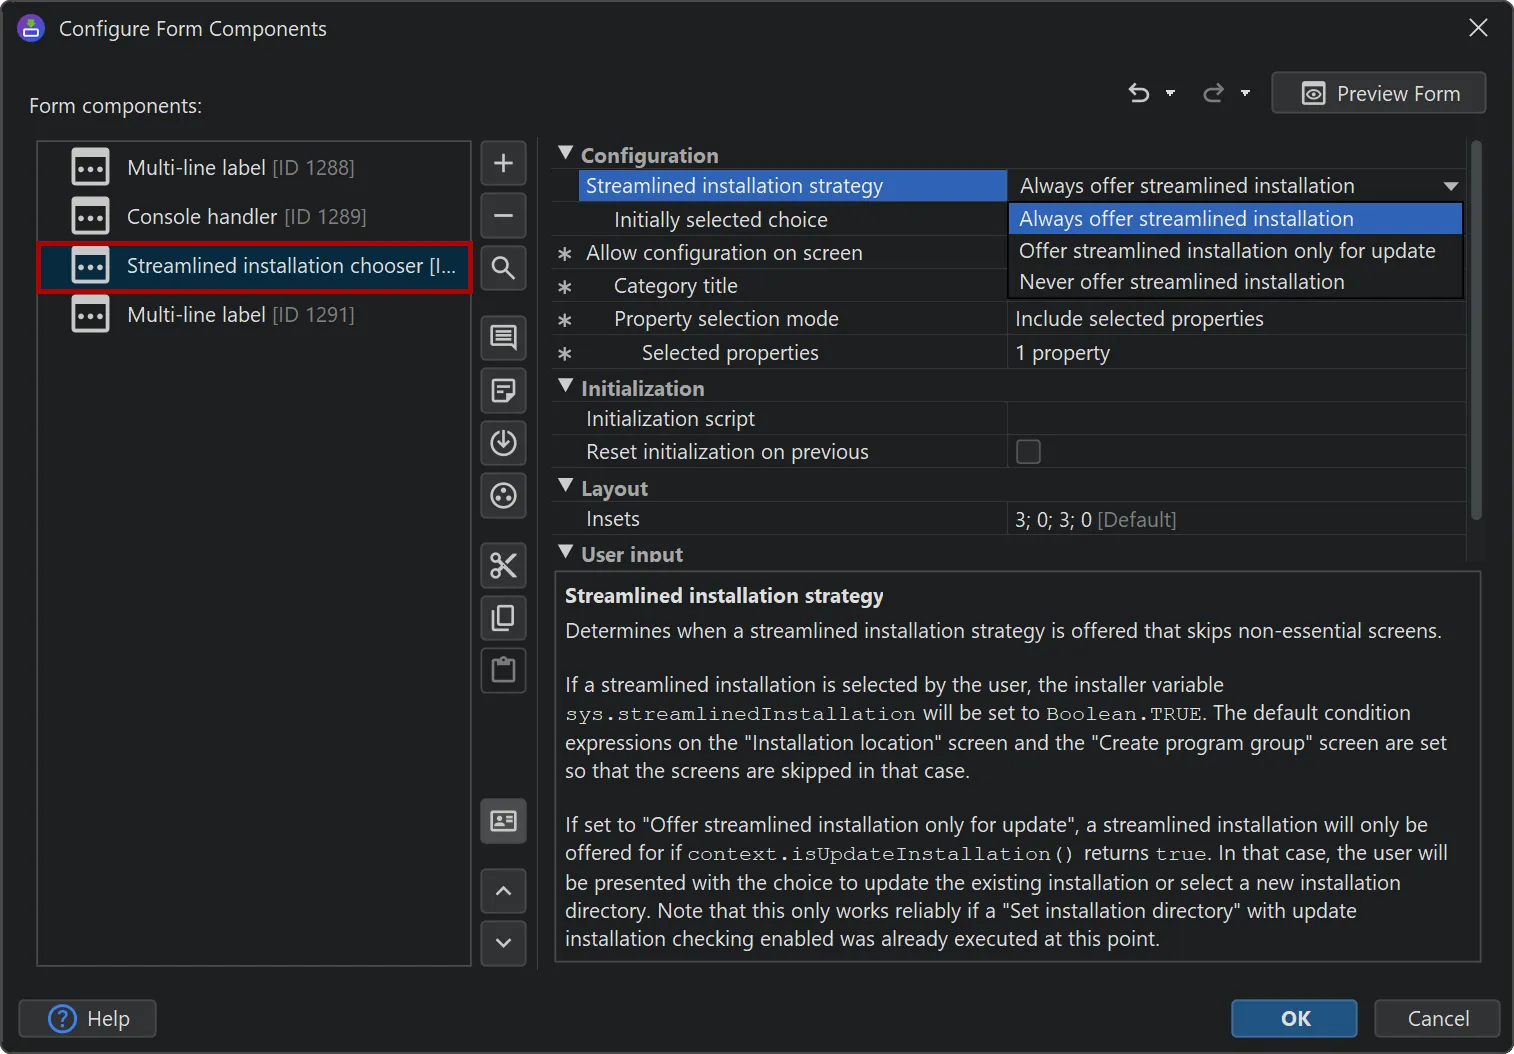
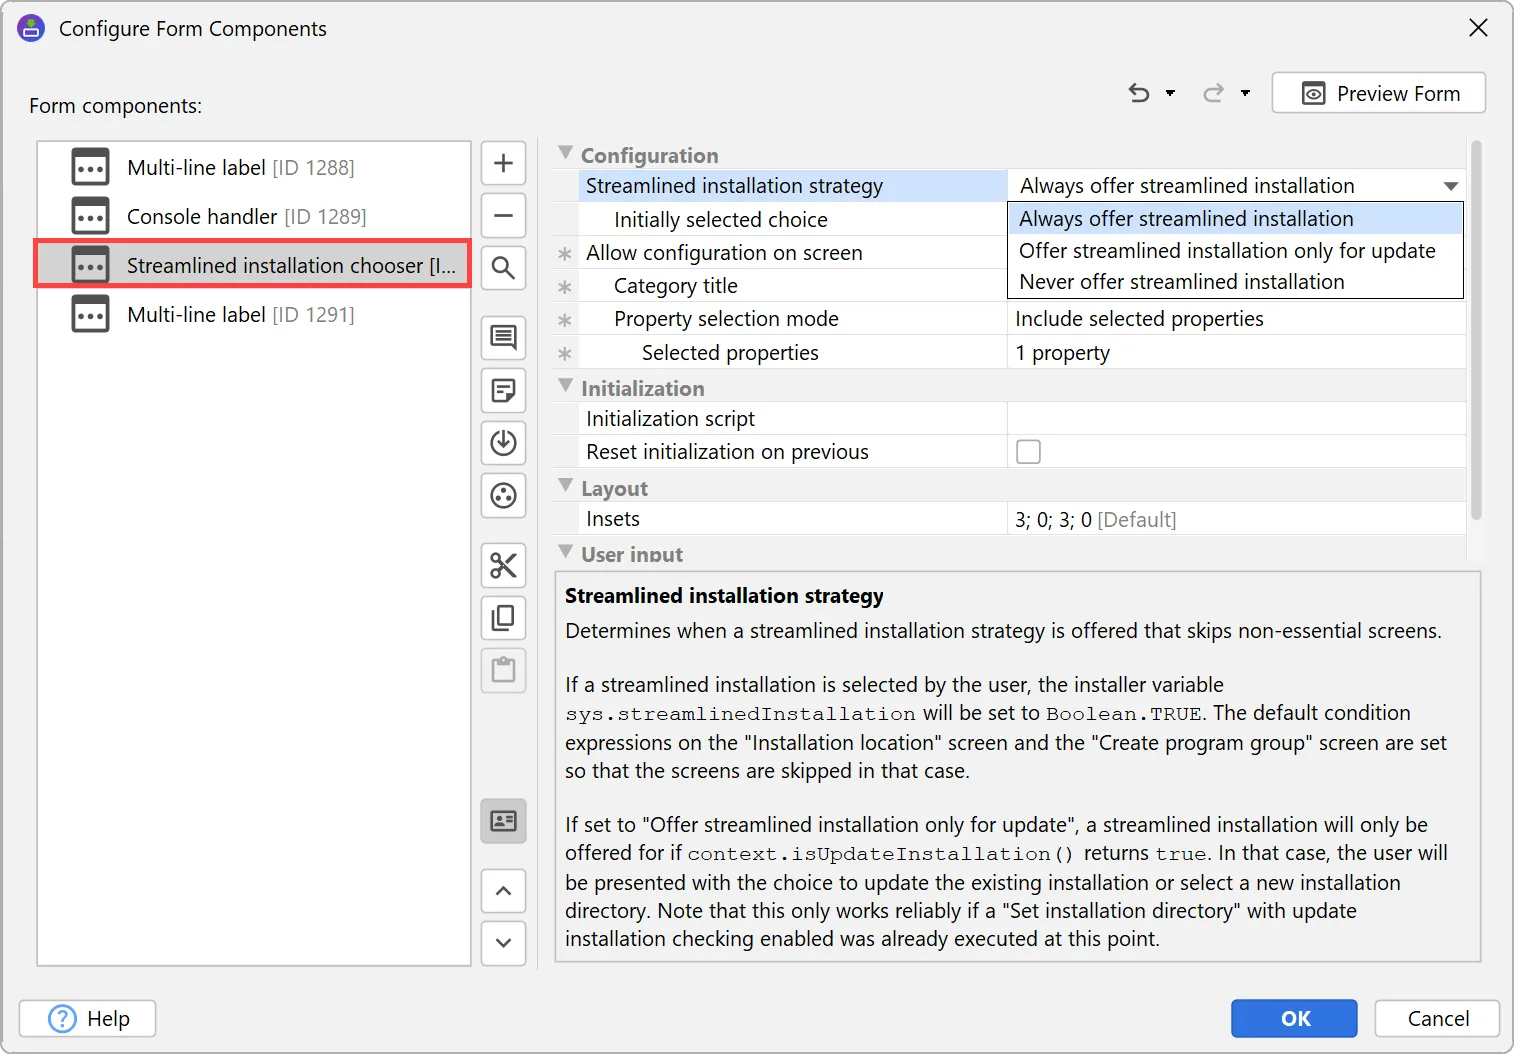
install4j 12 extends the "Update alert" form component into a "Streamlined installation chooser" form component with two modes for its
"Streamlined installation strategy" property.
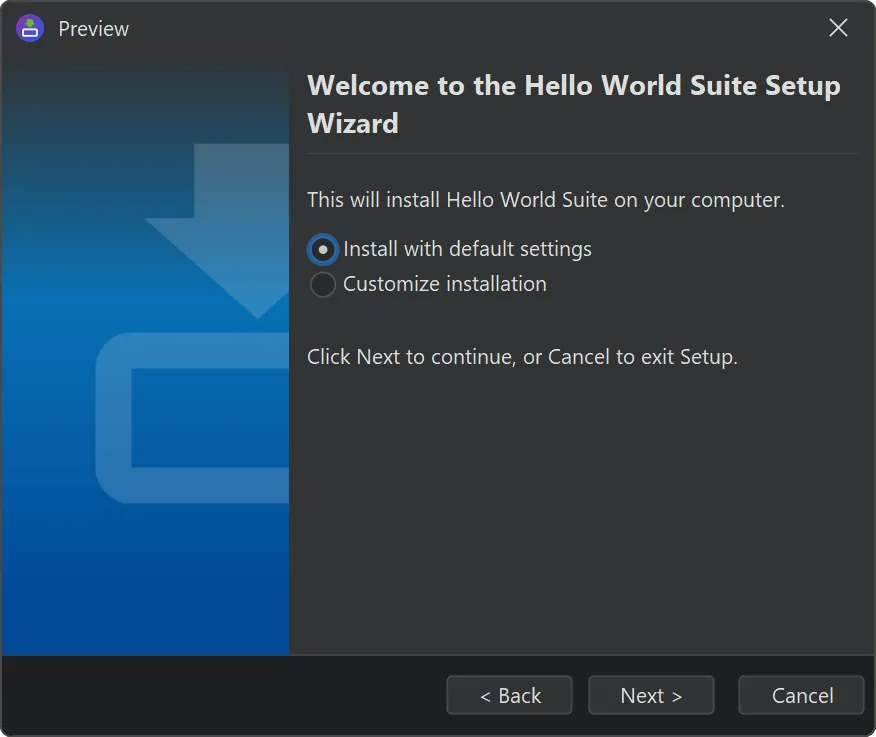
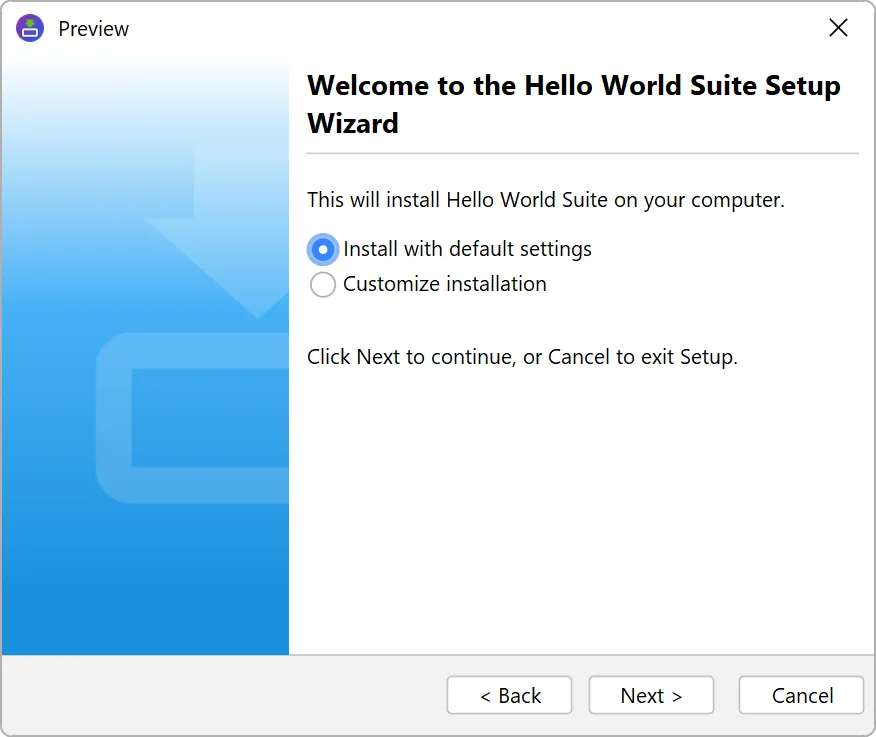
By default, streamlining offers either a "default" installation or a "customized" installation. The result of the user selection is saved
to the boolean installer variable sys.streamlinedInstallation. That variable can be used to conditionally execute other
screens and actions. By default, several screens in install4j have such condition expressions when you add them.
Alternatively, you can choose to only alert the user for update installations and offer streamlining only in that case. This corresponds to
the behavior in previous versions of install4j.
Support for renaming for RPM and DEB media files has been added.
Whenever you rename the "Short name" on the "General Settings->Application Info" step, your package name will change, and upgrades will no
longer work, leaving old versions installed.
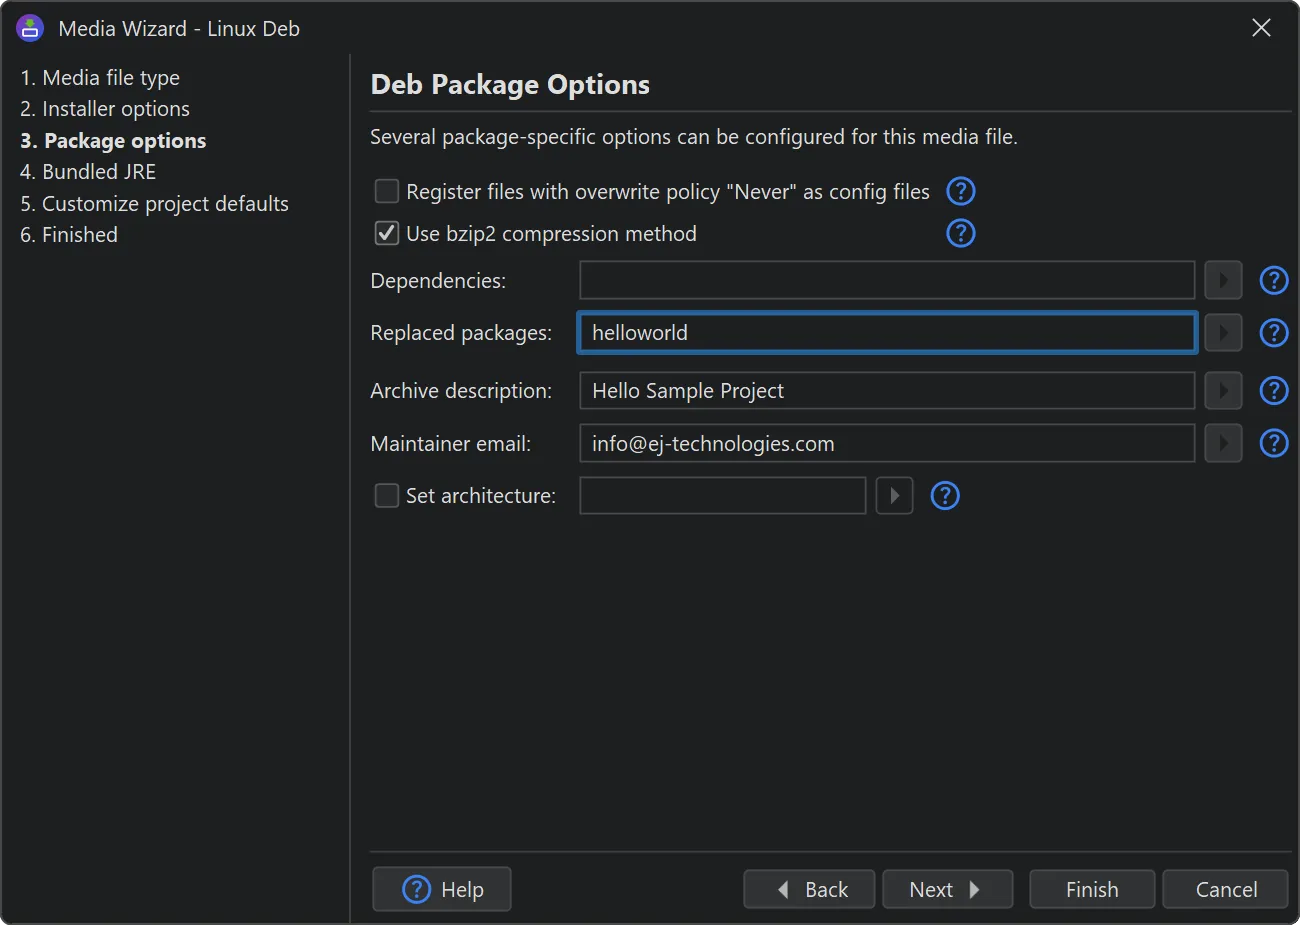
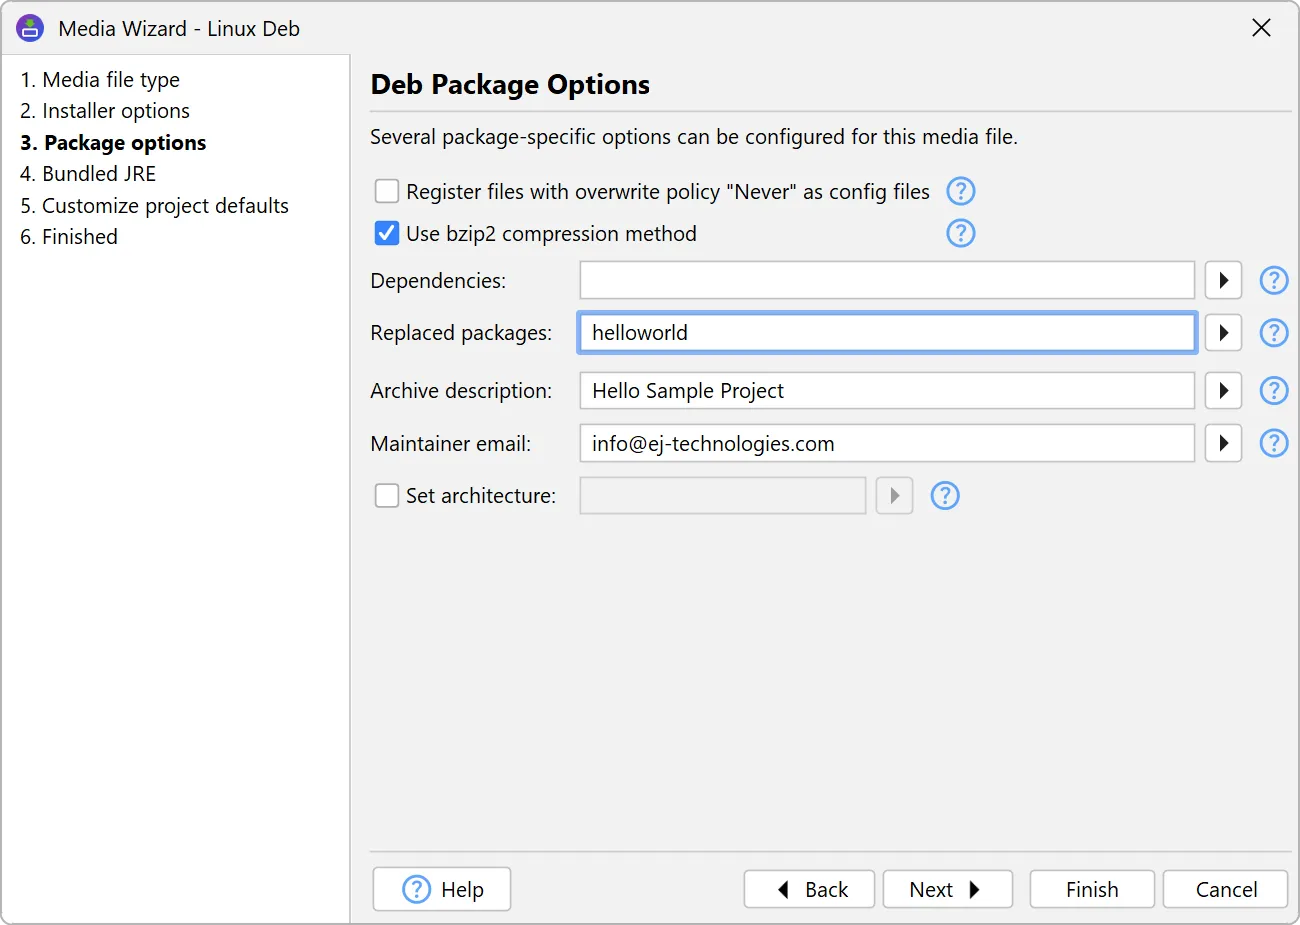
With the new "Replaced packages" option in the "Package options" step of the media wizards for RPM and DEB media files, you can
specify a comma-separated list of package names that should be removed when the package is installed.
A JDK provider for IBM Semeru was added. Semeru runtimes are
IBM-branded OpenJ9 JDKs. You can now select these JDKs for bundling on the "General Settings->JRE Bundles" step.
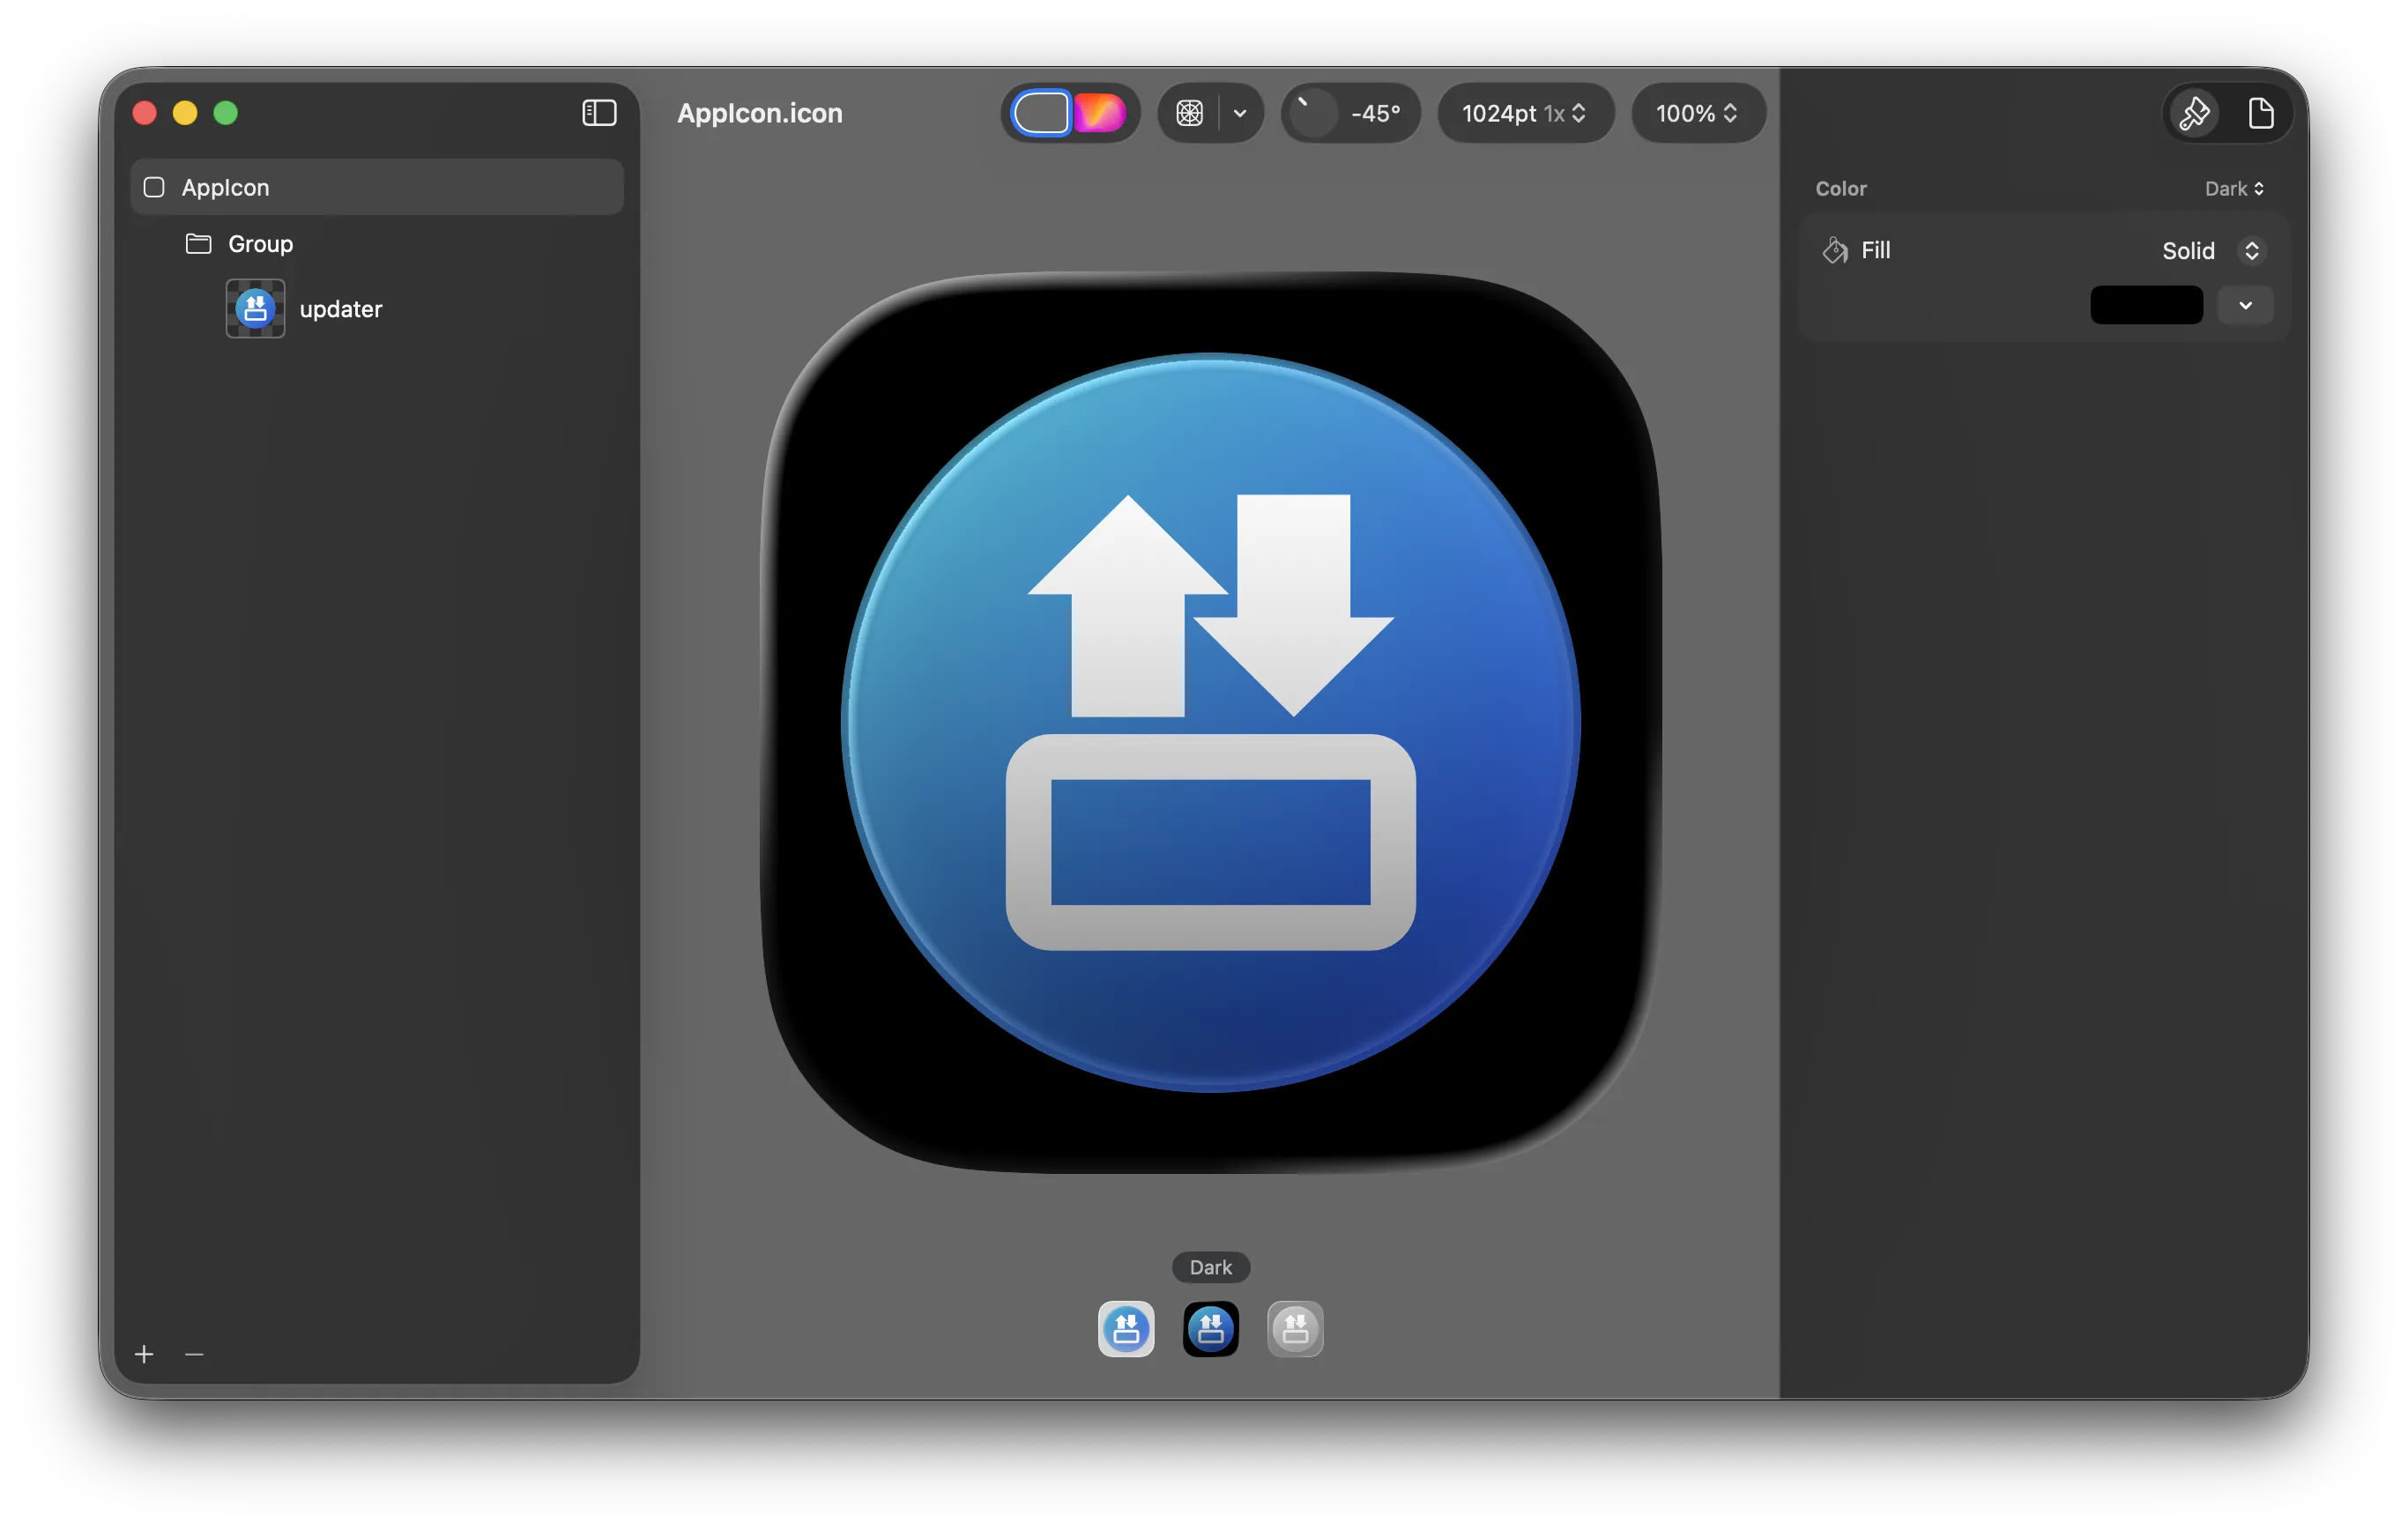
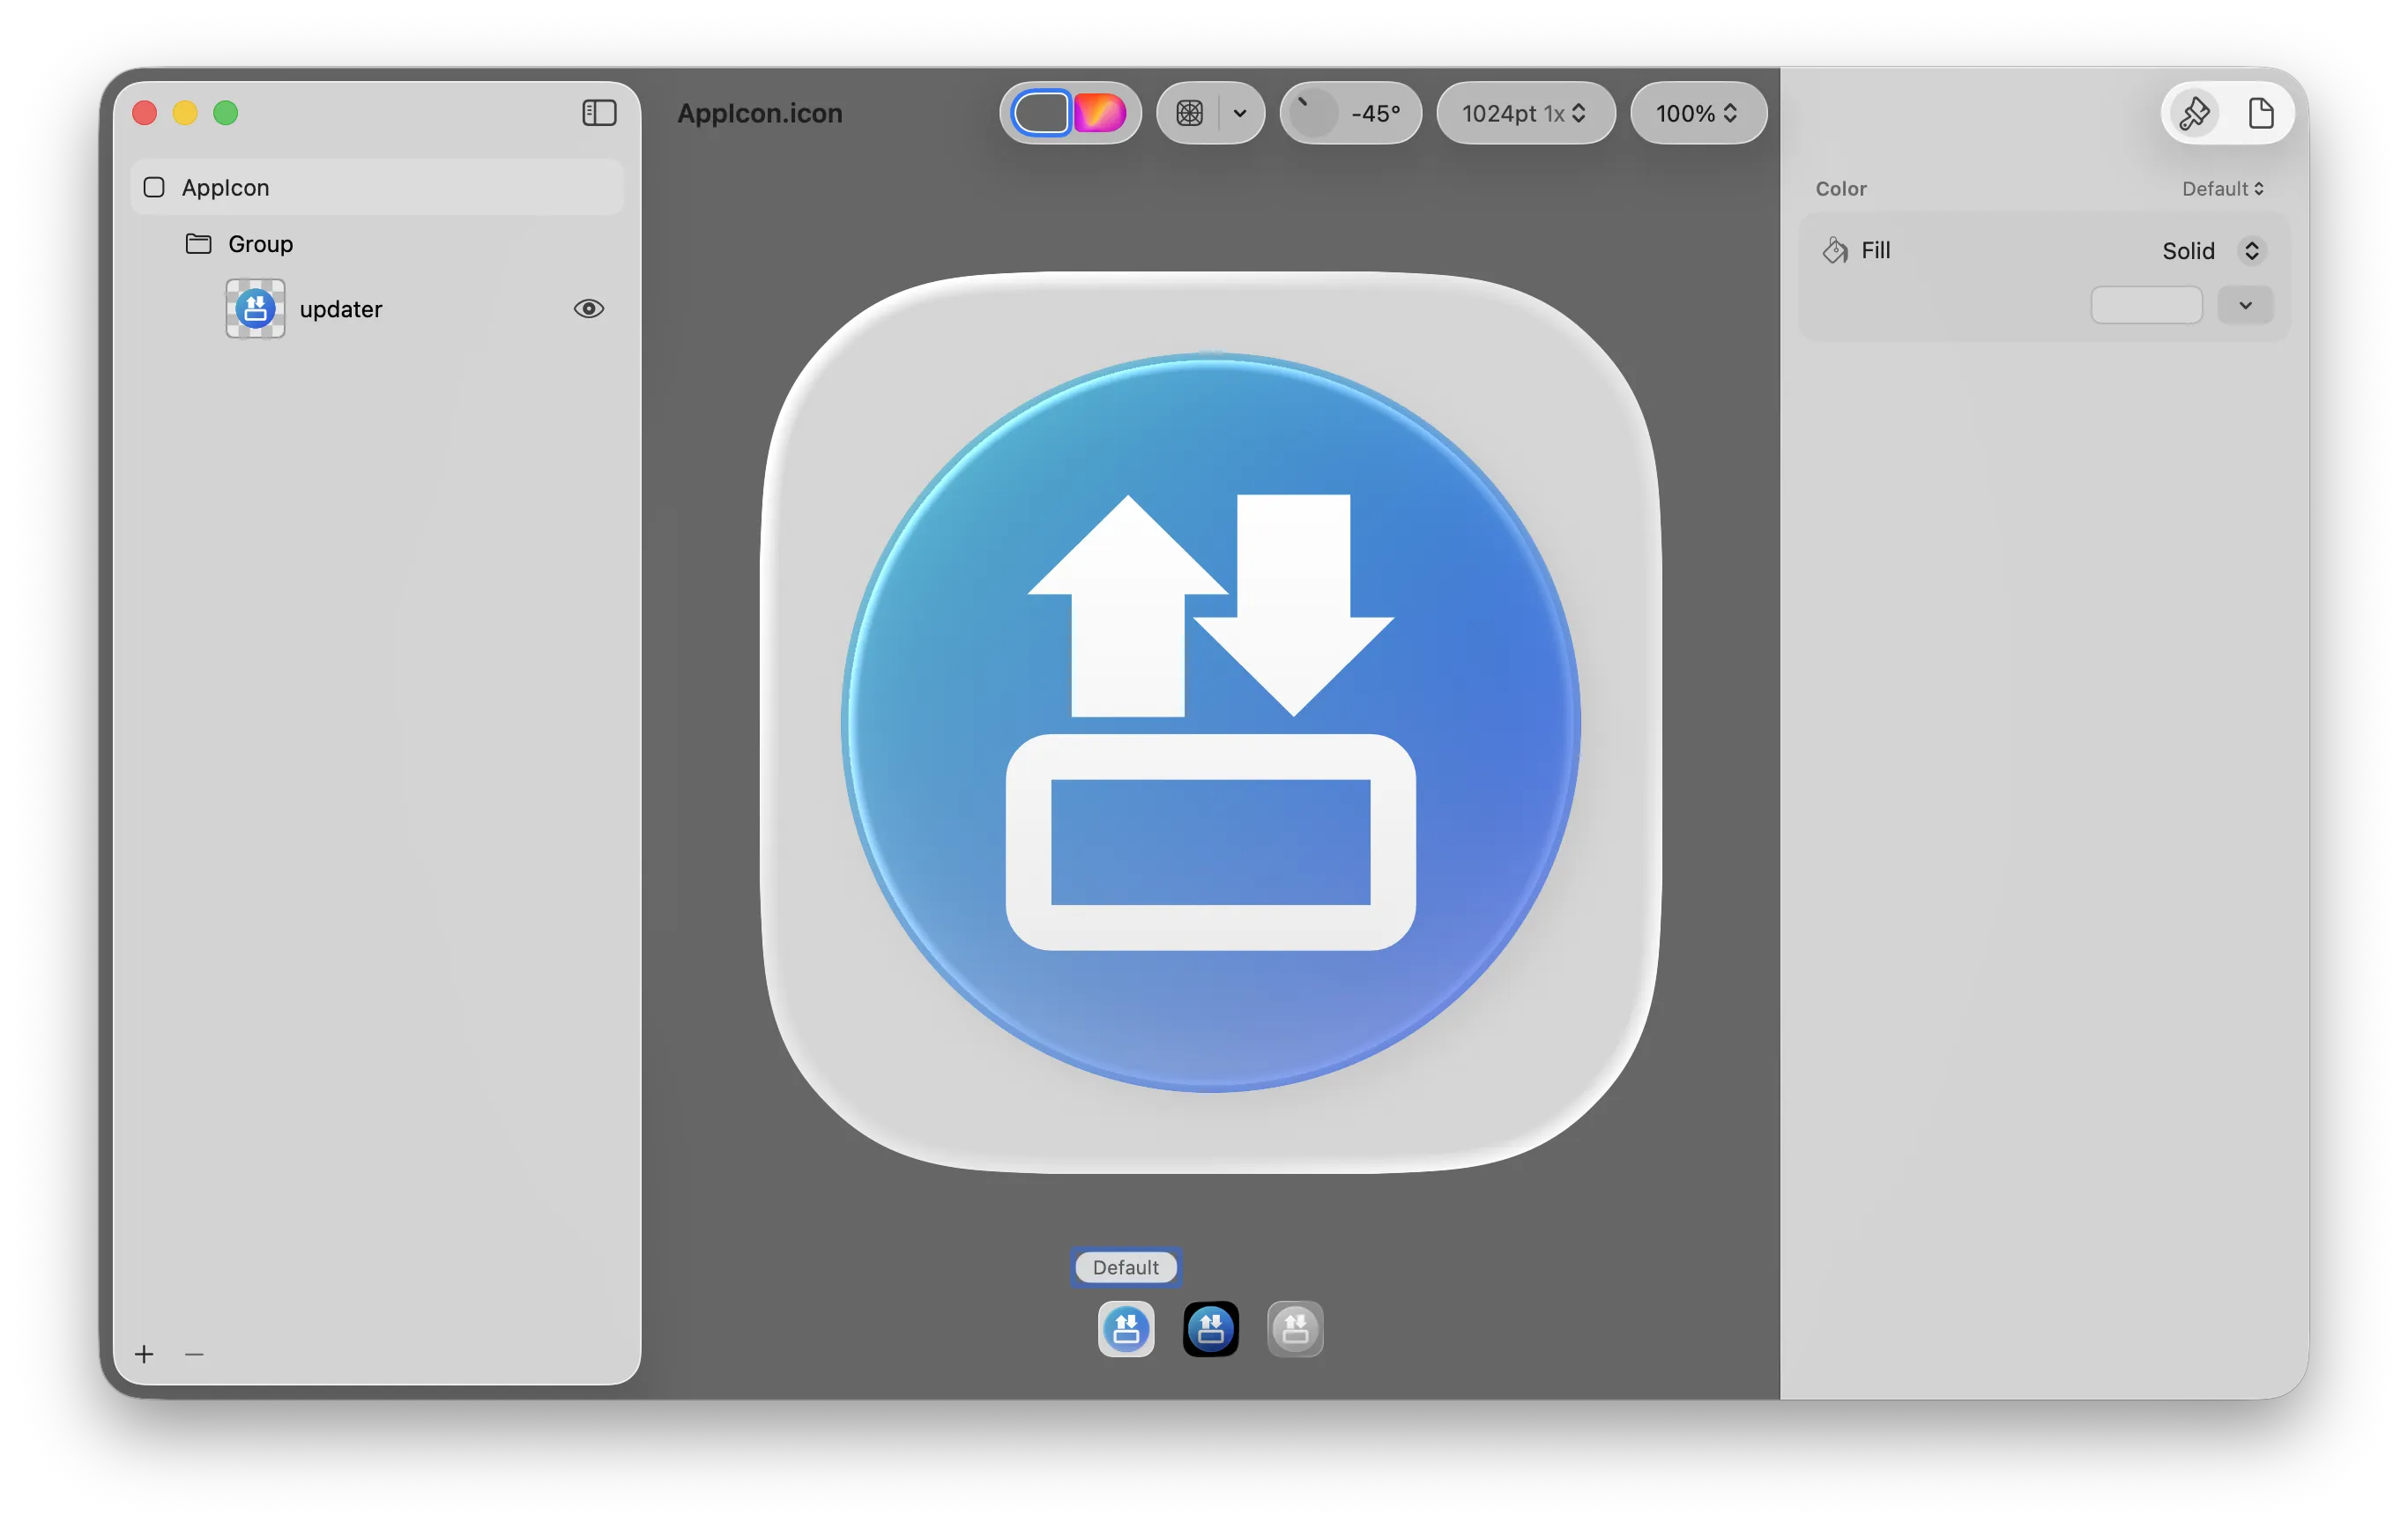
Support for the new Apple .icon bundles was added.
macOS 26 ships with a new "Icon Composer" app allowing you to design icons with different transparency layers that work well with
the new icon styles in that release. While install4j cannot use the output of that app directly, it can use the .car resource archive
that is created when the icon is compiled for an Xcode project.
To assist with the conversion of .icon files into .car and .icns files, a new command line utility
iconcompiler has been added. It only runs on macOS and requires Xcode 26 or newer. Use
"Project->Command Line Tools->Reveal Command Line Tools in Finder" to find the executable in your install4j installation.
Since you should always include an .icns file in addition to the .car file in your app bundle, there is no separate entry
for the .car file in install4j. Instead, install4j will pick up a .car file with the same name beside the specified
.icns file automatically.
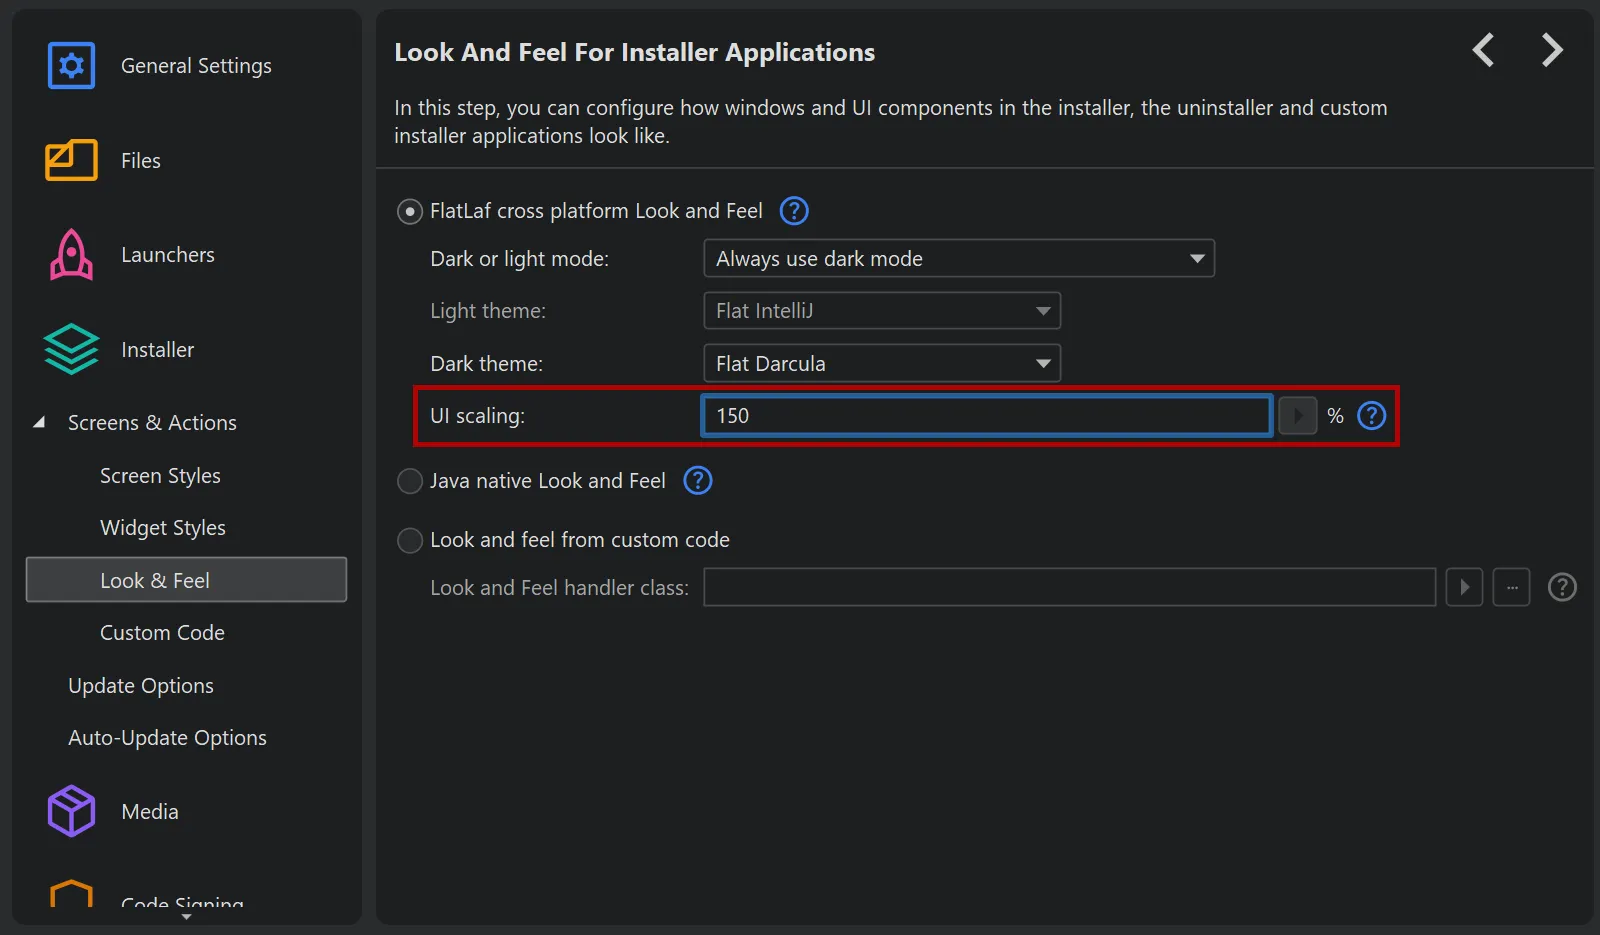
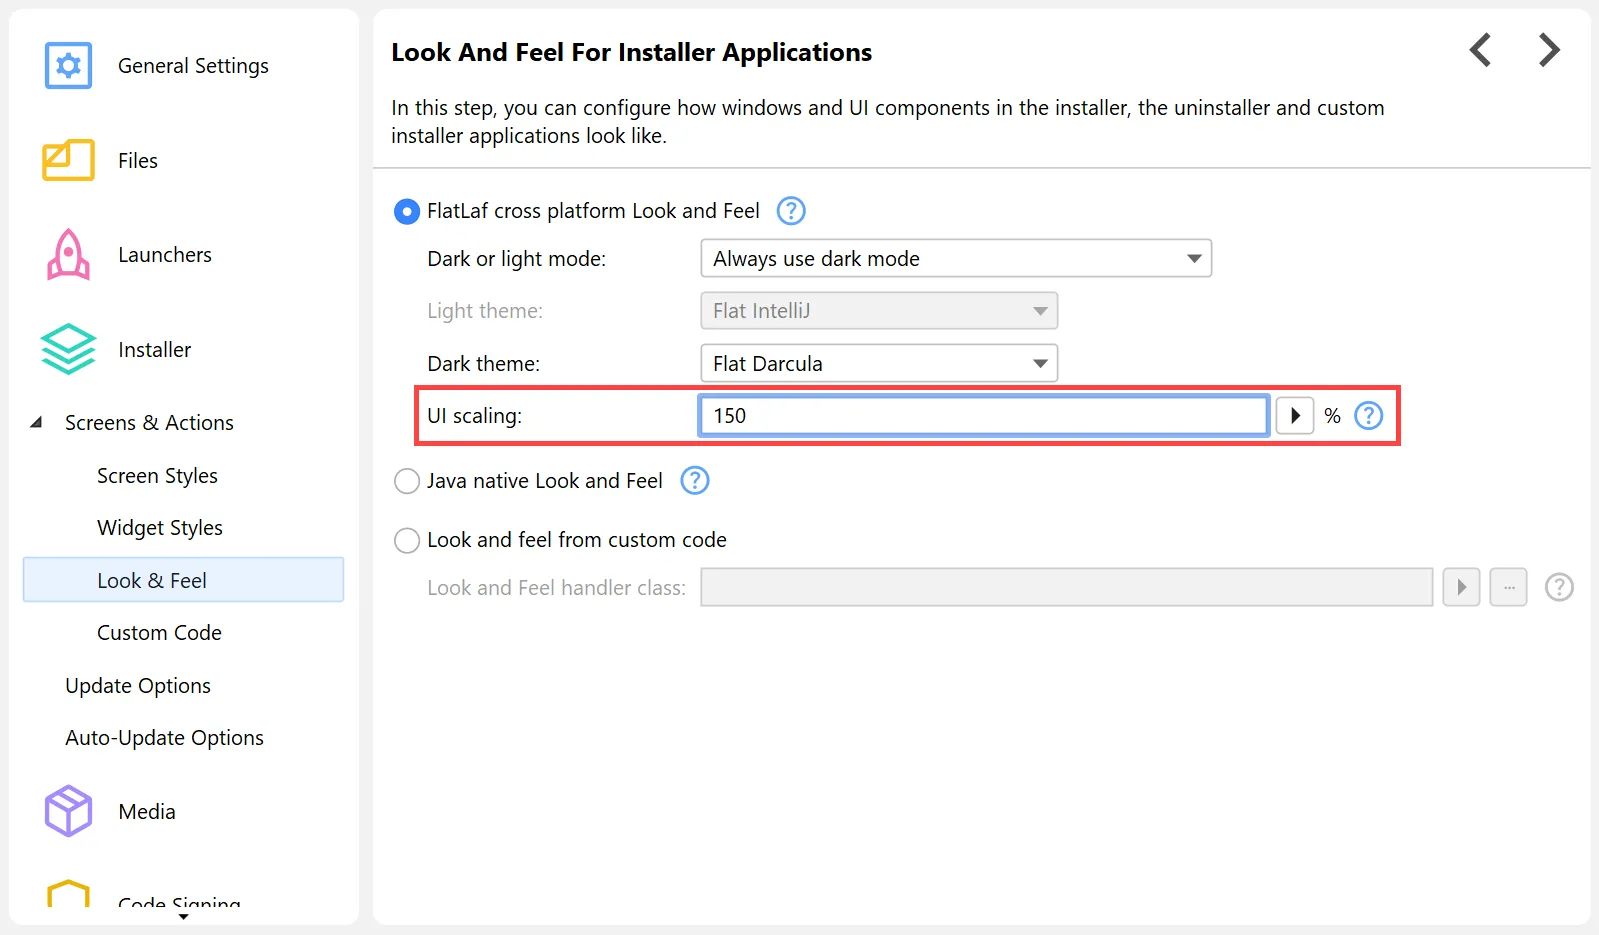
UI scaling has been implemented for installer applications.
You can now scale the size of installer applications by an arbitrary percentage on the
"Installer->Look & Feel" step.
Scaling will be applied to all widgets, icons, and fonts, here with a 150% enlargement:
Support for choosing the JRE on the command line has been added.
You can explicitly set the JRE used by installers and generated launchers with the VM parameter -jvm=/path/to/jreBundle.
This is supported in .vmoptions files and with -J-jvm=... as command line arguments.
install4j beans now support composition. If you develop your own beans for screens, actions, and form components, you can
take advantage of the new bean composition feature.
A property of the bean can now be a bean with a separate BeanInfo itself. In the BeanInfo of the parent bean,
the child bean is registered with the new com.install4j.api.beaninfo.Install4JPropertyDescriptor.setNestedBean method.
With #setNestedBeanCategory you can set a category for all properties of the nested bean, and with
#setNestedBeanPropertyFilter you can only include selected properties.
Conversion for installer variable values from string values has been added. On the command line and in response file
variables, you do not have to specify variableName$Boolean=true or variableName$Integer=1
anymore, but variableName=true or variableName=1 will work correctly for form components that are
bound to these variables and expect boolean or integer values. Enum values are also supported for string conversion.
Notable efficiency improvements in install4j 12 include
For a discussion of breaking changes when migrating from install4j 10, please see
this blog post.
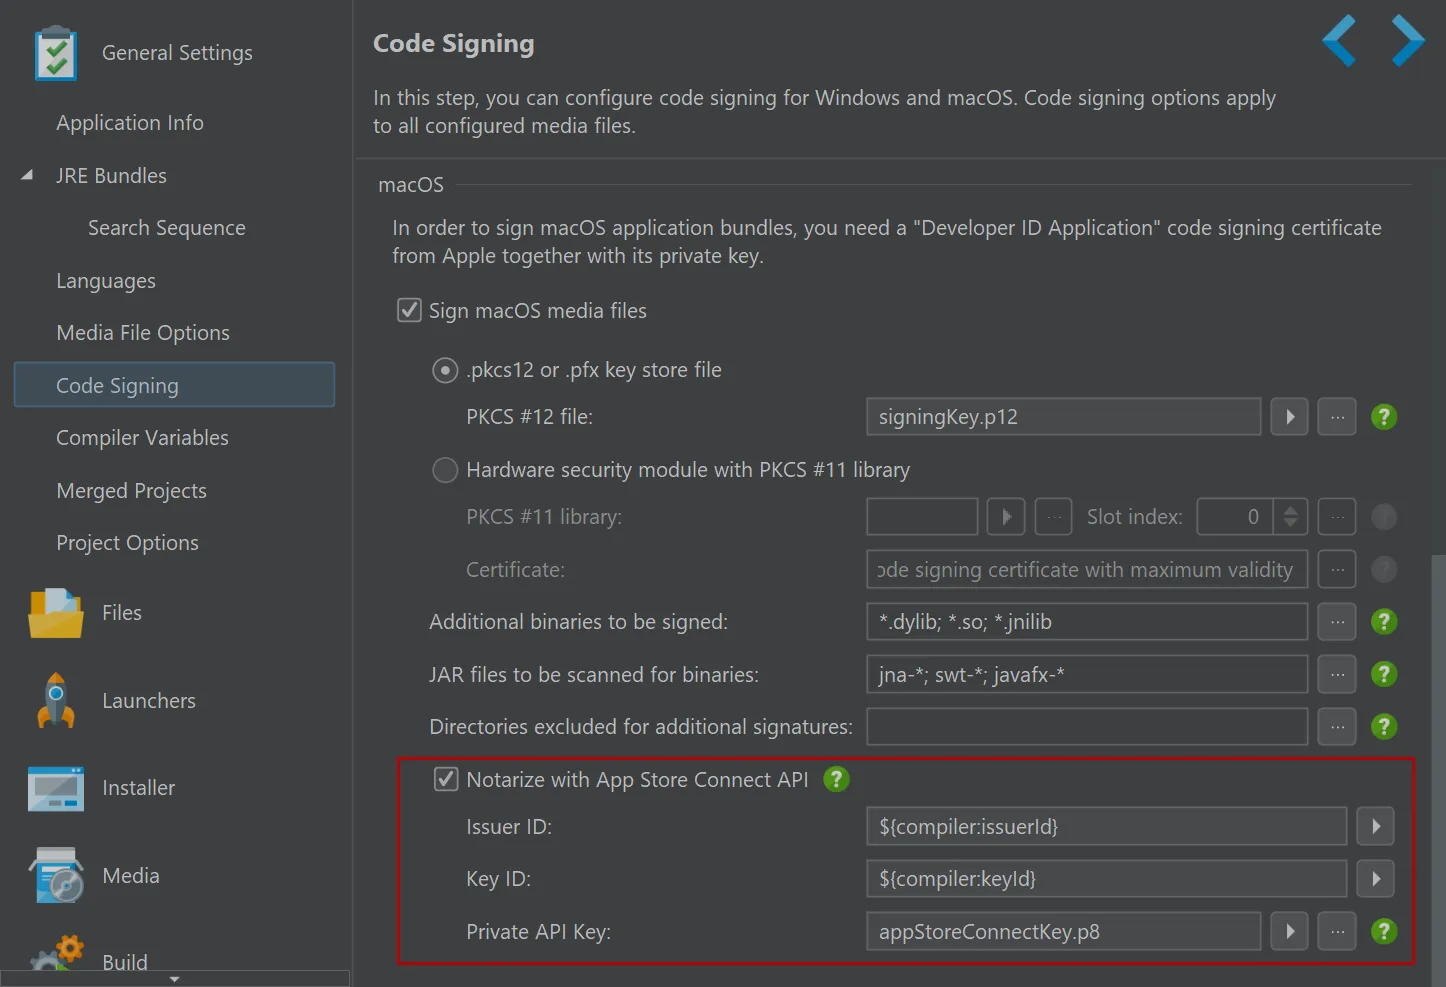
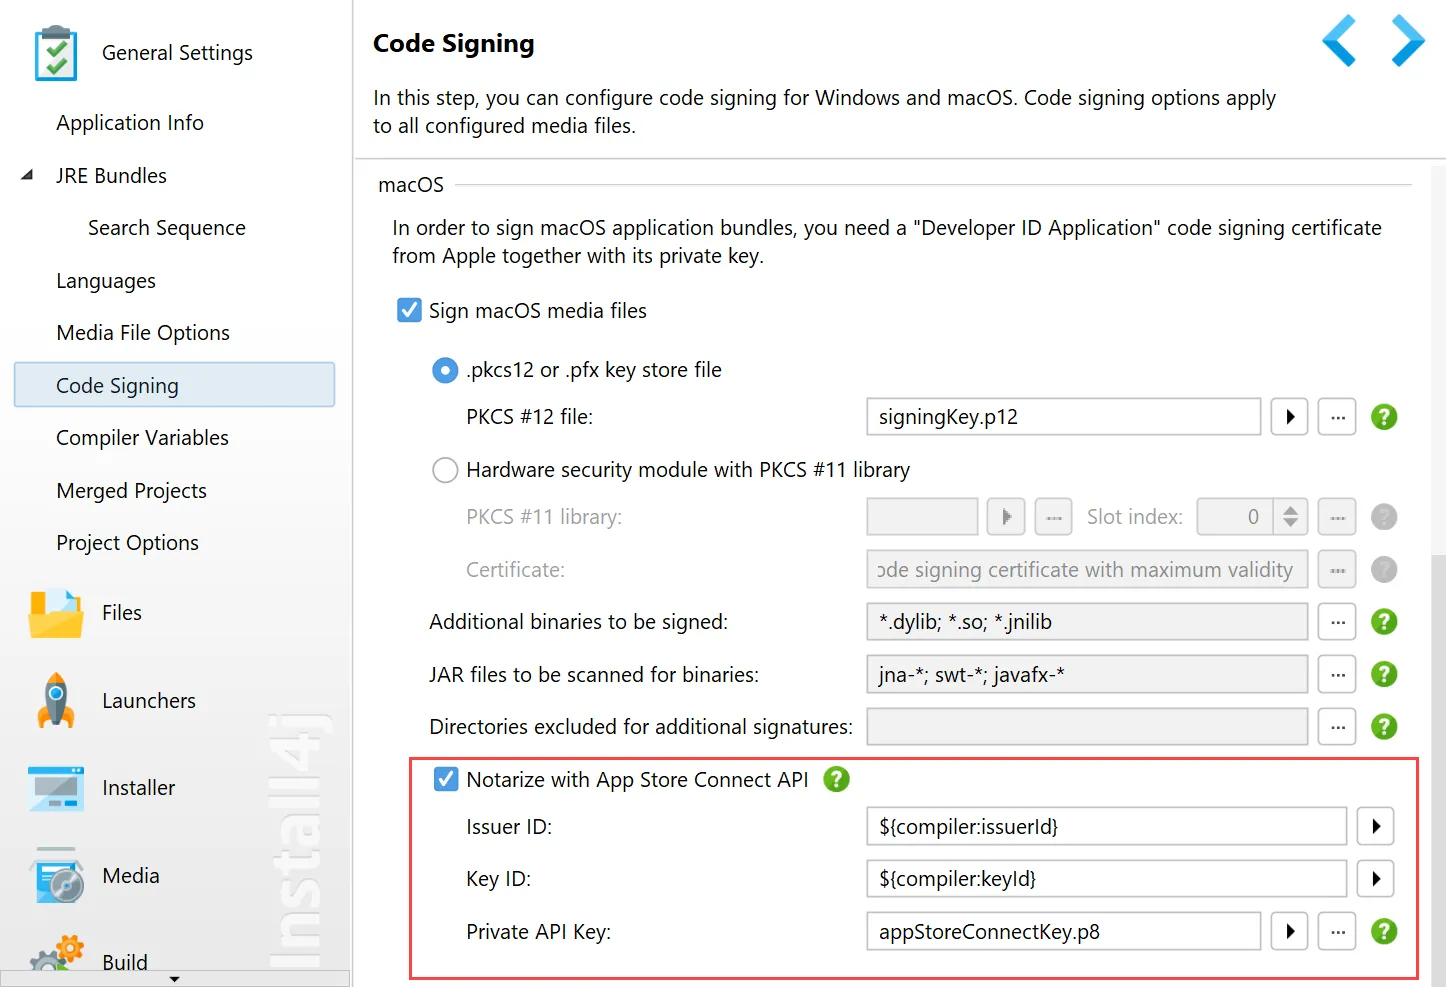
macOS notarization is now cross-platform. Previously, notarization required macOS, either for building or for manual post-processing.
From install4j 11 onwards, install4j can perform the notarization process on any platform.
This allows install4j builds to be fully cross-platform.
The App Store Connect API required for notarization operations is now configured with the issuer ID, the key ID and the private API key that
are obtained from App Store Connect.
PKCS #11 code signing improvements. The PKCS #11 implementation has been rewritten from scratch without the use of the SunPKCS11 Java
Security Provider. This enables the implementation of more features for PKCS #11 and provides better error messages in case of configuration
problems.
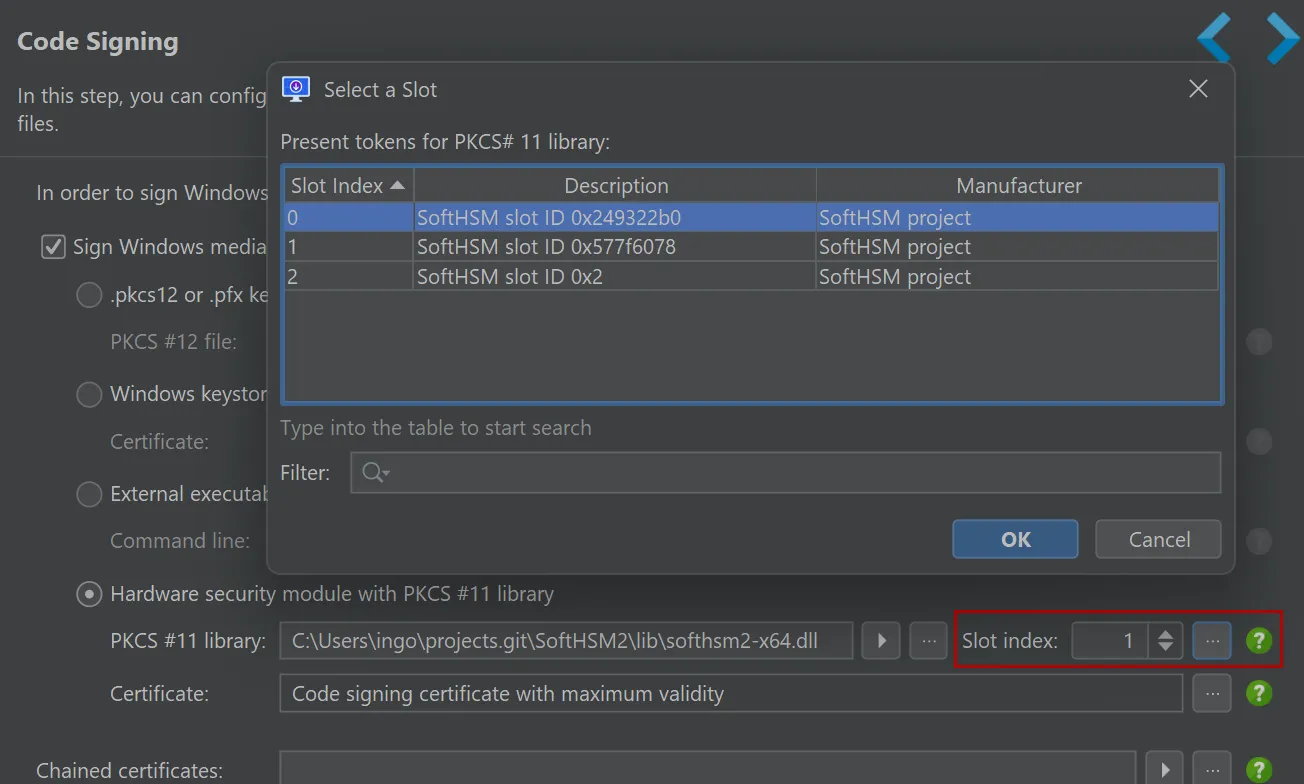
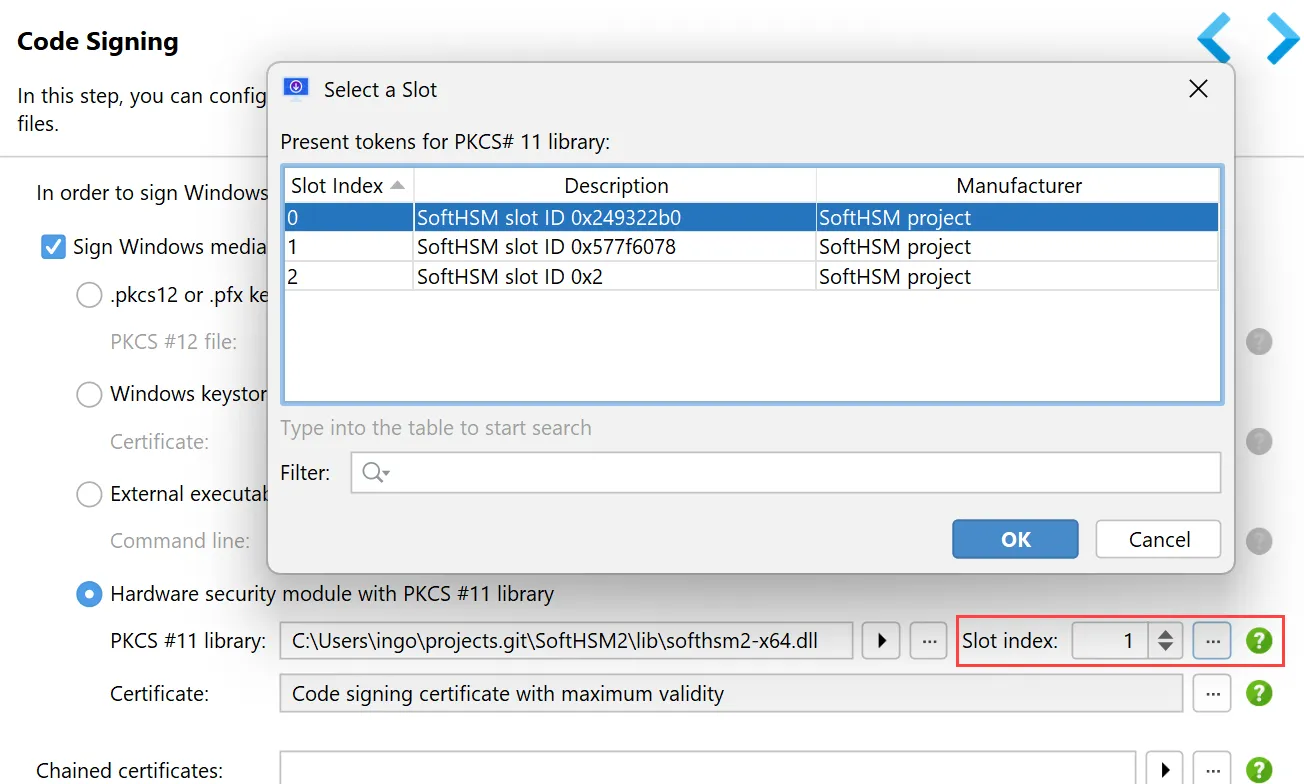
In this release, we added a selection dialog for the PKCS #11 slot index that lists HSM descriptions and manufacturers. This is
important if you have multiple HSMs.
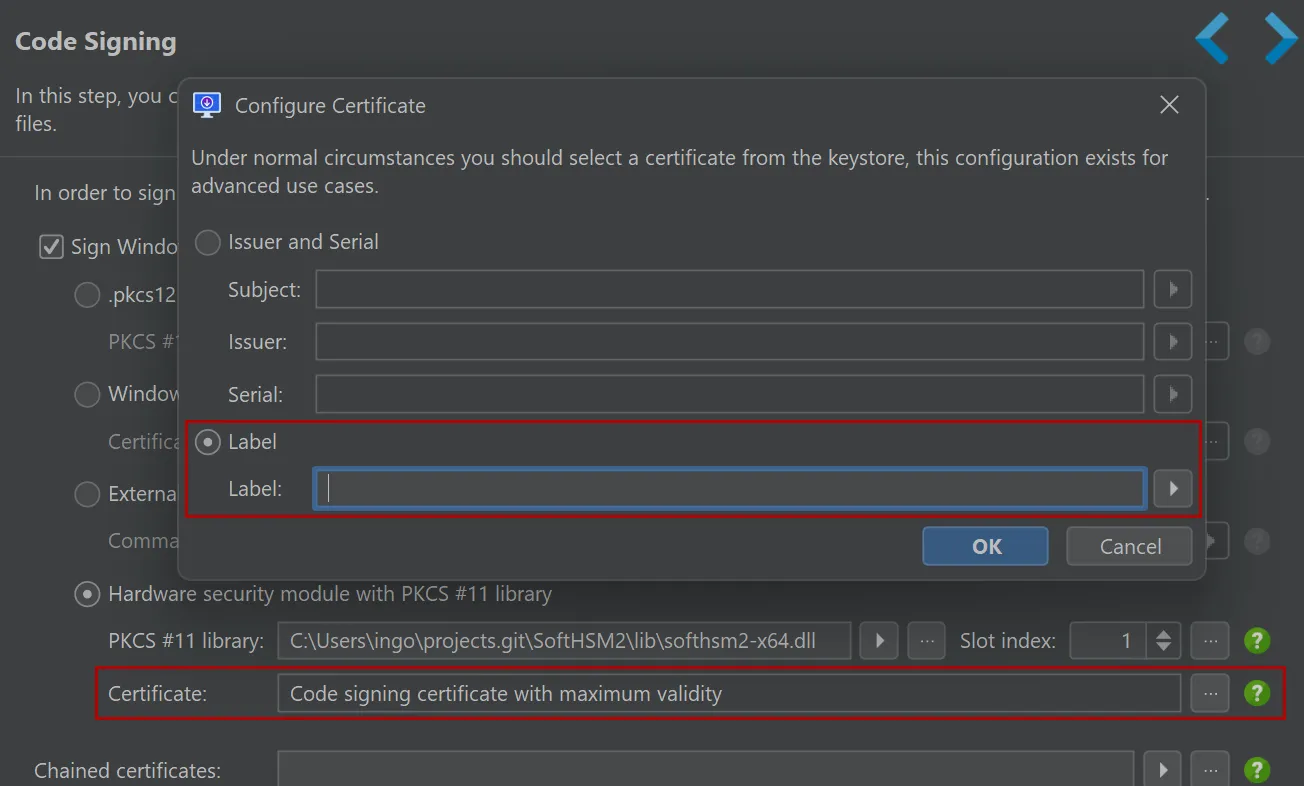
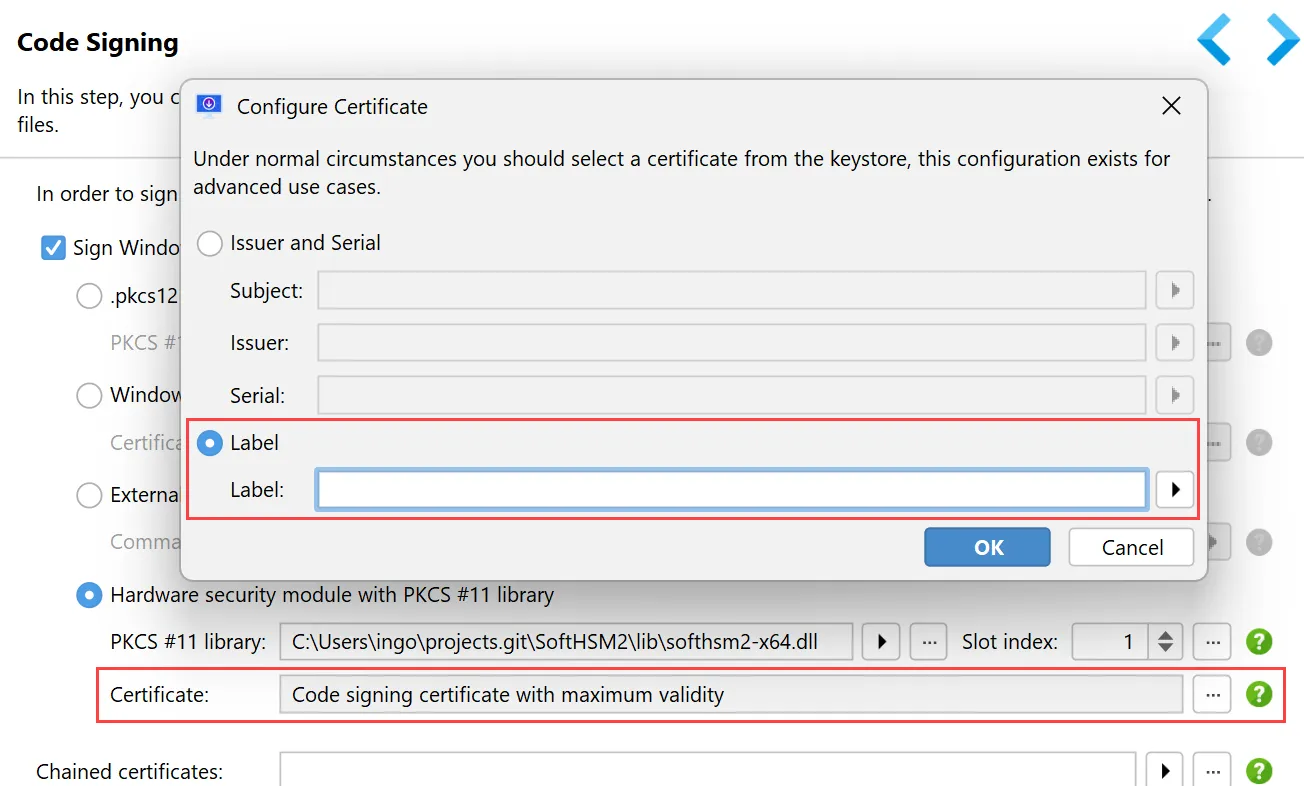
In install4j 11, you can now select a certificate by its label, as well as by its issuer and serial number
Also, if you leave the certificate selection empty, install4j will automatically select the code signing certificate with the longest
validity period.
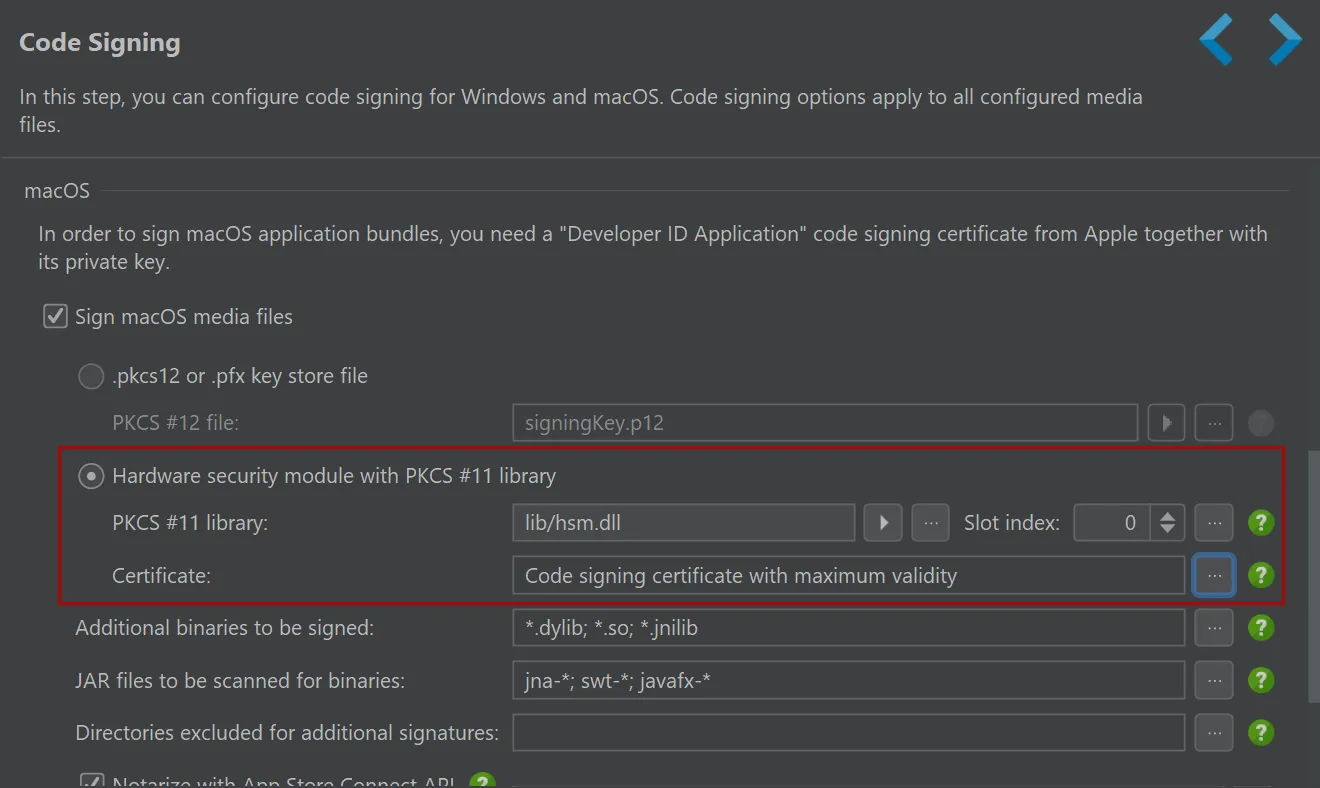
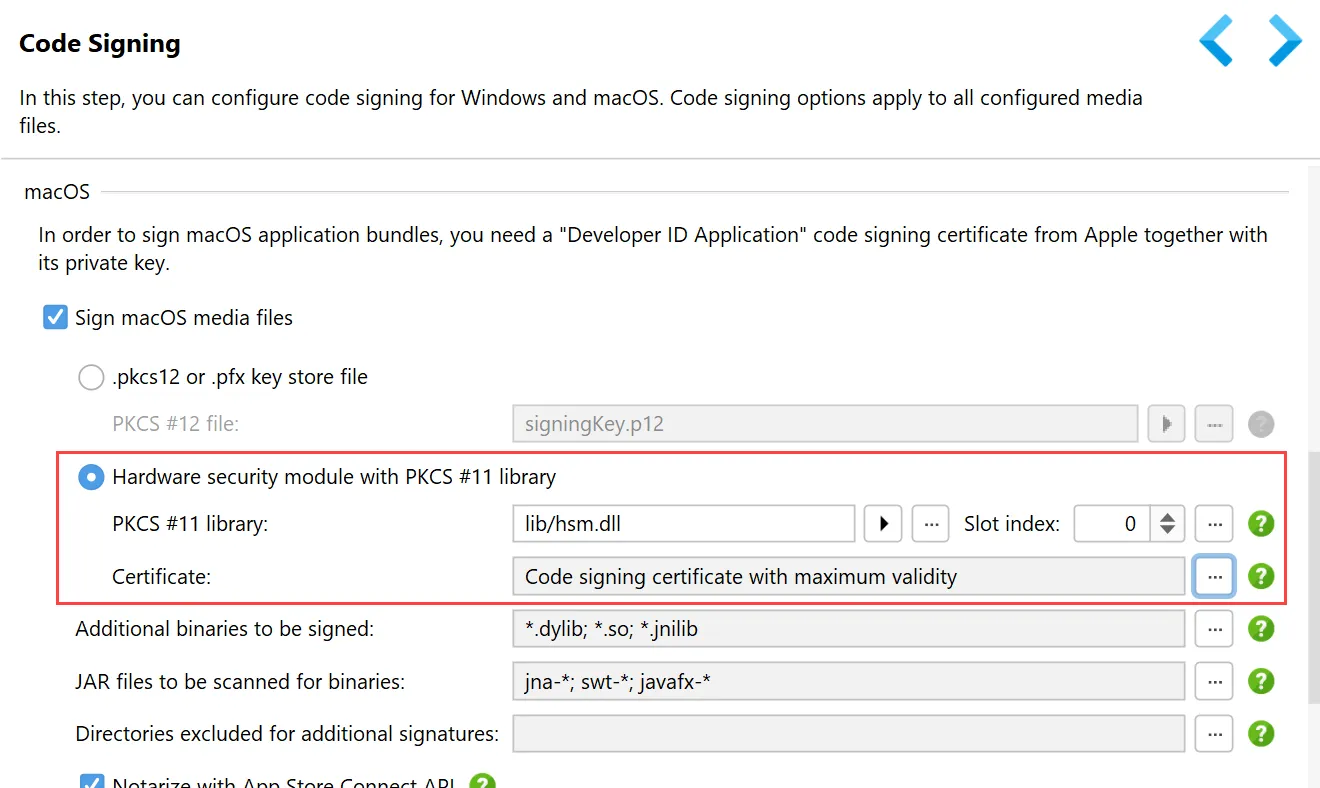
Up to install4j 11, PKCS #11 was only available for Windows code signing. Now there is a PKCS #11 option for macOS code signing as well.
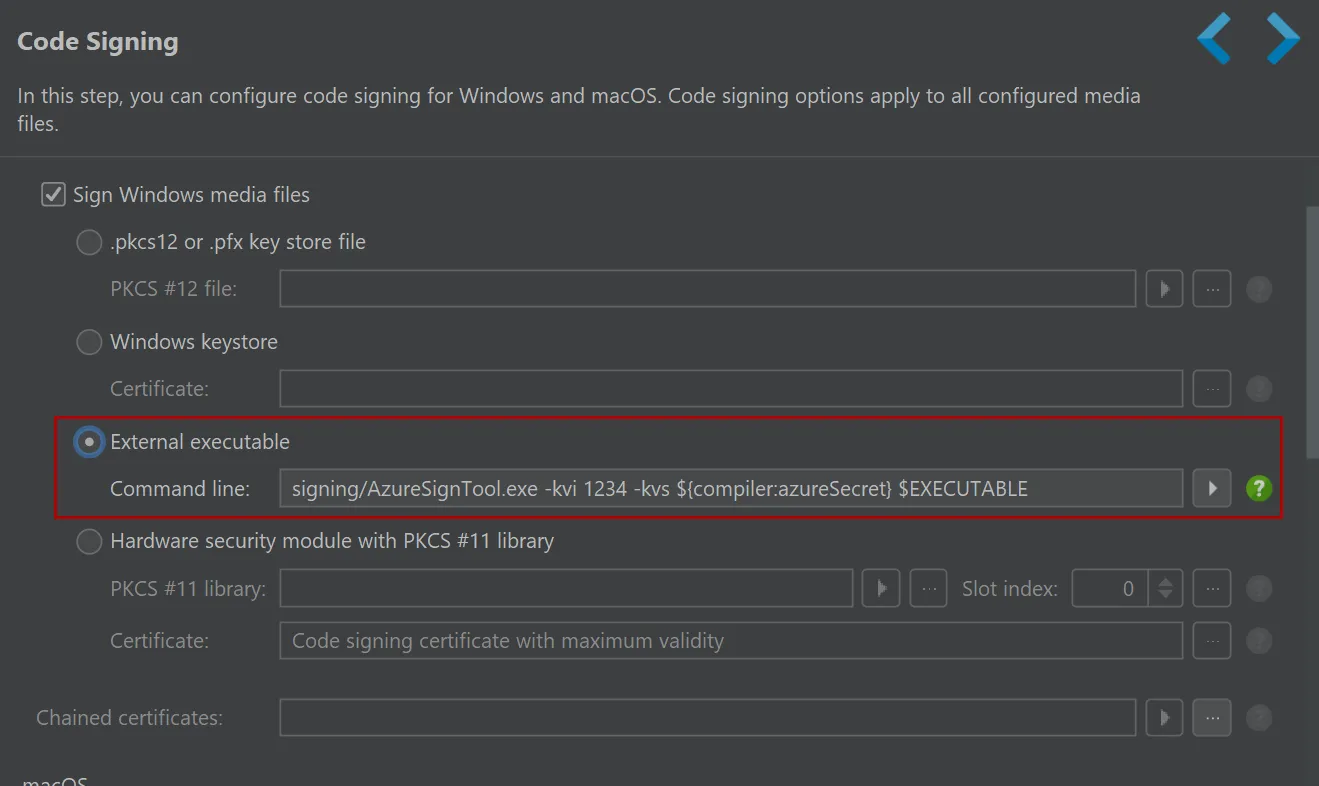
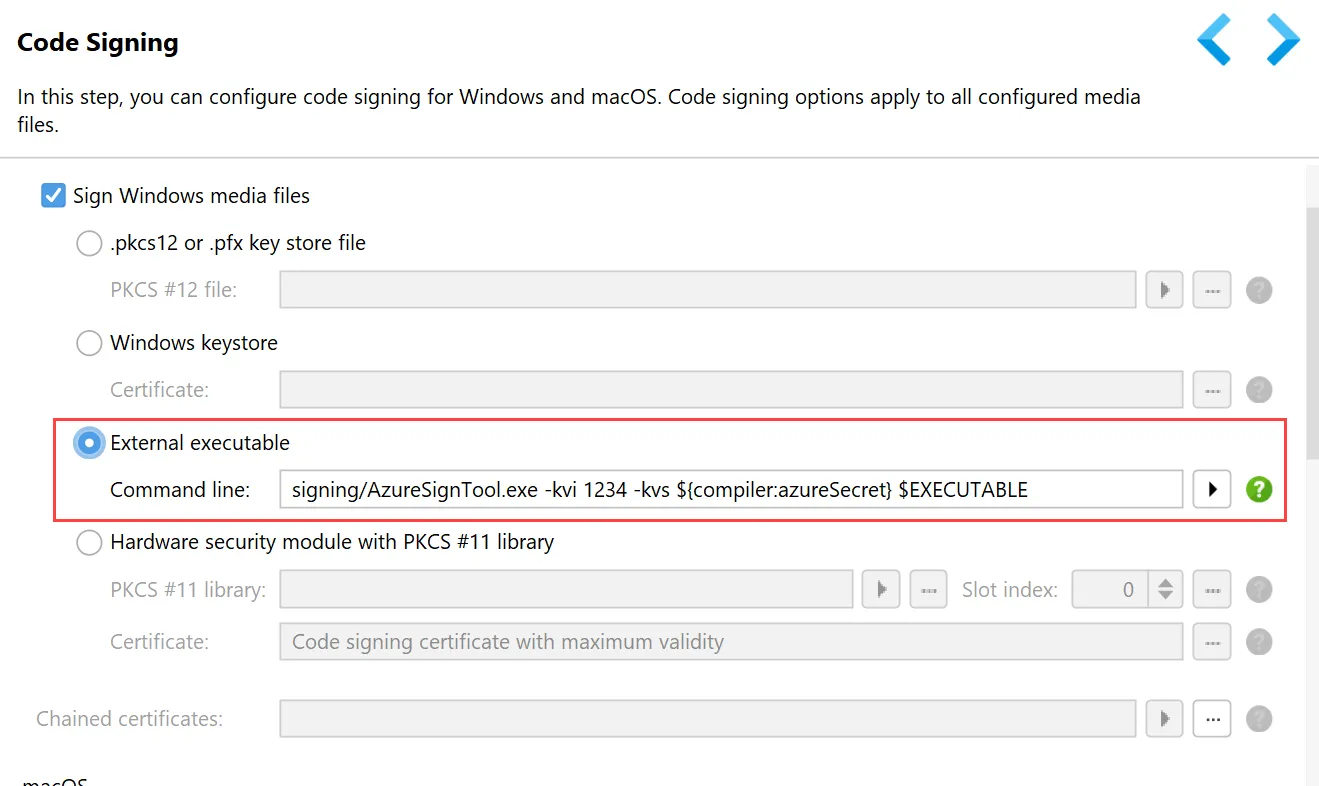
Windows code signing has been improved. Instead of configuring a code signing executable in the "Executable processing" step
in the media wizard for all Windows media files, you can now configure an executable like Azure Sign Tool
on the "General Settings → Code Signing" step. The command is called for each executable that has to be signed including the
generated launchers.
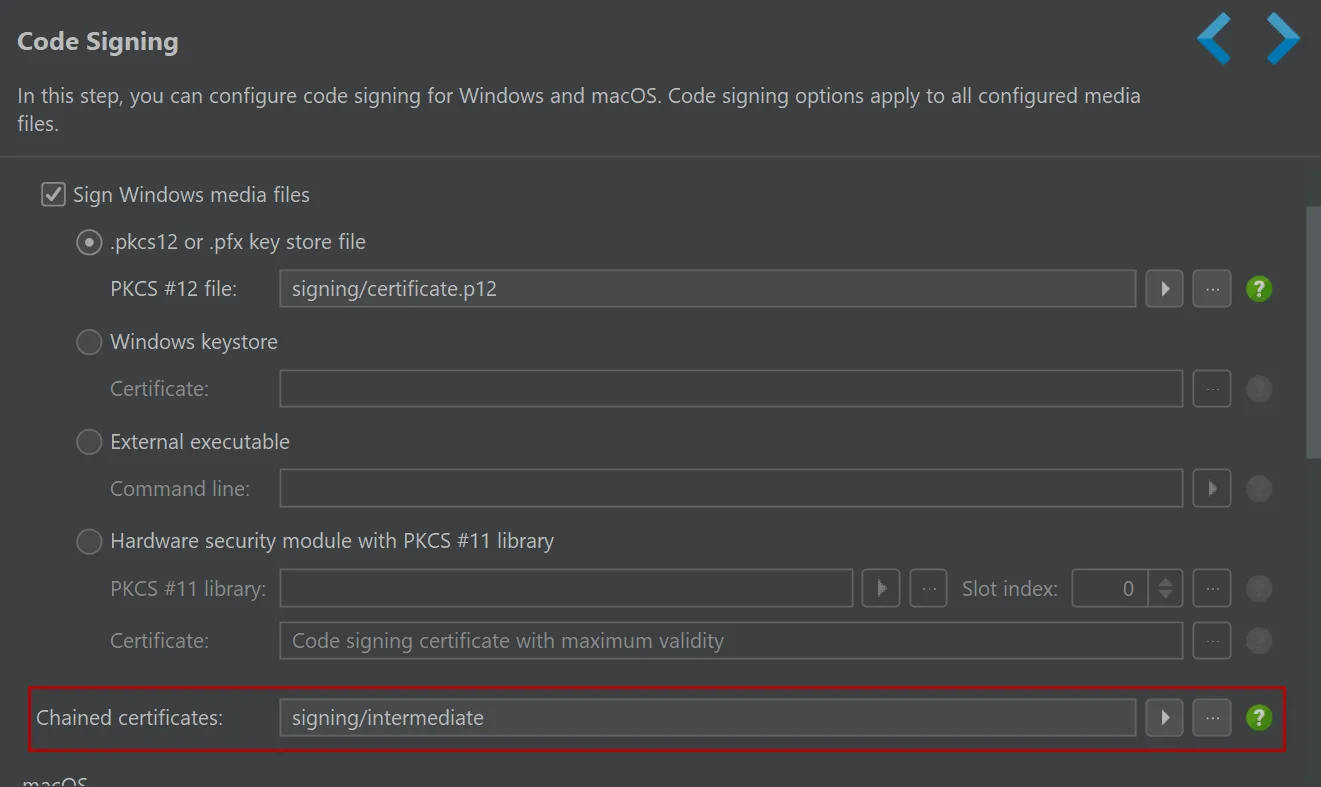
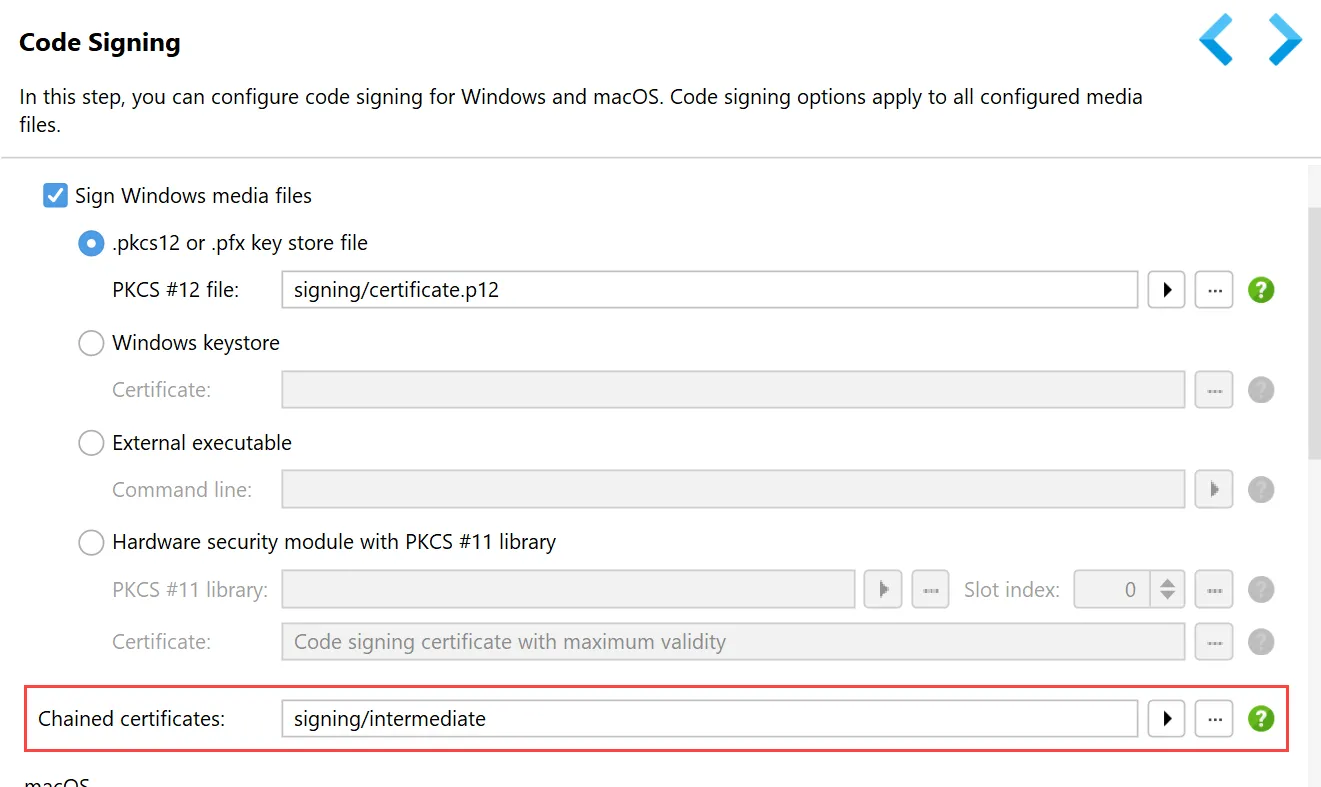
With the chained certificates directory, it is now possible to tell install4j about intermediate certificates that need to be taken
into account for code signing to establish the complete hierarchy of trust.
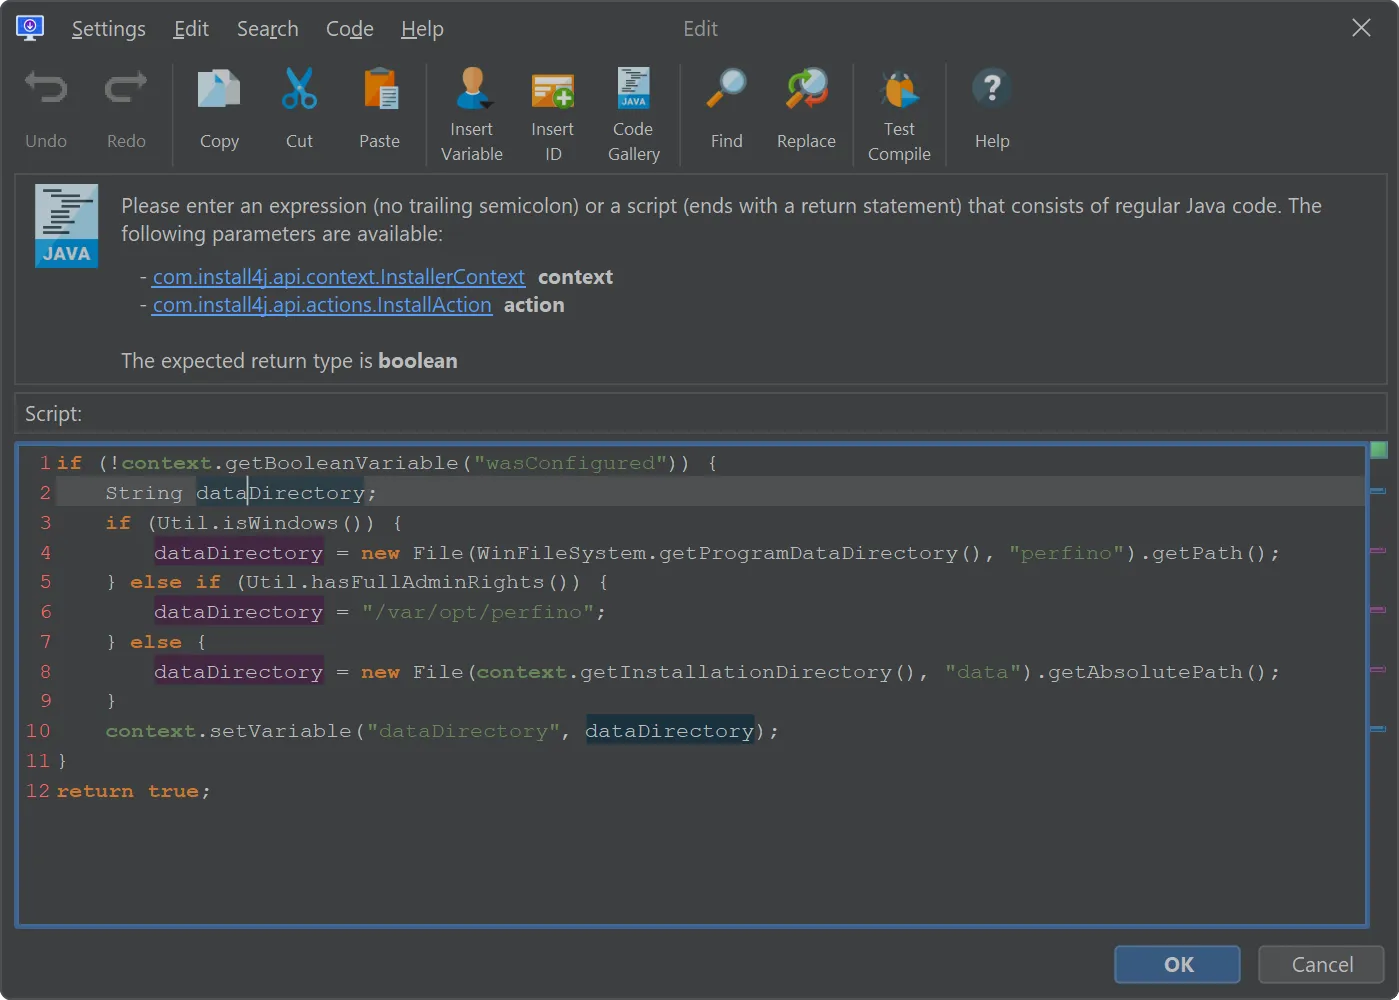
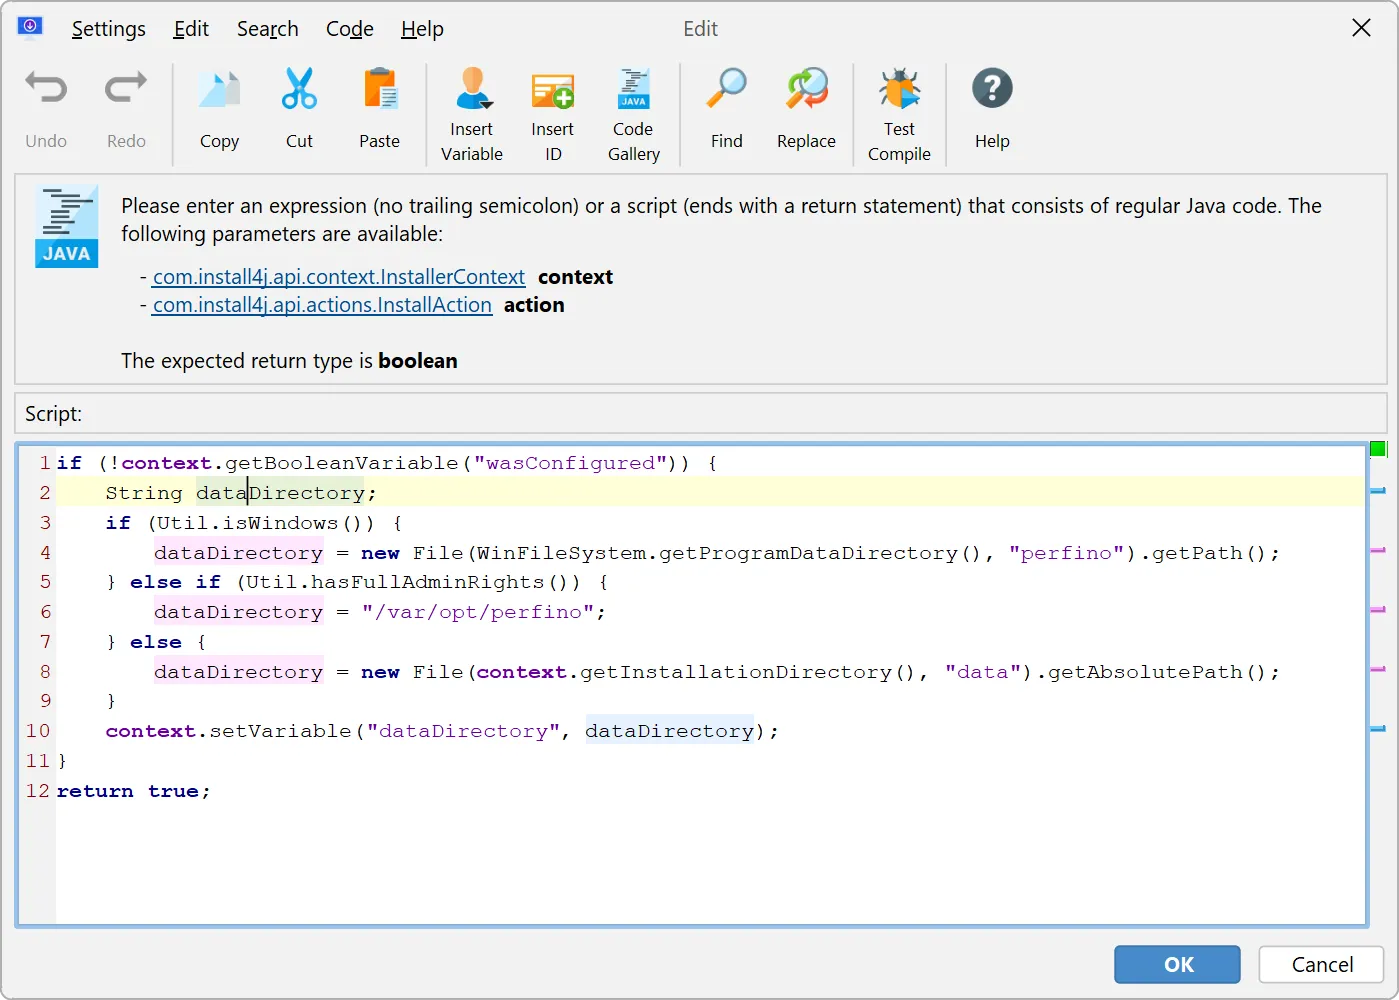
Major improvements in the script editor. When developing an installer with install4j, you usually make extensive use of the script editor.
Although the script editor previously included code completion and problem detection, it lacked many features that you
would expect from a modern IDE. In install4j 11, we implemented a lot of functionality to boost your productivity with install4j.
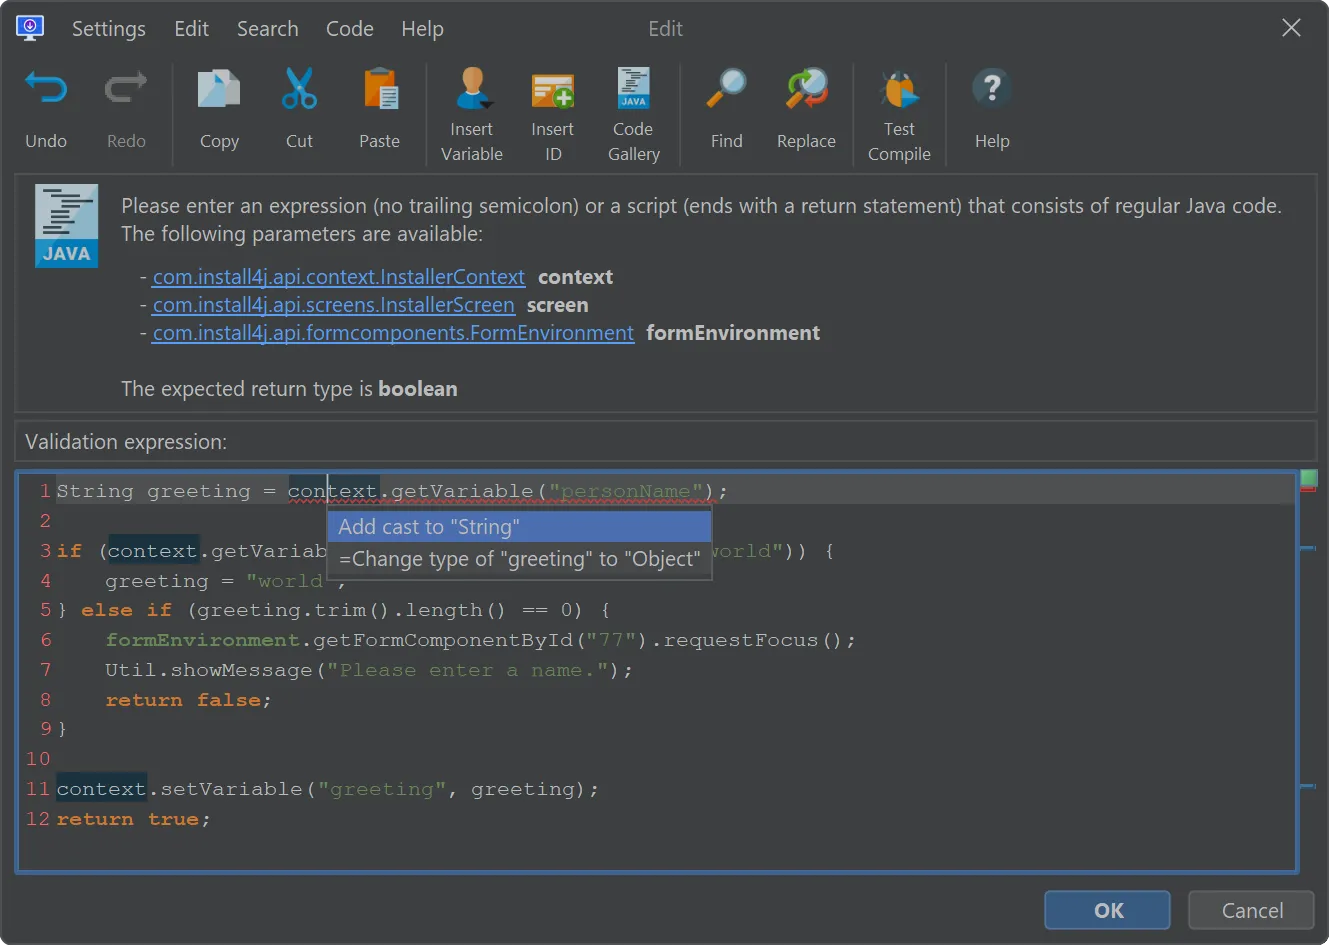
Caret highlights have been implemented in the script editor. Read and write access have different background colors, and the right
gutter shows occurrences that can be navigated to by clicking on them.
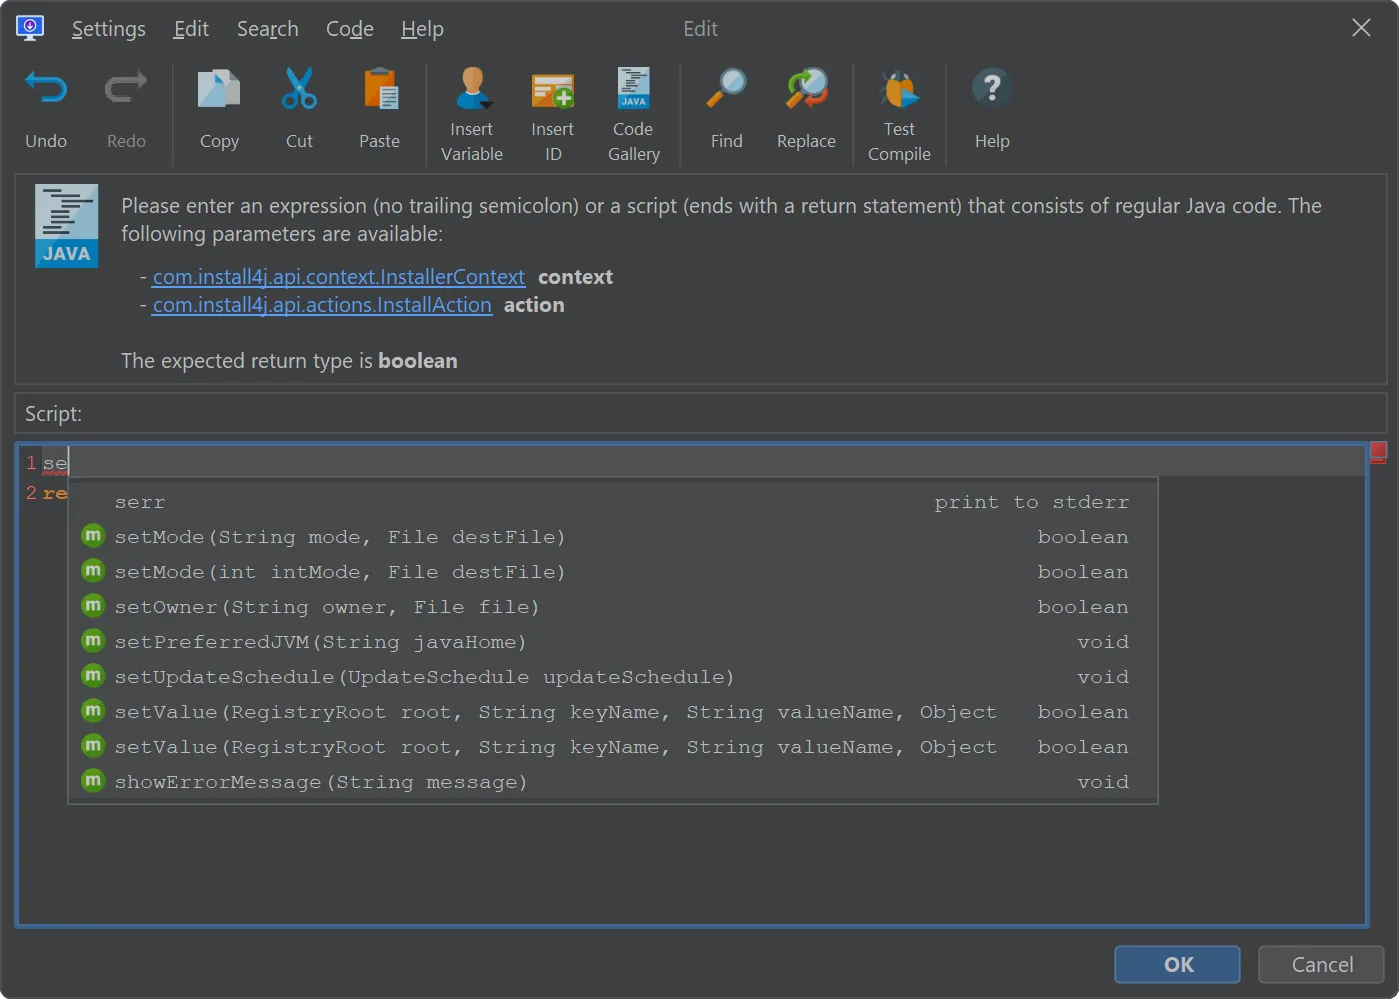
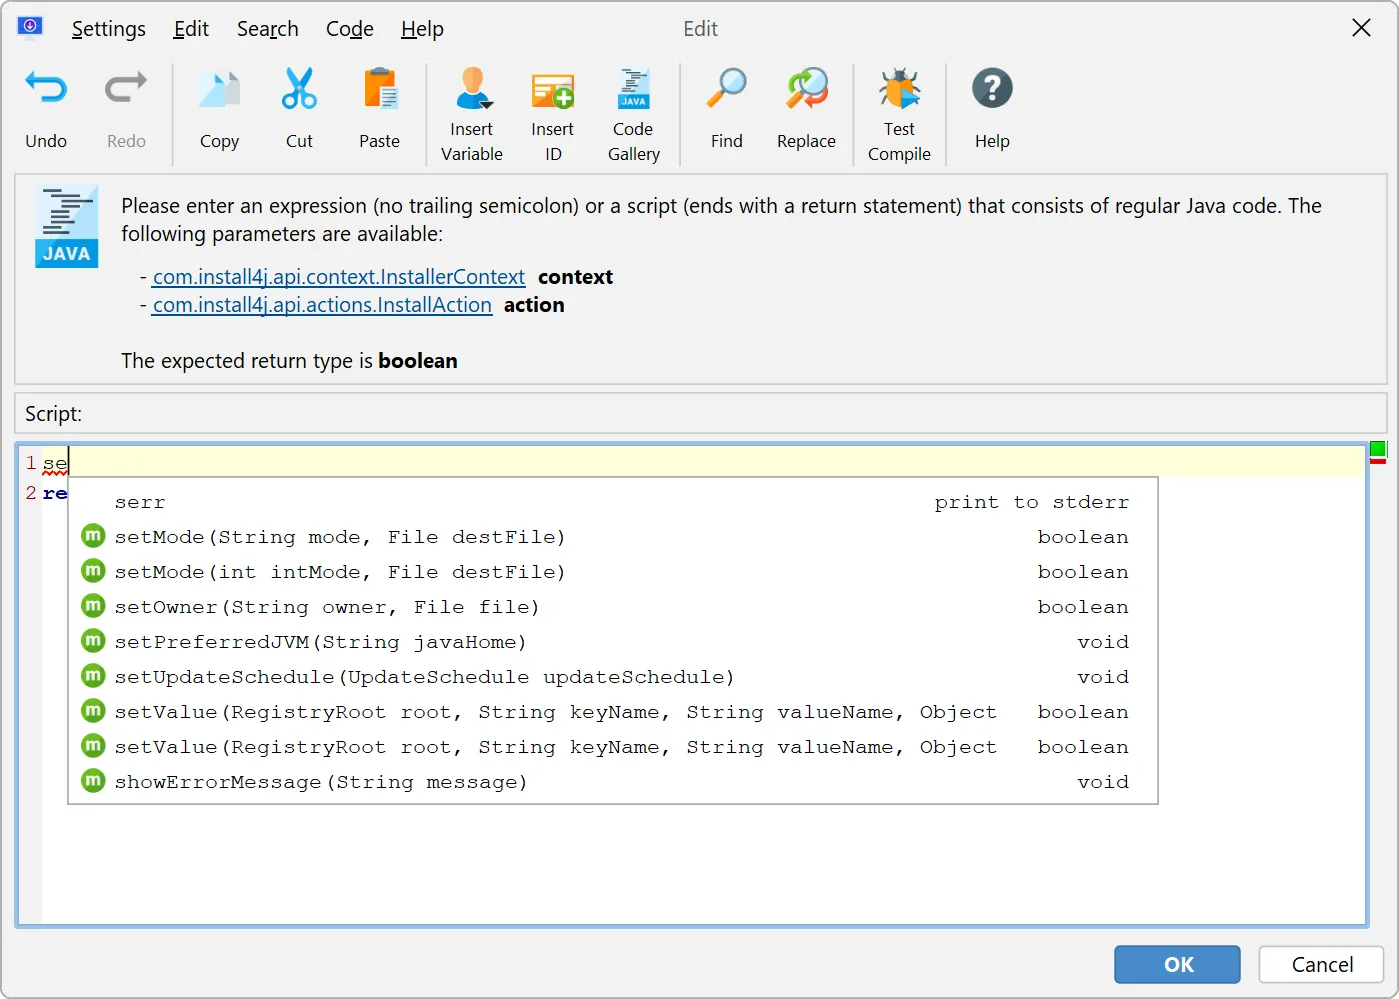
Code completion has been improved. It now suggests automatically as you type by default. You can disable this behavior in the
Java editor settings dialog.
There are now a number of templates that are tab-expandable for common code snippets, such as printing to
stderr with "serr", as shown in the screenshot below. Other snippets, for example, are "log" to write to the log file and "ex" to log an
exception.
Also, all static methods in install4j API classes are suggested without having to first type the class name. In that way, you can start with a
method name and install4j will add the static import for the class automatically.
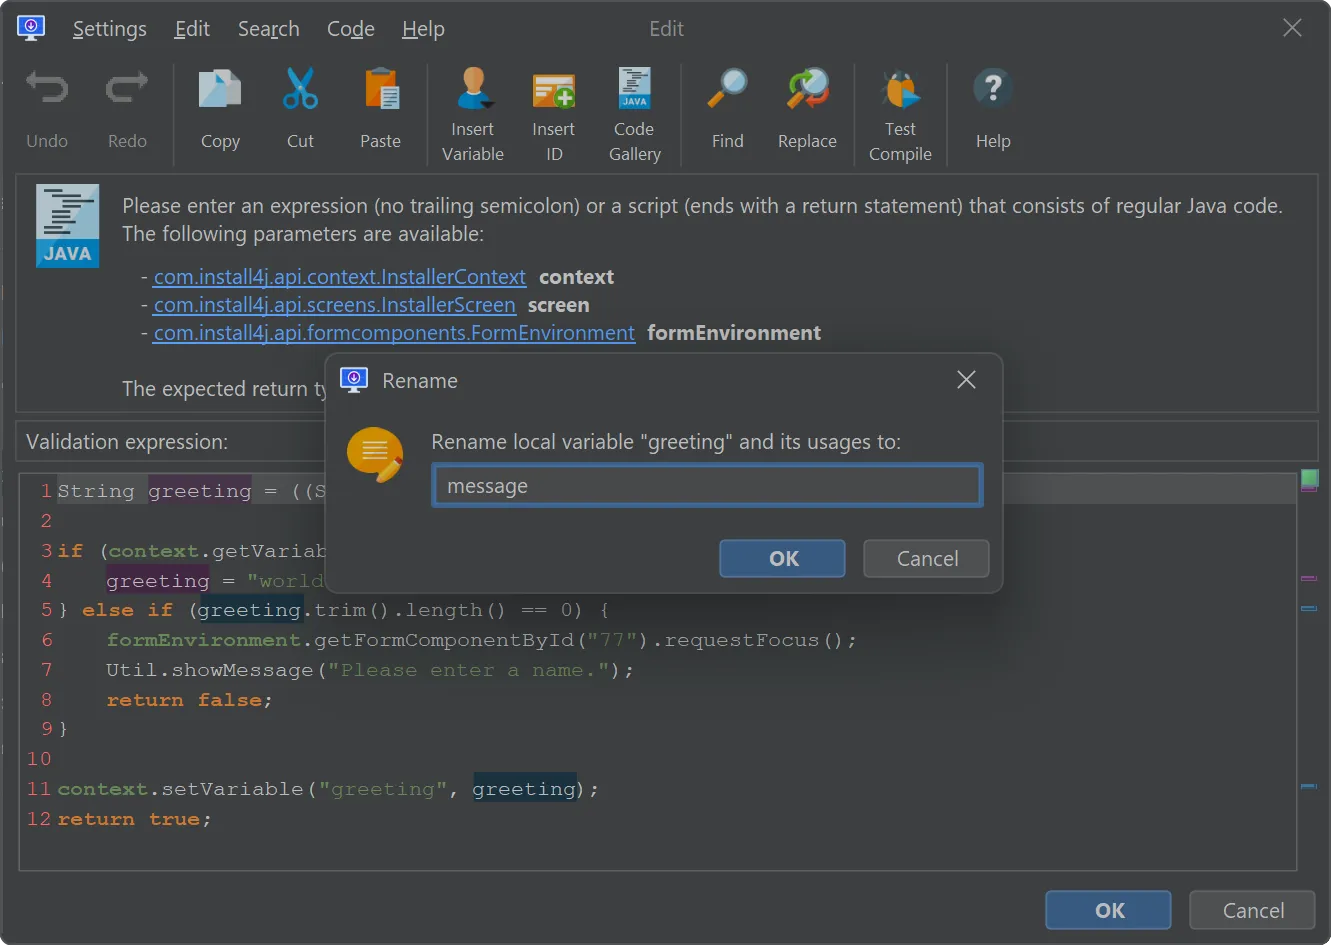
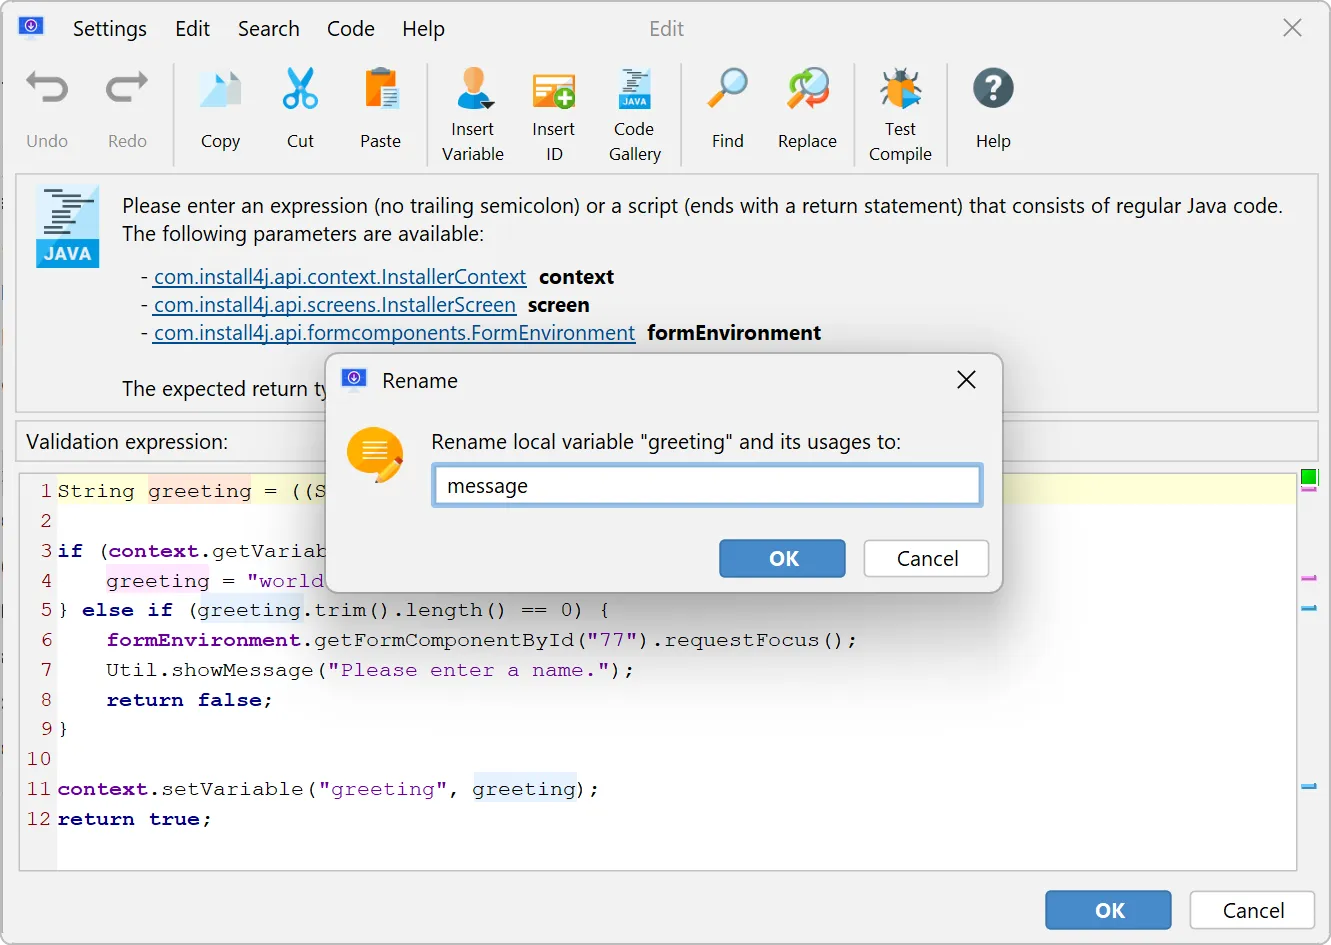
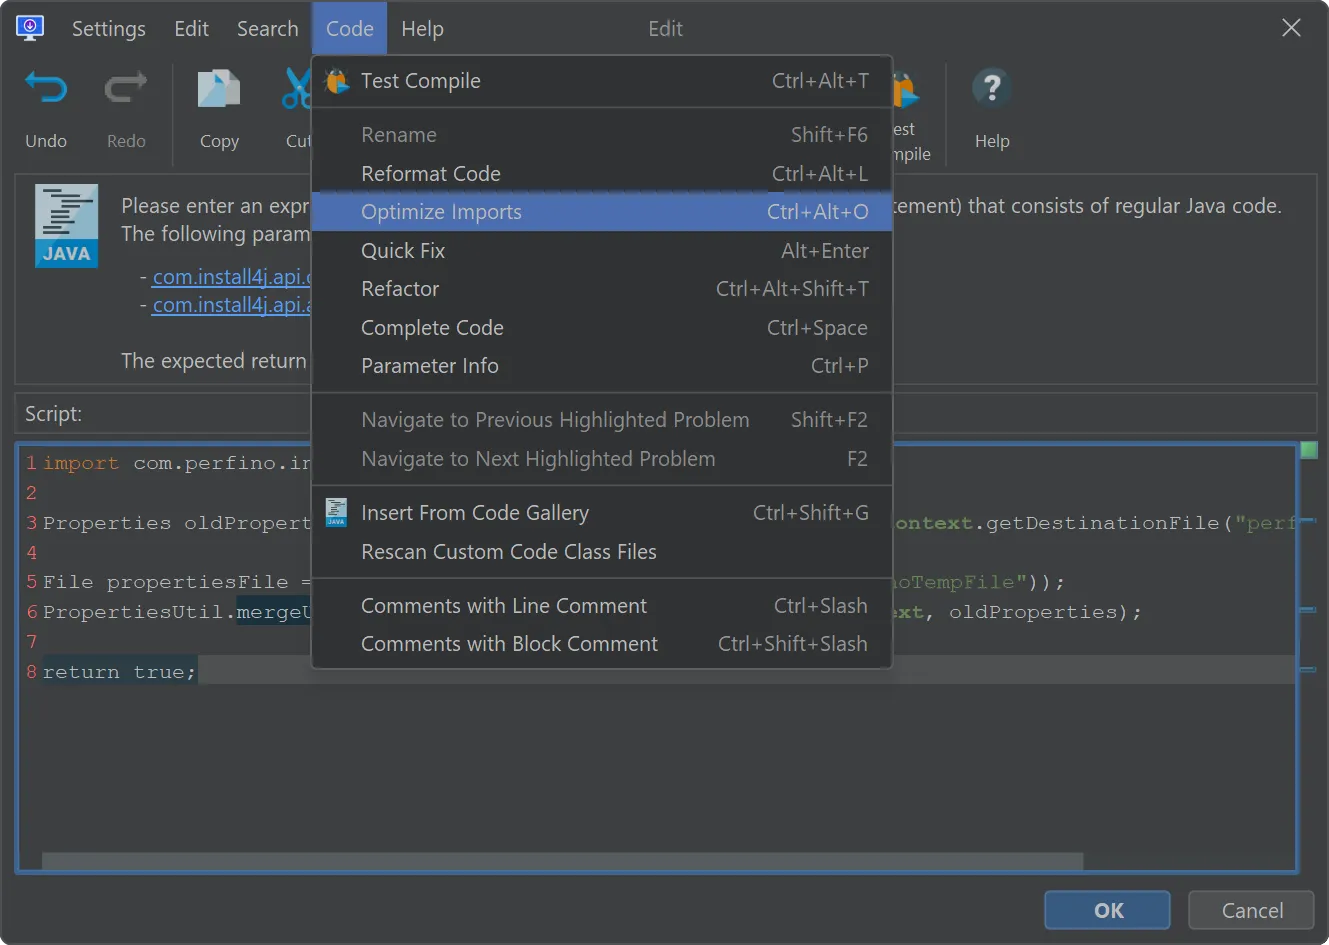
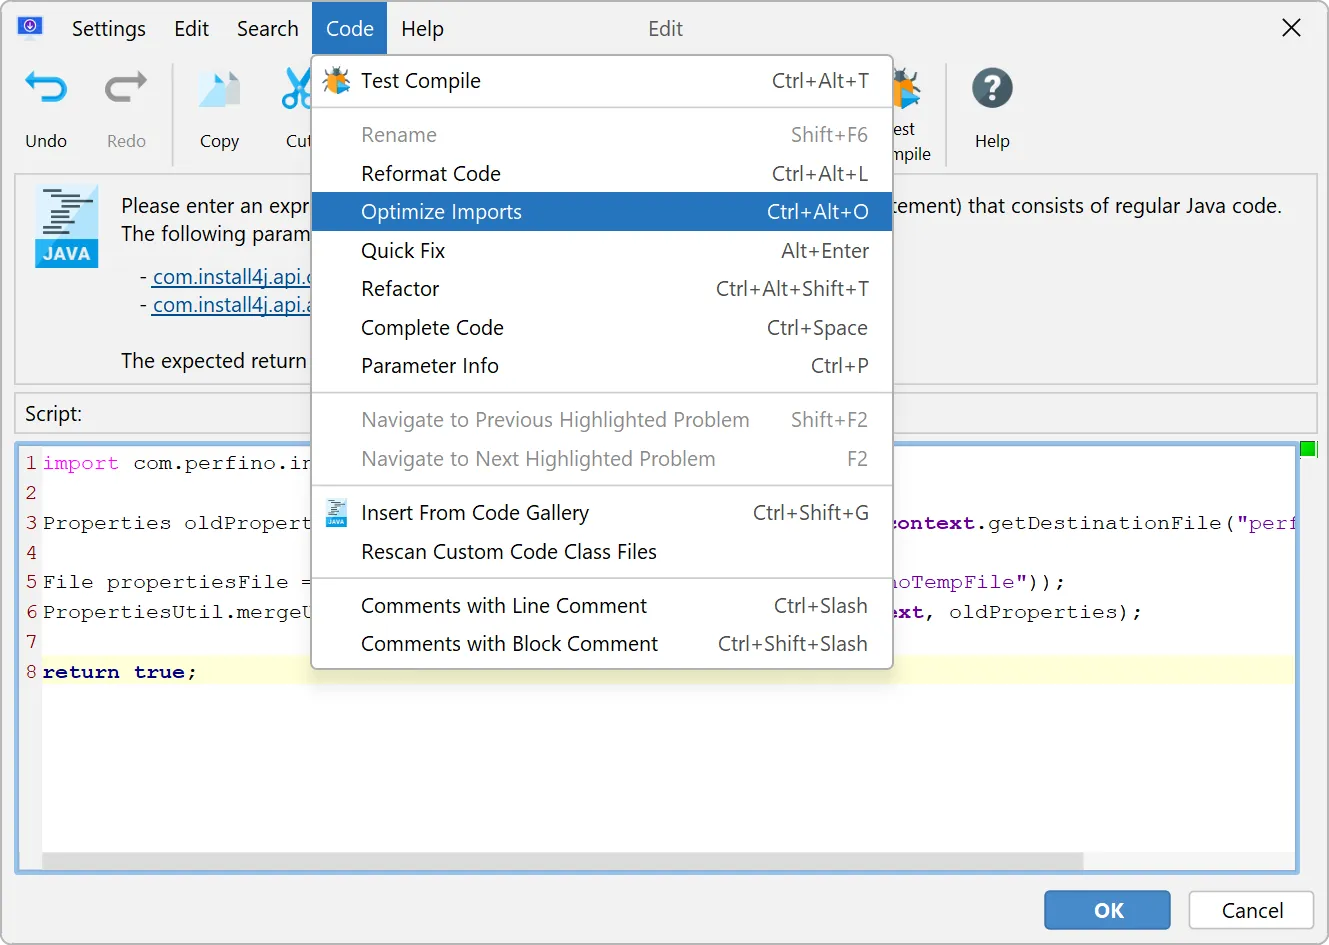
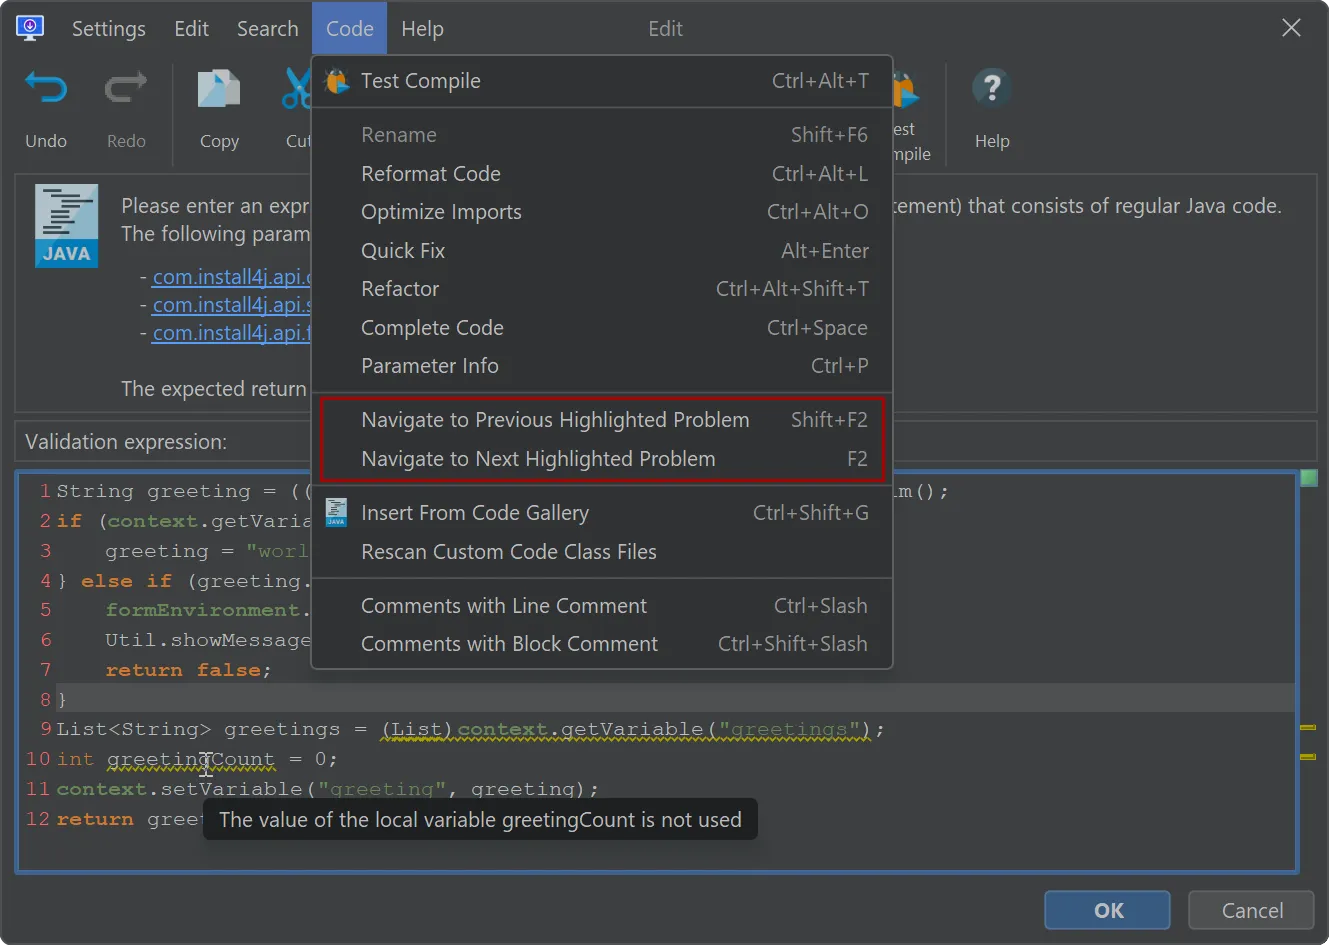
An action to rename variables has been added (Code → Rename).
A new action allows you to reformat the entire script or selected code (Code → Reformat Code).
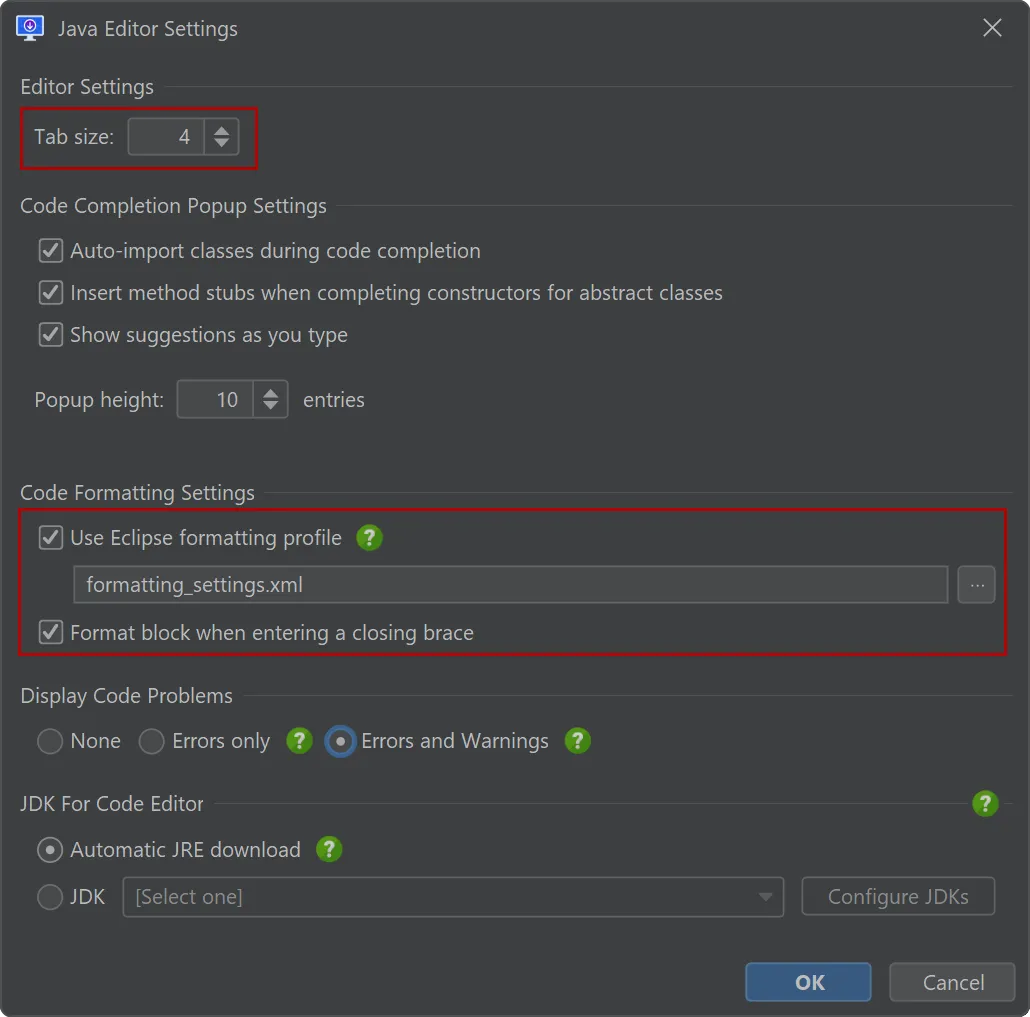
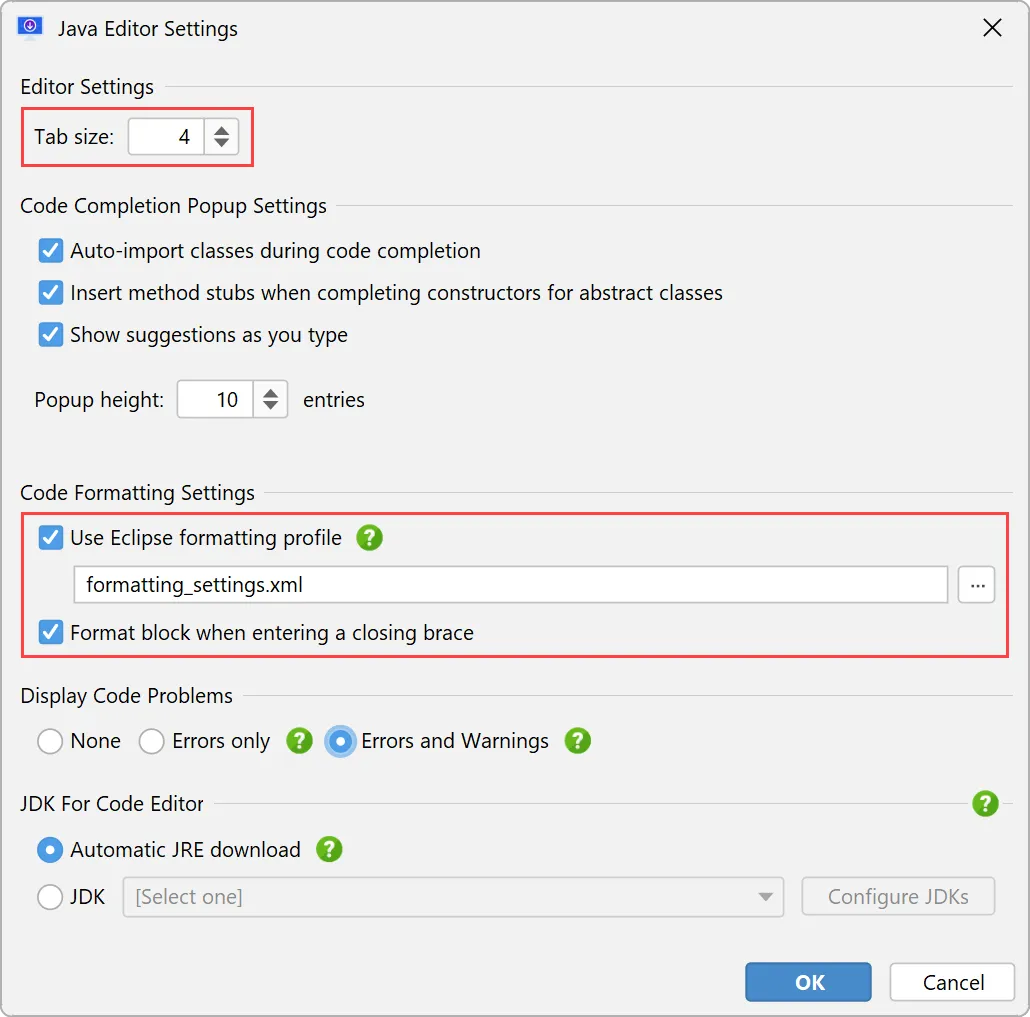
Reformatting is done according to the Eclipse default Java formatting style. If you would like to use custom formatting settings,
you can export a single Eclipse profile and specify it in the Java editor settings. Exporting Eclipse XML profile files is supported by
Eclipse, IntelliJ IDEA and the RedHat Java plugin of VS Code. The tab size used for editing and reformatting is directly configurable
in the Java editor settings.
Also, typing a closing brace now reformats the preceding block. This behavior can be disabled in the Java editor settings.
An action to optimize the imports for the current script has been added (Code → Optimize Imports).
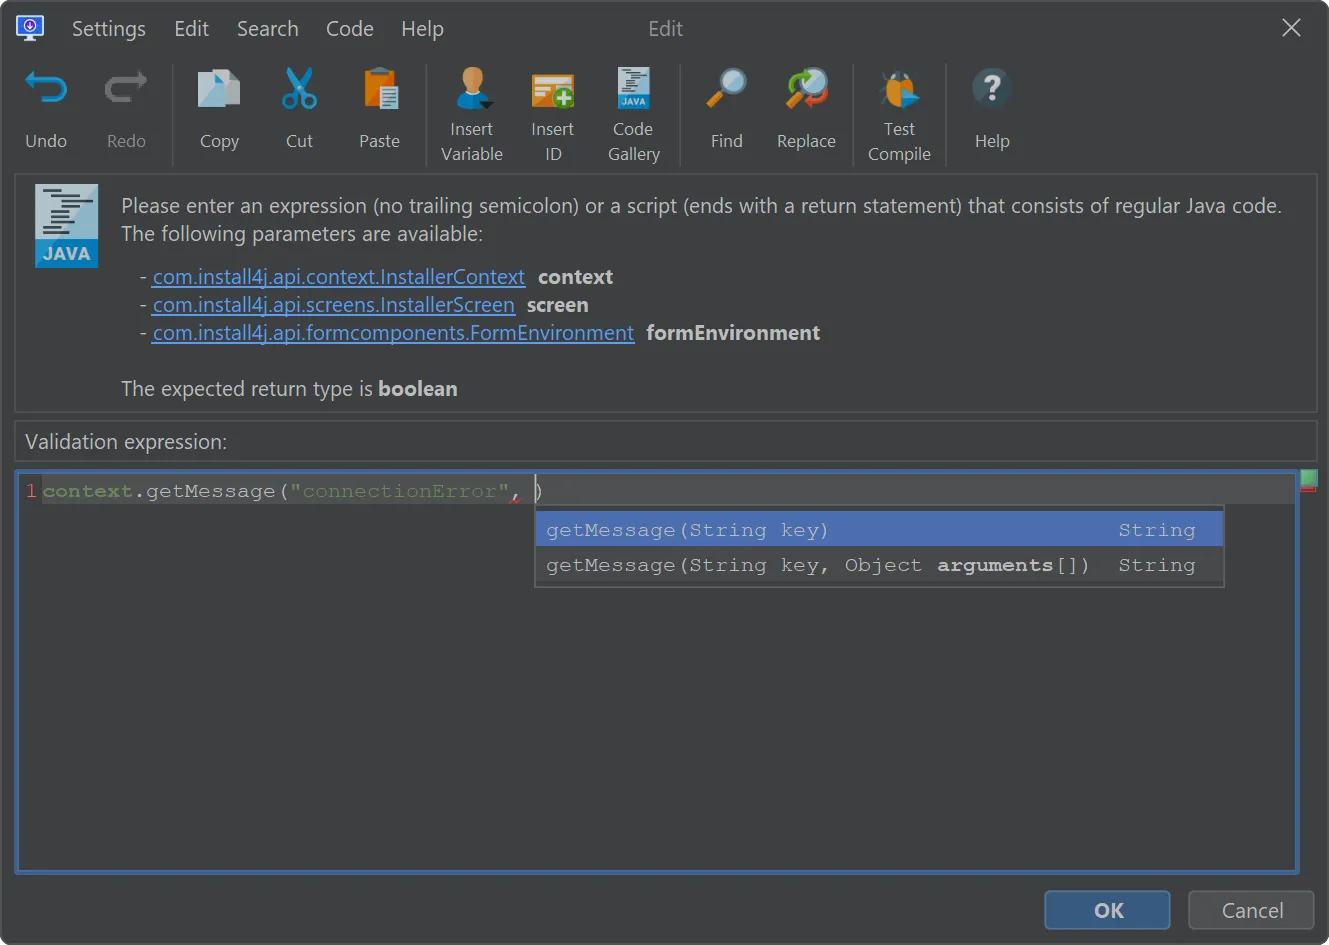
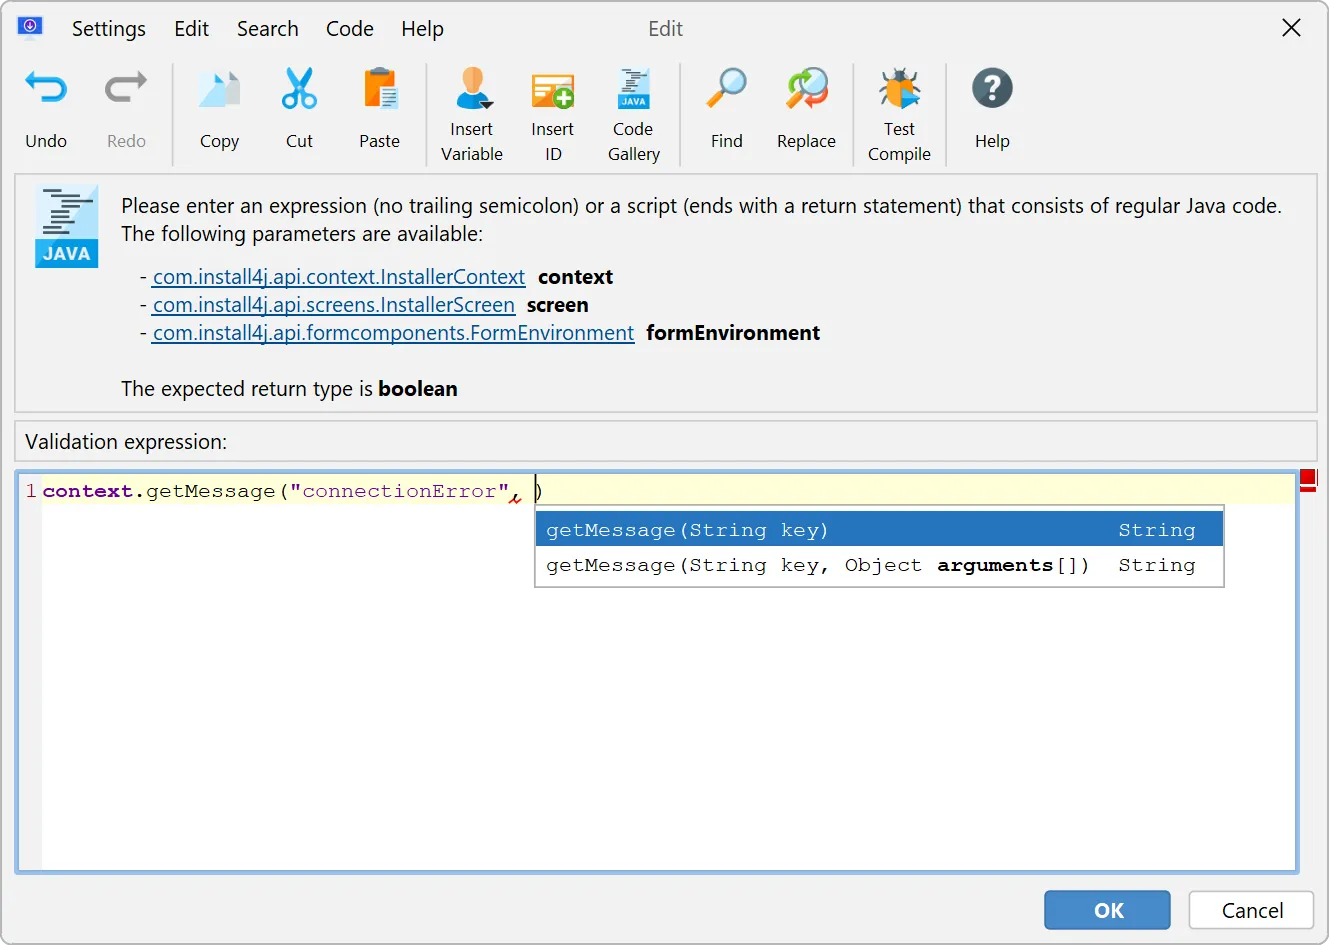
An action to show the available parameters for all overloaded methods of the method call at the caret has been added
(Code → Parameter Info). It highlights the matched arguments up to caret and selects the overloaded variant chosen during
code completion if possible.
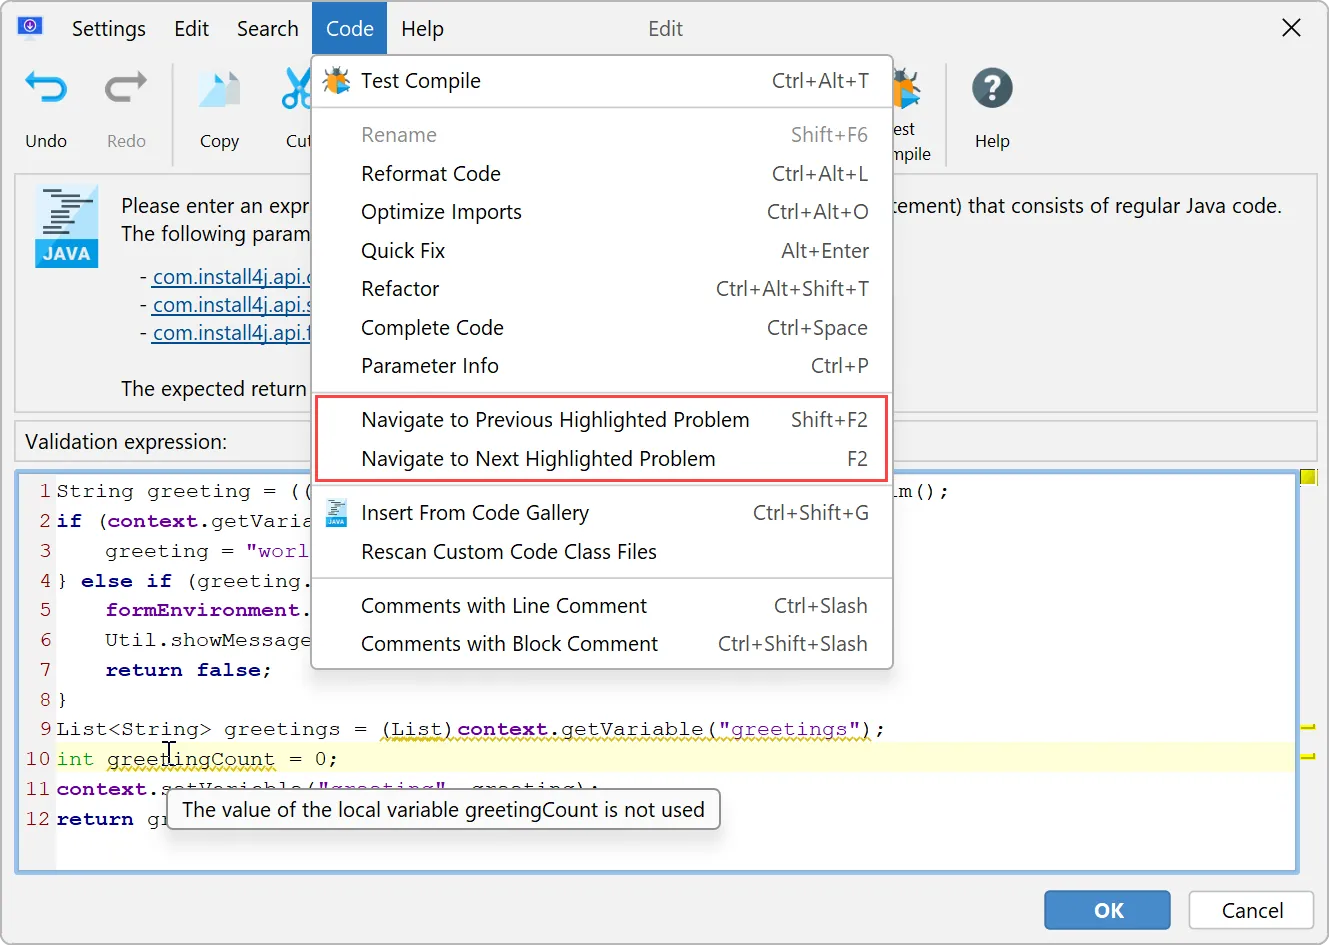
Actions to navigate between problems have been added to the script editor. Problems are either warnings or errors and can be shown
by hovering over the underlined text or the indicator in the right gutter.
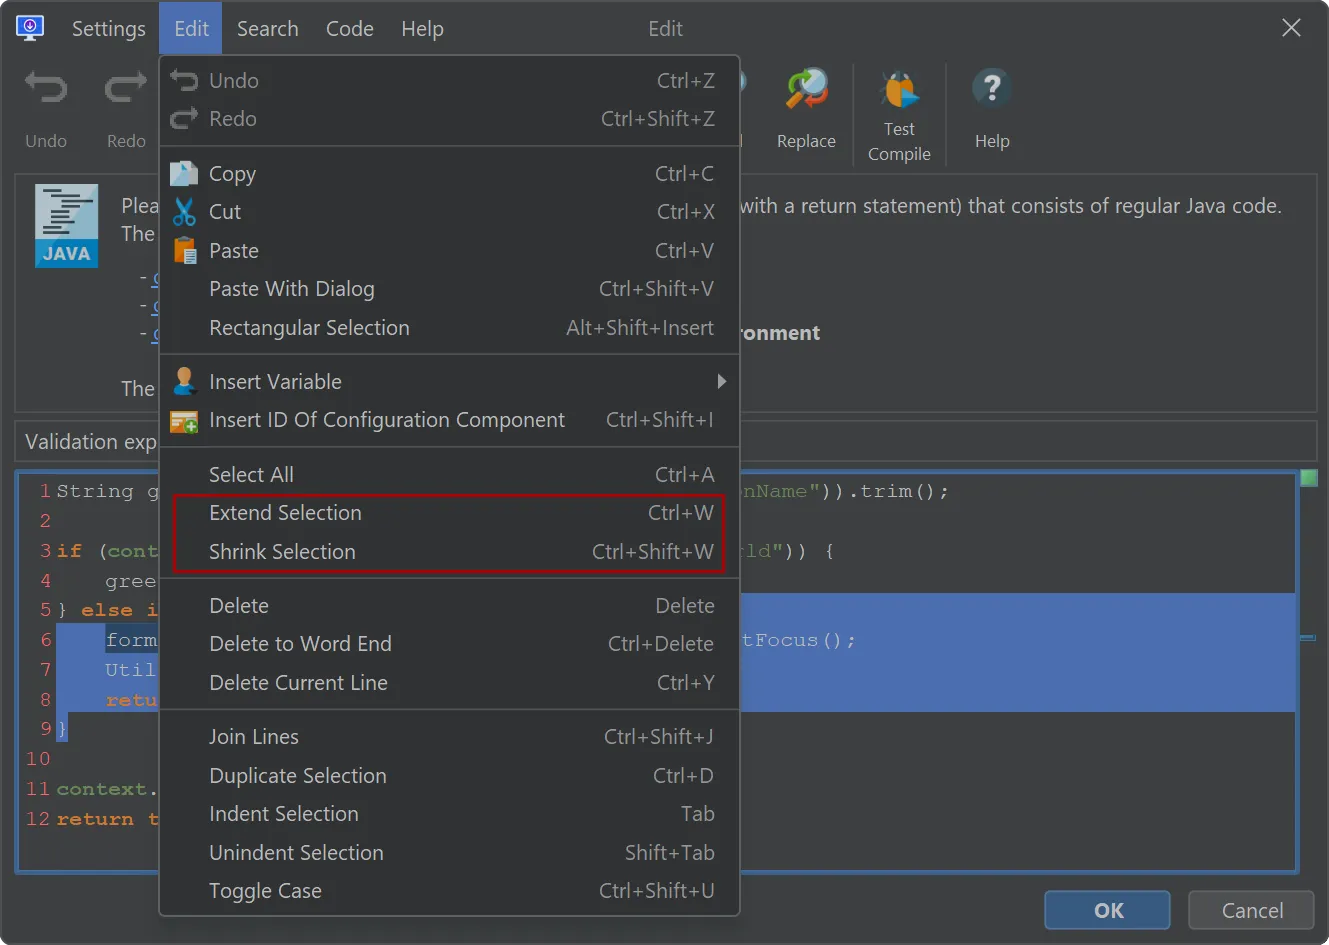
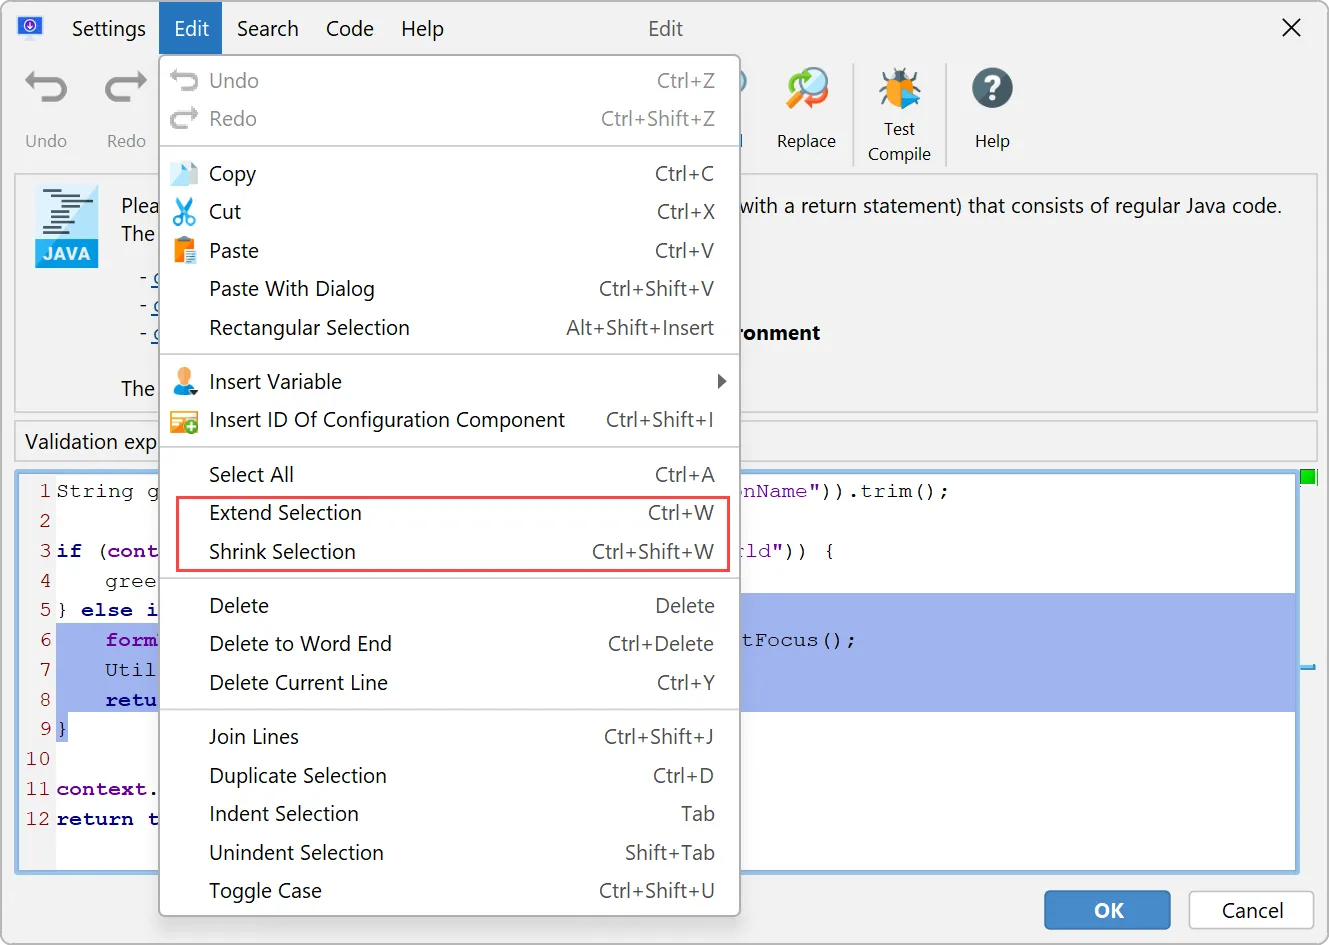
Selecting code blocks is now possible with the new "Extend selection" and "Shrink selection" actions. Repeated invocations of those
actions select surrounding or contained blocks of code around the current caret position.
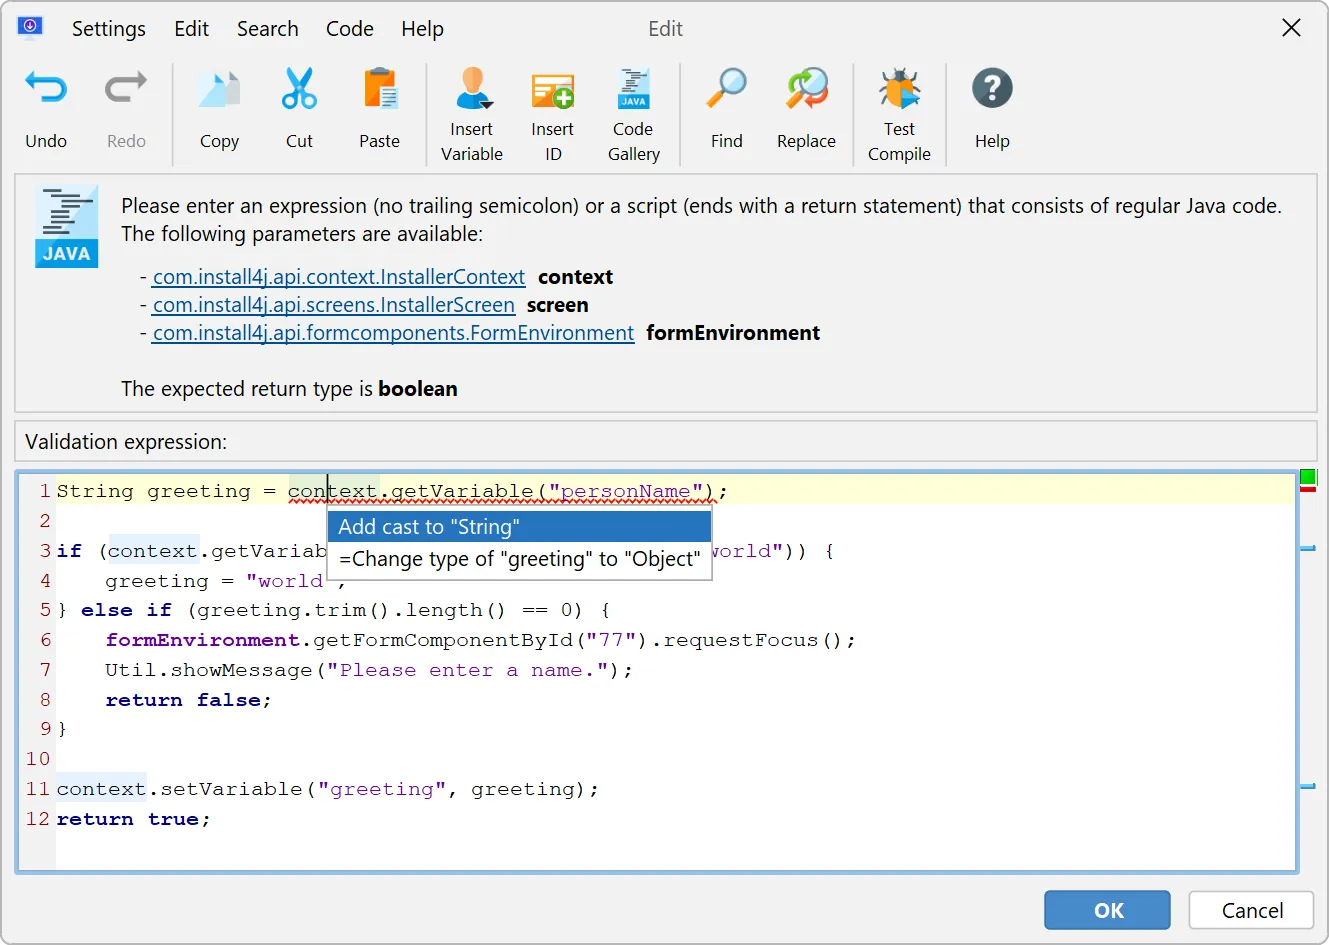
The script editor now has support for quick fixes. If the caret is on a detected problem, a floating popup with a lightbulb or the
Code → Quick Fix action will show a context menu with automatic modifications that will resolve the problem. The list of available quick fixes
include:
- Remove unused, duplicate, conflicting or non-existent imports
- Import ambiguous or unresolved types
- Fix unterminated strings
- Fix type mismatches
- Fix wrong return statements
- Fix instance access to static members
- Fix wrong visibilities and method modifiers in overrides
- Fix abstract modifier problems
- Implement unimplemented methods
- Create local unresolved variable
- Remove unused local variables
- Remove dead code
- Remove casts
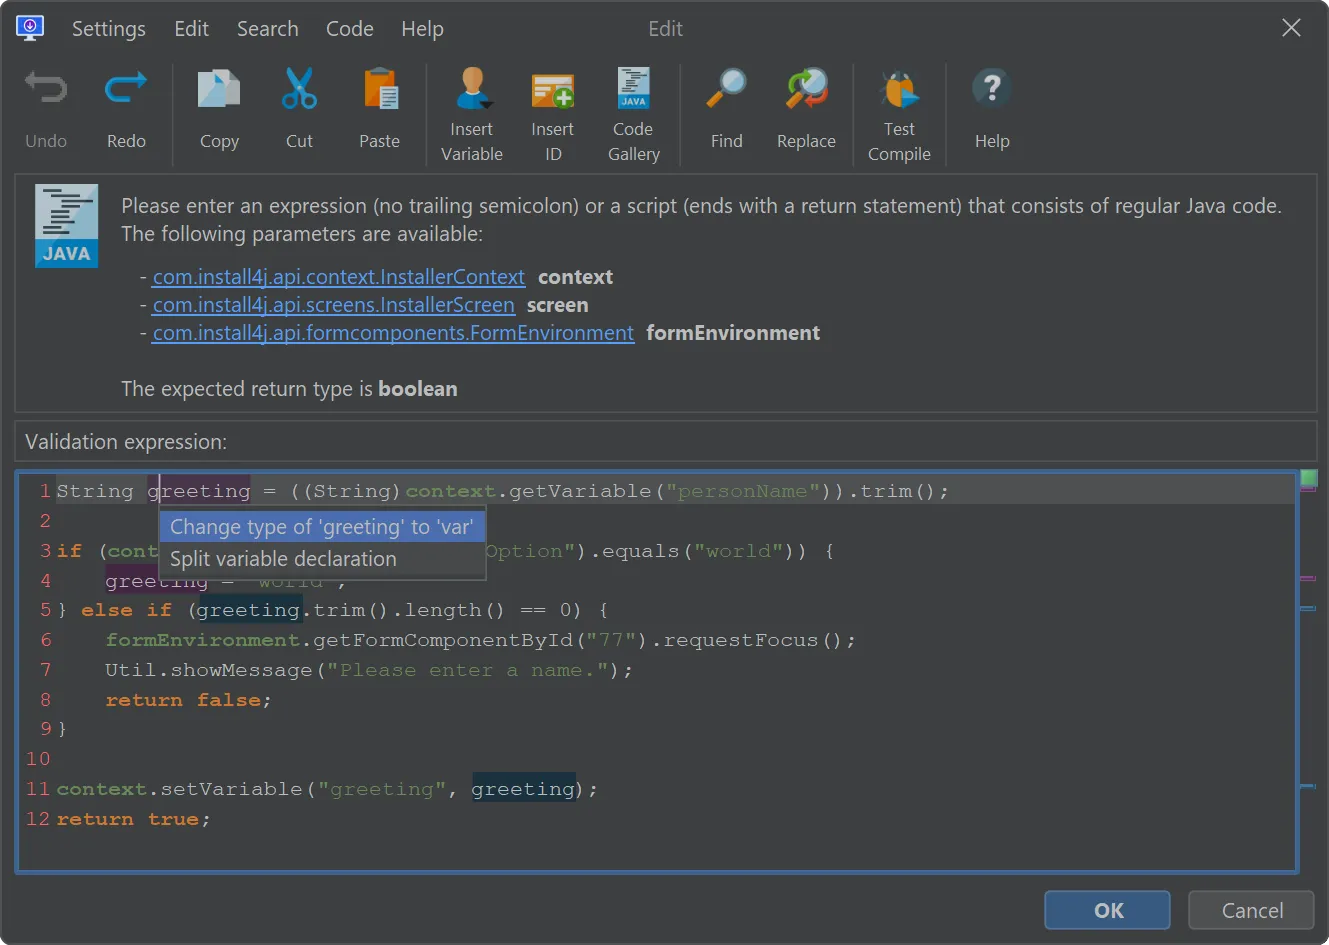
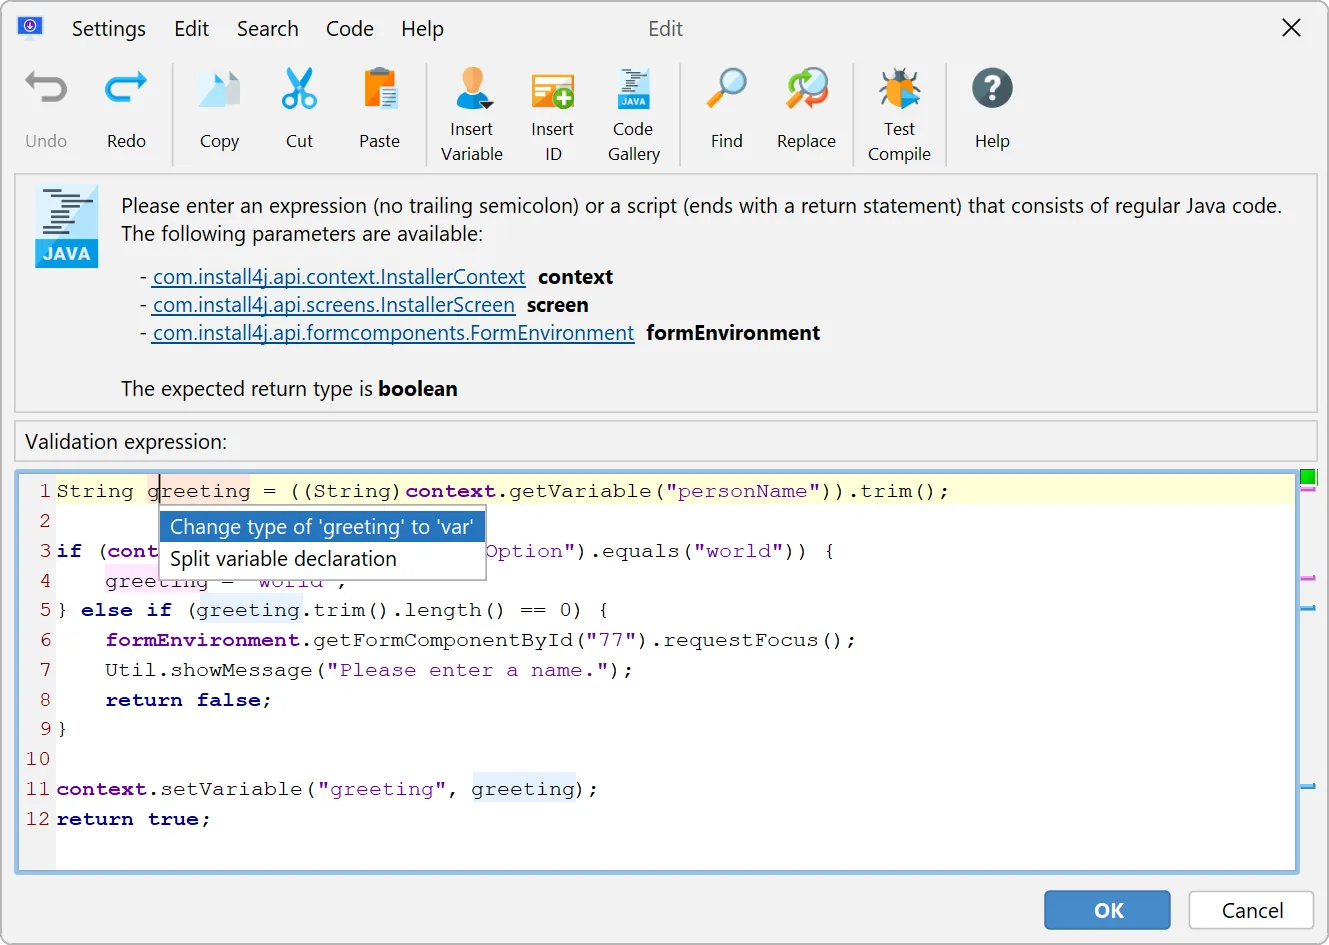
An new action has been introduced to refactor code (Code → Refactor). When invoked, a popup with applicable refactorings for the current
caret position is shown. The list of available refactorings include:
- Extract to local variable
- Inline local variable
- Convert to lambda expression
- Convert to anonymous class creation
- Convert var to an explicit type and vice versa
- Convert to static import
- Surround with try/catch
- Convert to enhanced for loop
- Add inferred lambda parameter type
- Replace lambda parameter types with var
- Change lambda body expression to block
- Change body block to expression
- Remove lambda parameter types
- Convert lambda to method reference
- Use MessageFormat for string concatenation
- Use StringBuilder for string concatenation
- Use "String.format" for string concatenation
- Convert String concatenation to text block
- Convert to switch expression
- Split variable declaration
- Join variable declaration
- Invert equals comparison
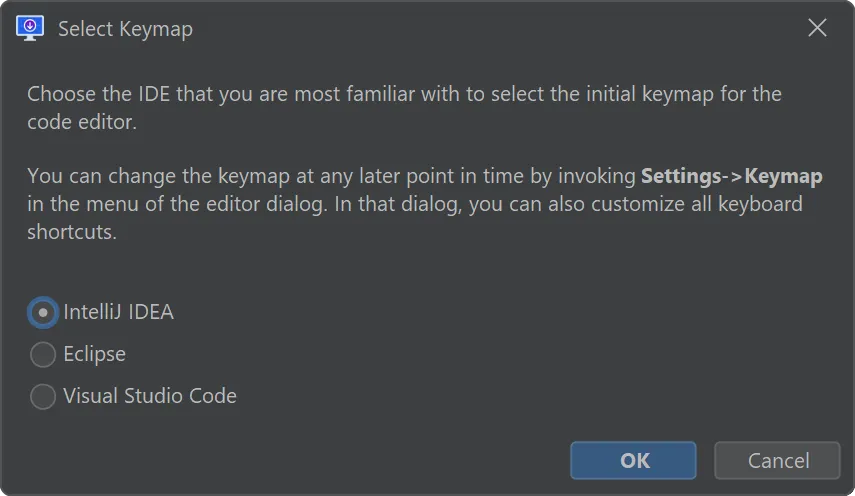
Alternative keymaps for popular IDEs are now supported by the script editor. When first using the script editor, install4j will ask you
to choose an initial keymap.
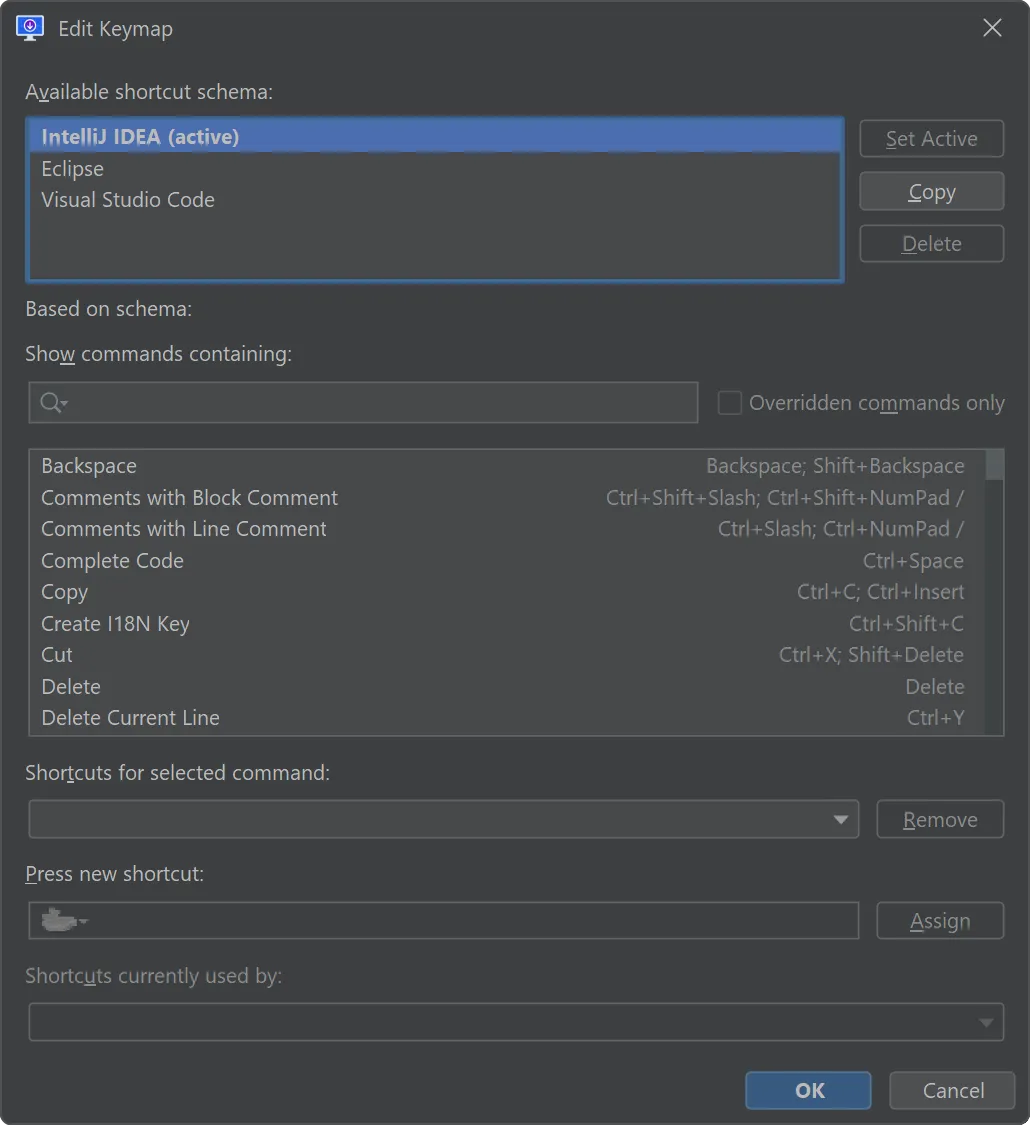
You can change the keymap or customize it at any later time by invoking Settings → Keymap in the Java editor settings.
install4j 11 delivers several important improvements for compiler variables. Compiler variables are used to define values that are
used in multiple places in the project and to customize the project externally from your build system.
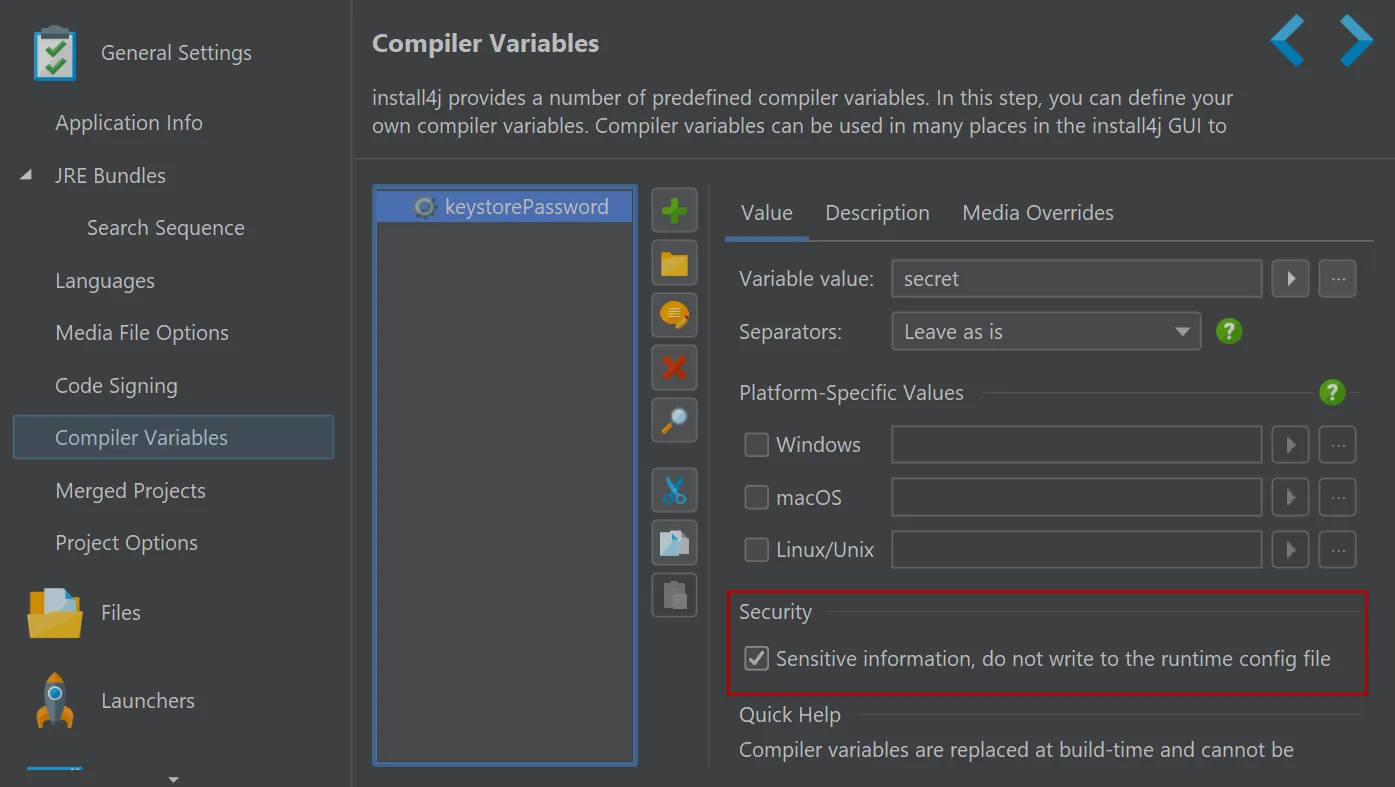
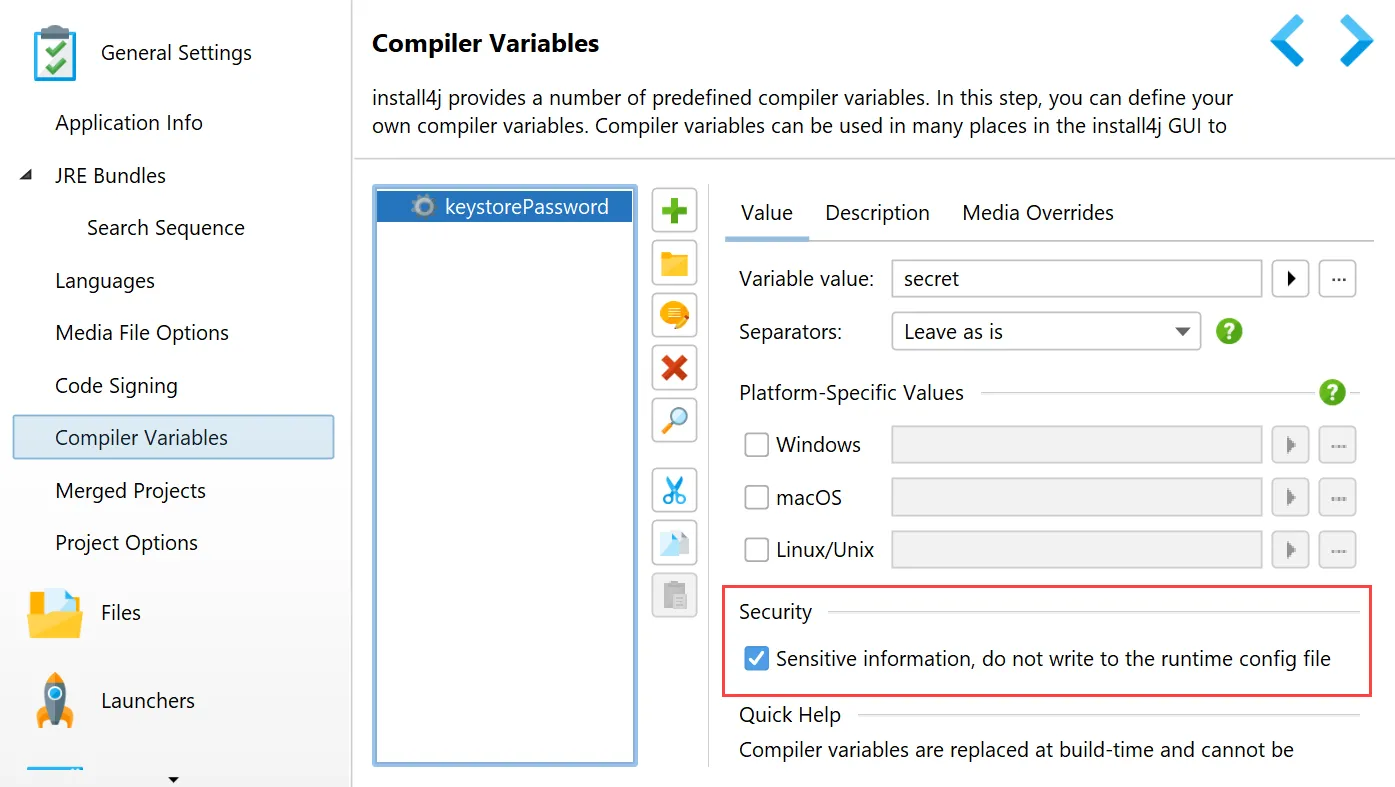
Compiler variables can be now declared to contain sensitive information. In that case, their value is not written to the runtime
configuration and cannot be retrieved via context.getCompilerVariable("variableName"). You can still use the compiler variable
in all text fields with the ${compiler:variableName} syntax because these usages are replaced at build time.
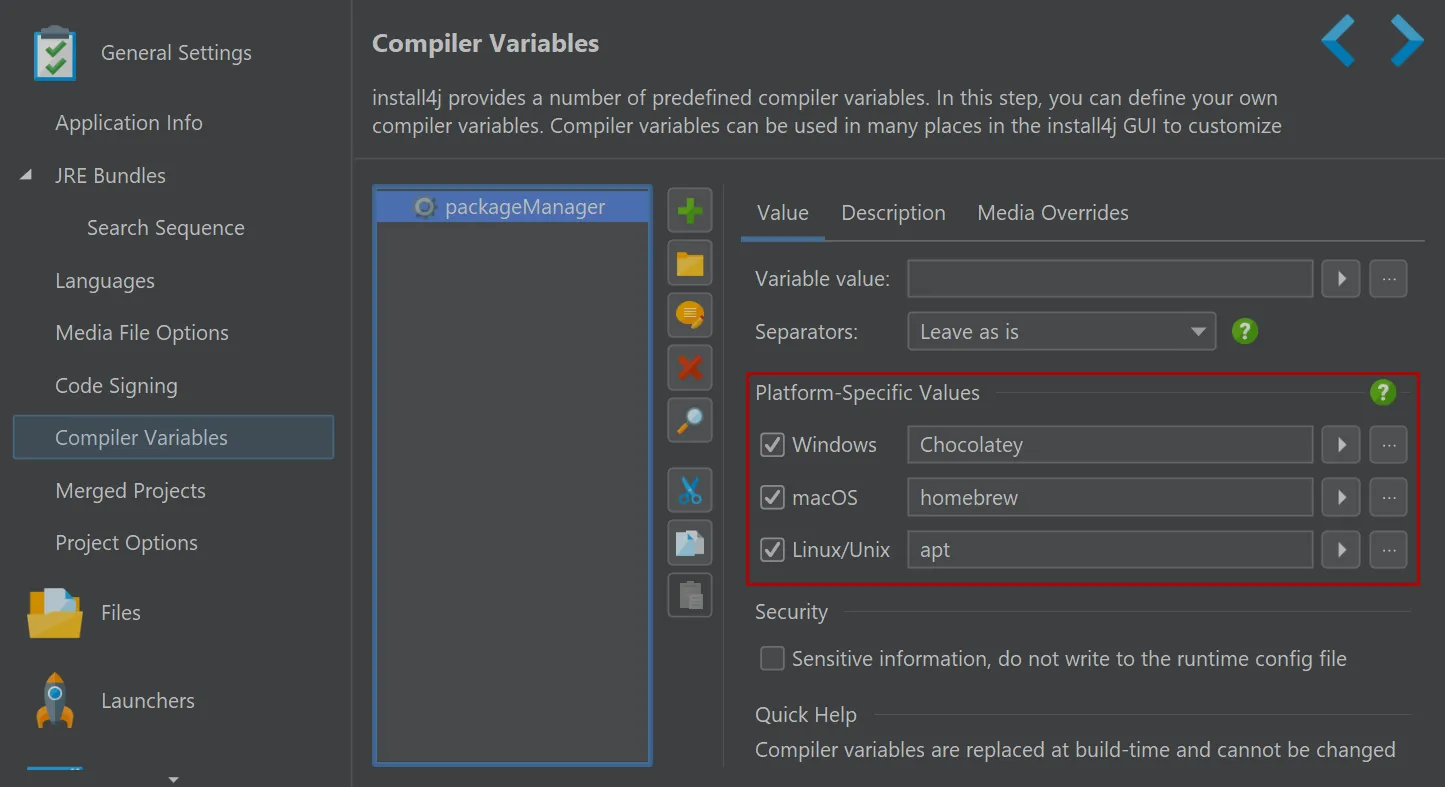
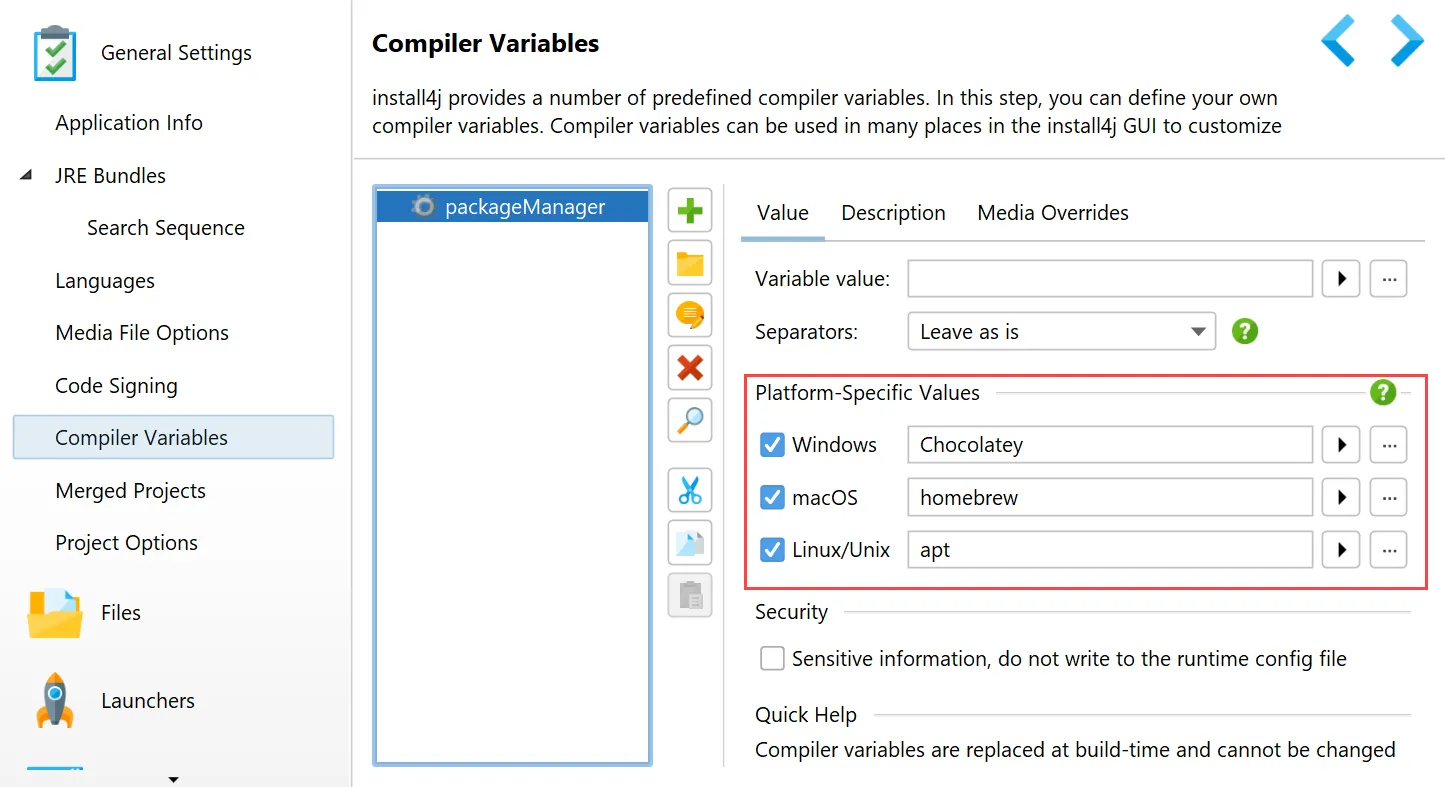
Platform-specific overrides for compiler variables were added. While it was always possible to override compiler variable values for
media files, it was inconvenient when the overriding value was always identical for the same platform. Now, you can override for Windows,
macOS and Linux/Unix. These overrides can be further refined with the media-specific overrides.
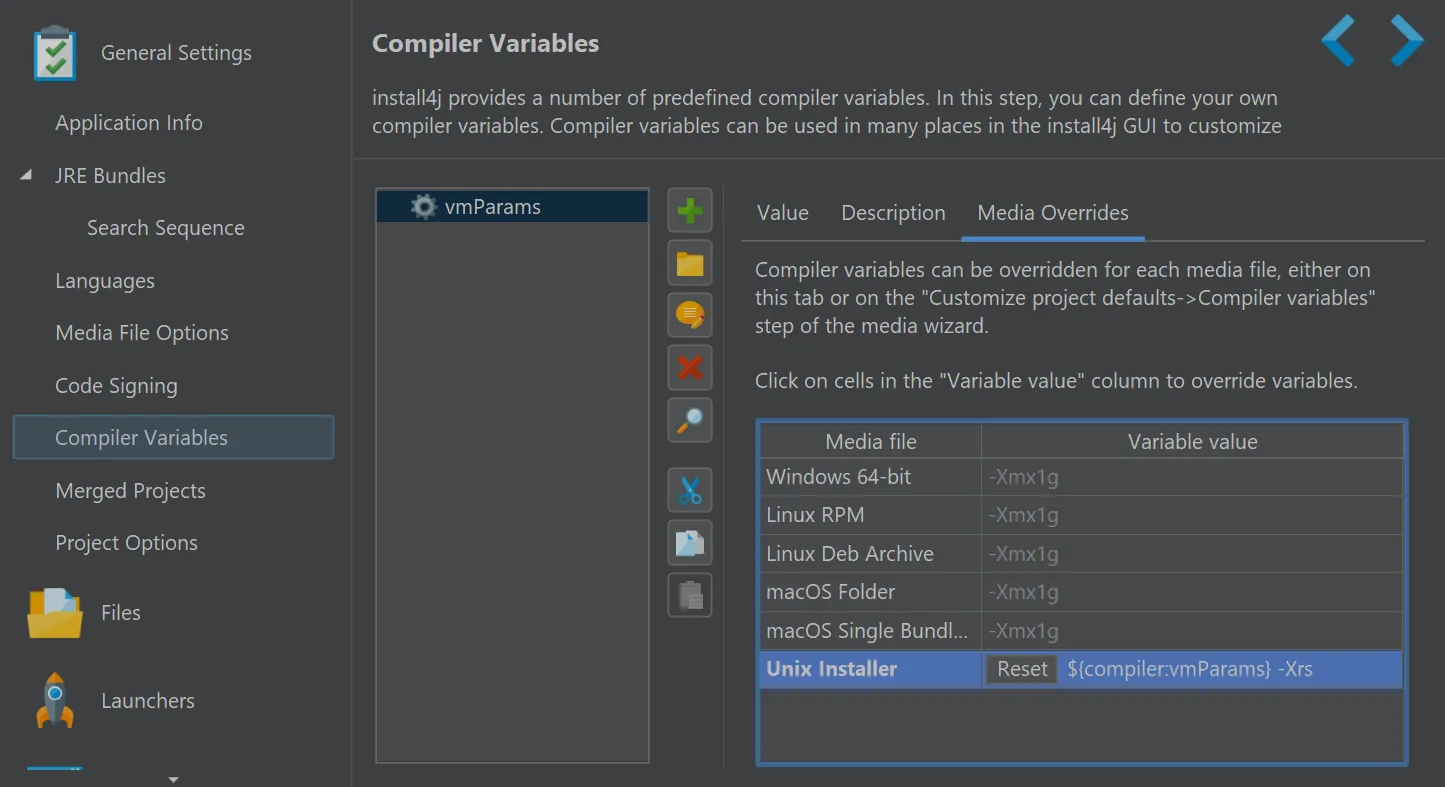
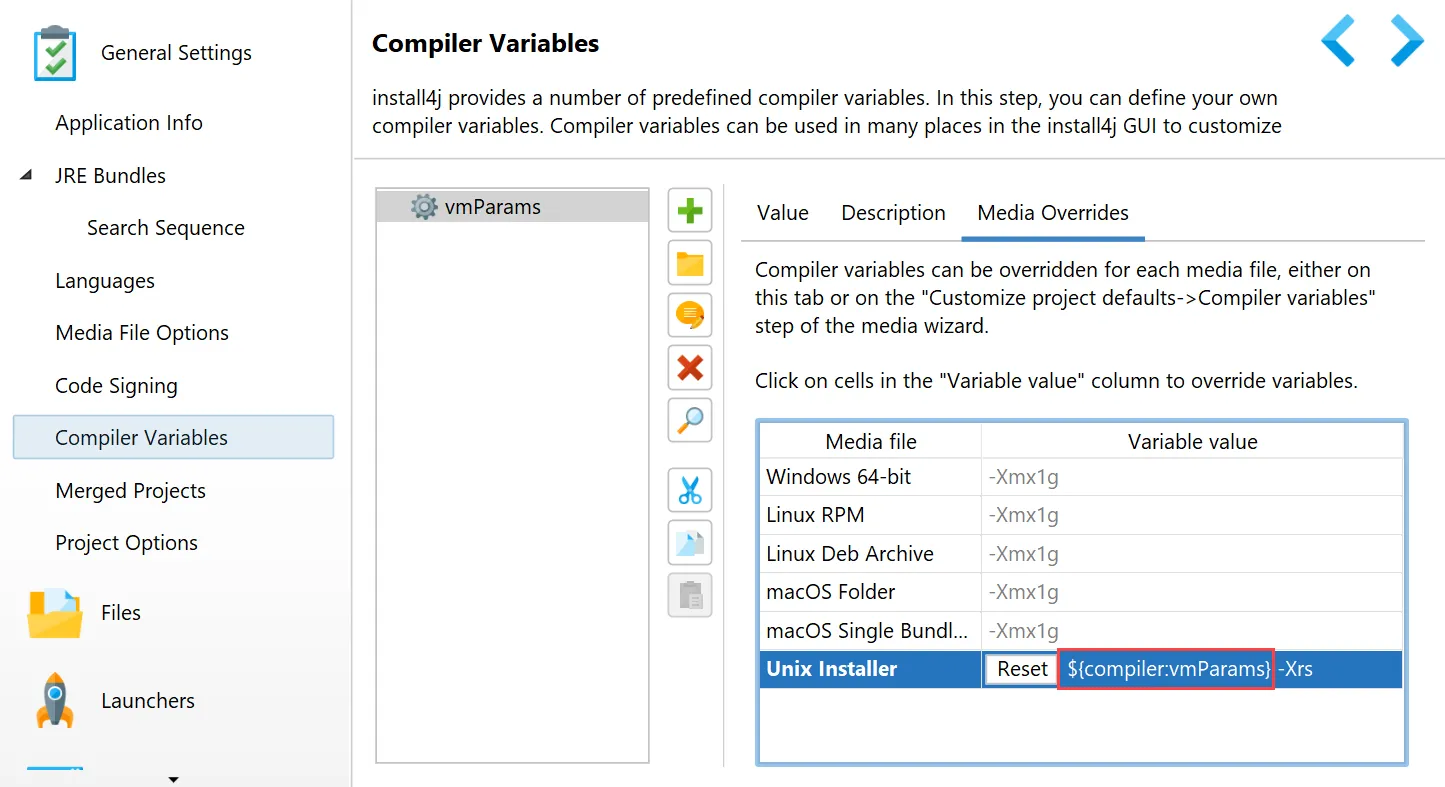
You can now refer to the base value when overriding a compiler variable with the syntax ${compiler:variableName}. This
applies to both platform-specific and media-specific overrides. There are many related use cases, for example, a list of VM parameters with
common values and additional values for each platform. Previously, you would have had to introduce a separate compiler variable for the
additional value.
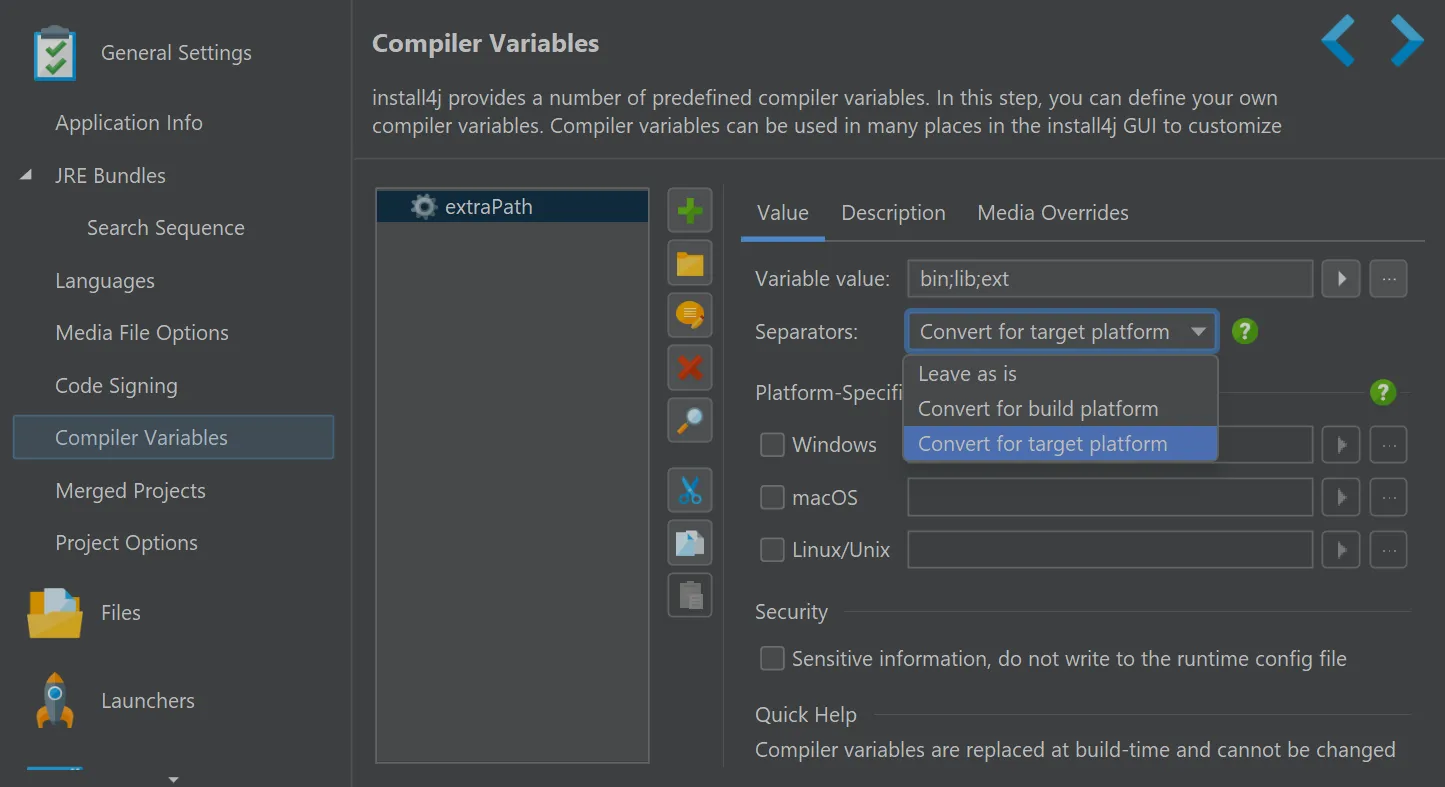
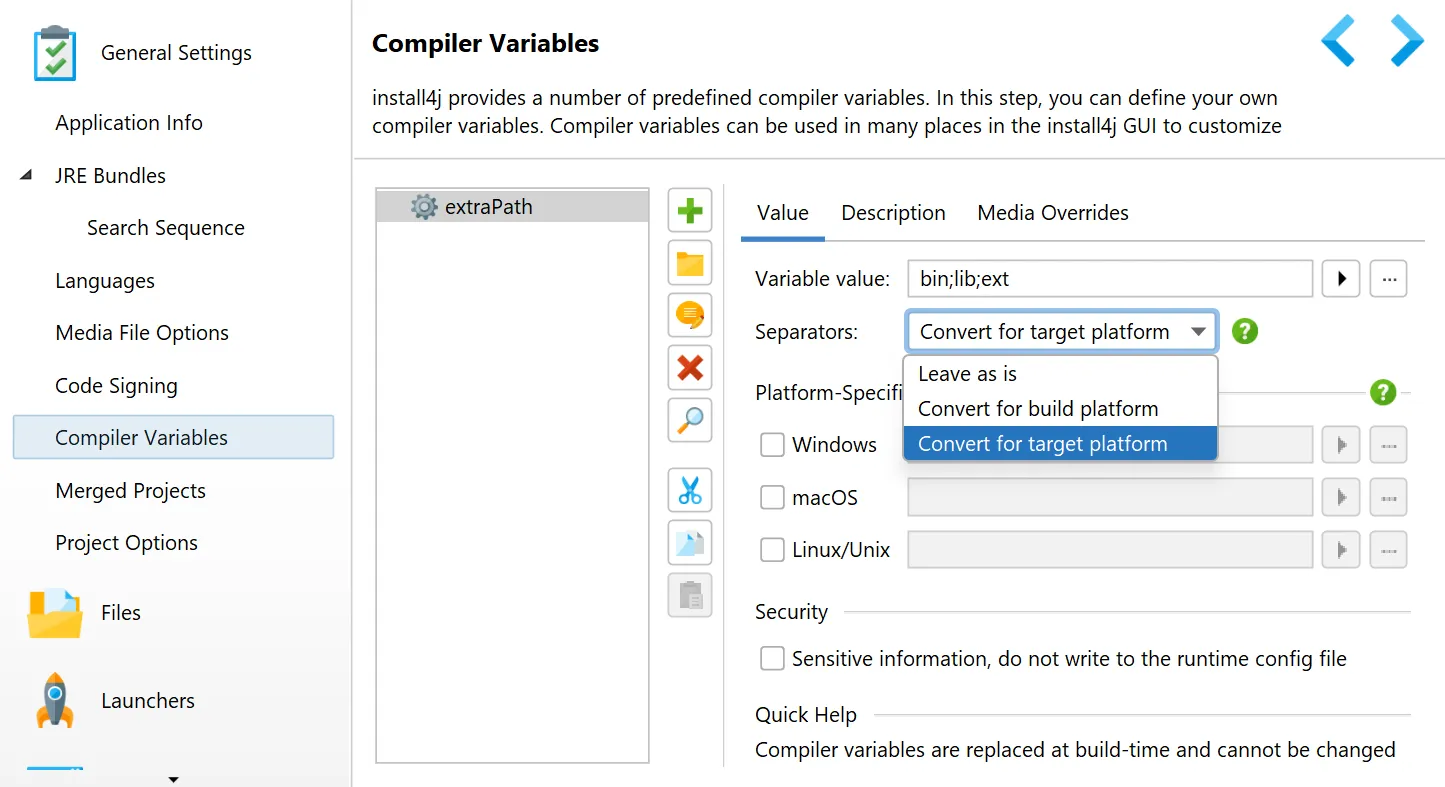
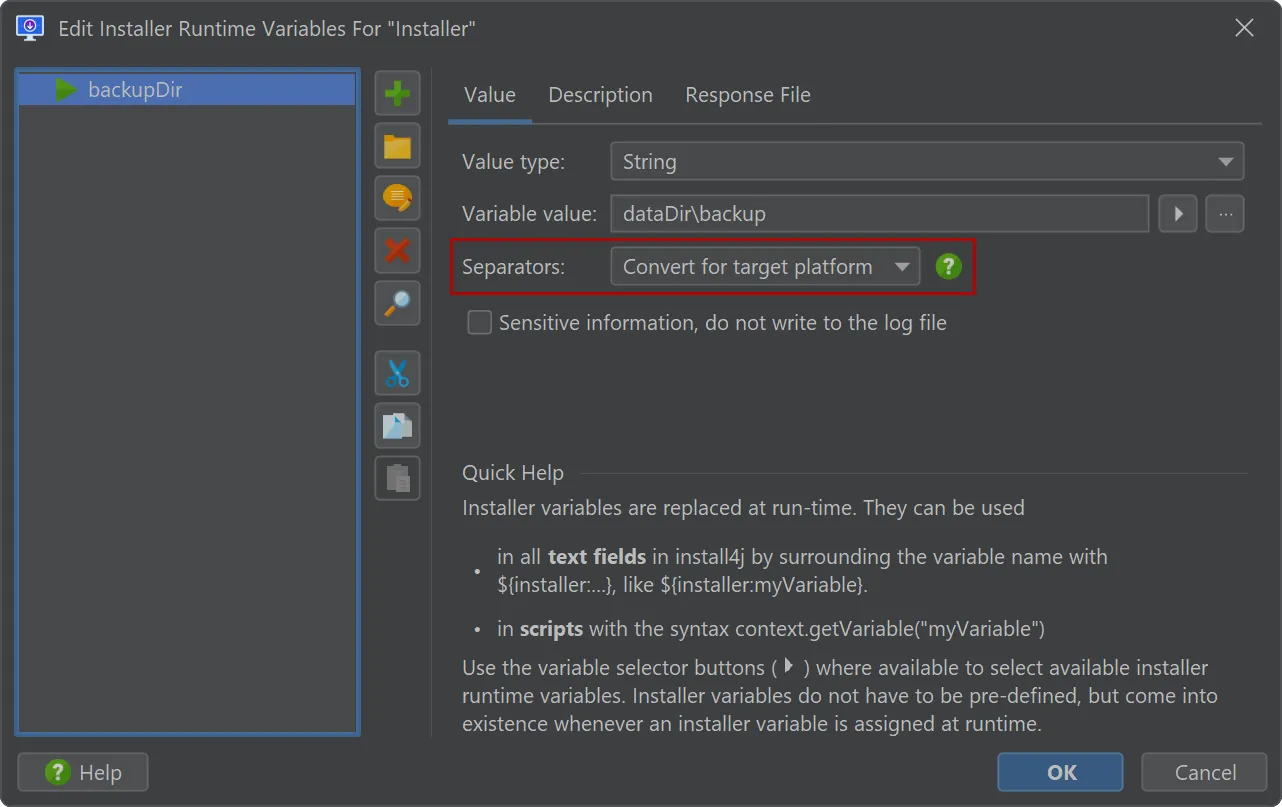
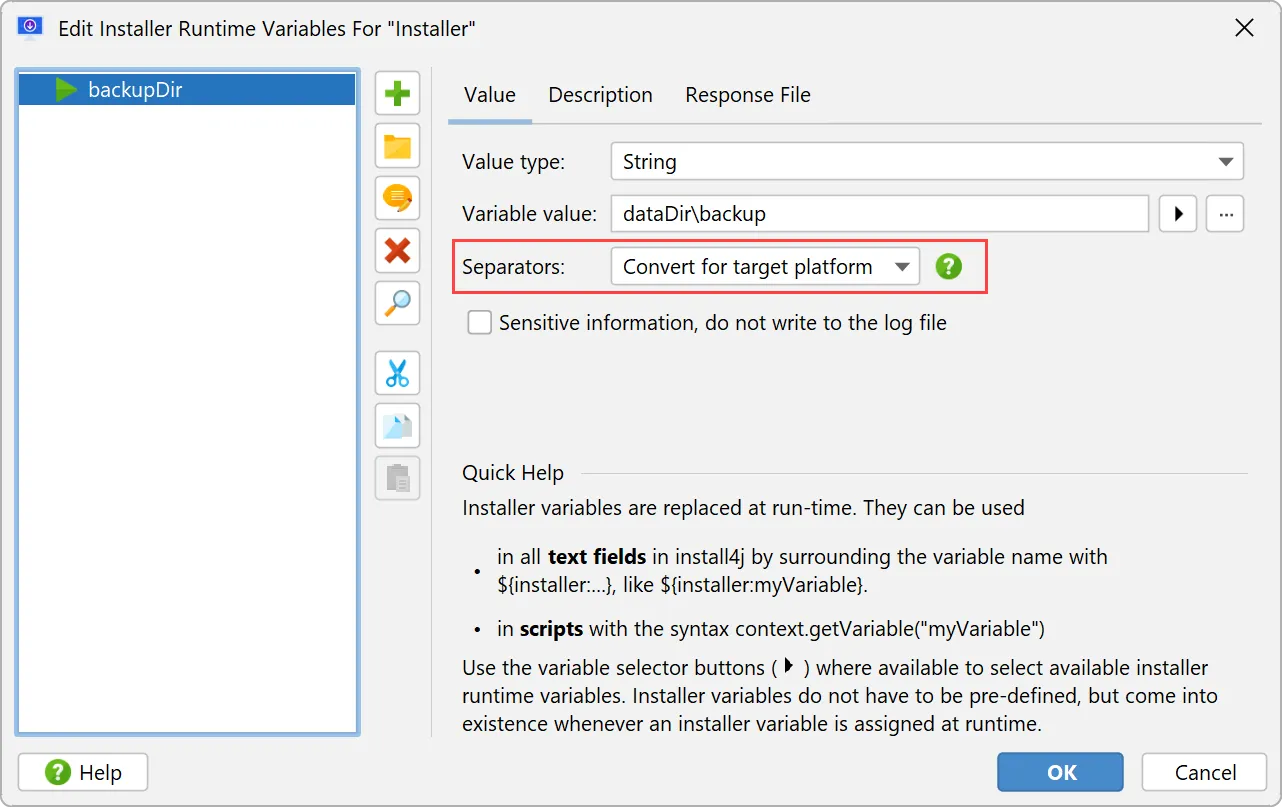
File and path separators can be converted to the build or the target platform. This means you do not have to repeatedly use the
compiler variables sys.fileSeparator, sys.pathlistSeparator, sys.mediaFileSeparator or
sys.mediaPathlistSeparator anymore. Instead, you can use either Unix-style ('/' and ':') or Windows-style ('\' and ';') file
and path separators in the value. Both styles are converted in the same way.
This feature has also been implemented for pre-defined installer variables of type String.
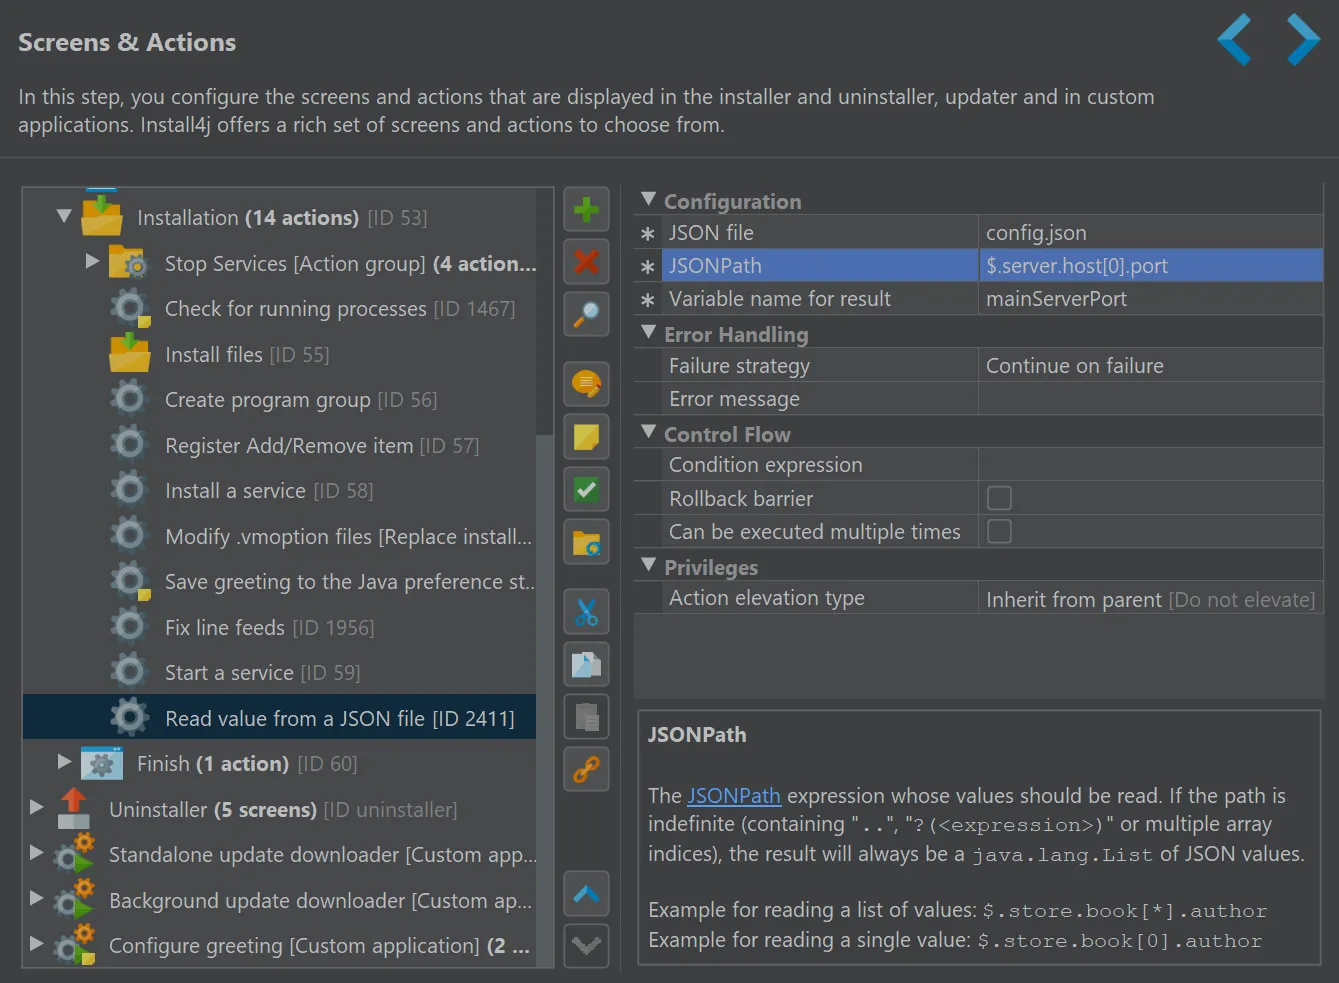
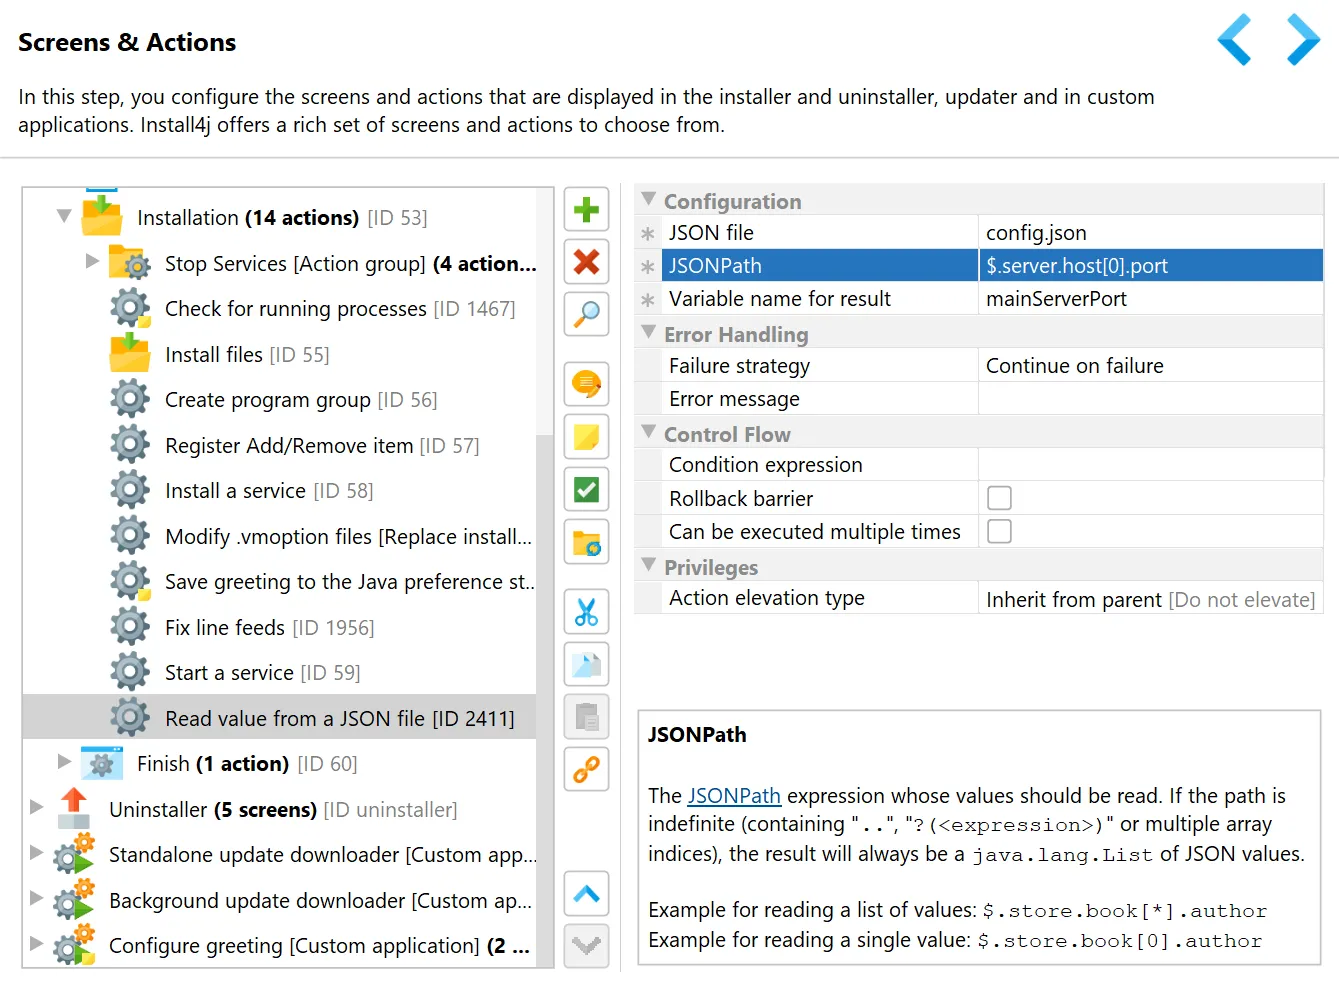
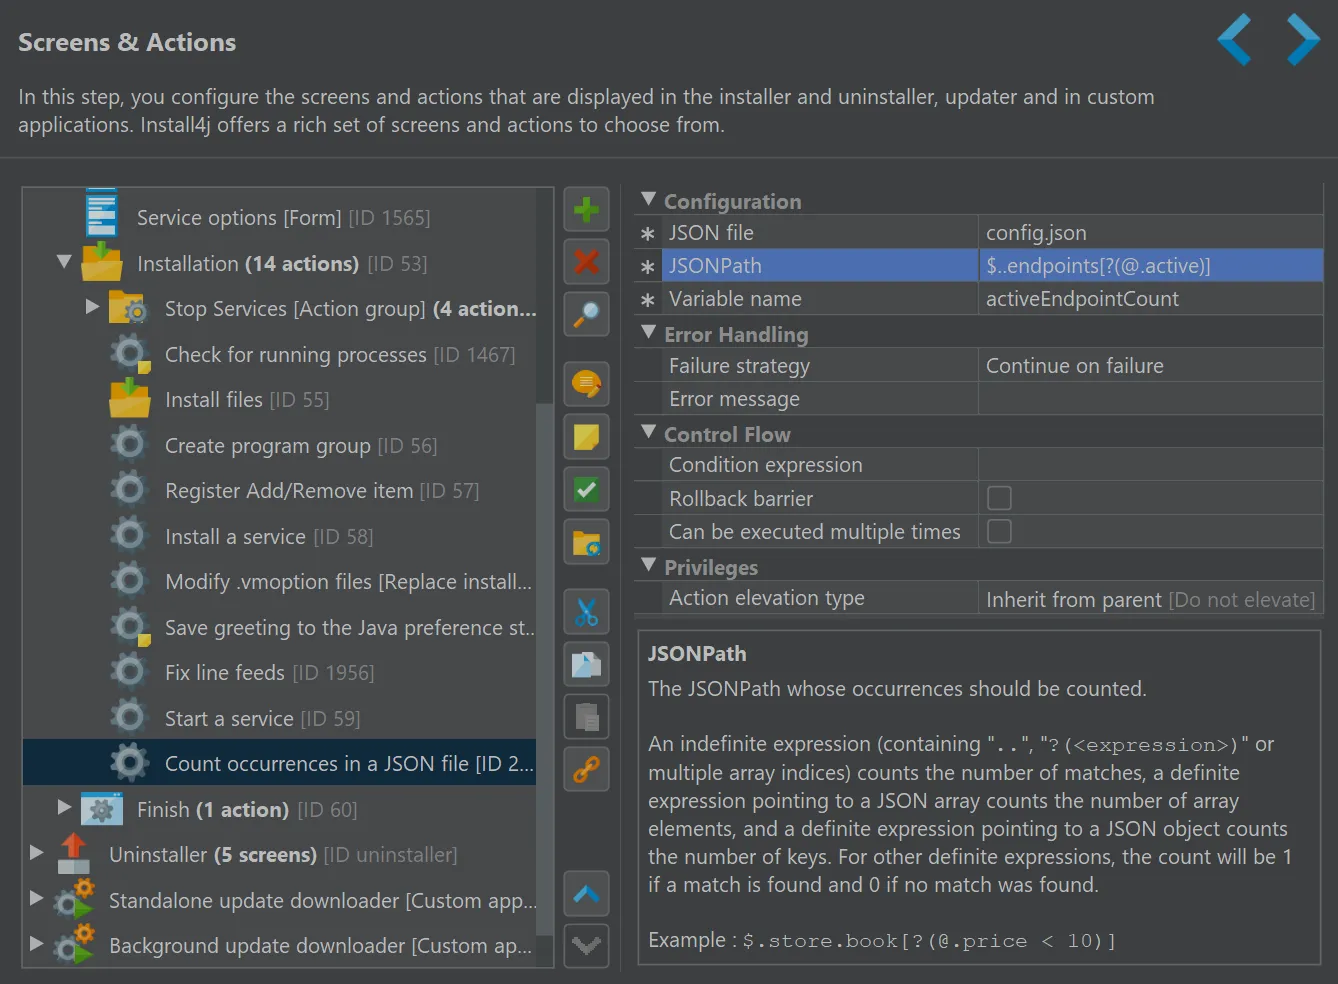
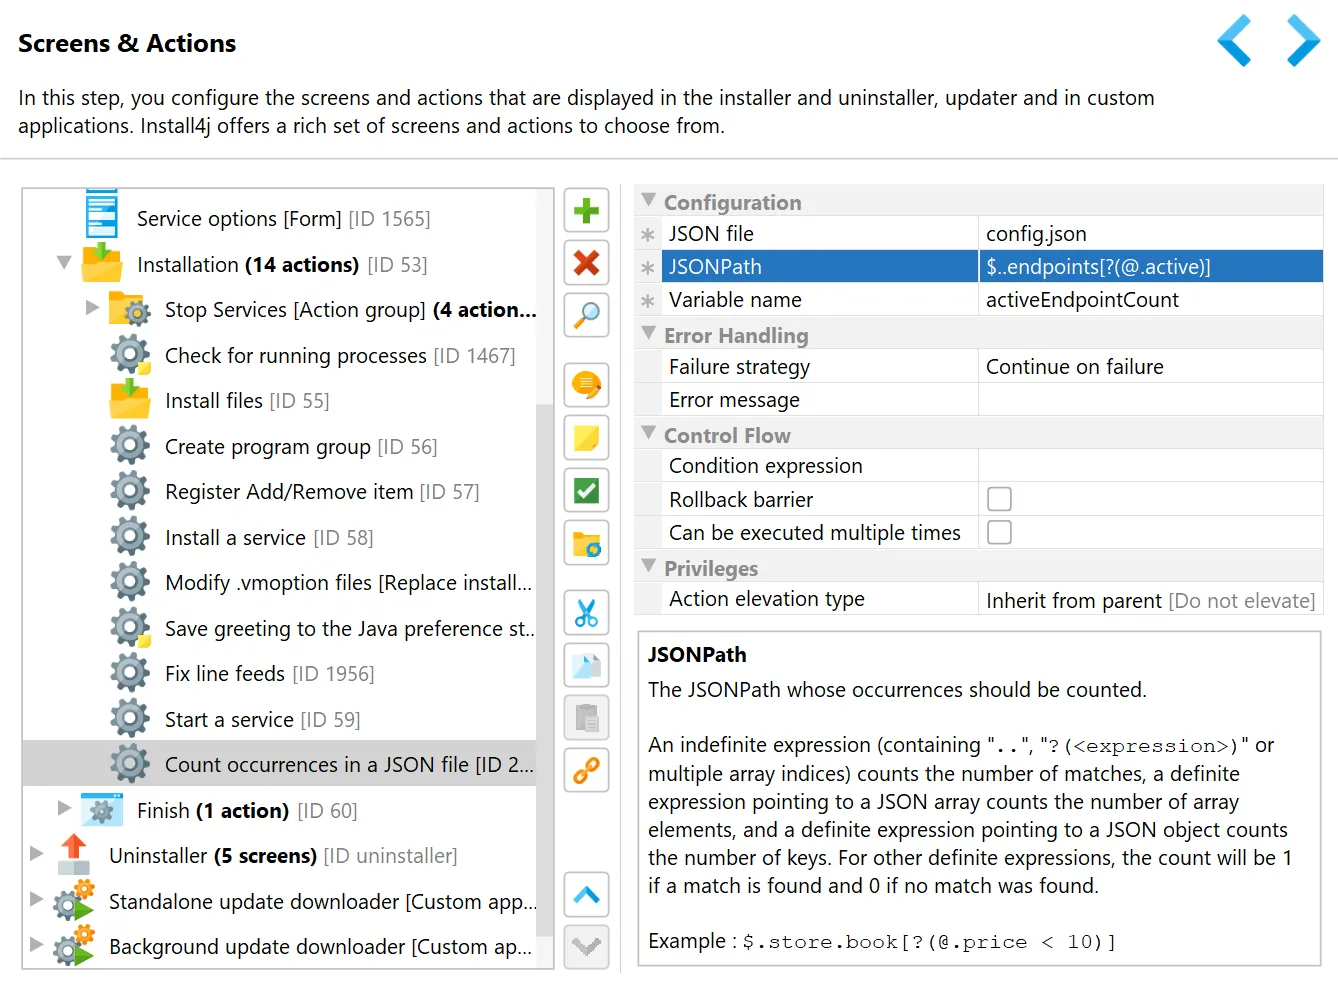
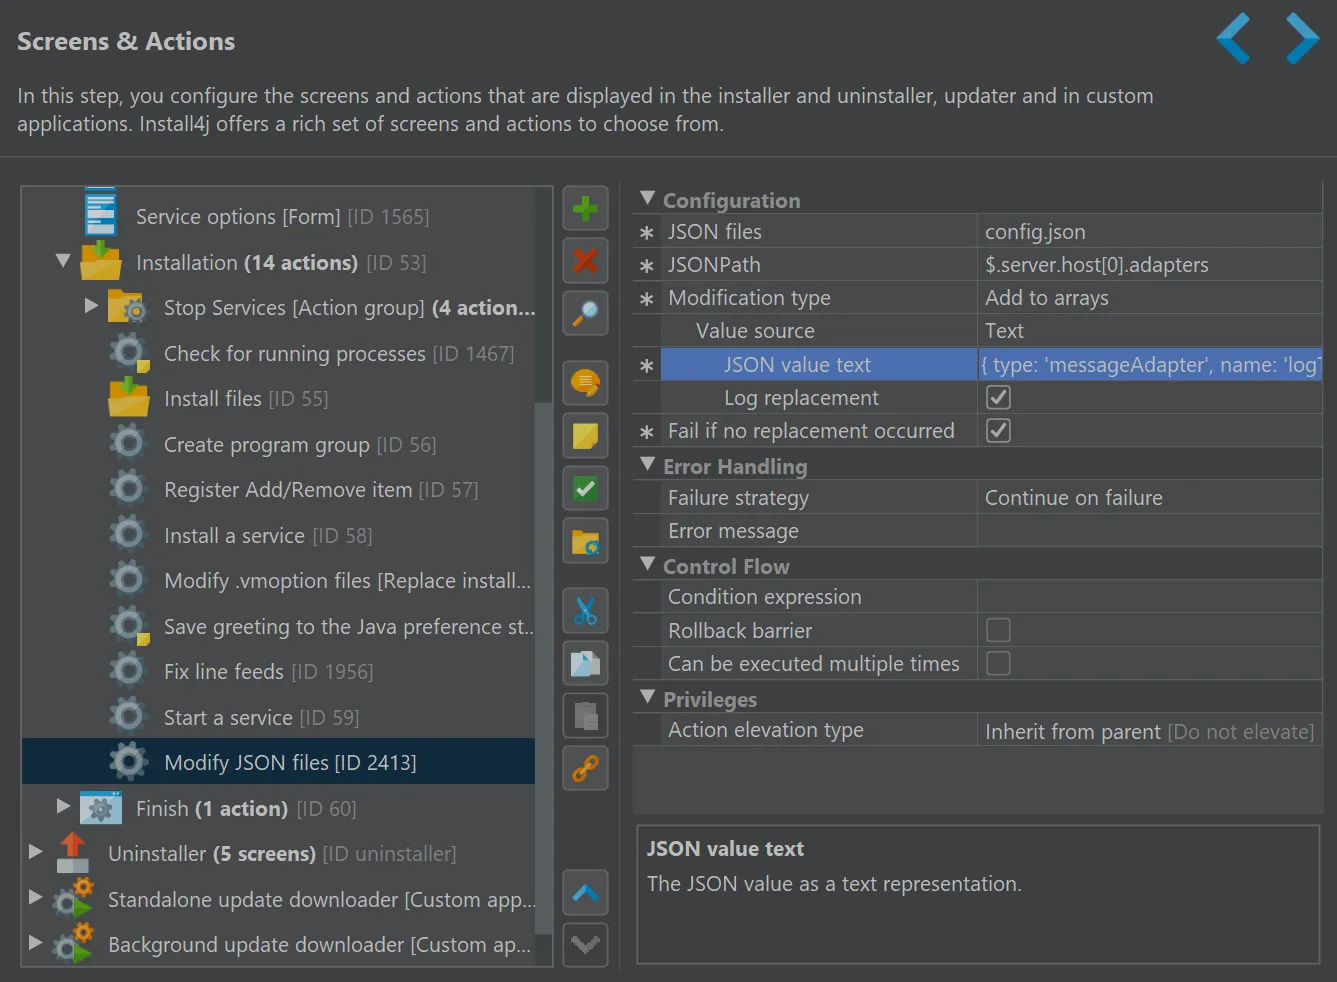
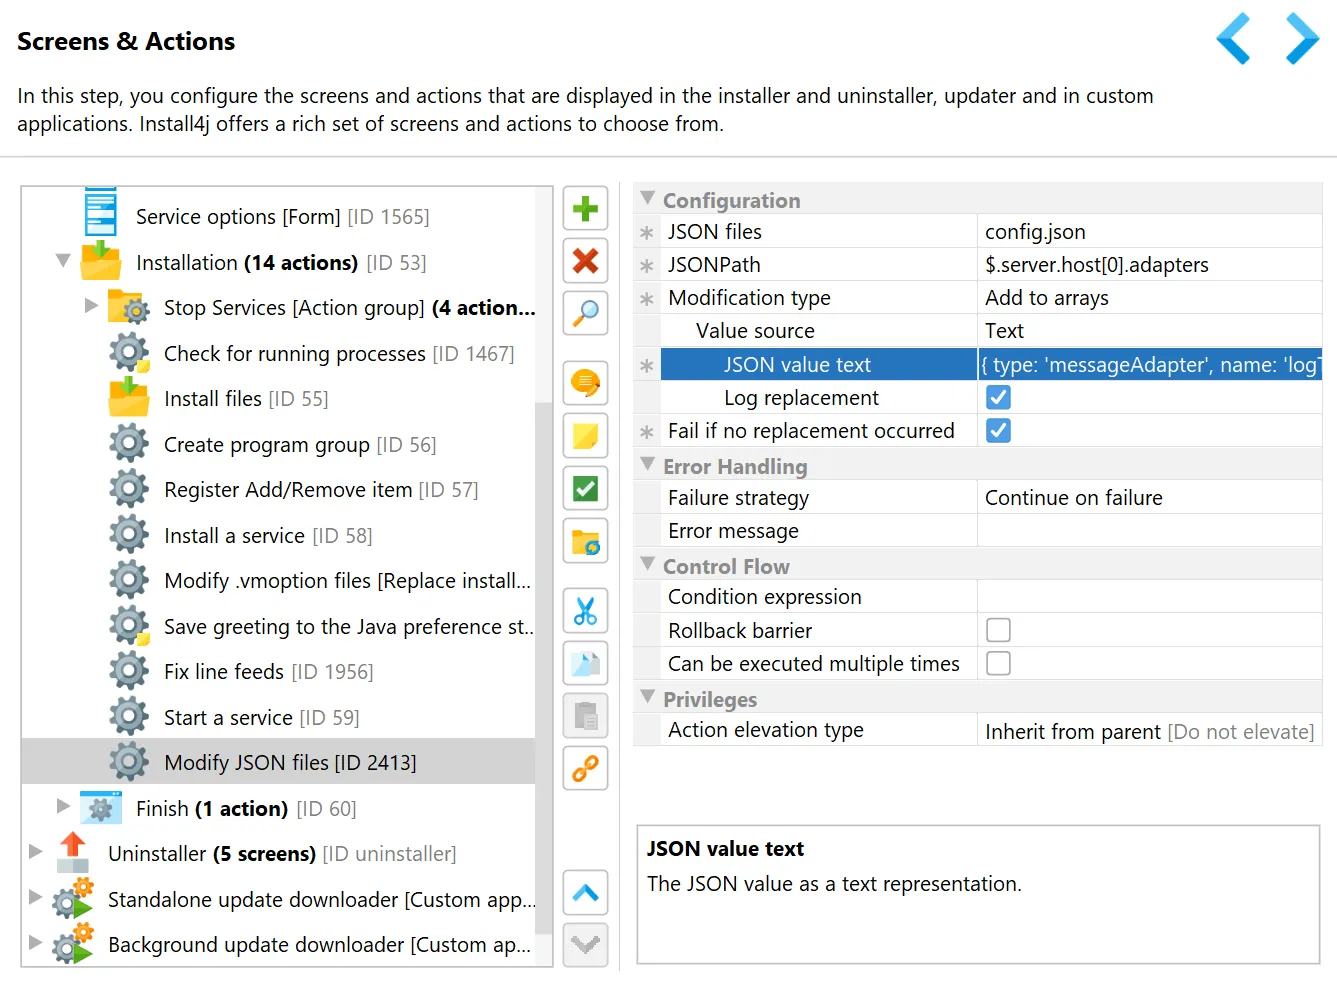
Actions to read and modify JSON files were added. The mechanism to select parts of a JSON document that should be read or modified is
the JSONPath expression. JSON actions use the
Jayway JsonPath library. A shadowed copy of this library is only bundled with the
installer if at least one JSON action is used in your project.
The "Read value from a JSON file" action saves the match of the JSONPath to the specified variable. Depending on the JSONPath
expression, the variable is either a primitive value, an instance of java.util.List for array matches, or an instance of
java.util.Map for object matches.
The "Count occurrences in a JSON file" action counts the number of matches of the JSONPath and saves the result to the specified
variable. In this case, the JSONPath expression should be an indefinite expression.
Finally, the "Modify JSON files" action replaces the matches of a JSONPath expression in one or multiple files. You
can choose to
- Set values
- Replace values
- Add to arrays
- Delete values
- Add or update object keys
- Rename object keys
by adjusting the "Modification type" property and filling out its child properties.
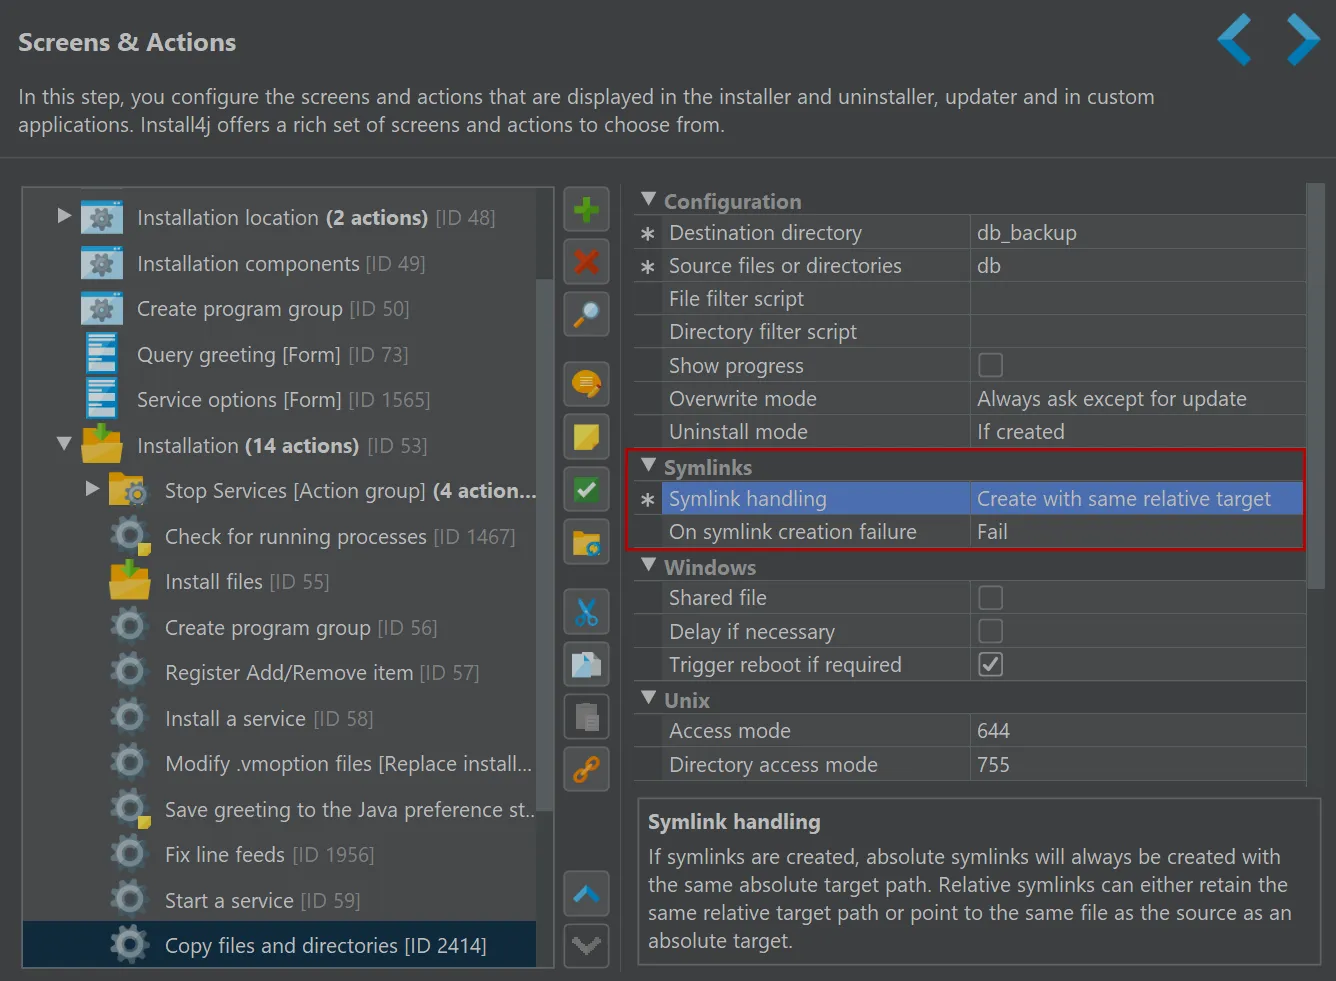
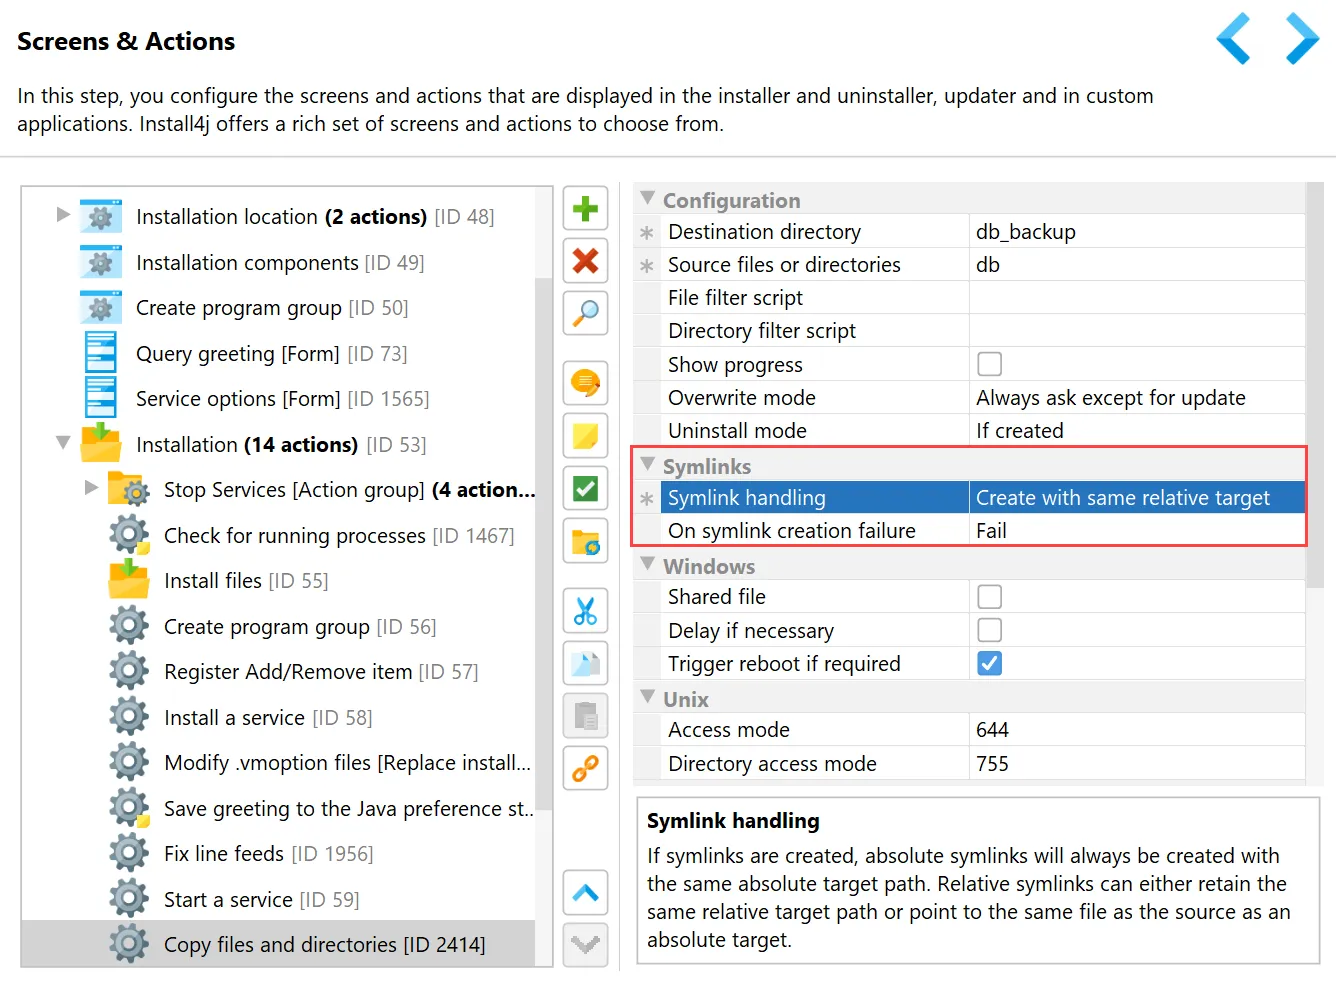
Support for symlinks has been improved. The "Copy files and directories" and "Move files and directories" actions now fully support
symlinks. Their "Symlink handling" property controls whether the content is copied or whether the same relative or absolute target should
be used. The "On symlink creation failure" property offers different failure strategies during symlink handling.
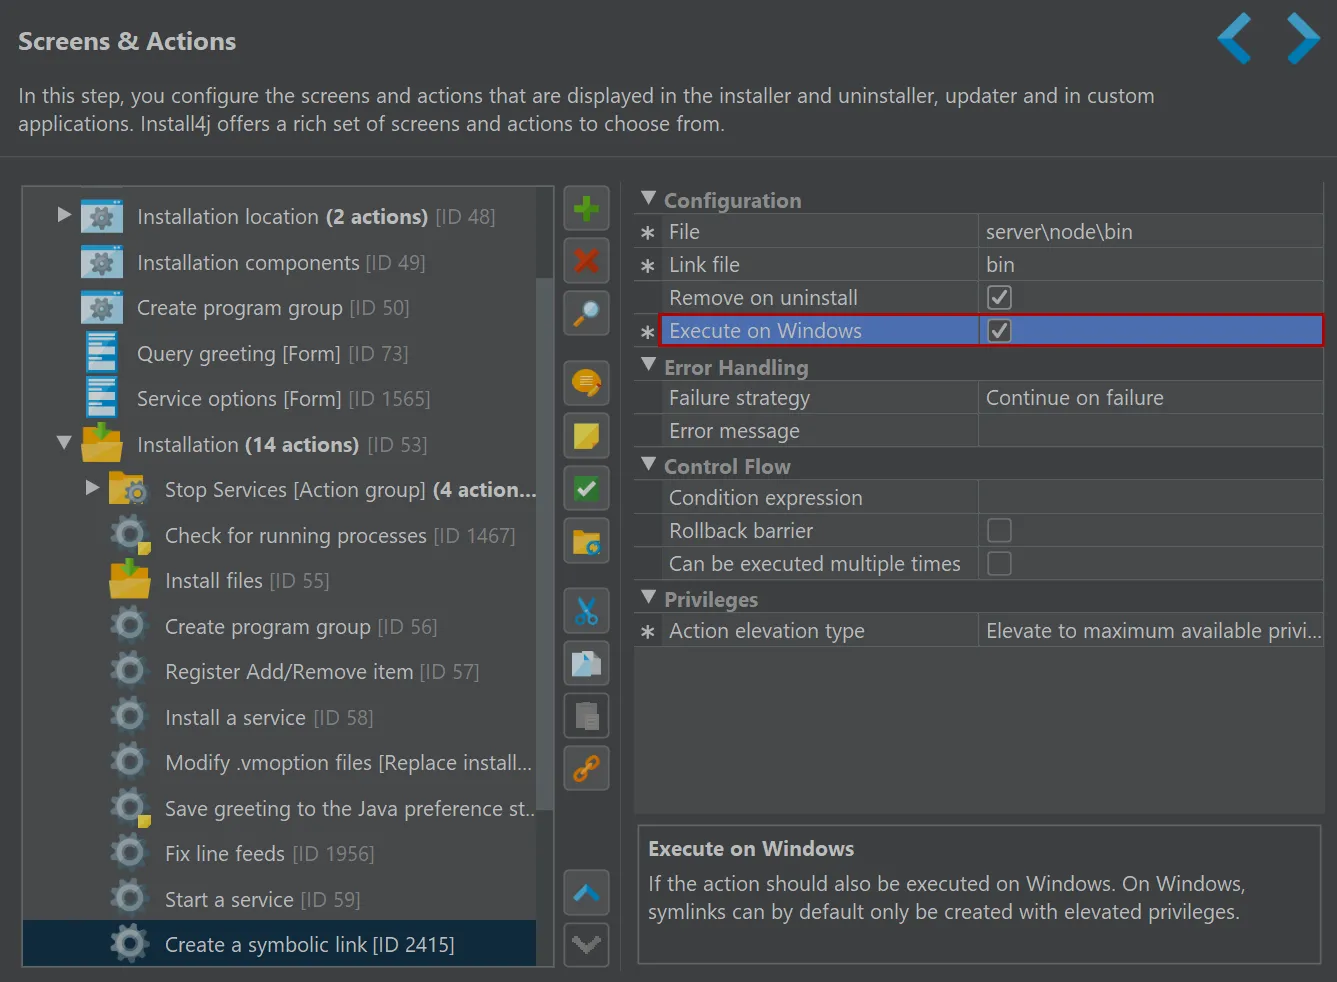
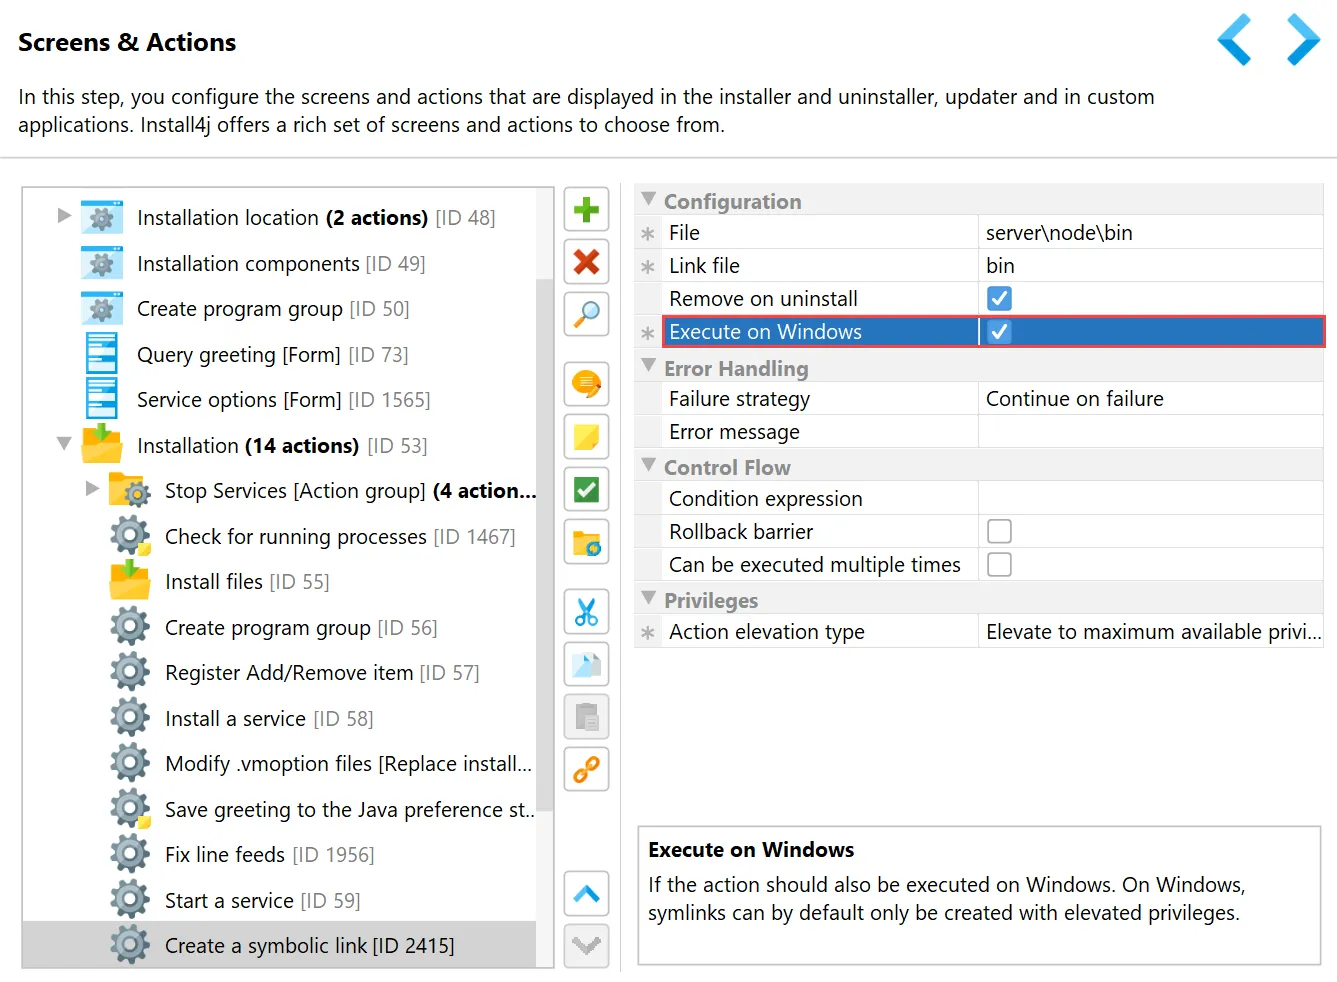
The "Create a symbolic link" action now also supports Windows. Execution on Windows is controlled by the "Execute on Windows" property
and is disabled by default.
The support for reusing the installed JRE in update installers was improved.
There is now a "Previous installations" search sequence entry type under "General Settings → JRE Bundles → Search Sequence"
that allows you to reuse the installed JRE in update installers. Only installations with the same application ID are considered.
If a JRE was found in that way, the "Install files" action now copies that JRE from a different installation to the current installation
directory. This prevents problems that would otherwise occur when the previous installation is uninstalled.
Update downloaders can now make decisions based on the Java version of the update installer by inspecting
com.install4j.api.update.UpdateDescriptorEntry#getJreMinVersion and #getJreMaxVersion.
In that way, you can choose to download an update installer without a bundled JRE if you can determine that the requirements for the JRE
have not changed. Other attributes in the update descriptor can also be used for this purpose. These attributes are configurable under
"Installer → Auto Update Options".
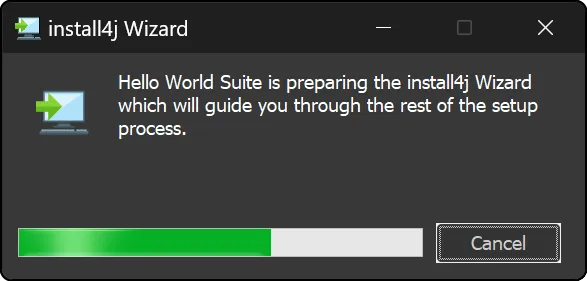
The initial progress dialog of Windows installers now supports dark mode. In those cases where the installer will be shown in dark mode,
the initial progress dialog will also have a dark theme. This is a native dialog and so its styling slightly differs from the main installer
window.
This feature works for Windows 11 and higher.
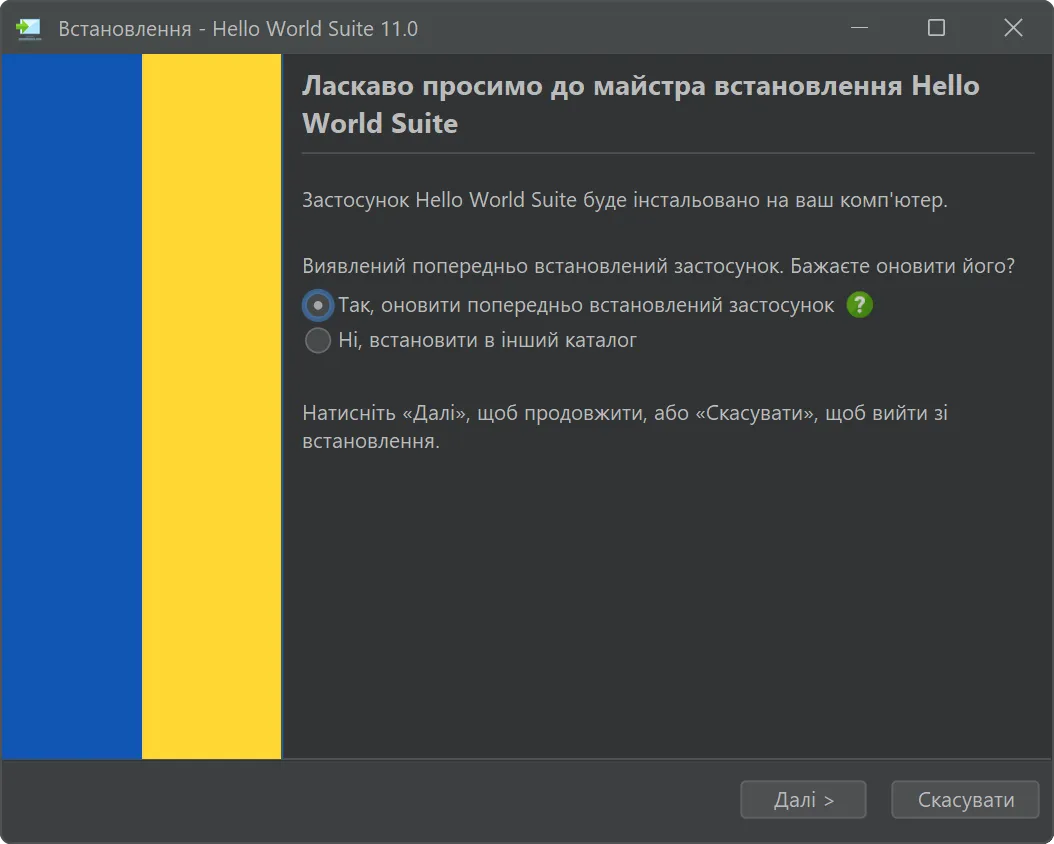
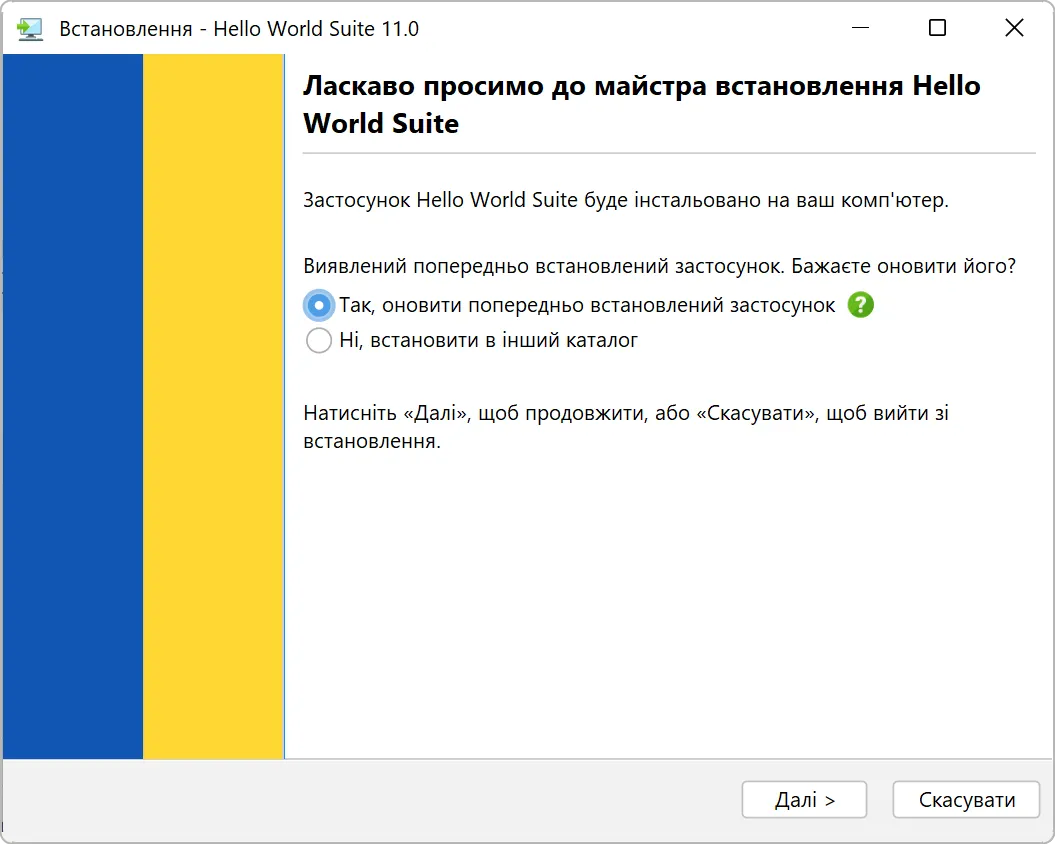
Installers are now localized into Ukrainian.
Localizations are configured under "General Settings → Languages".
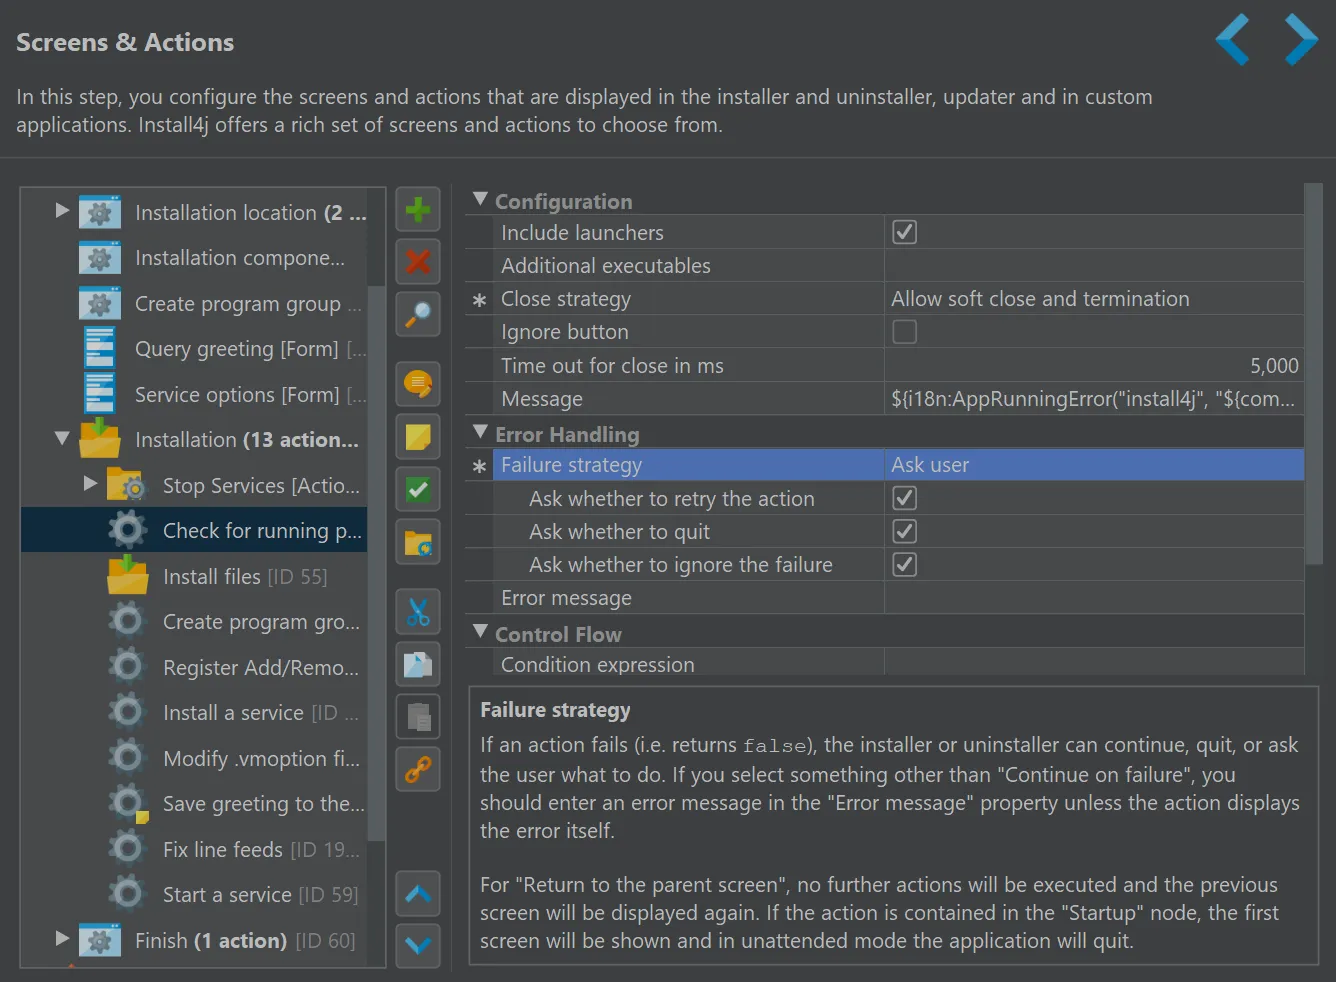
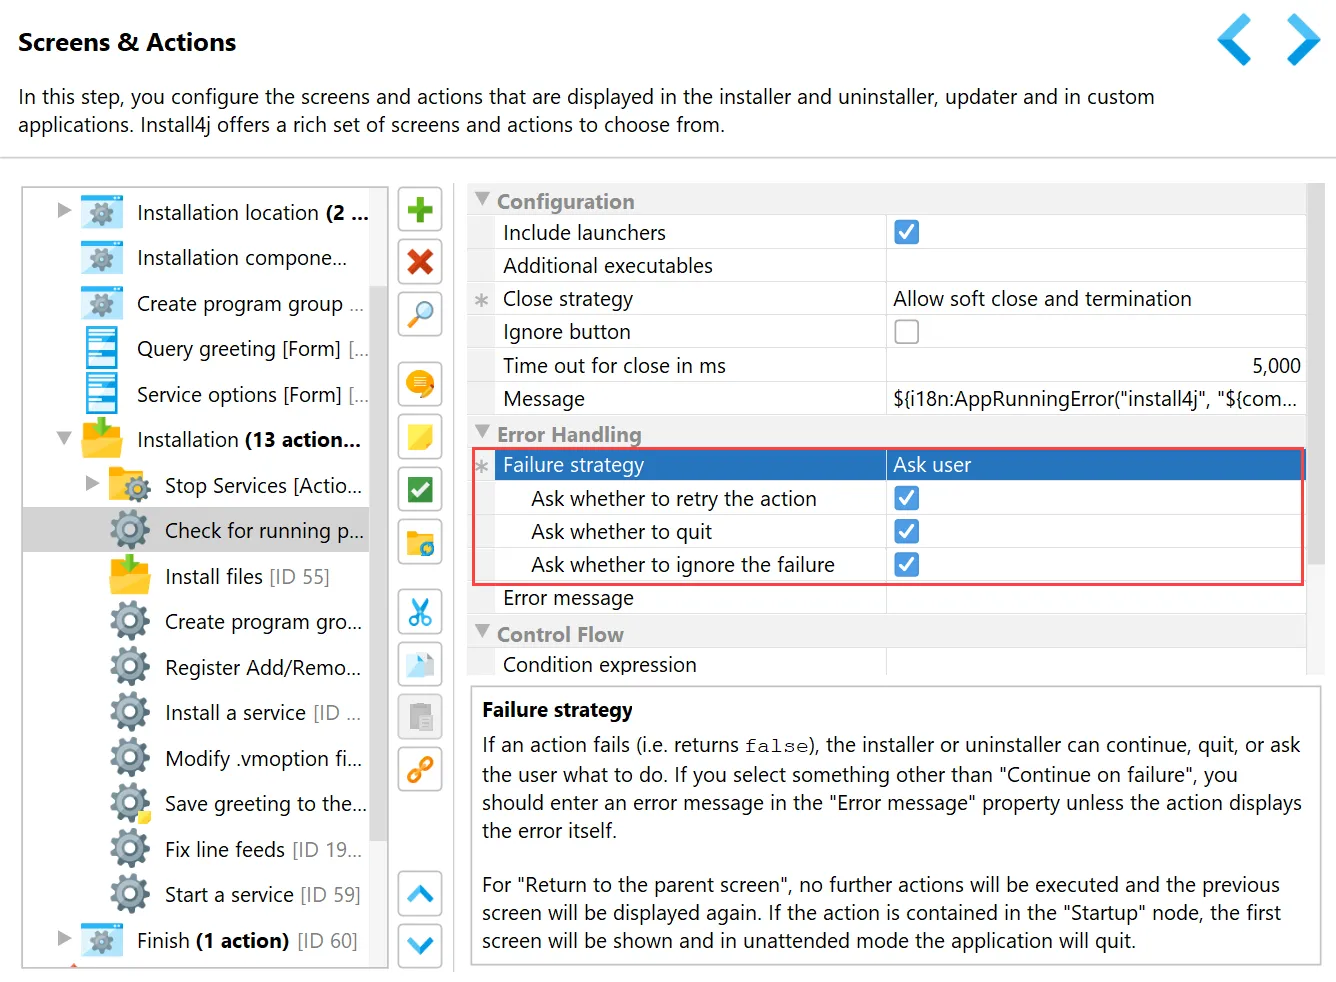
The options presented to the user in case of action failures are now more flexible.
The "Ask user" failure strategy for actions and action groups now has separate sub-options for allowing "Retry", "Ignore" and "Quit"
answers from the user. Previously there were only limited fixed combinations.
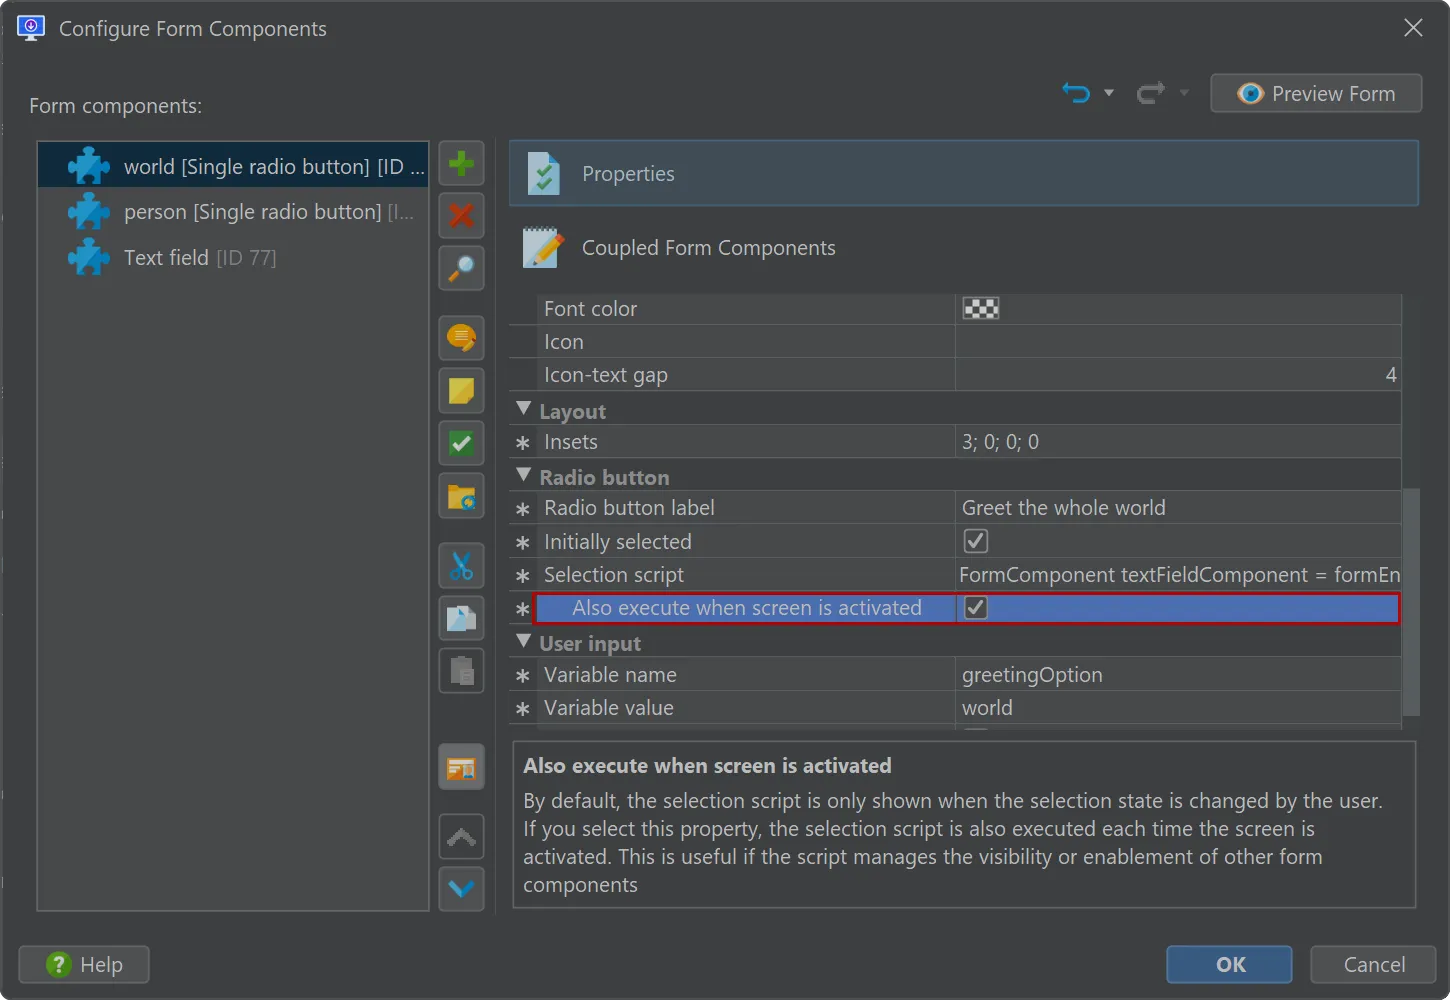
The selection script of several form components is now more flexible.
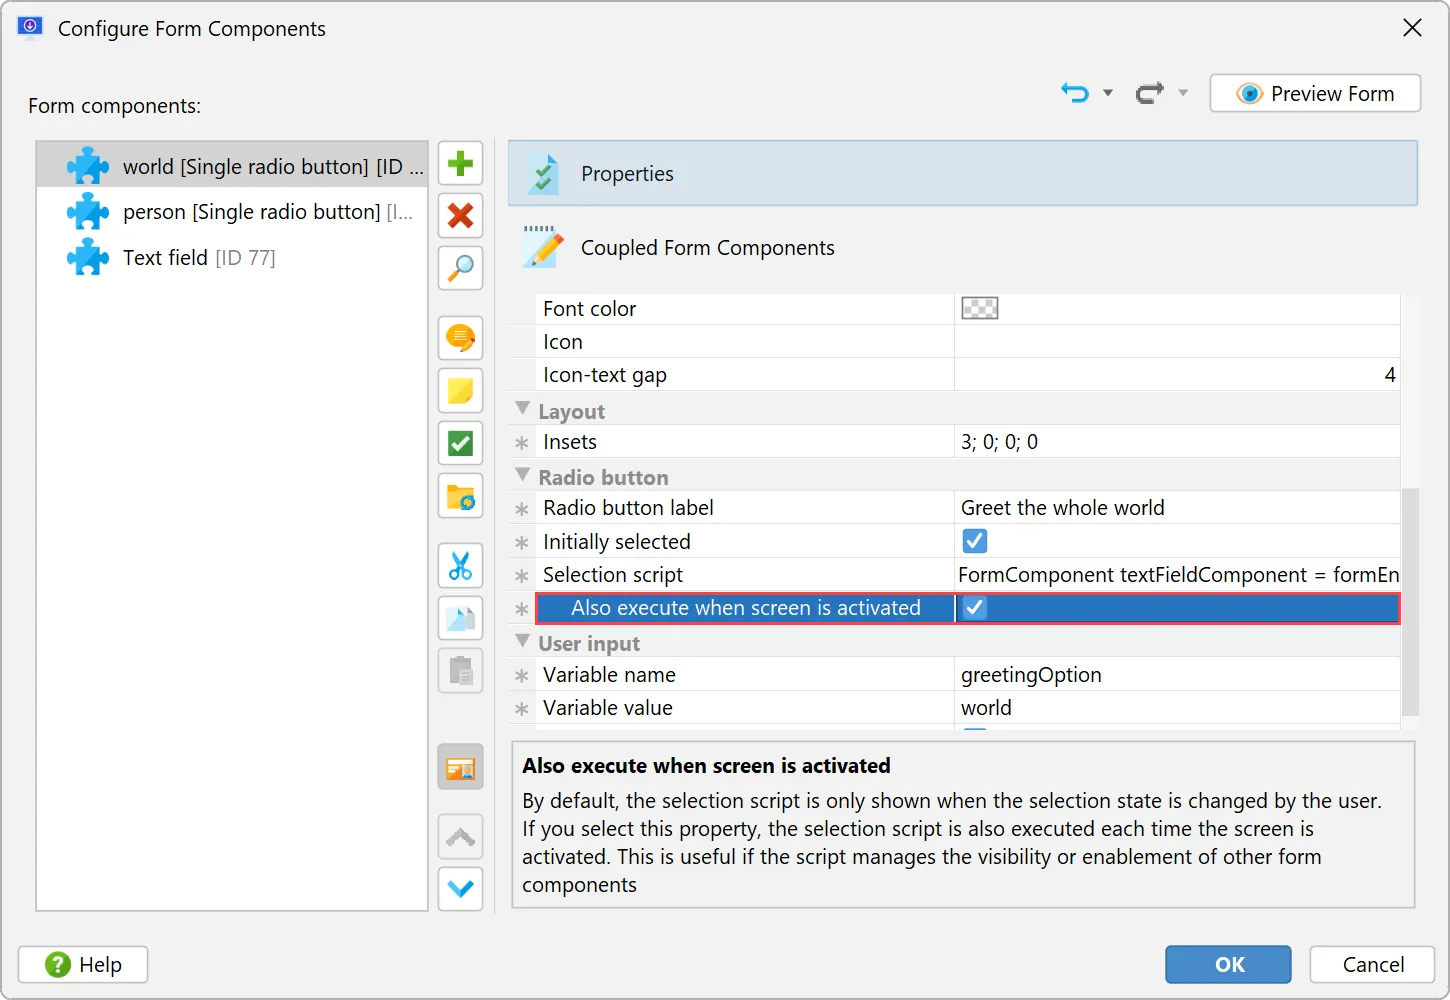
The "Checkbox", "Single radio button" and "Radio button group" form components received an "Also execute when screen is activated" property
as a child property of the "Selection script" property for cases where the script manages the visibility or enablement of other form
components.
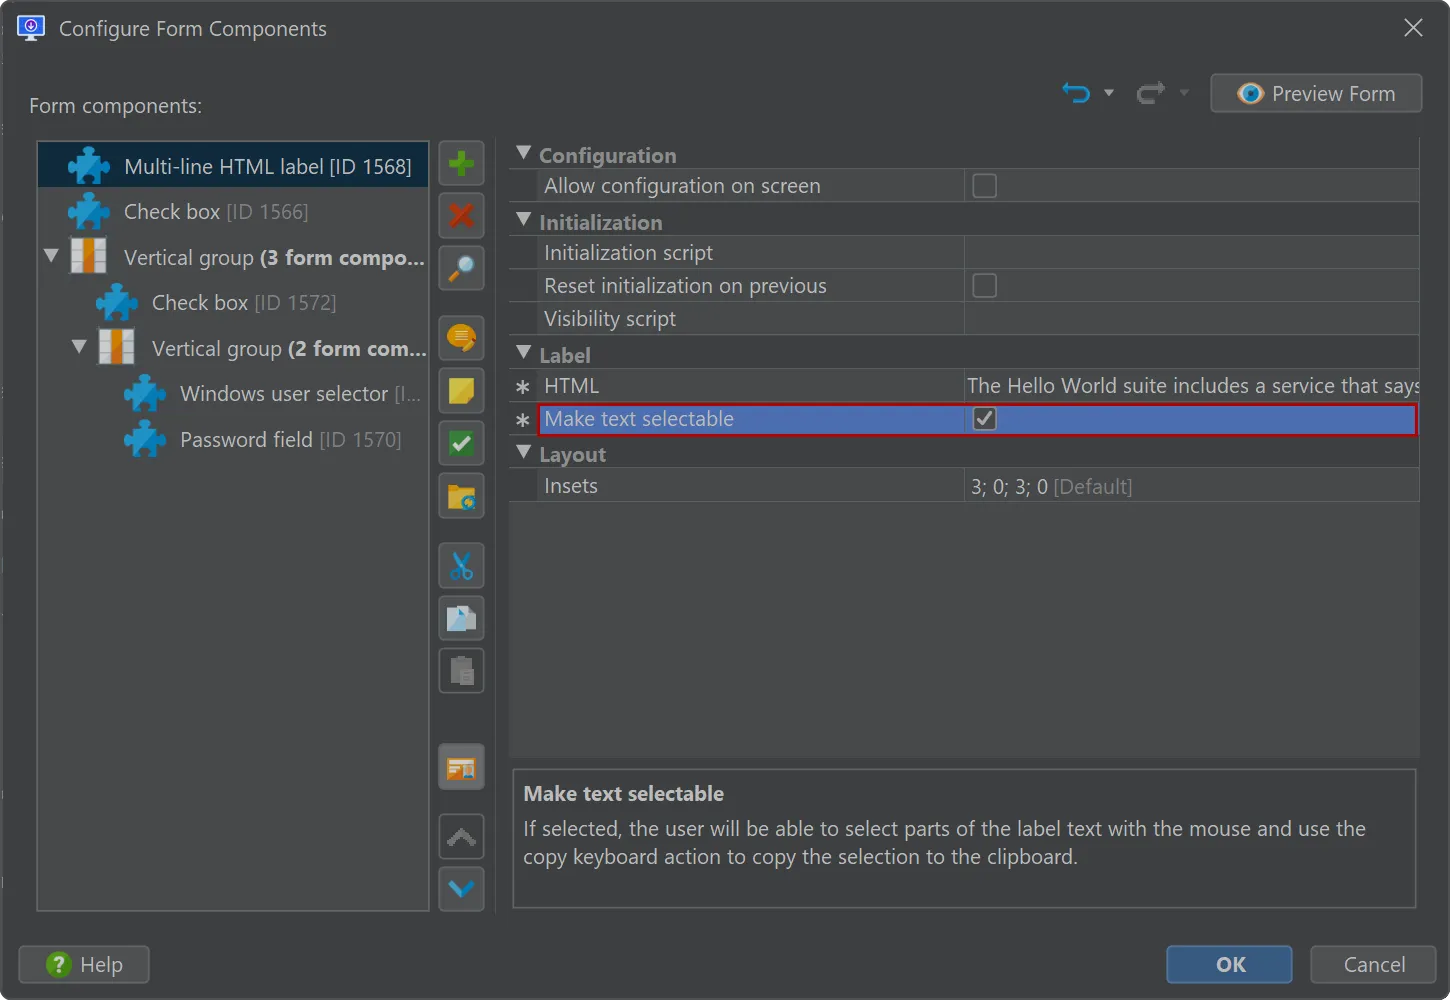
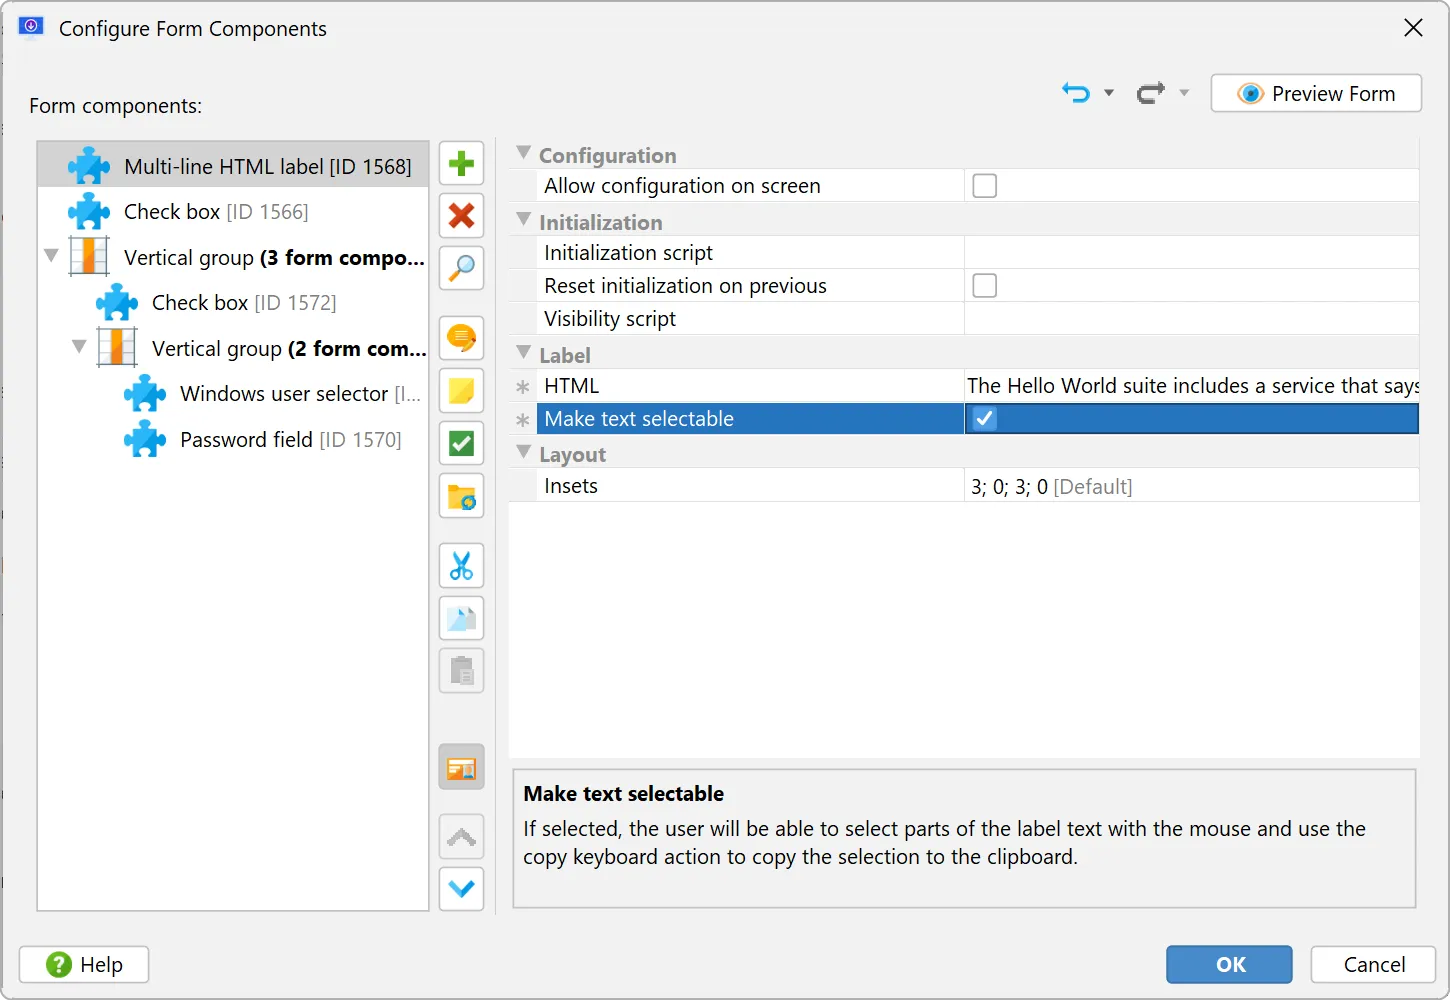
Multi-line labels can be made selectable.
The "Multi-line label" and the "Multi-line HTML label" form components have received a "Make text selectable" property so that the user
can select text with the mouse and copy it to the clipboard.
Gradle, Maven, and Ant plugins can now auto-provision the appropriate version of install4j.
Specifying the "installDir" parameter is still possible, but no longer required.
Here's an example of a minimal Gradle script that builds an installer with install4j 11.0:
import com.install4j.gradle.Install4jTask

plugins {
    id("com.install4j.gradle") version "11.0"
}

tasks.register<Install4jTask>("media") {
  projectFile = file("hello.install4j")
}
A Maven POM to compile an installer will look like this:
<project>
  <modelVersion>4.0.0</modelVersion>
  <groupId>com.test.hello</groupId>
  <artifactId>hello-world</artifactId>
  <version>1.0</version>

  <pluginRepositories>
    <pluginRepository>
      <id>ej-technologies</id>
      <url>https://maven.ej-technologies.com/repository</url>
    </pluginRepository>
  </pluginRepositories>

  <build>
    <plugins>
      <plugin>
        <groupId>com.install4j</groupId>
        <artifactId>install4j-maven</artifactId>
        <version>11.0</version>
        <executions>
          <execution>
            <goals>
              <goal>compile</goal>
            </goals>
            <configuration>
              <projectFile>${project.basedir}/hello.install4j</projectFile>
            </configuration>
          </execution>
        </executions>
      </plugin>
    </plugins>
  </build>
</project>
The earlier method of specifying the "installDir" property remains available.
The Gradle plugin now works with the configuration cache.
To check whether media files are up to date, the Gradle task would need to determine the list of input files.
Because the plugin cannot do that without invoking the compiler, the install4j task is never up to date and is always executed.
Starting with 11.0, if you define your own file inputs on the task, the up-to-date check is enabled.
You can track input files with calls like
...
inputs.dir(stagingDir)
inputs.files(file1, file2)
...
in the task definition.
To support the configuration cache, we had to migrate all properties to Gradle providers. This means that the binary interface of the
tasks has changed and you will likely have to adjust your build script.
For a discussion of breaking changes when migrating from install4j 9, please see
this blog post.
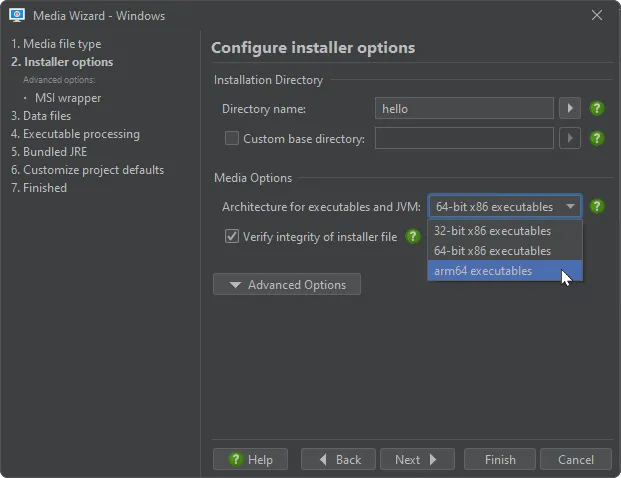
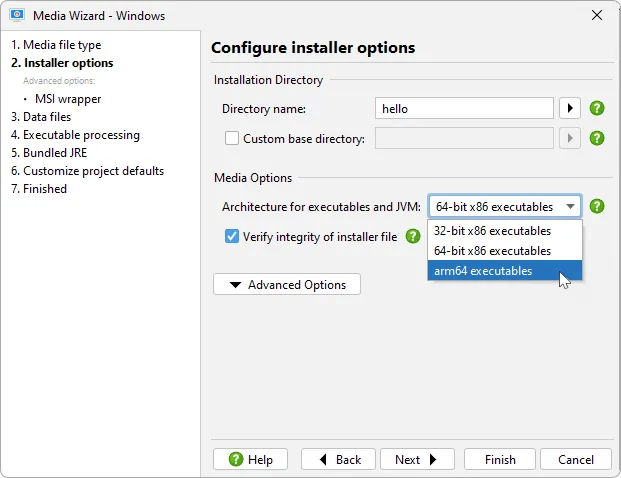
install4j now supports Windows on ARM. In addition to the 32-bit and 64-bit x86 architectures, you can choose the arm64 architecture
on the "Installer options" step of the Windows media wizard. With native ARM support, your application will run much more quickly
than as an x86 binary in the emulated mode.
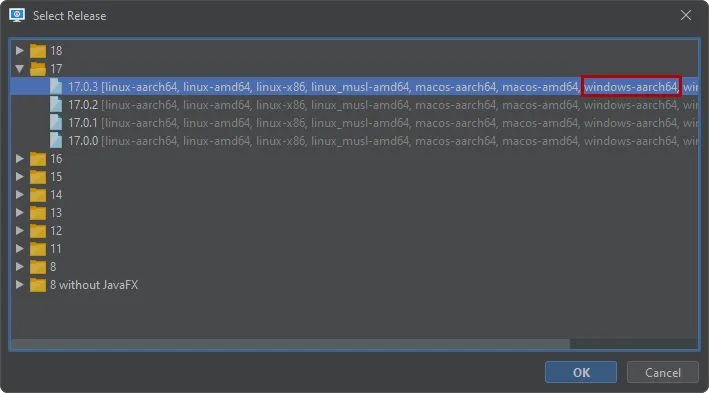
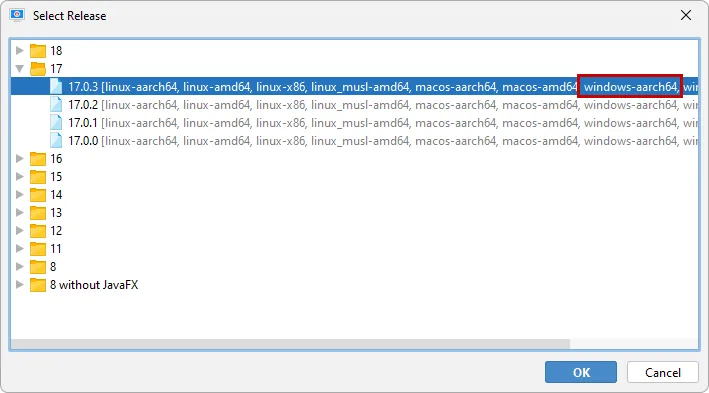
Both the installer as well as the generated launchers will be native arm64 executables in that case and will require a JRE with the
windows-aarch64 architecture. The Zulu and Liberica JDK providers contain such builds for recent Java releases.
Also, installers will find installed Microsoft JREs on Windows ARM machines if no JRE is
bundled.
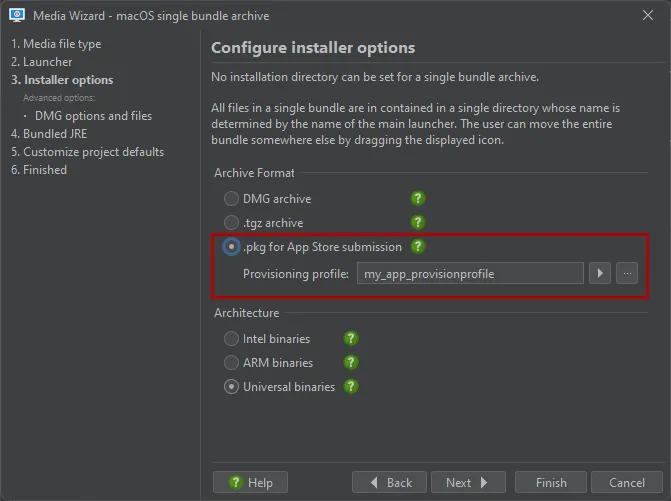
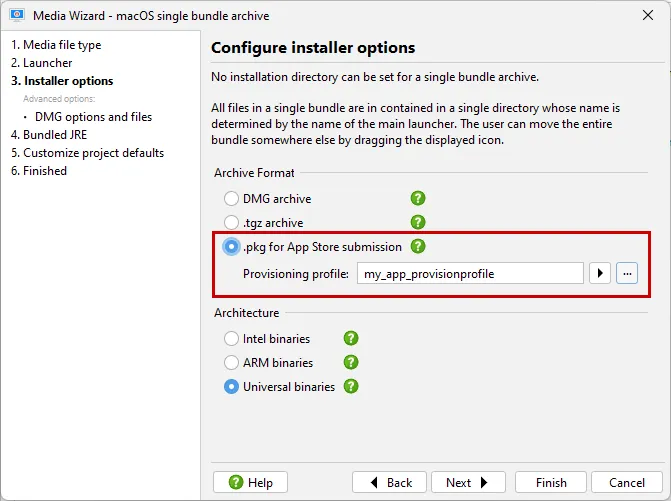
It is now possible to submit apps to the Apple App Store with install4j. The macOS single bundle archive type can be configured to
create a ".pkg for App Store submission". A provisioning profile has to be specified that is created in App Store Connect.
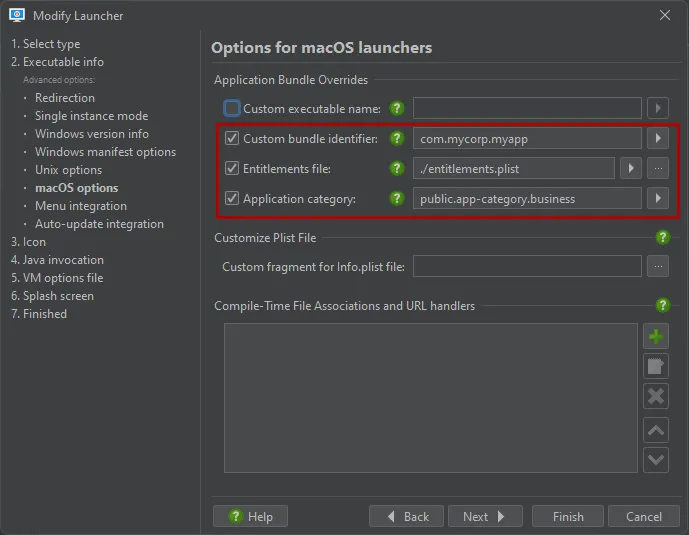
An app that is submitted to the App Store must fulfill a number of requirements and pass a review process by Apple. In the launcher, you
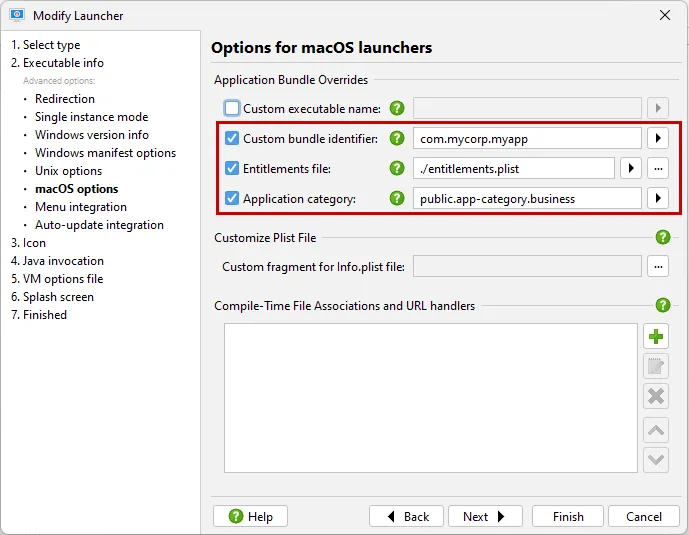
can configure a number of properties that are relevant for this purpose. A custom bundle identifier must be set to match the identifier in
the Apple Developer Account configuration, and the application category is required for an App Store submission. In addition, your
app may require entitlements such as the right to read and write user-selectable files. This is done in an entitlements file. The sandbox
is switched on automatically by install4j.
install4j will build a .pkg file that you can test locally to check the effects of the sandbox and your entitlements. The .pkg file
is then uploaded with the Transporter app or Xcode command line tools. A dedicated chapter has been added in the documentation that deals
with Apple App Store submission.
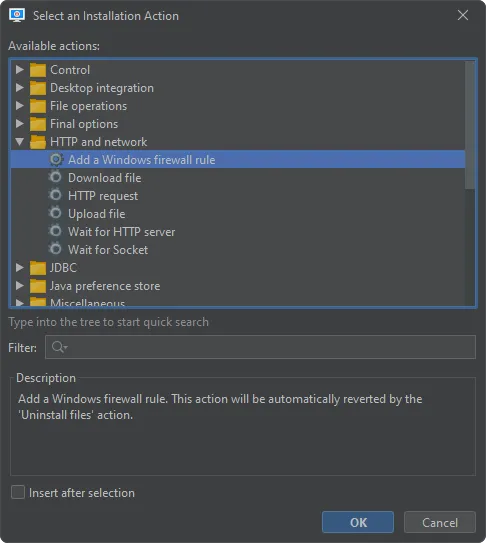
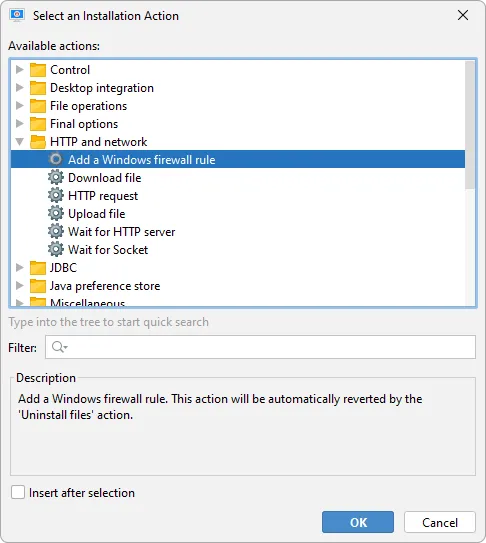
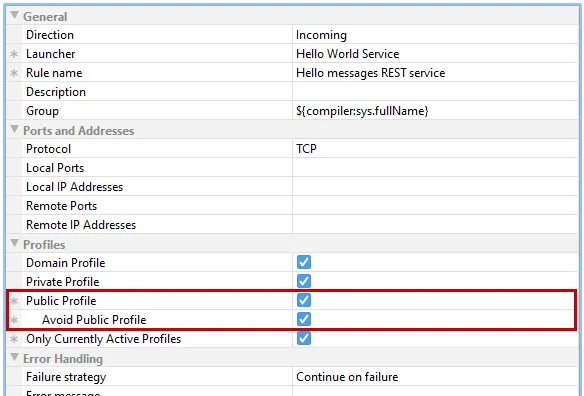
Support for adding Windows firewall rules has been added. You can add one or multiple "Add a Windows firewall rule" actions to your
installer to allow incoming or outgoing connections through the built-in Windows firewall.
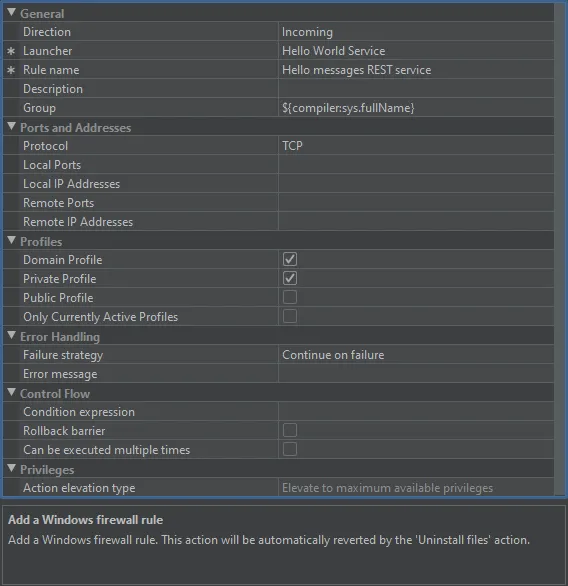
Each firewall rule applies to a selected launcher and handles either incoming or outgoing connections. Because firewall rules are shown in
the Windows management console, they need a rule name and optionally a rule group as well as a detailed description.
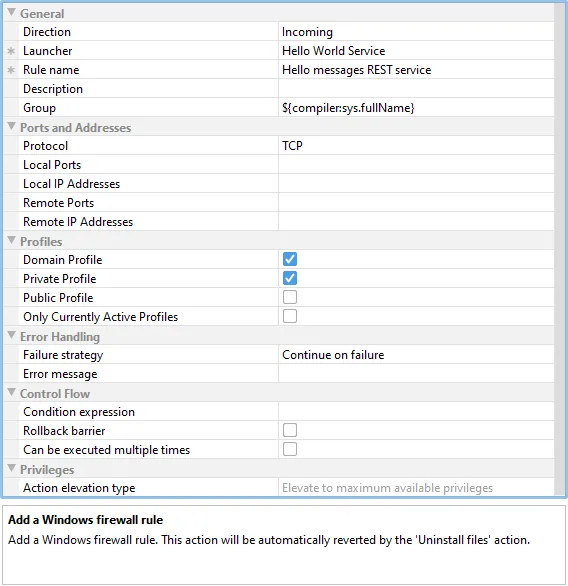
The properties of the action mirror the available settings when editing firewall rules in the Windows management console. By default,
any ports and IP addresses can be used on both local and remote side, but you can optionally restrict them for a more secure configuration.
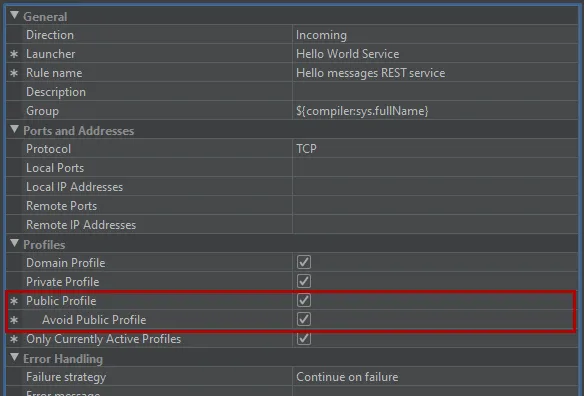
Windows offers different profiles for network connections that determine the security of the connection. Rules can be created in selected
profiles only.
As recommended by Microsoft, rules are not created for the public profile by default. If you really want to include it, consider
selecting the "Avoid public profile" child property. In that case, the public profile is only included if it is the only profile that is
currently active.
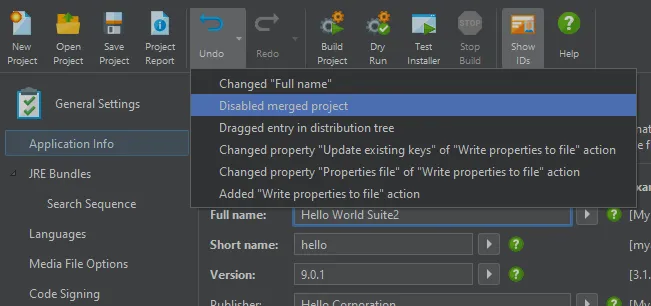
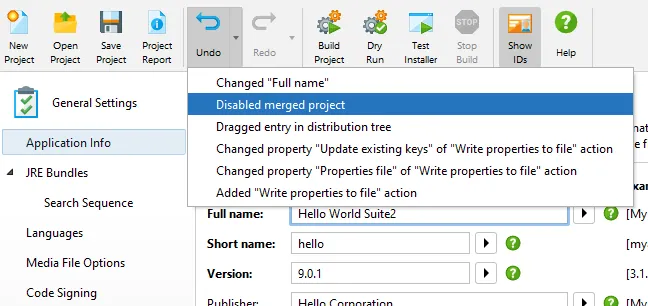
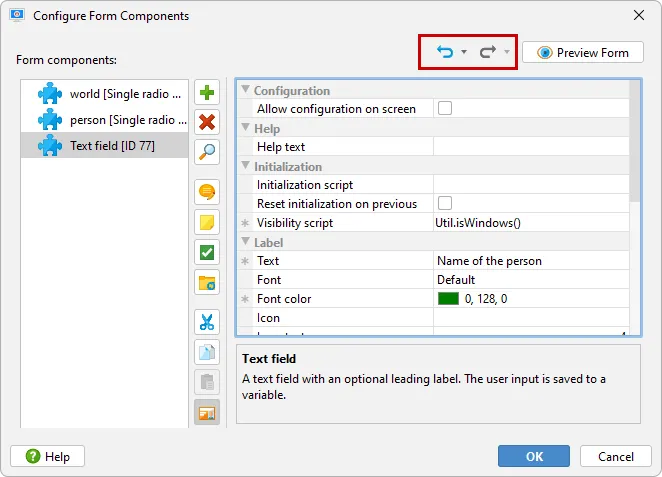
Undo/Redo functionality has been added for all modifications in the install4j IDE. The corresponding tool bar buttons show
the description of the last item in their tool tips. Clicking on the main area of these buttons will undo or redo the last edit.
Clicking on the drop-down arrow on the right side of the undo/redo tool bar buttons, will bring up a list of undoable or redoable items.
By clicking on an item you can undo or redo all items up to the selected item.
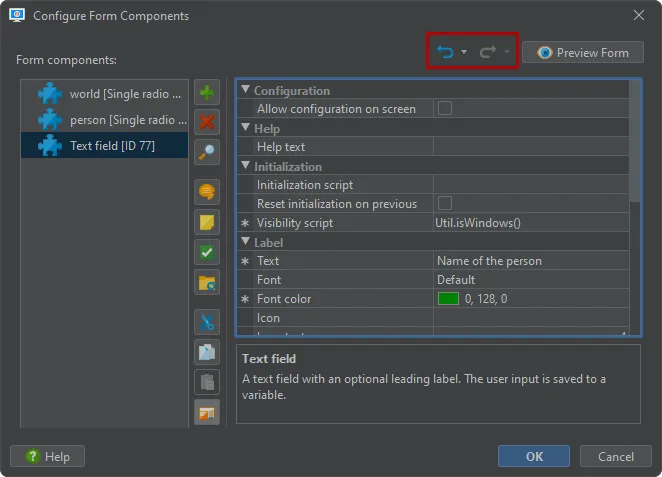
Modifications that were performed in modal dialogs such as the launcher wizard or the media wizard show as one atomic item. In the
form component configuration dialog there are separate undo/redo buttons for the life cycle of the current dialog.
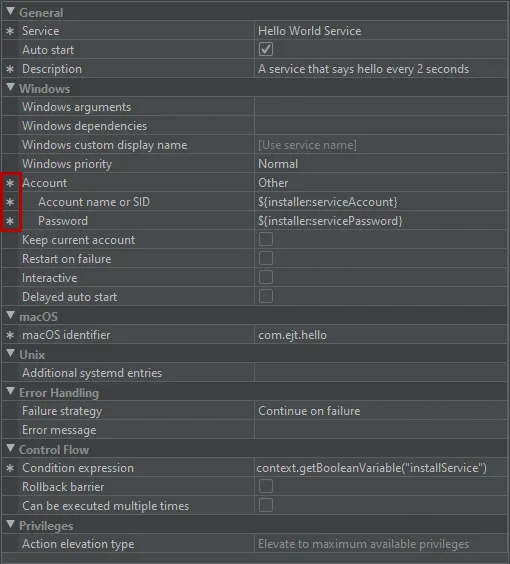
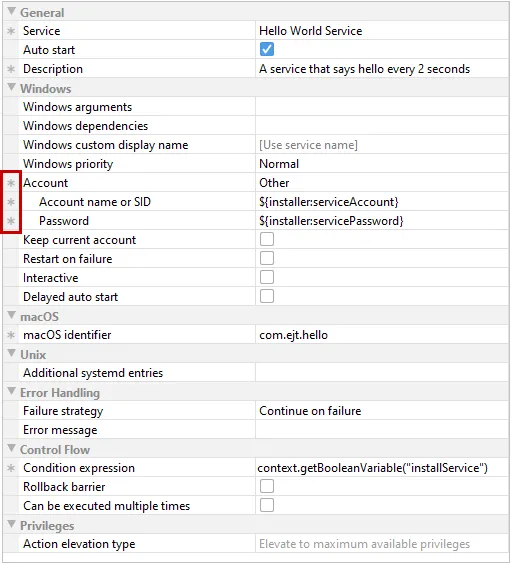
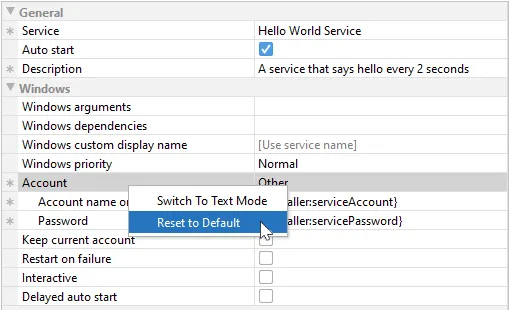
Default values for properties of installer applications, screens, actions and form components are now supported in the install4j IDE.
If you change a property from its default value, a star-shaped marker in the gutter will indicate the non-default status of the property.
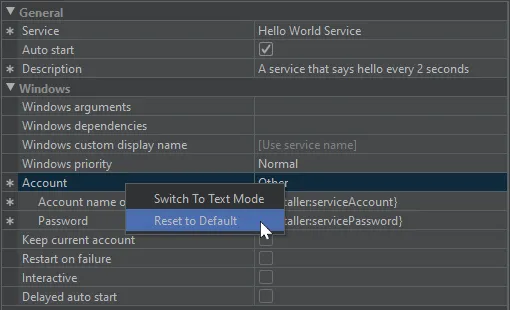
The context menu of properties contains a menu item to reset the selected property to its default value. This will also revert the text input
mode if it was set for the property.
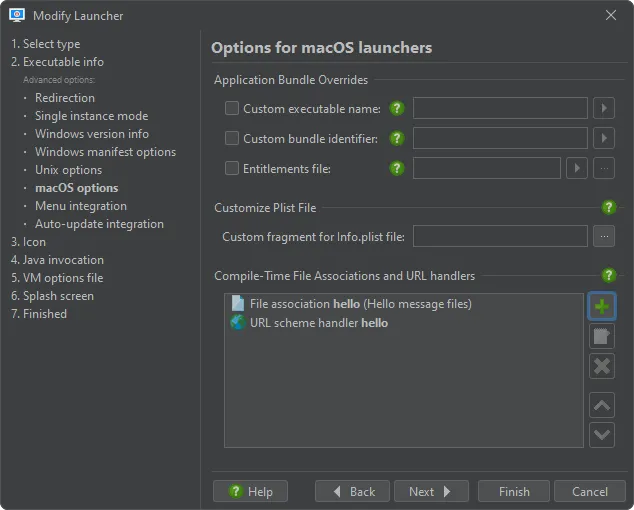
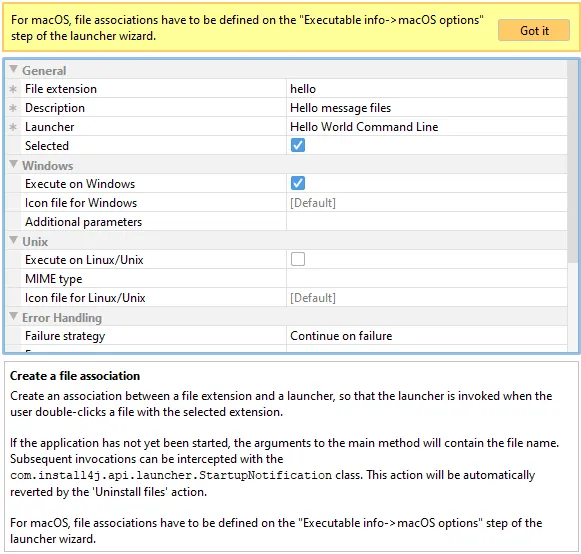
File associations and URL handlers for macOS are now configured for each launcher. Starting with ARM-based macOS machines,
the Info.plist files of launchers cannot be modified at runtime without breaking the signature, so all content must be generated
at compile time.
This means that it is not possible to conditionally add file associations or URL handlers at runtime anymore.
In earlier versions of install4j, the related behavior was different for Intel and ARM-based macOS machines, which was inconsistent.
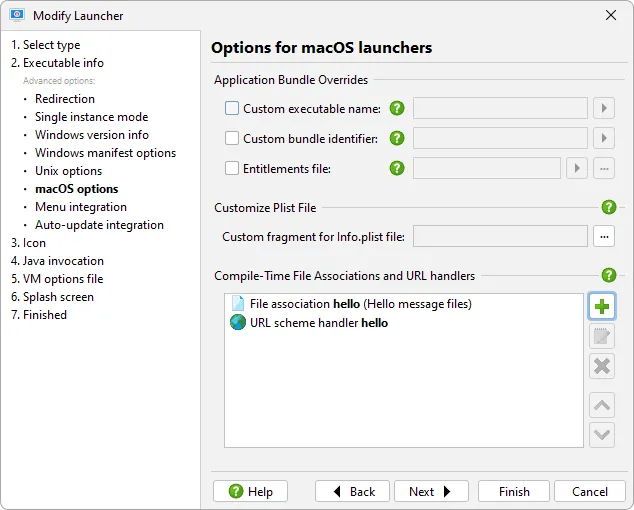
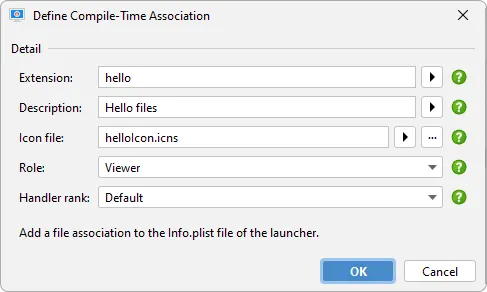
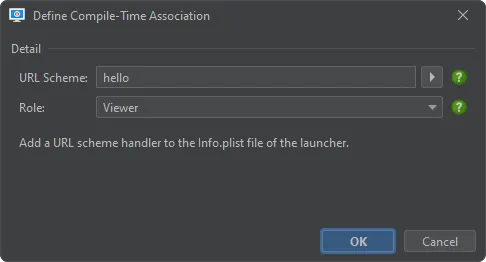
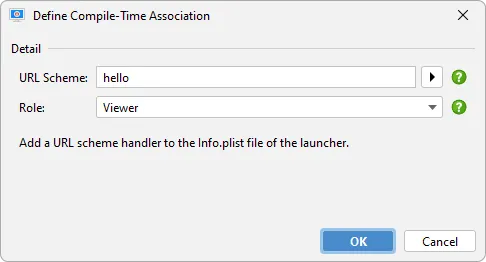
To provide a way of configuring this information, the "Executable info → macOS options" step of the launcher wizard now contains a list of
file associations and URL handler definitions that are translated into the corresponding entries of the Info.plist file of the installer.
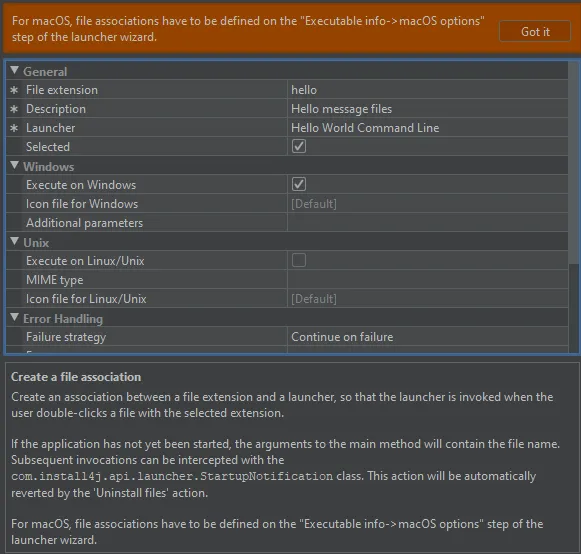
Previously, archives would process the definitions of selected "Create a file association" and the "Register a URL handler" actions in the
"Installer → Screens & actions" section.
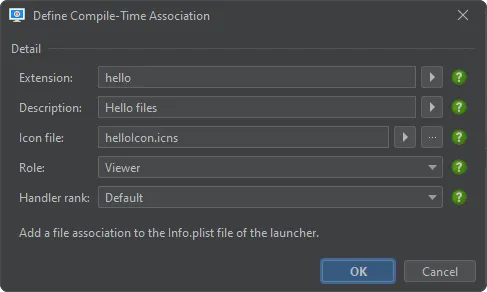
You can either add a file association or a URL handler. A file association is defined by its extension, a description and an optional icon
file. The role indicates whether the application just displays files or also edits their content.
The URL handler is defined by the URL scheme, so for a scheme of "hello" it handles requests in the browser that start with "hello://".
The "Create a file association" and the "Register a URL handler" actions now only work for Windows and Linux. If you open
projects that were saved with previous versions of install4j, the information from these actions is migrated into the new settings for macOS
in the launcher wizard.
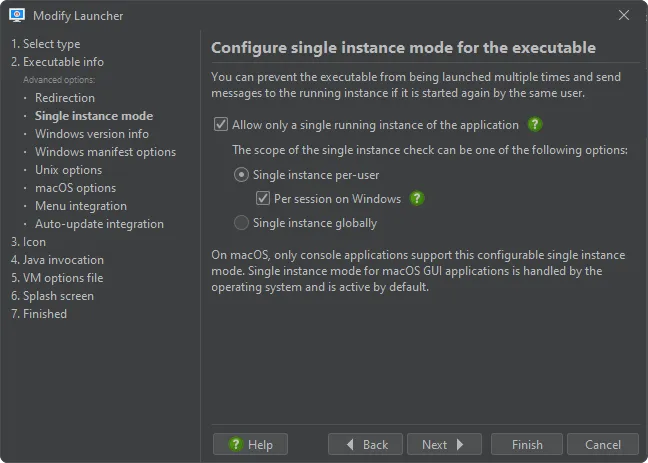
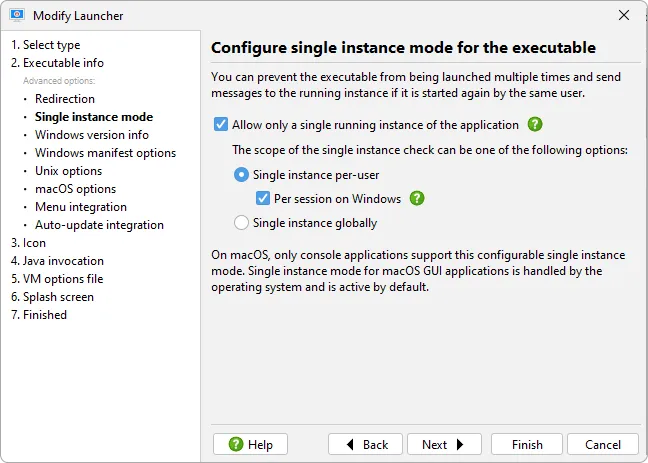
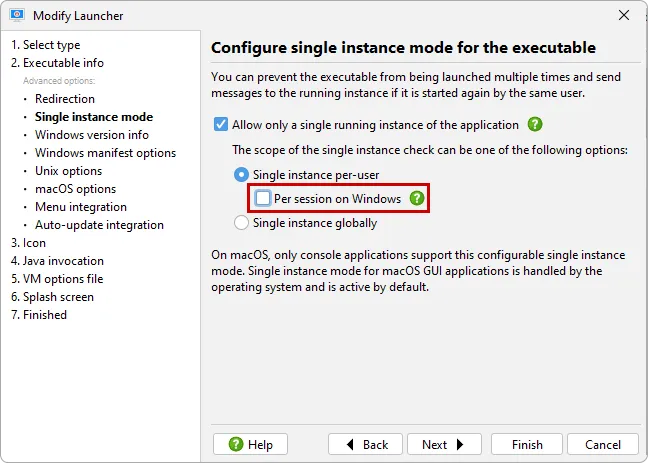
A global single instance mode has been added for generated launchers. Previously, single instance mode was always per-user, so
two different users could each start an instance of the application. The new single instance mode settings have been moved to a separate
step in the launcher wizard.
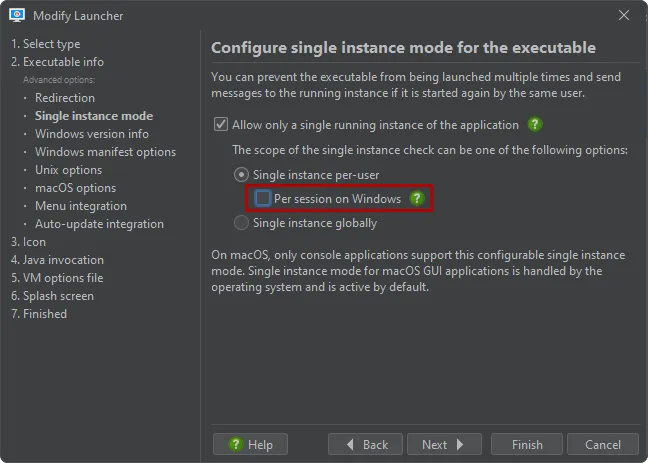
In addition, single instance mode has previously always been per session in Windows. The same user can run multiple RDP sessions to
a remote machine, and single instance mode should be able to cover all such sessions if desired. To do that, you can deselect the
"Per session on Windows" check box.
Startup notifications through the com.install4j.api.launcher.StartupNotification API are only
delivered if the same user in the same UI session starts the application again.
The icon compiler can now create ICNS icons with Retina images. Image files whose file names end with @2x.png and are located
next to the configured image files are picked up automatically by the icon compiler.
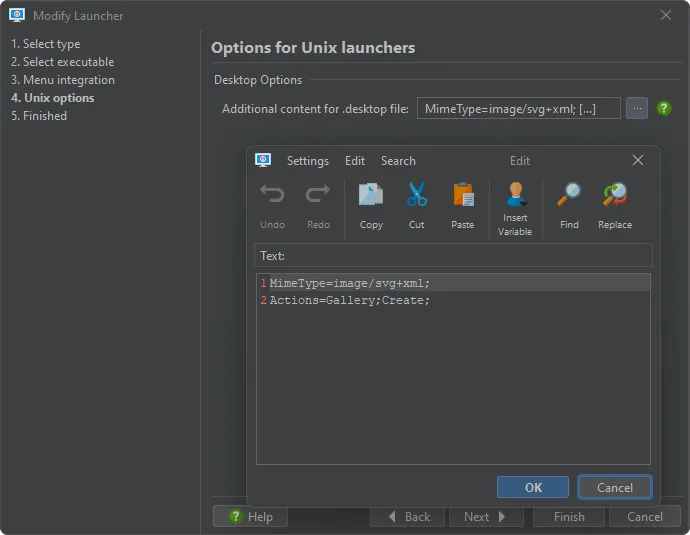
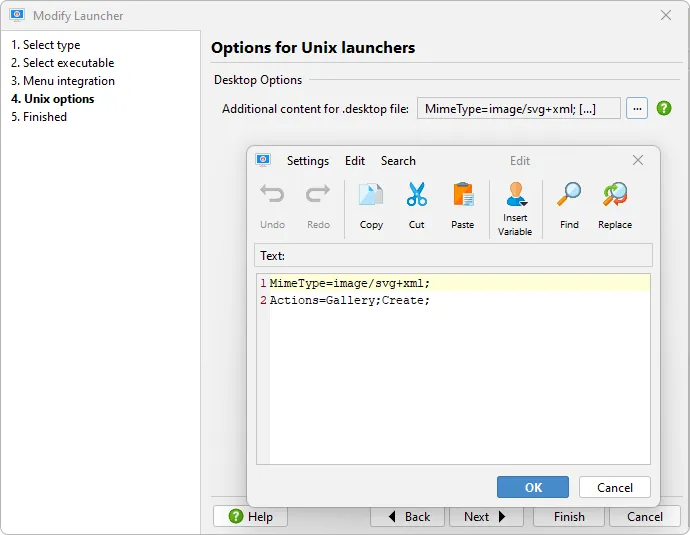
External launchers can now have additional desktop entries. These entries are written to the .desktop files that are created for
the integration into Linux desktop environments. In archives, the .desktop files are included statically while installers use the
"Create program group" action to create the .desktop files at runtime.
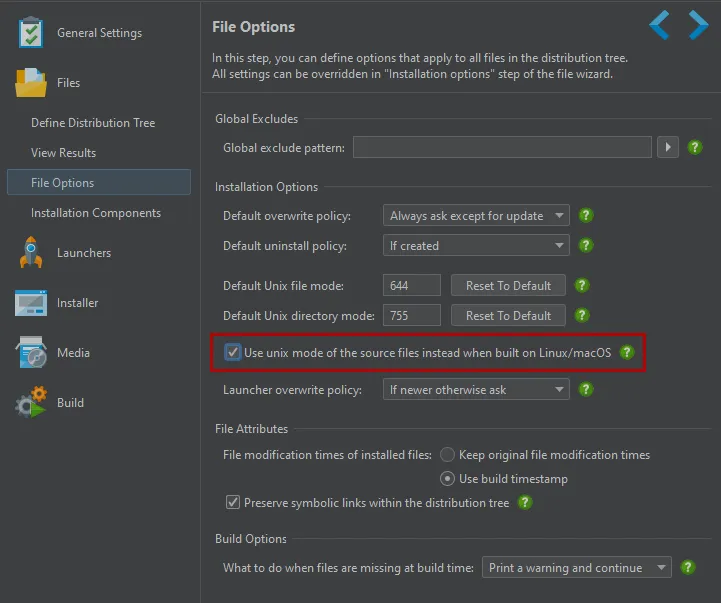
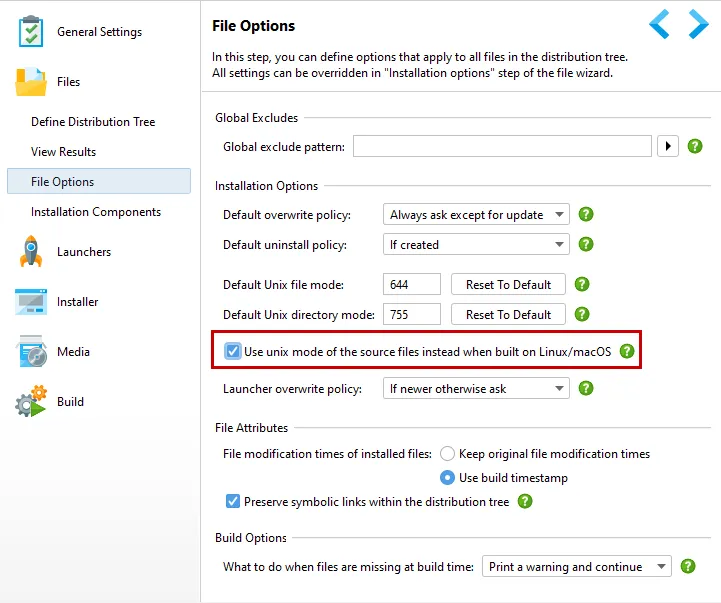
Unix file modes can be preserved from the source files in the distribution tree. If you prepare files and directories with the
desired Unix access modes on a Linux or macOS machine, install4j can now optionally pick up this information instead of using the default
file modes.
Overridden file modes that are defined for single entries in the distribution tree still take precedence over the detected file modes.
Headless JRE detection has been added for Linux/Unix. This is relevant if you do not bundle a JRE. The JRE search sequence is now
aware whether an installed JRE is headless or not. This solves three problems:
-
If the installer should how a UI, headless JREs should be ignored and a non-headless JRE installation should be preferred
-
If only a headless JRE is available, the installer will fall back to console mode instead of failing to show a UI
-
Due to the internal screen model, installers require a working AWT subsystem. If only a headless JRE is available, the installer will
now operate correctly in the AWT headless mode
The development experience for background updaters has been improved.
The complete cycle for a background updater spans 5 processes. Starting from the invoking launcher, an update downloader is invoked. The
update downloader schedules the invocation of the update installer. The next launcher invocation starts the update installer which then
terminates the calling launcher and restarts it again after the completion of the update.
If anything goes wrong in this chain of events, it was difficult to get logging information with previous versions of install4j.
Especially when setting up the auto-update process for the first time, some settings may be misconfigured or files may not be in the expected
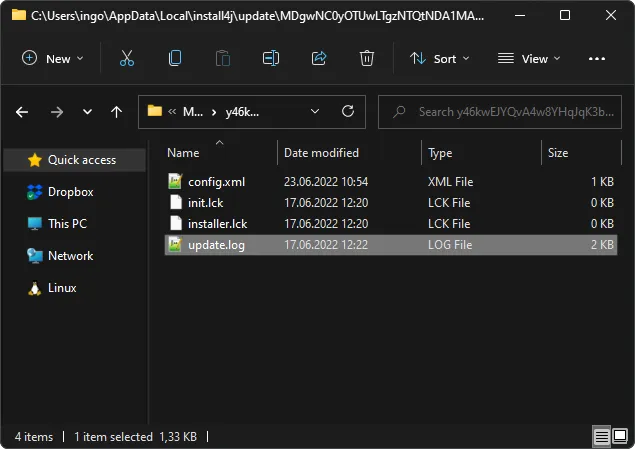
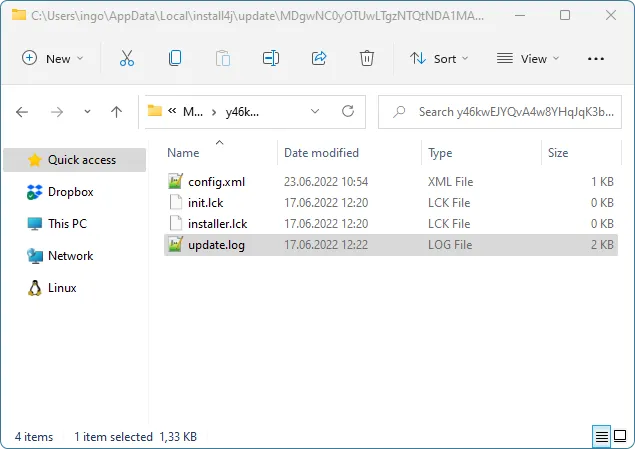
location. install4j 10 adds unified logging for background updates. If you start your launcher with the VM parameter
-Dinstall4j.updateLog=true
a cross-process log file will be created in the updater cache directory that contains logging for important events as well as error
messages that will help you pinpoint the cause of a malfunction.
The updater cache directory has a platform-specific location:
-
Windows: %LOCALAPPDATA%/install4j/update
-
macOS: $HOME/Library/Caches/install4j/update
-
Linux/Unix: $XDG_CACHE_HOME/install4j/update or $HOME/.cache/install4j/update if
XDG_CACHE_HOME is undefined
Individual updaters store their data under two levels of directories with hash names of application ID and installation directory.
You can easily find the current updater by locating the most recently modified directories.
While setting up the auto update process, you may want to perform several updates in a row for testing or debugging purposes. Because the
inhibition time for auto updates is set to 24 hours, this was not possible before. Starting with install4j 10, the
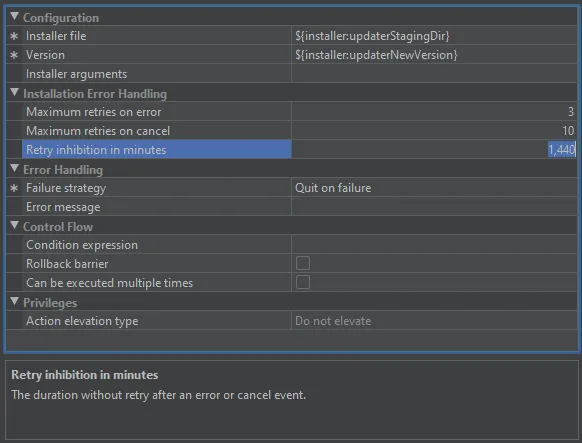
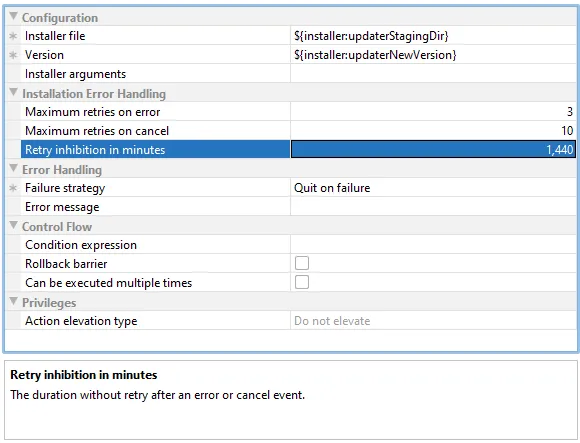
"Schedule update installation" action has a "Retry inhibition in minutes" property that can be reduced appropriately.
Finally, the documentation for auto-update functionality and background downloaders has been improved with more background information
and trouble-shooting assistance.
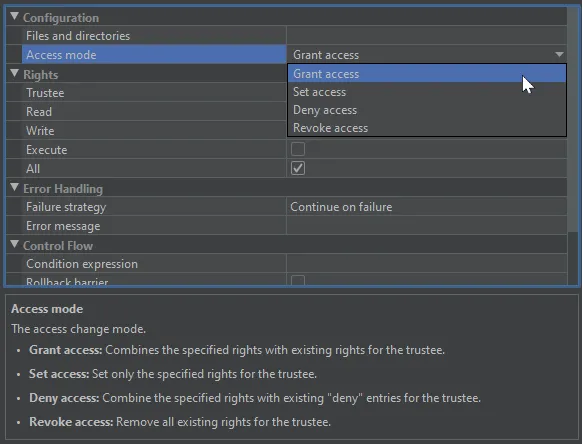
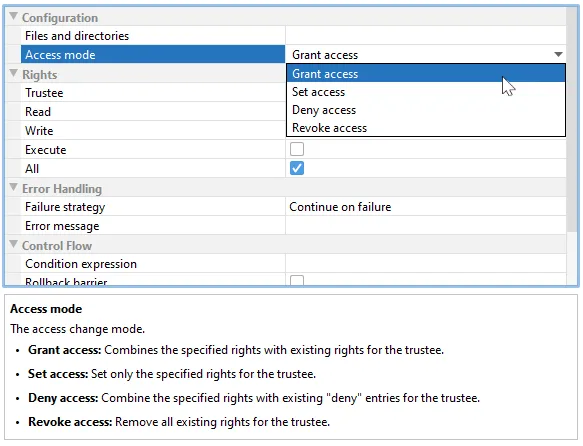
Access right modifications on Windows have been improved. The "Change Windows file rights" action now has an
"Access mode" property that can be configured to grant, set, deny or revoke access.
While previously you could only grant additional rights, you now have a complete set of tools at your disposal to modify access rights of
installed files and directories.
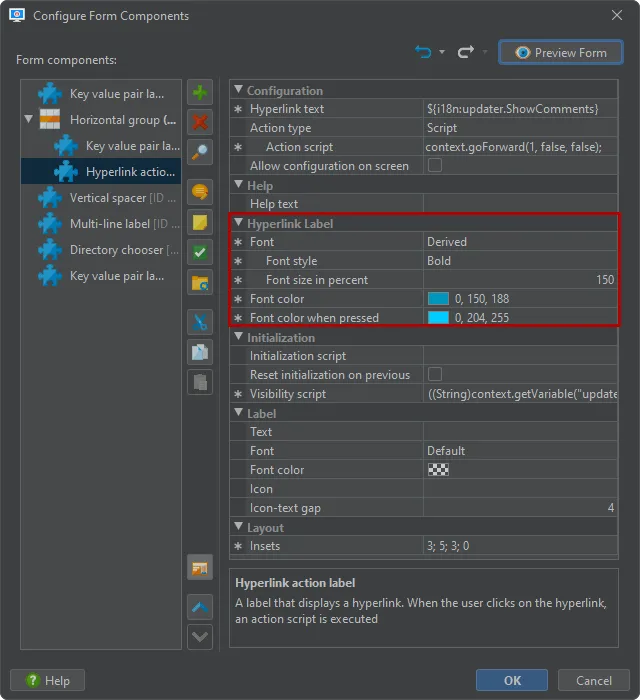
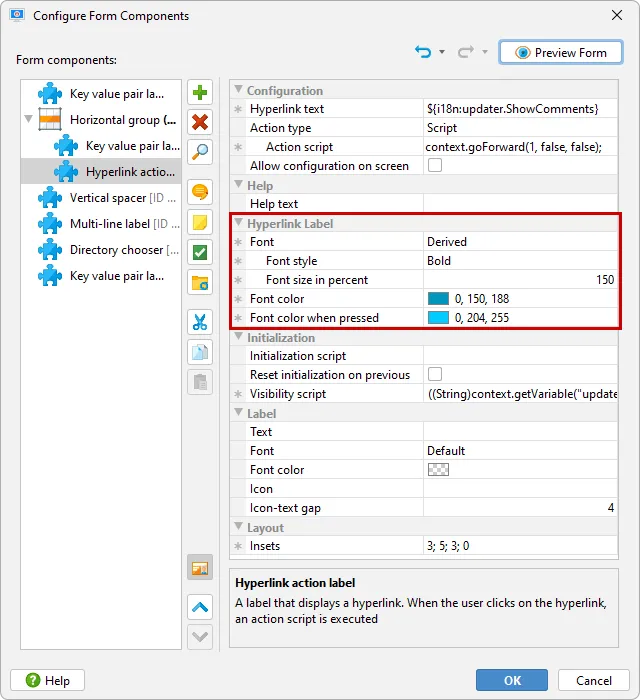
Hyperlink labels can now be styled. This affects the "Hyperlink URL label" and the "Hyperlink action label" form components.
Both font as well as font colors in the passive and active states of the link label can now be configured.
These properties are in the "Hyperlink label" property section which is different from the "Label" property section for the optional
leading label that you can set for most form components.
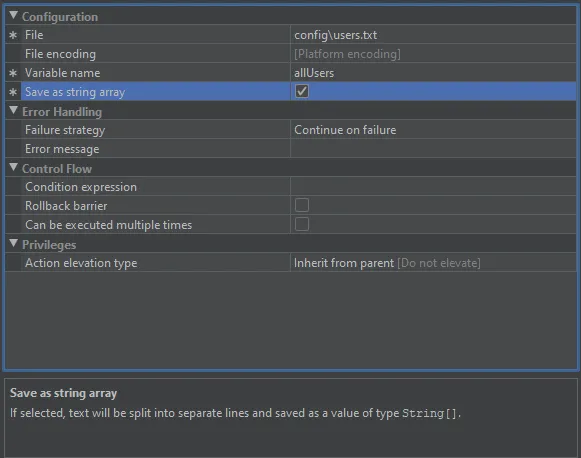
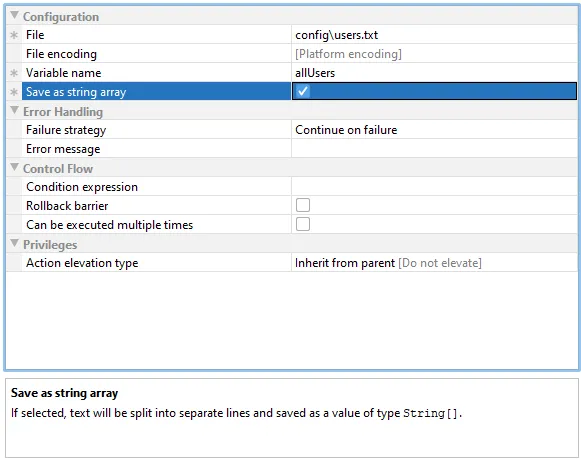
The "Read text from file" action can now save lines to a string array. This is useful if the contents of a file should directly
be used as the input of another action or form component.
For example, a "Drop-down list" form component expands the array value into separate items.
The "Stop a service" action now has a configurable timeout. In some cases, the default timeout of 30 seconds was too short
and the action could fail prematurely.
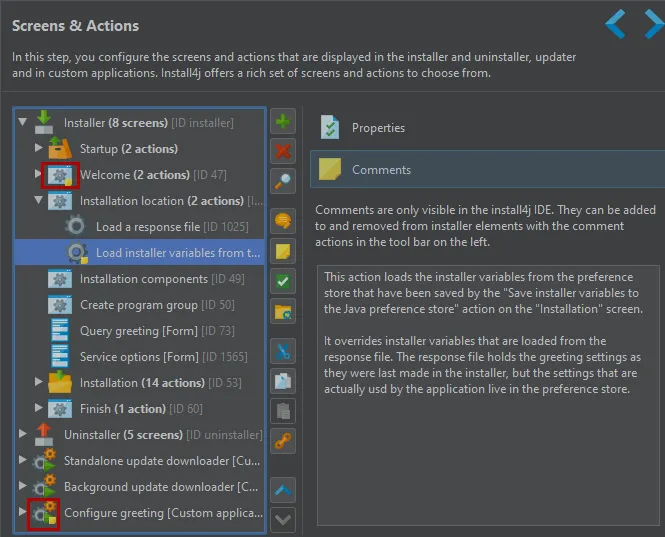
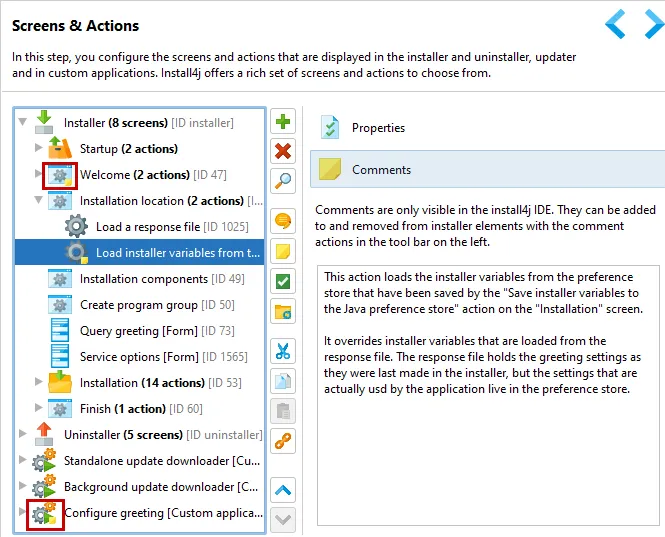
It is now easier to find elements with comments. Installer applications, screens, actions and form components that have comments now
show an overlaid badge at the bottom right of their icon.
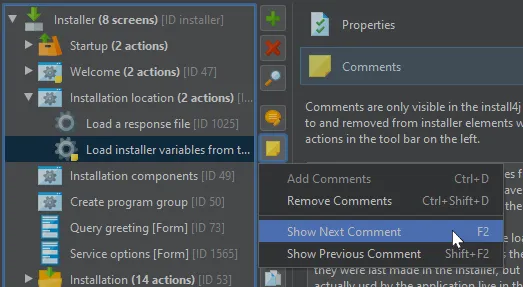
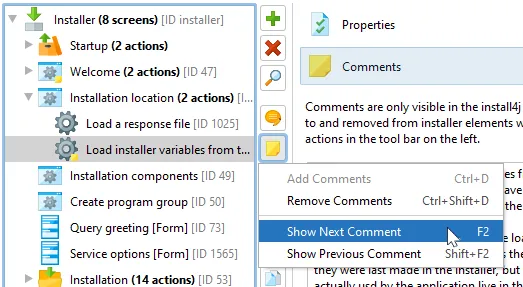
Apart from the new comment indicator, moving between comments is facilitated by the "Show next comment" and "Show previous comment" actions.
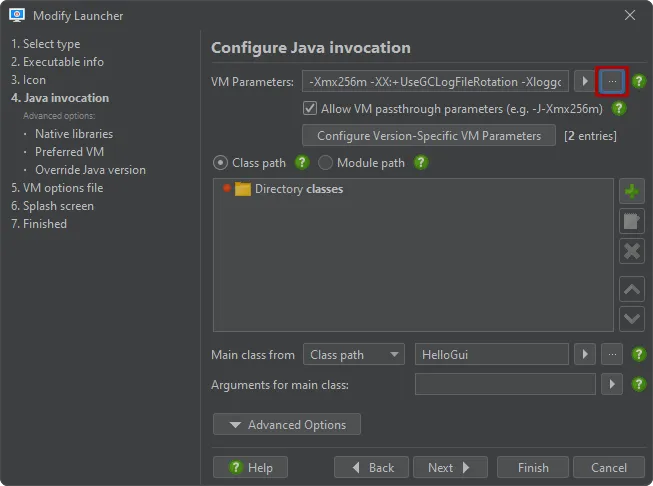
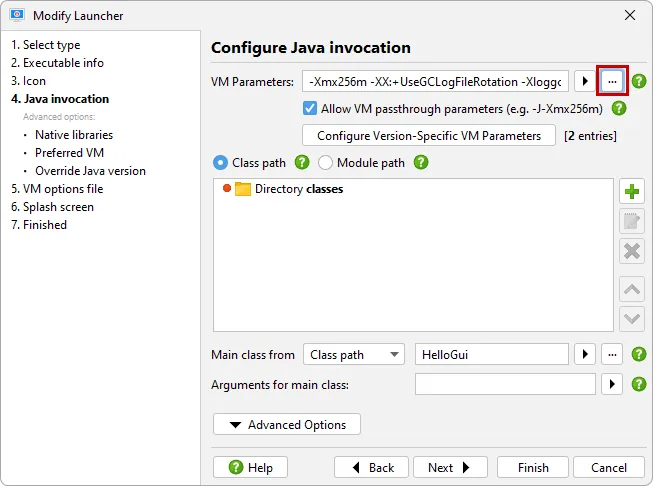
Editing VM parameters has been improved. Text fields that hold VM parameters now have an edit button to their right that brings
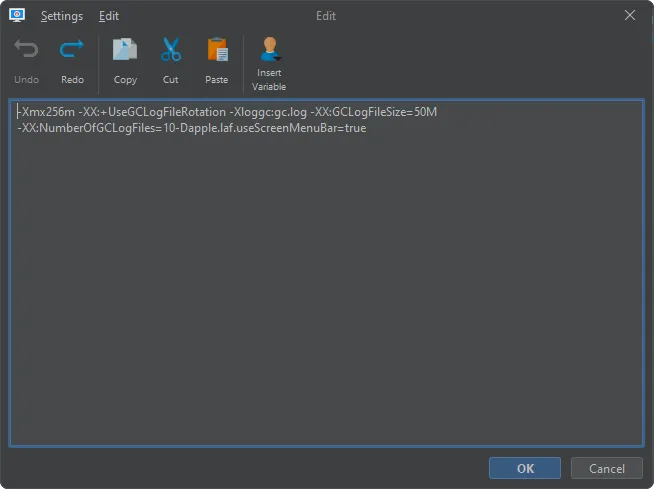
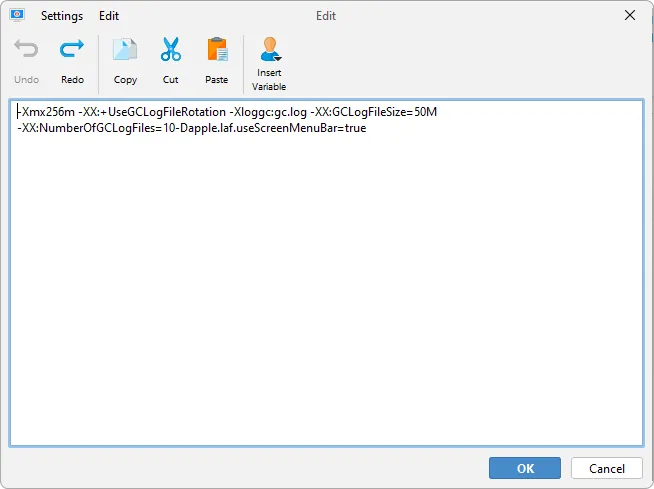
up a separate dialog.
In this case, VM parameters are not split into separate lines as it is done for other properties that hold sequences of values or the
.vmoptions files where each VM parameter is on a separate line. This is because quoting is not resolved at this point, and compiler or
installer variables can inject unquoted sequences of VM parameters. As a result, the dialog soft-breaks the VM parameters with spaces as a
delimiter so you can see the entire line at once.
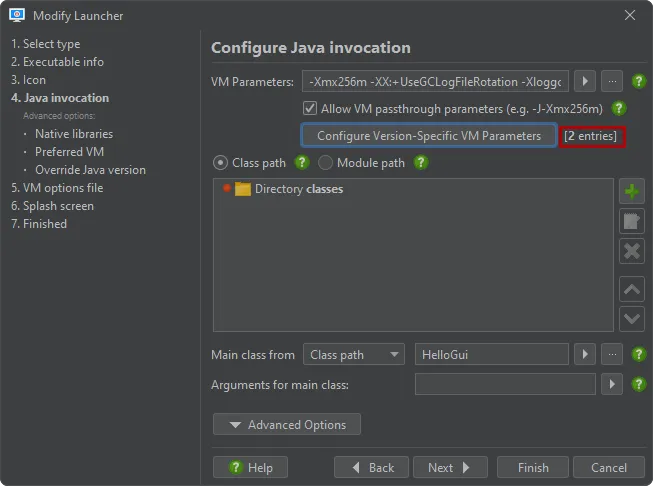
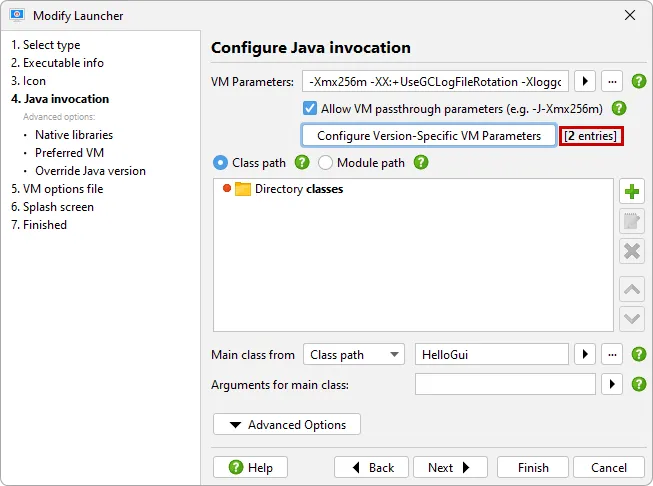
In addition, it is now easier to spot version-specific VM parameter configurations. In the "Java invocation step" of the launcher
wizard, the number of version-specific VM parameters is displayed next to the button that shows the configuration UI.
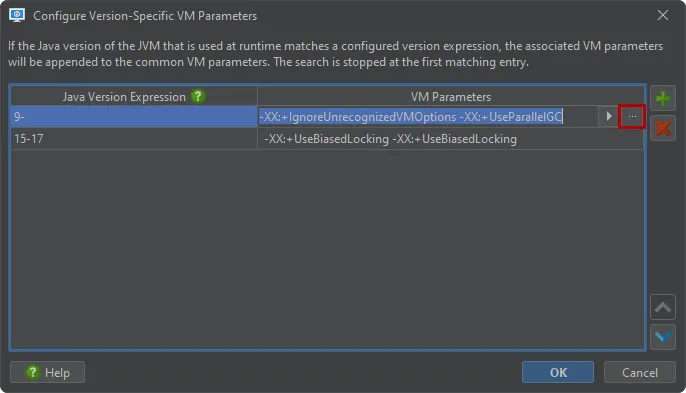
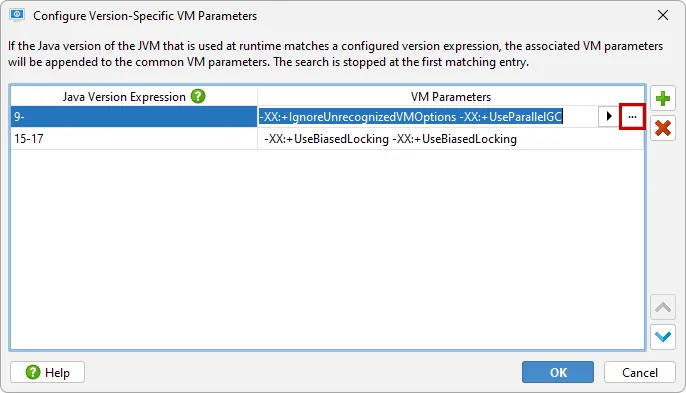
Version-specific VM parameters are defined as pairs of Java version expressions and corresponding VM parameters. The cell editor for the
VM parameters in the table also has a button that shows the separate dialog for editing VM parameters.
install4j now supports live switching between light and dark mode in the IDE. When the OS theme changes, install4j will switch
automatically. In the general settings, it is also possible to select a fixed theme. Previously, live theme switching was only supported for
installers.
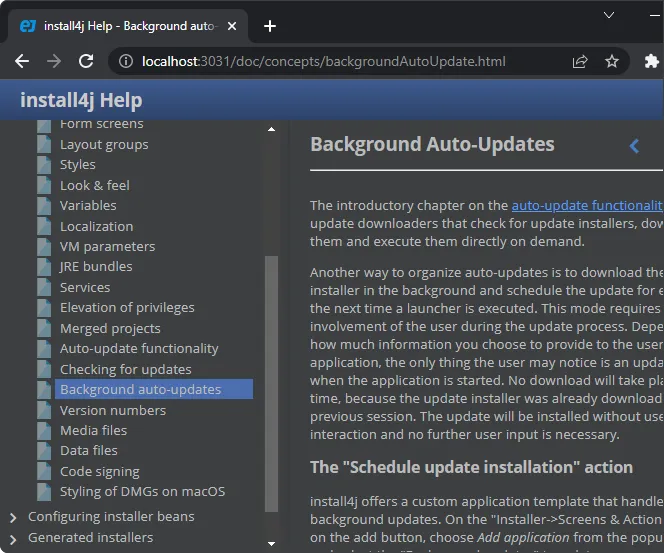
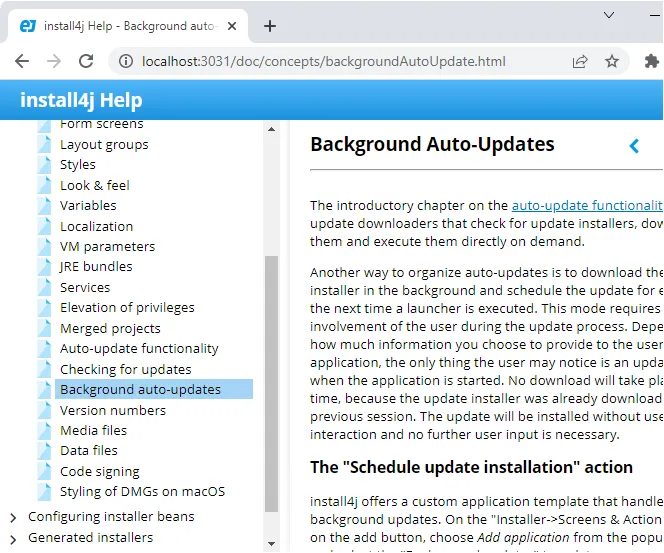
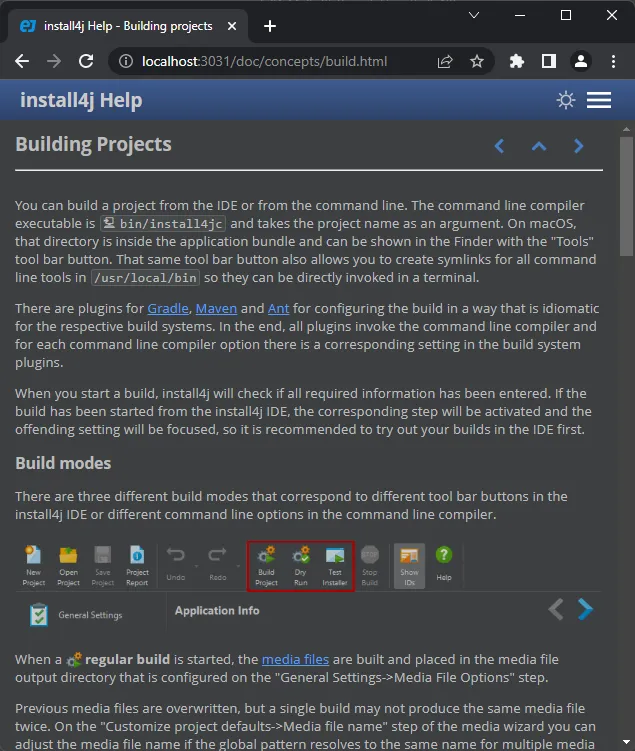
The documentation is now available in dark mode. The default theme follows the OS theme and can be switched manually in the top right
corner.
For a discussion of breaking changes when migrating from install4j 8, please see
this blog post.
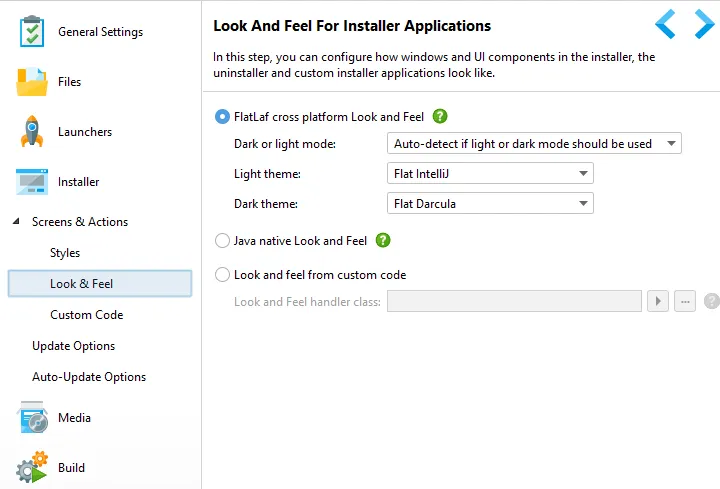
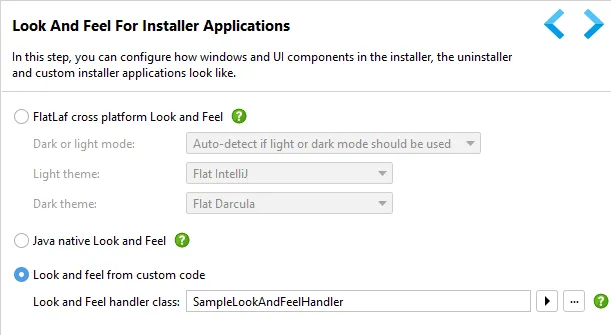
The look & feel of installers is now customizable. By default, the look and feel is set to
FlatLaf, a cross-platform look & feel with
automatic detection of dark or light mode.
You can adjust the look and feel on the new "Look & Feel" step. You can choose between two built-in themes
for the light mode and two built-in themes for the dark mode. The auto-detection of light and dark mode is
implemented on macOS, Windows and Linux. On macOS, switching between dark mode and light mode is also detected
while the installer is running, on Windows this is only supported with the JetBrains Runtime.
You can choose to disable auto-detection and only use either light or dark mode.
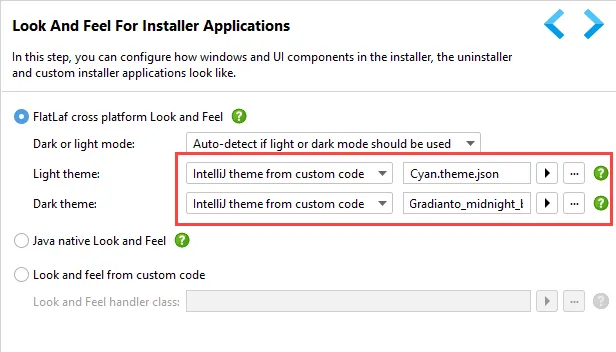
In addition to the built-in themes, you can select
themes for IntelliJ IDEA. These themes are based
on JSON files that define the colors and other properties of UI elements. Using this mechanism, you can develop
your own custom theme for the installer UI.
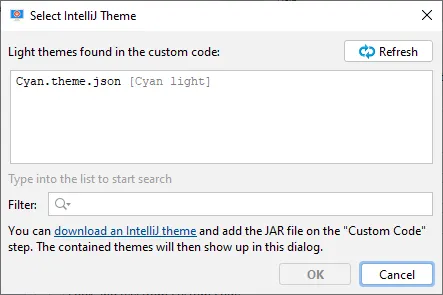
JAR files containing themes have to be added on the "Custom Code" step. After that, you can select the resource
path to the JSON file of an IntelliJ theme with the theme chooser.
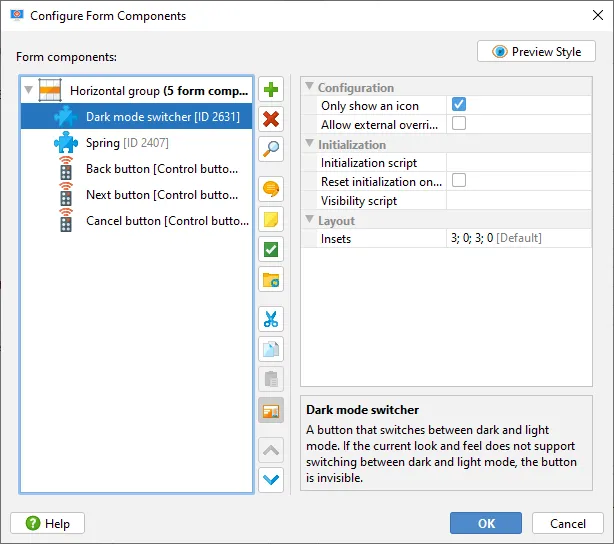
To allow the user to manually switch between dark and light mode, a "Dark mode switcher" form component
has been added that can also be used in styles.
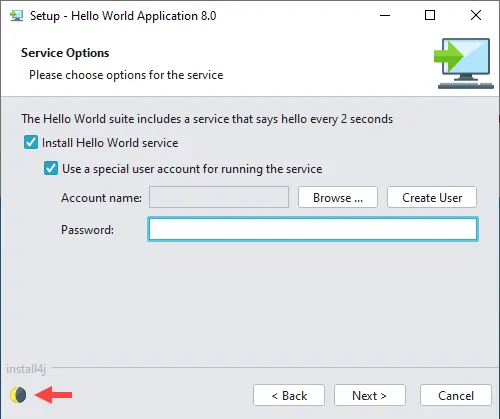
If only the icon is shown, the dark mode switcher button has a flat appearance. This makes it a good
addition to the footer area, here shown with the "Cyan" light theme.
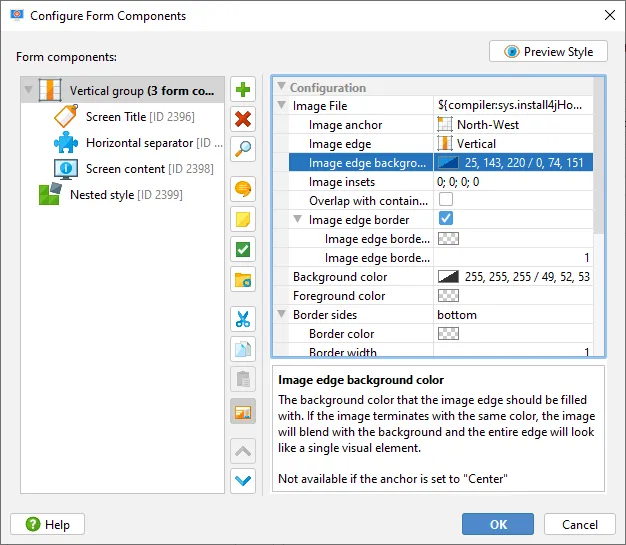
To support light and dark mode with the same screens, all color properties now support light and dark
variants. If you develop custom code, this will automatically be available for all properties
of type java.util.Color.
In the color editor, you can choose whether to provide separate colors for light and dark mode or not.
For custom code, if different variants are configured, the color instance will be a derived class that
seamlessly switches its color component values during a theme change.
The Java native look & feel that is built into the JRE is still supported, although not recommended,
because it does not work well with recent releases of macOS and fractional HiDPI resolutions on Windows.
Finally, you can now integrate your own look and feel by implementing com.install4j.api.laf.LookAndFeelHandler
and adding your class on the "Custom Code" step together with the dependencies of the look & feel.
LookAndFeelHandler extends com.install4j.api.laf.LookAndFeelEnhancer that
contains methods for UI elements where the runtime needs special collaboration from the look & feel,
such as the creation of a tri-state check box. You can override the default implementation of these methods
to improve the fidelity of your look and feel in the context of install4j.
The "customCode" sample project contains an example of a custom look and feel.
Finally, you may have noticed from the above screenshots that the install4j IDE is now using FlatLaf as well.
Please consider starring FlatLaf on GitHub.
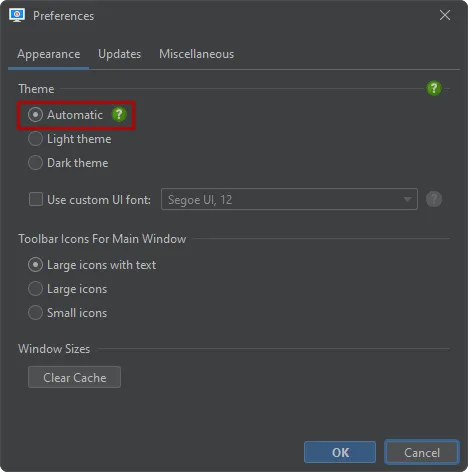
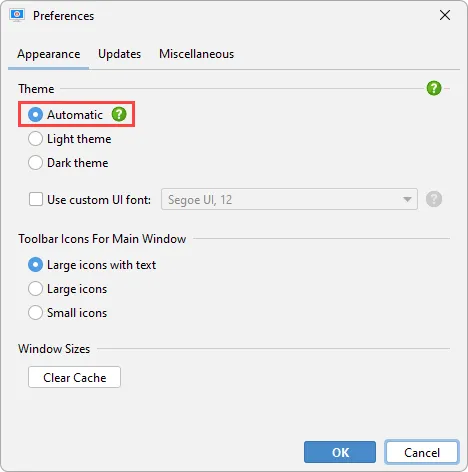
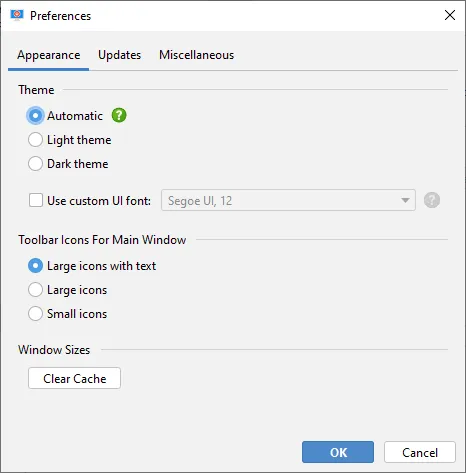
Dark mode and light mode settings for the install4j IDE continue to be available in the preferences dialog.
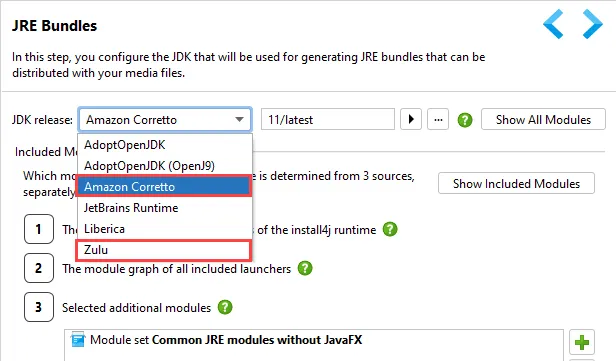
JDK providers for Amazon Corretto and Azul Zulu have been added to install4j. To use these JDKs,
you no longer have to pre-create bundles yourself on all required platforms, but can let install4j do this
as part of the build.
Besides Liberica, Azul Zulu is another option with JavaFX included for recent Java versions. It also
offers Java 8 without JavaFX, making the JRE bundles much smaller. In addition, recent releases
already include the macos-aarch64 target for machines with Apple Silicon.
Amazon Corretto is an OpenJDK distribution that focuses on including additional fixes and patches from the
main branch and other sources into LTS releases. Recently, they have started to add support for the latest
feature release as well.
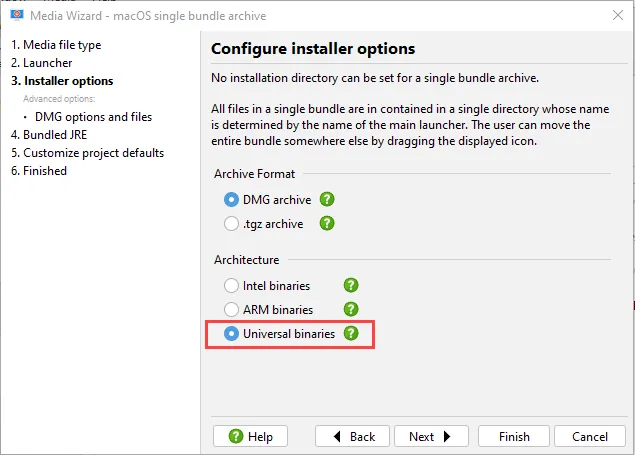
install4j can now produce universal binaries for macOS to support Intel and Apple Silicon at the same time.
In the media wizard, you can select the "Universal binaries" architecture on the "Installation options" step.
Universal binaries will not only be generated for the launchers and the installer, but also for the JRE bundle.
This only works if the selected JDK provider has published both the macos-amd64 and the macos-aarch64
architectures for the selected release. install4j will then download both archives and merge them into a
universal JRE bundle.
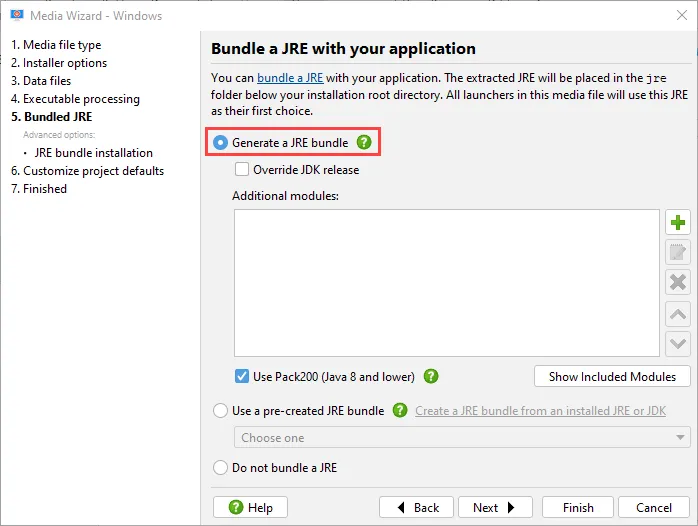
JRE bundling is now the default. Since Java 9 and the shift from the Oracle JRE to OpenJDK distributions,
the concept of public JRE installations has become less and less important. This is why new projects
are now configured with an AdoptOpenJDK of the current LTS version and new media files are configured to
bundle a JRE by default.
The old "Java version" step is now ordered below the "General Settings → JRE bundles" step, and its minimum
Java version setting has become optional. If empty, the required Java version is the major version of the
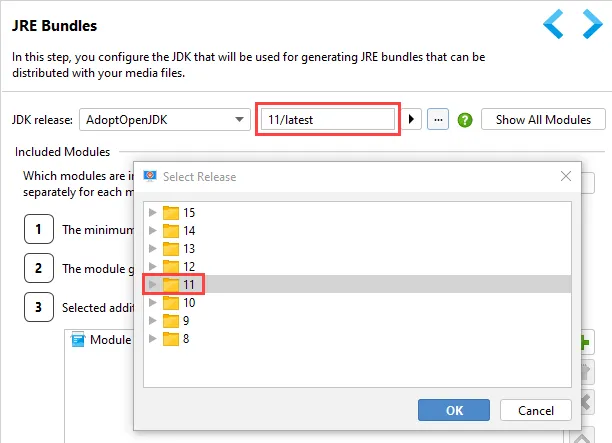
selected JDK. JDK versions now have the syntax <major version>/<provider-specific version> across
JDK providers.
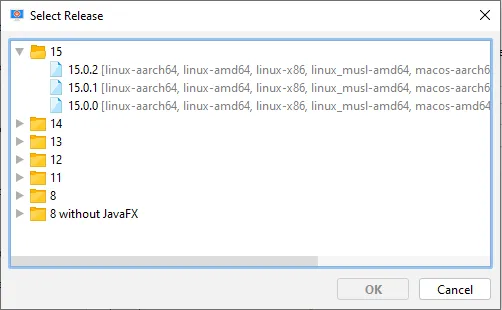
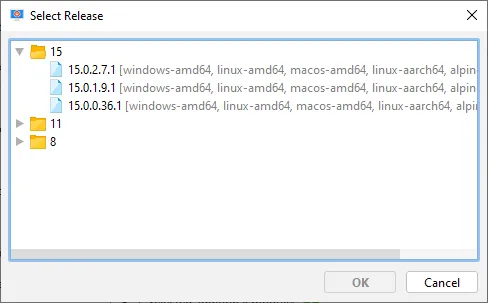
Since install4j 9, you can specify a provider-specific version "latest" to use the latest release of the
selected major version. Because media files require a particular platform, this mechanism searches for the
latest release in which that platform is available, separately for each media file. You can also insert this
version string in the release selection dialog by selecting the folder node of the major version.
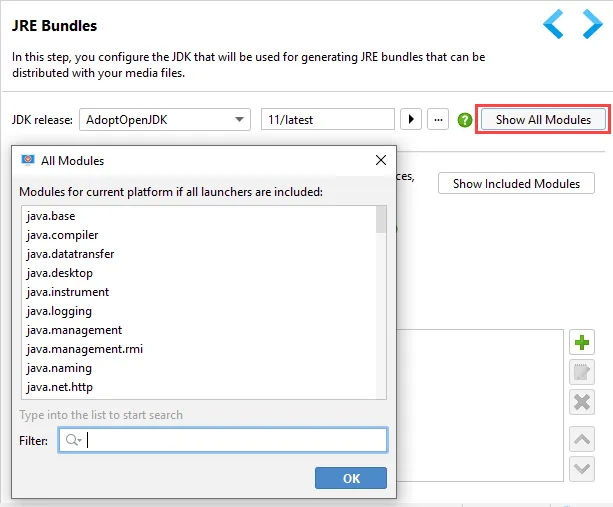
For the configured JDK, it is now possible to inspect all available modules with the "Show All Modules"
button. Previously, you could only see which modules would be included in the JRE bundle. That functionality
continues to be available with the "Show Included Modules" button.
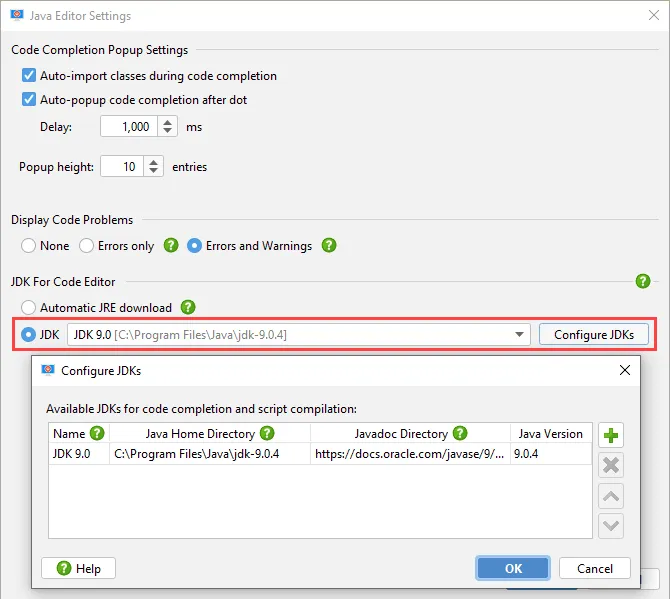
In install4j 9, there is no need to configure the JDK for script compilation and for the script editor,
because the configured JDK for the JRE bundle will be used for that purpose automatically.
If you do not bundle a JDK, the JRE that install4j is running with will be used as a fallback and you can
still manually configure a JDK in the Java editor settings dialog.
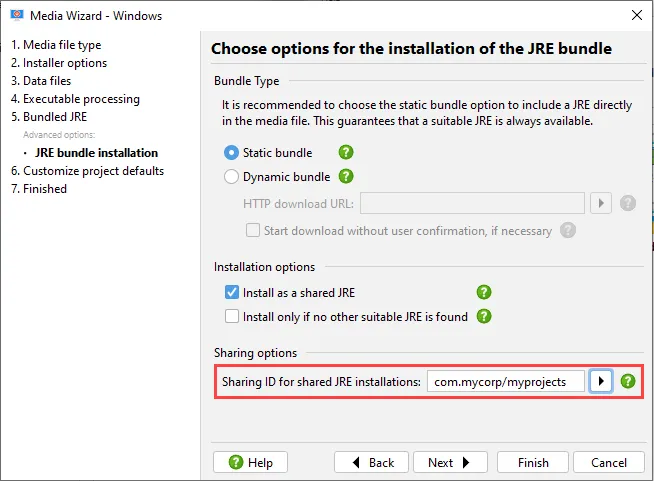
For shared JRE bundles, a sharing ID has been introduced. This limits the sharing to a scope of projects
that is defined and controlled by yourself. This also deals with the variable module contents of JREs in the
post-Java 9 world. The sharing ID should start with a domain name that is controlled by you and must be
configured both by media files that publish a shared JRE as well as by media files whose Java search sequence
wants to find a shared JRE.
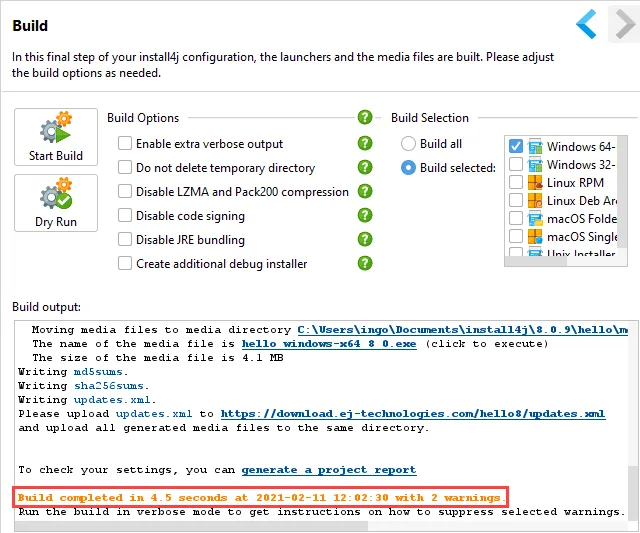
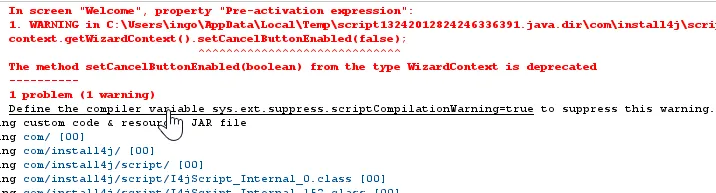
Warnings have been improved. The warning count is now printed in the build summary, and the text color
is orange if there was a warning. For command line builds, you can force the build to fail in that case if you
pass the --fail-on-warning command line argument or set the corresponding attributes in the Gradle,
Ant and Maven plugins.
Warnings can be suppressed on a per-warning basis with special compiler variables. If you build in
verbose mode, after each warning, an instruction is printed on how to disable it. In the install4j IDE,
the description comes with a hyperlink to define the corresponding compiler variable.
As you can see in the above screen shot, script compilation warnings are now printed during the build.
This makes it easier to eliminate new deprecations and find possible bugs across the whole project.
A Maven plugin has been added. Previously, Maven integration was only available through a third party
plugin. Now, the latest features will be available immediately when a new version of install4j is released.
To get started, see the pom.xml file in the "hello" sample project. In the configuration
section of the plugin, you can add all options that can be passed to the command line compiler.
<plugin>
  <groupId>com.install4j</groupId>
  <artifactId>install4j-maven</artifactId>
  <version>9.0</version>
  <executions>
    <execution>
      <id>install4j</id>
      <phase>package</phase>
      <goals>
        <goal>compile</goal>
      </goals>
      <configuration>
        <installDir>/path/to/install4j</installDir>
        <projectFile>${'$'}{project.basedir}/hello.install4j</projectFile>
      </configuration>
    </execution>
  </executions>
</plugin>
In the above example, the install4j installation directory is specified. Alternatively, you can do that in the
settings.xml file where you can also define the license key and keystore passwords.
<profiles>
  <profile>
    <id>development</id>
    <properties>
      <install4j.home>/path/to/install4j</install4j.home>
      <install4j.licenseKey>CHANGEME</install4j.licenseKey>
      <install4j.winKeystorePassword>SECRET</install4j.winKeystorePassword>
      <install4j.macKeystorePassword>SECRET</install4j.macKeystorePassword>
    </properties>
  </profile>
</profiles>
<activeProfiles>
  <activeProfile>development</activeProfile>
</activeProfiles>
In addition to compiling projects, you can also use the create-jre-bundle Mojo to pre-create
JRE bundles. See the documentation for more details.
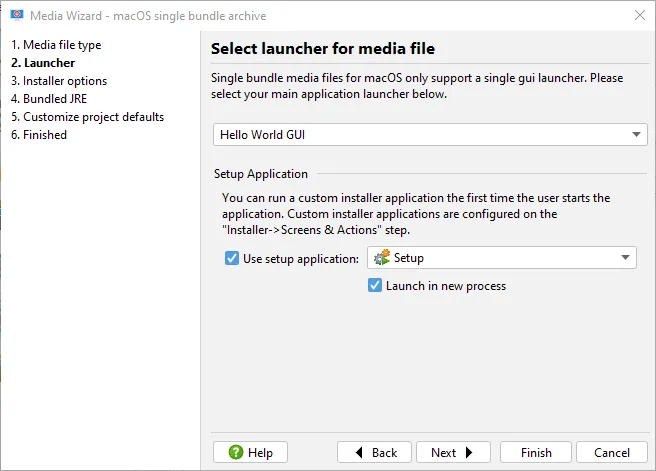
macOS single bundles archives now have a configurable setup application.
The first time a new archive installation or update is run by the user, the configured installer
application is launched. This means that you can use screens and actions to perform setup tasks that you
would otherwise include in an installer.
To get the look & feel of the installer, you have to choose the "Launch in a new process" check box.
If you launch the installer application in the same process, it will use the current look & feel.
This is not recommended for JavaFX or SWT applications.
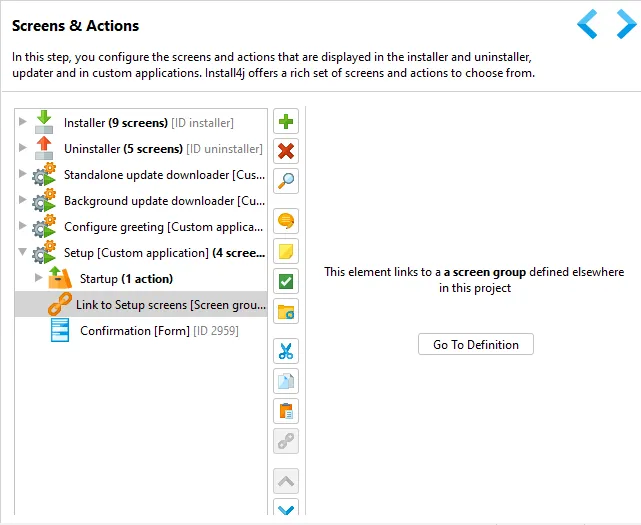
Installer applications are added on the "Installer → Screens & Actions" step and can contain links into
other installer application such as the installer itself. In this way, you can reuse screens and actions
in different contexts.
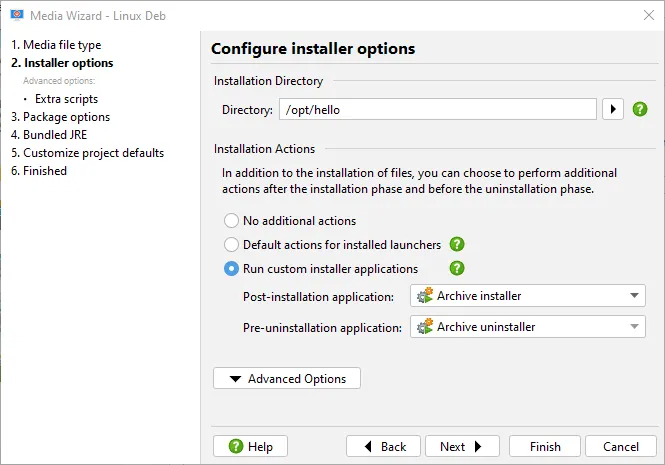
Linux RPM and DEB archives now have configurable post-installation and pre-uninstallation applications.
On the "Installation options" step of the media wizard, additional installation actions are now configurable.
Previously, Linux archives always performed a set of default actions like adding symlinks and installing
services. Additional steps could only be performed with shell scripts in the "Extra scripts" step for the
various phases of the installation and uninstallation.
Since install4j 9, you can choose to either disable extra installation actions completely or to choose
custom installer applications for the post-installation and pre-uninstallation phase.
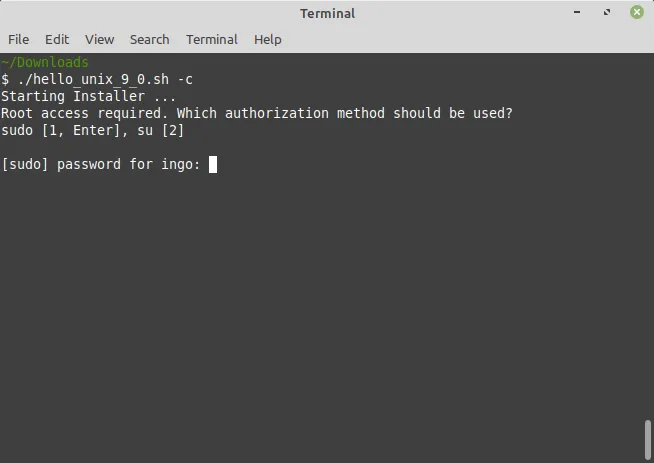
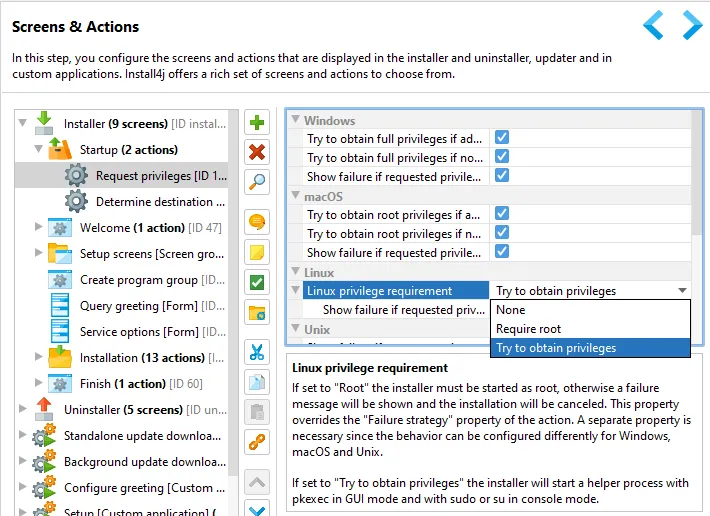
The "Request privileges" action can now elevate privileges on Linux. In previous versions, this was
only implemented for Windows and macOS. The "Linux privilege requirement" property can take one of three values:
"None" and "Require root" correspond to the "Show failure if current user is not root" property in previous
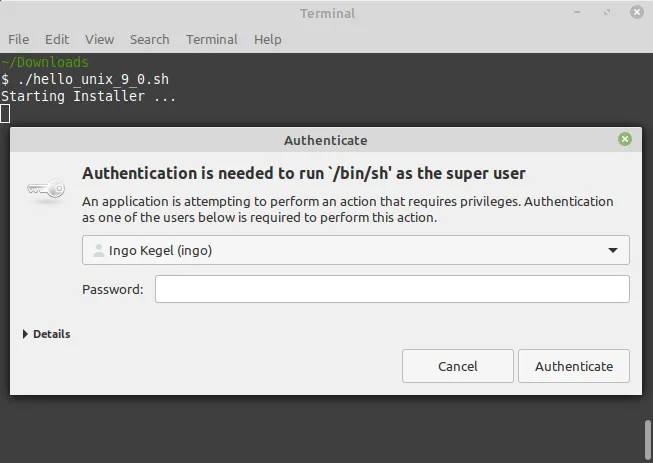
versions of install4j. If the property is set to "Try to obtain privileges", the installer will start a helper
process with pkexec in GUI mode and with sudo or su in console mode.
pkexec is a PolicyKit application that is available on most Linux distributions and uses the
authentication dialog of the desktop environment to execute the elevated helper process with root privileges.
pkexec cannot be used in console mode, so install4j asks the user which command line authentication
method (su or sudo) should be performed.
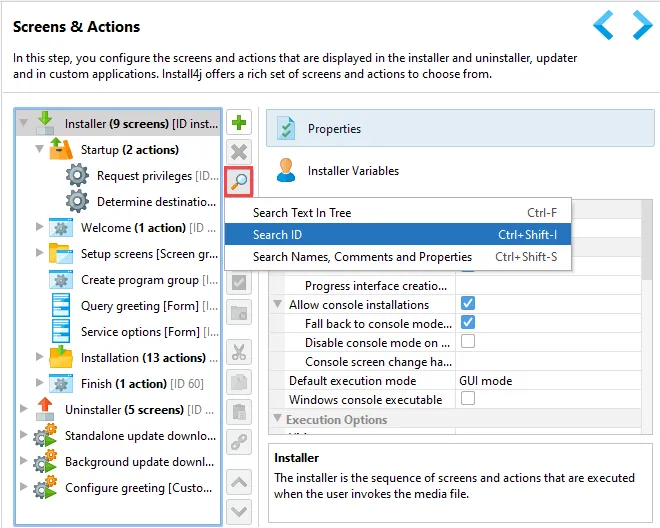
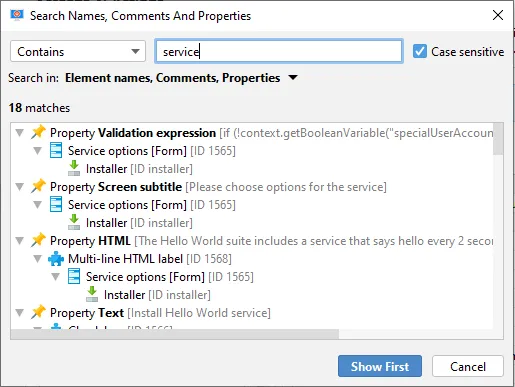
Search for IDs, names, property values and comments has been implemented in the "Screens & Actions" step,
the "Styles" step, as well as form component dialogs.
There are two separate search actions, one for searching IDs, and one for searching various text values, both
are accessible from the search button or through their keyboard shortcuts.
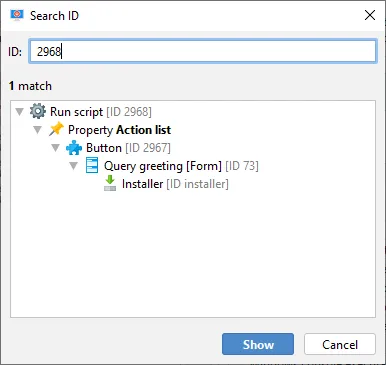
When searching for an ID, all screens, actions and form components that are reachable in some way from the
current view are included.
The matching elements are shown at the top of the result tree together with the reverse path to the top-level
element. When you confirm the search dialog, the match is shown in the install4j IDE.
For text values a similar dialog is shown that provides optional text matching options like wildcards,
regular expressions and case sensitivity. You can also choose whether to include element names, comments
or property values.
By default, the first match is shown when confirming the dialog. You can show any other element in the result
tree by selecting it beforehand.
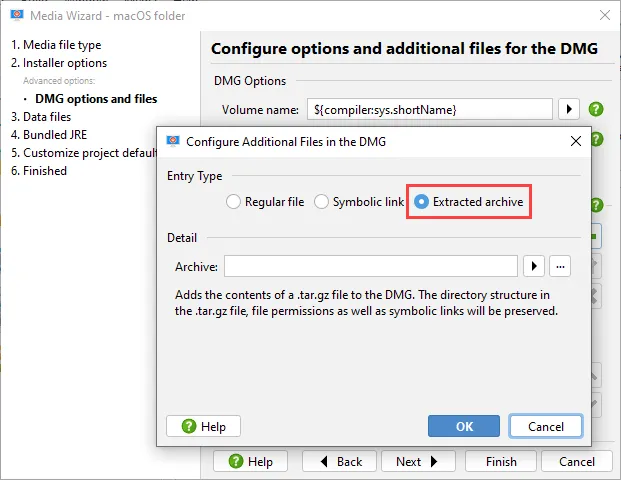
install4j 9 allows more flexible configuration of top-level files in DMGs.
Top-level files appear in the Finder next to the launcher or the
installer when you mount the DMG. You also need them to style DMGs.
In addition to single files and symbolic links, you can now add a .tar.gz file to include another
application, an external installer or documentation to the DMG.
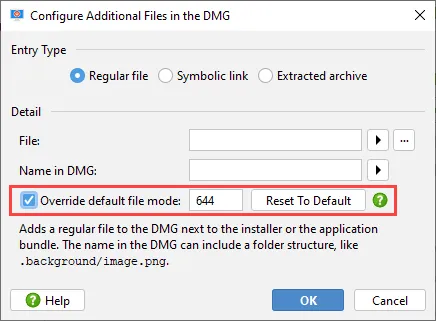
In addition, you can now specify the file mode for single files.
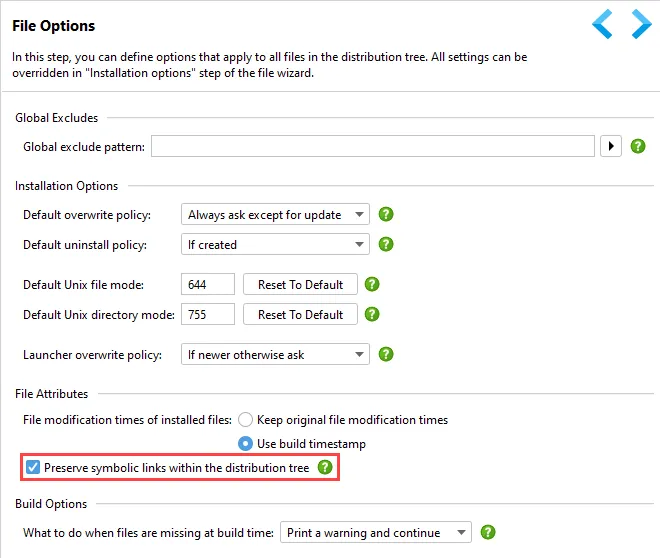
The install4j compiler can now preserve internal symbolic links in the distribution tree for
non-Windows media files. On the "Files → File Options" step, the corresponding option can be deselected
if this behavior is not desired.
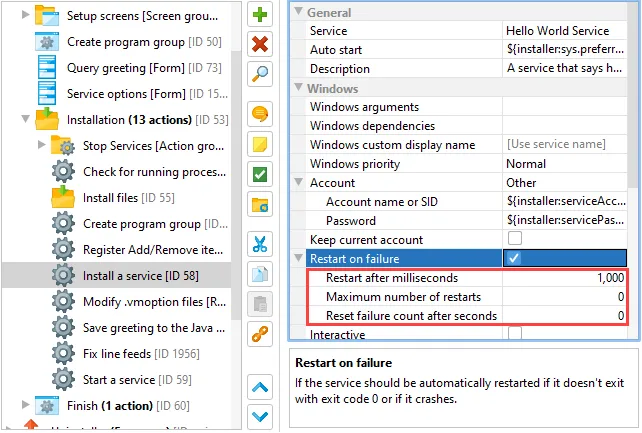
The restart behavior of the "Install a service" action can now be customized. The pause before restarting,
the maximum number of restarts as well as the time threshold after which the failure count is reset are
configurable as child properties of the "Restart on failure" property.
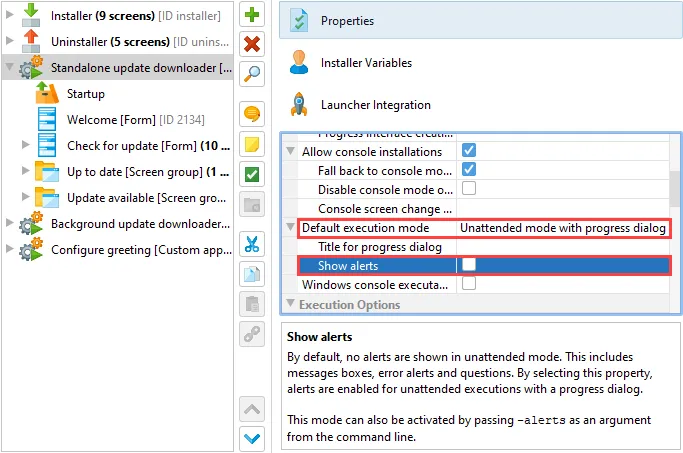
In unattended mode with progress dialog, alerts can optionally be displayed.
This new mode can be activated with the "Show alerts" property for installer applications or the -alerts
command line parameter.
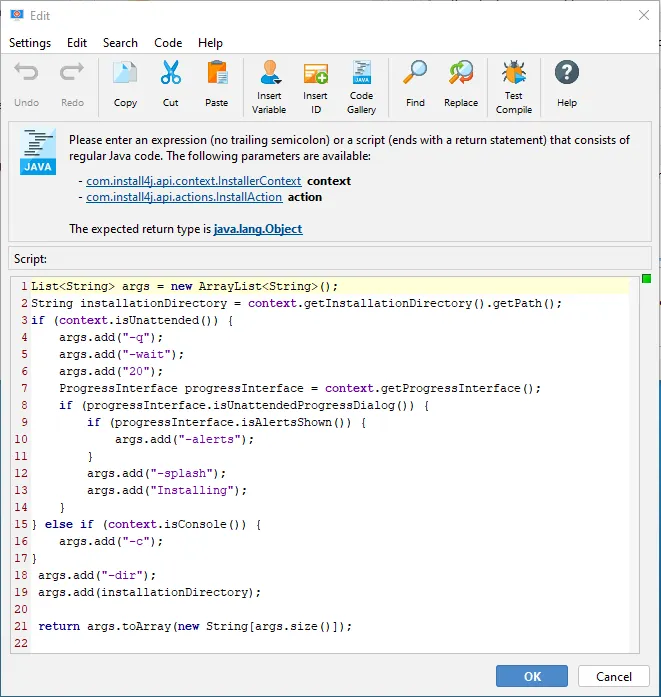
The update downloader template propagates the execution mode to the downloaded installers. Since install4j 9,
it also propagates this alert setting. Because the update downloader is a template, this is not automatically
updated for your existing projects. You would have to locate the action named "Set installer arguments" in the
update downloader and replace the script with that from a new updater application.
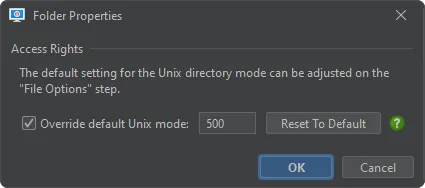
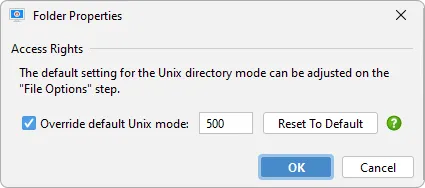
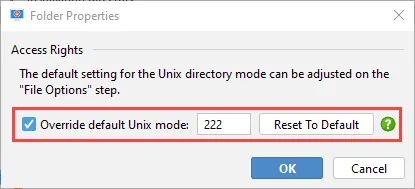
The Unix default directory mode is now used for manual directory entries in the distribution tree
and can be overridden when editing a manual directory entry. The default mode is configured on the
"Files → File Options" step.
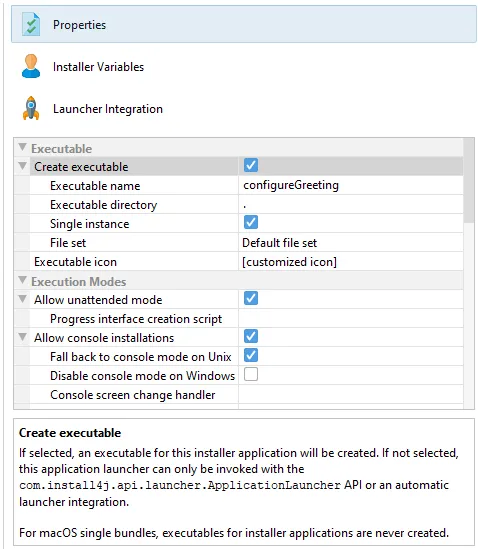
Custom installer applications now have a "Create executable" property to prevent the creation of
executables. In this case, the custom installer application can only be launched through the
ApplicationLauncher API and through launcher integrations.
Progress information can be obtained when using the ApplicationLauncher API.
Update downloaders and other installer applications are often launched with via
ApplicationLauncher.launchApplication or ApplicationLauncher.launchApplicationInProcess
in unattended mode.
Previously, there was no way to get progress information from the launched application, you could only wait
until it was finished. Since install4j 9, the callback that is passed to the ApplicationLauncher API has a method
createProgressListener that can be overridden to return your own implementation.
That progress listener then receives all progress information including status messages, screen and action IDs
as well as progress percentages.
The "HelloGui" class in the "hello" sample project shows you how to do that.
ApplicationLauncher.launchApplication("<ID>", null, true,
    new ApplicationLauncher.Callback() {
        @Override
        public void exited(int exitValue) {
        }

        @Override
        public void prepareShutdown() {
        }

        @Override
        public ApplicationLauncher.ProgressListener createProgressListener() {
            return new ApplicationLauncher.ProgressListenerAdapter() {
                @Override
                public void percentCompleted(int value) {
                    // TODO use
                }

                @Override
                public void indeterminateProgress(boolean indeterminateProgress) {
                    // TODO use
                }

                //TODO override other methods as required
            };
        }
    }
);